The default configuration file (/etc/samba/smb.conf) allows users to view their home directories as a Samba share. It also shares all printers configured for the system as Samba shared printers. In other words, you can attach a printer to the system and print to it from the Windows machines on your network.
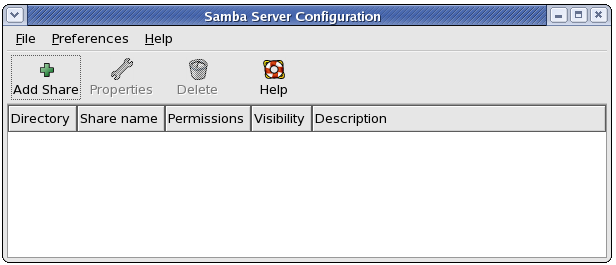
To configure Samba using a graphical interface, use the Samba Server Configuration Tool. For command line configuration, skip to Section 19.4.2, “Command Line Configuration”.
The Samba Server Configuration Tool is a graphical interface for managing Samba shares, users, and basic server settings. It modifies the configuration files in the /etc/samba/ directory. Any changes to these files not made using the application are preserved.
To use this application, you must be running the X Window System, have root privileges, and have the system-config-samba RPM package installed. To start the Samba Server Configuration Tool from the desktop, go to the System (on the Panel) => Administration => Server Settings => Samba or type the command system-config-samba at a shell prompt (for example, in an XTerm or a GNOME terminal).
Note
The Samba Server Configuration Tool does not display shared printers or the default stanza that allows users to view their own home directories on the Samba server.
The first step in configuring a Samba server is to configure the basic settings for the server and a few security options. After starting the application, select Preferences => Server Settings from the pulldown menu. The Basic tab is displayed as shown in Figure 19.4, “Configuring Basic Server Settings”.
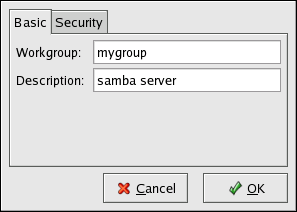
On the Basic tab, specify which workgroup the computer should be in as well as a brief description of the computer. They correspond to the workgroup and server string options in smb.conf.
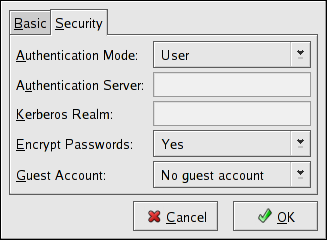
The Security tab contains the following options:
-
Authentication Mode — This corresponds to the security option. Select one of the following types of authentication.
-
ADS — The Samba server acts as a domain member in an Active Directory Domain (ADS) realm. For this option, Kerberos must be installed and configured on the server, and Samba must become a member of the ADS realm using the net utility, which is part of the samba-client package. Refer to the net man page for details. This option does not configure Samba to be an ADS Controller. Specify the realm of the Kerberos server in the Kerberos Realm field.
Note
The Kerberos Realm field must be supplied in all uppercase letters, such as EXAMPLE.COM.
Using a Samba server as a domain member in an ADS realm assumes proper configuration of Kerberos, including the /etc/krb5.conf file.
-
Domain — The Samba server relies on a Windows NT Primary or Backup Domain Controller to verify the user. The server passes the username and password to the Controller and waits for it to return. Specify the NetBIOS name of the Primary or Backup Domain Controller in the Authentication Server field.
The Encrypted Passwords option must be set to Yes if this is selected.
-
Server — The Samba server tries to verify the username and password combination by passing them to another Samba server. If it can not, the server tries to verify using the user authentication mode. Specify the NetBIOS name of the other Samba server in the Authentication Server field.
-
Share — Samba users do not have to enter a username and password combination on a per Samba server basis. They are not prompted for a username and password until they try to connect to a specific shared directory from a Samba server.
-
User — (Default) Samba users must provide a valid username and password on a per Samba server basis. Select this option if you want the Windows Username option to work. Refer to Section 19.4.1.2, “Managing Samba Users” for details.
-
-
Encrypt Passwords — This option must be enabled if the clients are connecting from a system with Windows 98, Windows NT 4.0 with Service Pack 3, or other more recent versions of Microsoft Windows. The passwords are transfered between the server and the client in an encrypted format instead of as a plain-text word that can be intercepted. This corresponds to the encrypted passwords option. Refer to Section 19.4.3, “Encrypted Passwords” for more information about encrypted Samba passwords.
-
Guest Account — When users or guest users log into a Samba server, they must be mapped to a valid user on the server. Select one of the existing usernames on the system to be the guest Samba account. When guests log in to the Samba server, they have the same privileges as this user. This corresponds to the guest account option.
After clicking OK, the changes are written to the configuration file and the daemon is restarted; thus, the changes take effect immediately.
The Samba Server Configuration Tool requires that an existing user account be active on the system acting as the Samba server before a Samba user can be added. The Samba user is associated with the existing user account.
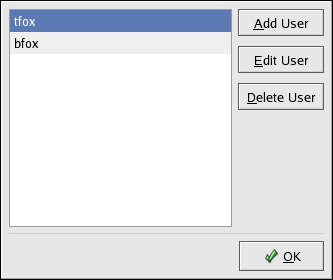
To add a Samba user, select Preferences => Samba Users from the pulldown menu, and click the Add User button. In the Create New Samba User window select a Unix Username from the list of existing users on the local system.
If the user has a different username on a Windows machine and needs to log into the Samba server from the Windows machine, specify that Windows username in the Windows Username field. The Authentication Mode on the Security tab of the Server Settings preferences must be set to User for this option to work.
Also, configure a Samba Password for the Samba User and confirm it by typing it again. Even if you opt to use encrypted passwords for Samba, it is recommended that the Samba passwords for all users are different from their system passwords.
To edit an existing user, select the user from the list, and click Edit User. To delete an existing Samba user, select the user, and click the Delete User button. Deleting a Samba user does not delete the associated system user account.
The users are modified immediately after clicking the OK button.
To create a Samba share, click the Add button from the main Samba configuration window.
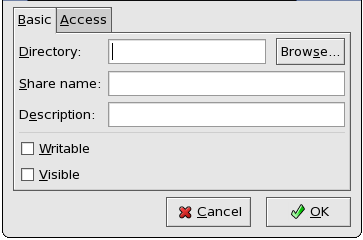
The Basic tab configures the following options:
-
Directory — The directory to share via Samba. The directory must exist before it can be entered here.
-
Share name — The actual name of the share that is seen from remote machines. By default, it is the same value as Directory, but can be configured.
-
Descriptions — A brief description of the share.
-
Writable — Enables users to read and write to the shared directory
-
Visible — Grants read-only rights to users for the shared directory.
On the Access tab, select whether to allow only specified users to access the share or whether to allow all Samba users to access the share. If you select to allow access to specific users, select the users from the list of available Samba users.
The share is added immediately after clicking OK.
Samba uses /etc/samba/smb.conf as its configuration file. If you change this configuration file, the changes do not take effect until you restart the Samba daemon with the command service smb restart.
To specify the Windows workgroup and a brief description of the Samba server, edit the following lines in your smb.conf file:
workgroup = WORKGROUPNAME
server string = BRIEF COMMENT ABOUT SERVER
Replace WORKGROUPNAME with the name of the Windows workgroup to which this machine should belong. The BRIEF COMMENT ABOUT SERVER is optional and is used as the Windows comment about the Samba system.
To create a Samba share directory on your Linux system, add the following section to your smb.conf file (after modifying it to reflect your needs and your system):
[sharename]
comment = Insert a comment here
path = /home/share/
valid users = tfox carole
public = no
writable = yes
printable = no
create mask = 0765
The above example allows the users tfox and carole to read and write to the directory /home/share, on the Samba server, from a Samba client.