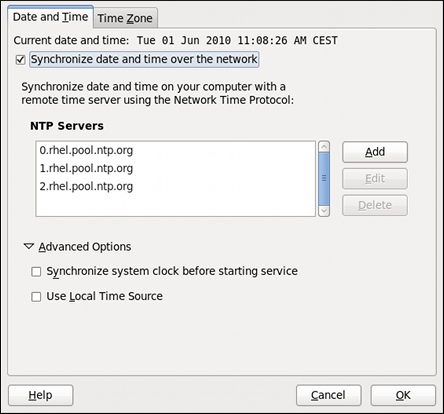
13.1.2. Network Time Protocol Properties
Here you can choose one of the predefined servers, edit a predefined server by clicking the Edit button, or add a new server name by clicking Add. In the Advanced Options, you can also select whether you want to synchronize the system clock before starting the service, and if you wish to use a local time source.