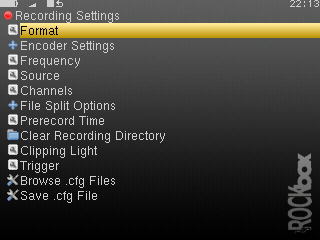
9. Recording Settings
Note: To change the location where recordings are stored open the Context Menu (see
section 4.1.2) on the directory where you want to store them in the File Browser and select
Set As Recording Directory.
9.1. Format
Choose which format to save your recording in. The available choices are the two
uncompressed formats PCM Wave and AIFF, the losslessly compressed WavPack and the
lossy MPEG Layer 3.
9.2. Encoder Settings
This sets the bitrate when using the MPEG Layer 3 format. And has no settings for the other
formats.
9.3. Frequency
Choose the recording frequency (sample rate). are available. Higher sample rates use up
more disk space, but give better sound quality.
Note: The 11.025kHz setting is not available when usingMPEG Layer 3 format.
9.4. Source
Choose the source of the recording. The options are: , and Line In.
9.5. Channels
This allows you to select mono or stereo recording. Please note that for mono recording, only
the left channel is recorded. Mono recordings are usually somewhat smaller than
stereo.
9.6. File Split Options
This sub menu contains options for file splitting, which can be used to split up long
recordings into manageable pieces. The splits are seamless (frame accurate), no audio is lost at
the split point. The break between recordings is only the time required to stop and restart the
recording, on the order of 2 – 4 seconds.
-
Split Measure:
- This option controls wether to split the recording when the Split
Filesize is reached or when the Split Time has elapsed.
-
What to do when Splitting:
- This controls what will happend when the splitting
condition is fullfilled the two available options here are Start a new file or
Stop recording.
-
Split Time:
- Set the time to record between each split, if time is used as Split Measure.
Options (hours:minutes between splits): Off, 00:05, 00:10, 00:15, 00:30, 1:00, 1:14
(74 minute CD), 1:20 (80 minute CD), 2:00, 4:00, 8:00, 10:00, 12:00, 18:00, 24:00.
-
Split Filesize:
- Set the filesize to record between each split, if filesize is used as Split
Measure.
9.7. Prerecord Time
This setting buffers a small amount of audio so that when the record button is pressed, the
recording will begin from that number of seconds earlier. This is useful for ensuring that a
recording begins before a cue that is being waited for.
9.8. Clear Recording Directory
Resets the location where the recorded files are saved to the root of your player’s
drive.
9.9. Clipping Light
Causes the backlight to flash on when clipping has been detected.
Options: Off, Main unit only, Main and remote unit, Remote unit only.
9.10. Trigger
When you record a source you often are only interested in the sound and not the silence in
between. The recording trigger provides you with a tool to automatically distinguish between
sound and silence and record the sound only. Unfortunately it is not very easy to make this
distinction between silence and sound because you hardly ever encounter real silence. There
always are background noises. What is considered as background noise depends on the
situation. For example during a lecture the very low noise of rustling paper might be
considered as background noise. During a rock concert the murmur of the audience might be
concidered background noise which is much louder compared to rustling paper. Also the
duration of the signal matters. When you record speech you want to record every
syllable. When you record live music you may not be interested in that chord the
guitarist strokes for two minutes before the show to verify his amp is turned on.
The trigger features numerous parameters to adapt its behaviour to the desired
situation.
-
Trigger
- This parameter specifies the trigger mode. When set to Off the recording must
be started manually and apart from the Prerecord time no other parameter has
any effect. Once will have the trigger start one recording only; after the recording
has finished the input signal will not start another recording. Repeat will have
the trigger start multiple recordings.
-
Trigtype
- Add description of Trigtype Options: Stop, Pause, New File.
-
Prerecord Time
- This specifies the time that is included into the recording before the
trigger event occurs. This is very useful if you record a signal that fades in. Usually
you want to set the prerecord time ¿= start duration. That ensures that you record
the entire sound. Strictly speaking the prerecord time is not a special parameter
of the trigger. It is available during normal recordings too.
-
Start Above
- The start threshold defines the minimal volume a sound must have to
start the recording. It is displayed numerically in the line ”Start Above”. Note that
the unit of the threshold depends on the settings of the peak meter. (i.e. When the
peak meter displays db you can adjust the level in db and when the peak meter
is set to linear the threshold is displayed as percentage.) In the peak meter at the
bottom of the screen the start threshold is displayed graphically by a little triangle
pointing to the right. There are two special values. The value Off turns the start
condition off. With this setting you have to start the recording manually and the
trigger only stops the recording according to the stop condition. The setting -inf
sets the trigger to the absolute minimum. This setting only makes sense when you
record via a digital input as even the noise of the device itself would exceed this
threshold immediately.
-
for at least
- The start duration defines the minimal duration that a signal must exceed
the start threshold to start the recording. Depending on your situation you may
want to set this setting to 0 (e.g. when copying a song from a commercial medium)
or to quite big values. Because sound is not continuous by nature (think of
percussion) neglectable dropouts are tolerated during this start duration.
-
Stop Below
- When the sound level drops below the stop threshold the recording is
stopped. It is displayed numerically in the line ”Stop Below”. Just like the start
threshold the unit of the stop threshold depends on the settings of the peak meter.
There’s also a small triangular marker in the peak meter at the bottom of the
screen. In contrast to the start threshold marker it points to the left. The value
Off turns the stop condition off. With this setting you have to stop the recording
manually.
-
for at least
- This time specifies the duration the signal must drop below the stop
threshold to stop the recording. By selecting high values you can ensure that, for
example, trailing fade-outs are recorded entirely.
-
Presplit Gap
- When the signal drops below the stop threshold for the time specified by
the presplit gap a new recording may be started when the signal raises above the
start threshold. Thus the value of the presplit gap should be smaller than the stop
hold time. Otherwise the recording would stop anyway and the presplit gap has
no effect. For most uses I recommend to set this parameter equal to the stop hold
time. Sometimes you may encounter a sound source (e.g. a CD) where the songs
have fade outs and hardly any gaps between the tracks. Here you can set the stop
hold time to long values to ensure that all fade outs are recorded completely. By
specifying a short presplit gap you still can split the recording into seperate tracks
whenever the trigger start condition is met.
More information can be found at VolumeTriggeredRecording.