Before beginning development, configure the development environment to work with the application. In the case of GreenPages this means Maven and Eclipse.
The GreenPages application uses Maven for dependency management in Eclipse and for building at the command line. Since Maven downloads needed dependencies, it is helpful to tell dm Server to use the local Maven cache as a repository. In this step the dm Server configuration is modified to search the local Maven cache for bundles.
Open $DMS_HOME/config/server.config. At the bottom of the file, add
provisioning configuration that points at the local Maven cache.
…

    "osgiConsole": {
        "enabled": true,
        "port": 2401
    },
    "provisioning" : {
        "searchPaths": [
            "repository/bundles/subsystems/{name}/{bundle}.jar",
            "${user.home}/.m2/repository/**/{bundle}.jar",
            "repository/bundles/ext/{bundle}",
            "repository/libraries/ext/{library}",
            "repository/libraries/usr/{library}"
        ]
    }
}
Errors in this configuration may cause the dm Server instance to fail to start later. Ensure that this is entered correctly (cut and paste would be ideal) before proceeding.
When this is complete save the file and go to the next step.
The following instructions are most easily followed using the Java perspective rather than the Java EE perspective. If not already in the Java perspective, switch to the Java perspective in Eclipse using the Open Perspective menu:
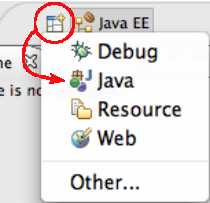 |
The GreenPages application also uses the SpringSource dm Server Tools. These tools integrate with the instance of dm Server that was modified earlier. In this step an instance of the dm Server runtime in Eclipse is created that the GreenPages application will integrate with.
In Eclipse open → → . Select Add… to create a new instance of the dm Server. In the dialog that opens, select the SpringSource dm Server runtime environment and check the box to create a new local server. When complete, press Next.
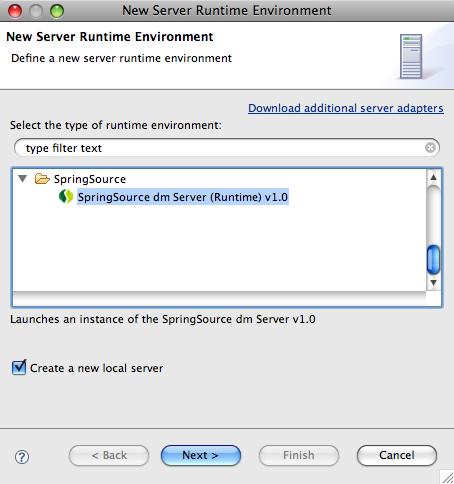 |
In the next dialog, set the SpringSource dm Server installation directory field to the
value of $DMS_HOME and press Finish.
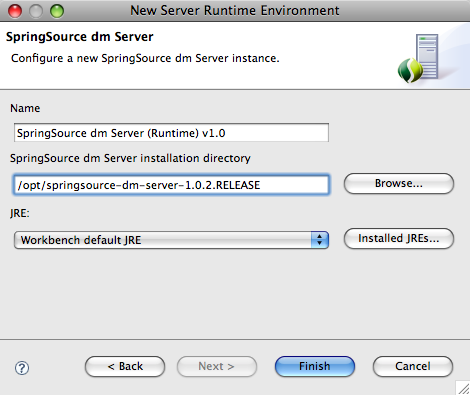 |
After returning to the Preferences window, press OK to return to Eclipse. The Servers view has opened and now shows an instance of SpringSource dm Server in it.
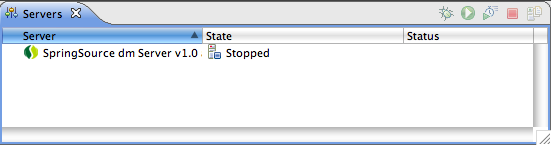 |
Proceed to the next step.