The GreenPages application uses Spring’s @MVC style of web application development. A central type of this development style is the controller class.
The GreenPages application is divided up into a number of OSGi bundles that are represented as Eclipse
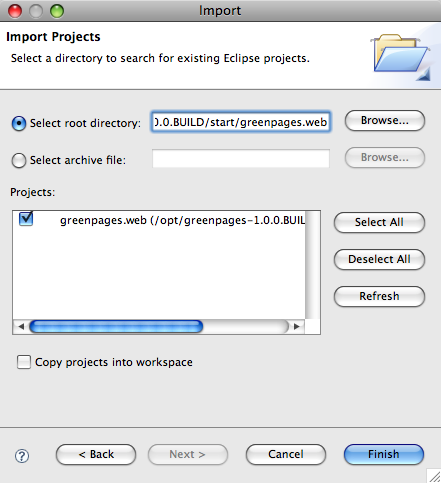
projects. In this step the starting version of the greenpages.web project is imported.
Right-click in the Package Explorer view and select Import…. In
the dialog that opens, choose → and select
Next. In the following dialog set the root directory
field to the
value of $GREENPAGES_HOME/start/greenpages.web and press Finish.
Initially this project will have compile failures in it; this is to be expected.
 |
When Eclipse finishes importing the project, go to the next step.
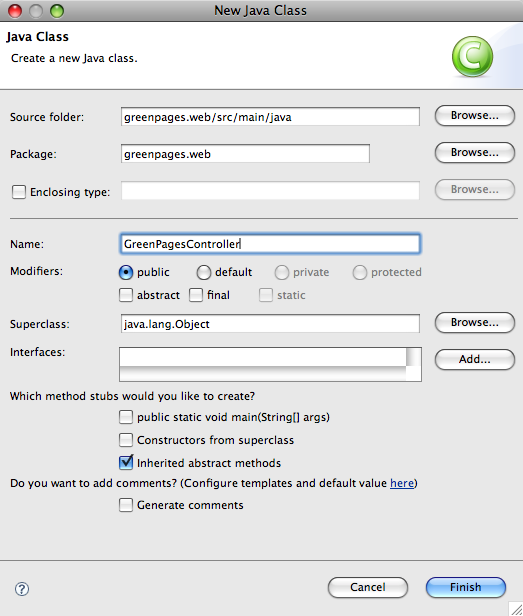
Create a new class by right-clicking on the greenpages.web
package in
the src/main/java source folder and selecting
→ .
(If Class is not offered on the
menu, then the Java perspective may not be being used.
Look for the Class option under
Other… in the Java section.)
Name the new class
GreenPagesController and press Finish.
 |
Next add the following code to the GreenPagesController class.
@Controller
public class GreenPagesController {

    @RequestMapping("/home.htm")
    public void home() {
    }
}
This will not compile.
Eclipse will offer (as a Quick Fix) to insert imports for Spring Framework annotations
Controller and RequestMapping; these should be accepted.
After these changes, save the file and go to the next step.
Once the controller is written, Spring needs to be told to instantiate a bean of the controller type. In
this step you enable Spring’s component scanning to detect the
GreenPagesController class.
Open the META-INF/spring/module-context.xml file in the
src/main/resources source folder. Switch to the Source pane:
 |
In this file add the following line.
<context:component-scan base-package="greenpages.web"/>
When this is complete save the file and go to the next step.