Image Processor Effects Guide
This document introduces you to the Image Processor effects.
Purpose
Image Processor provides many imaging effects. These effects can be used, for example, in a photo editor, a photo album or a camera application.
Introduction
Image Processor has variety of uses ranging from one-shot effects like Sepia to graphical overlay effects like adding borders to the image. Imaging effects are accessed by
the generic interface using ImageProcessor::TEffect
the derived interface using ImageProcessor::CImgProcessor::EffectL(TUid)
The various image effects are listed below:
Antique
To apply the antique effect to an input-image call ImageProcessor::TEffectAntique() function. The image below shows the difference to a standard image without and with the antique effect applied.
This effect applies an antique look to an image.
Blur
To apply the blur effect to an input-image call ImageProcessor::TEffectBlur() function. The image below shows a standard image with the blur effect applied in increasing amounts.
The degree of blurriness is adjustable. The blur function can be used to make transitions of images to look more smoothly, or to hide or make certain areas less recognizable. For low blur settings it can be used as noise reduction.
Negative
To apply the negative effect to an input-image call ImageProcessor::TEffectNegative(). The image below shows the difference to a standard image without and with the negative effect applied.
This effect produce an effect similar to a photo negative.
Grayscale-negative
To apply the grayscale-negative effect to an input-image call ImageProcessor::TEffectGrayscaleNegative(). The image below shows the difference to a standard image without and with the grayscale-negative effect applied.
This effect produce an effect similar to a photo negative.
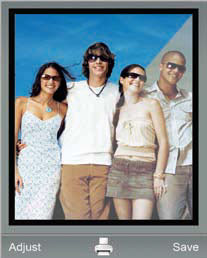
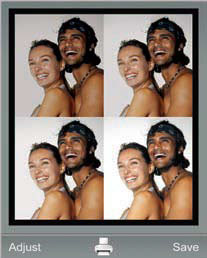
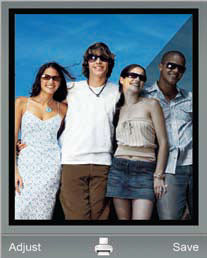
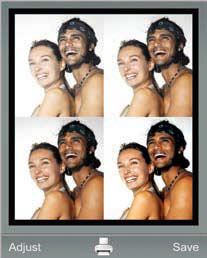
Add overlay from the file
To add overlayfrom a file use ImageProcessor::TOverlay::SetInputL(const TDesC &,const TUid &,const TUid &). The image below shows the addition of overlay.
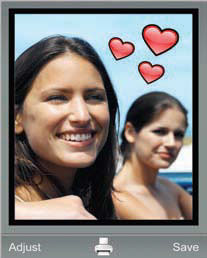
This function adds a clipart from file to an image. the user is able to change its position, angle and scale both when inserting the clipart and after save as clipart from the file. Supported image formats can be called by using ImageProcessor::TOverlay::SupportedInputFormatsL().
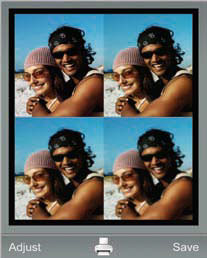
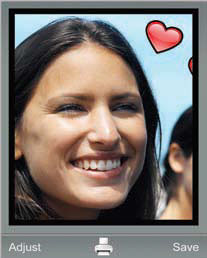
Add overlay from the buffer
To add overlay from a buffer use ImageProcessor::TOverlay::SetInputL(const TDesC8 &,const TUid &,const TUid &). The image below shows the addition of overlay.

ImageProcessor::TOverlay::SetInputL(const TDesC8 &,const TUid &,const TUid &) function adds a overlay from a buffer to an image. The user is able to change its position, angle and scale both when inserting the overlay and after save as overlay from the buffer.
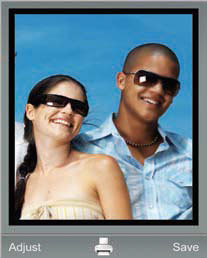
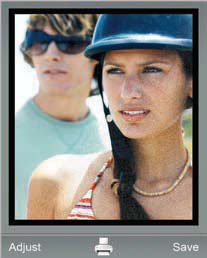
Crop
To apply the crop effect to an input-image call ImageProcessor::CImgProcessor::SetInputRectL(const TRect& ). The image below shows the crop effect applied.
ImageProcessor::CImgProcessor::SetInputRectL(const TRect& ) function crops an arbitrary area of an image. The cropped iamges will be the current session image.
Despeckle
To apply the despeckle effect to an input-image call ImageProcessor::TEffectDespeckle(). The image below shows the despeckle effect applied.
ImageProcessor::TEffectDespeckle() effect performs median filtering of an image. The result is a smoother looking image. If the image has defects such as popcorn noise, the despeckle effect can be used for noise reduction. The size of the kernel (despeckle strength) is adjustable.
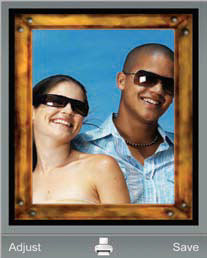
Border effect from a file
To apply the border effect from a file to an input-image call ImageProcessor::TEffectBorder::SetInputL(const TDesC& ). The image below shows the border effect applied.

ImageProcessor::TEffectBorder::SetInputL(const TDesC& ) function adds a frame to an image. The frame is automatically stretched to fit.
Border effect from the buffer
To apply the border effect from a buffer to an input-image call ImageProcessor::TEffectBorder::SetInputL(const TDesC8 & ). The image below shows the border effect applied.
ImageProcessor::TEffectBorder::SetInputL(const TDesC8 & ) function adds a frame to an image. The frame is automatically stretched to fit.
Frosted-glass
To apply the frosted-glass effect to an input-image call ImageProcessor::TEffectFrostedGlass(). The image below shows the difference to a standard image without and with the frosted-glass effect applied.
ImageProcessor::TEffectFrostedGlass() effect creates the effect of looking at the image through a frosted window. The strength of the frost is adjustable.
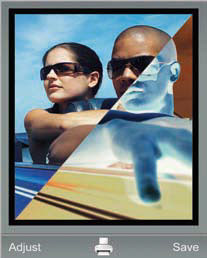
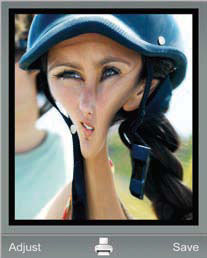
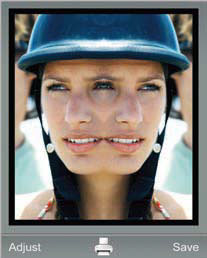
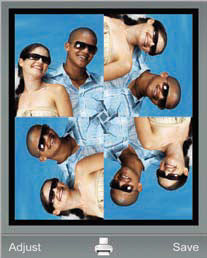
Custom transformation from file
For example, a warp (twist) effect from a file to an input-image call ImageProcessor::TEffectCustomTransformation::SetInputL(const TDesC &). The image below shows the warp effect applied.

ImageProcessor::TEffectCustomTransformation::SetInputL(const TDesC &) function distorts and twists the image according to a pre-defined warp table. This can produce very funny effects if applied on, for example, a face. But it can also be used for lens correction and transformations.
Note: The Warp effect is part of the CAPS adaptation delivered with the Symbian platform.
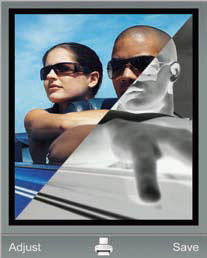
Custom transformation from buffer
To apply the warp (twist) effect from a buffer to an input-image call ImageProcessor::TEffectCustomTransformation::SetInputL(const TDesC8 &). The image below shows the warp effect applied.
ImageProcessor::TEffectCustomTransformation::SetInputL(const TDesC8 &) function distorts and twists the image according to a pre-defined warp table. This can produce very funny effects if applied on, for example, a face. But it can also be used for lens correction and transformations.
Magic-pen
To apply the magic-pen effect to an input-image call ImageProcessor::TEffectMagicPen(). The image below shows the difference to a standard image without and with the magic-pen effect applied.
ImageProcessor::TEffectMagicPen() function applies a mix of edge distinction and colour manipulation to the image to create the illusion of a drawing made by a magic.
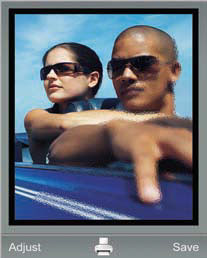
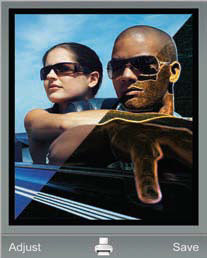
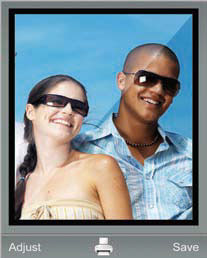
Mirror effect left to right
To apply the mirror effect from left to right to an input-image call ImageProcessor::TEffectMirrorLeftToRight(). The image below shows the mirror effect applied from left to right.
ImageProcessor::TEffectMirrorLeftToRight() function mirrors the left side of image on the right side of the image.
Oil-paint
To apply the oil-paint effect to an input-image call ImageProcessor::TEffectOily(). The image below shows the difference to a standard image without and with the oil-paint effect applied.
ImageProcessor::TEffectOily() function makes the image look like an oil painting.
Paint
To apply the paint effect to an input-image call ImageProcessor::TEffectPaint(). The image below shows the difference to a standard image without and with the paint effect applied.
ImageProcessor::TEffectPaint() function produces an effect that looks like a painting.
Solarize
To apply the solarize effect to an input-image call ImageProcessor::TEffectSolarize(). The image below shows the difference to a standard image without and with the solarize effect applied.
ImageProcessor::TEffectSolarize() function applies a solarize look to an image.
Sharpness
To apply the sharpness effect to an input-image call ImageProcessor::TEffectSharpness(). The image below shows a standard image with the sharpness effect applied in increasing amounts.
ImageProcessor::TEffectSharpness() function applies a sharpening filters to an image. Makes the edges more distinct. The size of the sharpening kernel is adjustable.
Brightness
To apply the brightness effect to an input-image call ImageProcessor::TEffectBrightness(). The image below shows a standard image with the brightness effect applied in increasing amounts.
ImageProcessor::TEffectBrightness() function adjusts the brightness of an image.
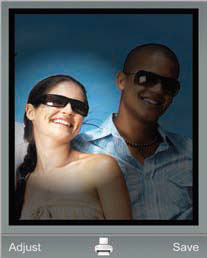
Sepia
To apply the sepia effect to an input-image call ImageProcessor::TEffectSepia(). The image below shows the difference to a standard image without and with the sepia effect applied.

ImageProcessor::TEffectSepia() function produces an old-looking, vintage look on the image.
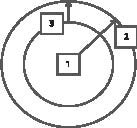
Spot-light
To apply the spot-light effect to an input-image call ImageProcessor::TEffectSpotLight(). The image below shows the spot-light effect applied.
ImageProcessor::TEffectSpotLight() function creates an illuminated circle giving the appearance a spotlight.
Note: The spotlight insertion must end with a call ImageProcessor::TEffectSpotLight::EndL(). For example use the spotlighteffect in Image Editor and Postcard Creator.
The diagram below illustrate the positon, radius and transition size.
Moon-light
To apply the moon-light effect to an input-image call ImageProcessor::TEffectMoonlight(). The image below shows the difference to a standard image without and with the moon-light effect applied.
ImageProcessor::TEffectMoonlight() function applies a moonlight effect to an image.
Contrast
To apply the contrast effect to an input-image call ImageProcessor::TEffectContrast(). The image below shows a standard image with the contrast effect applied in increasing amounts.
ImageProcessor::TEffectContrast() function adjusts the contrast of an image.
Noise
To apply the noise effect to an input-image call ImageProcessor::TEffectNoise(). The image below shows the noise effect applied.
ImageProcessor::TEffectNoise() function applies noise to an image.
Fog
To apply the fog effect to an input-image call ImageProcessor::TEffectFog(). The image below shows the difference to a standard image without and with the fog effect applied.
ImageProcessor::TEffectFog() function applies a fog effect to an image.
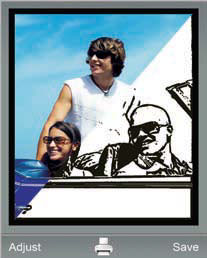
Sketch-gray mode
To sketch-gray mode to the image call ImageProcessor::TEffectSketch::ESketchModeGray(). The image below shows the difference to a standard image without and with the sketch-gray mode effect applied.
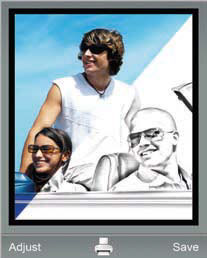
ImageProcessor::TEffectSketch::ESketchModeGray() function applies a sketch effect to an image.
Sketch-color mode
To sketch-color mode to the image call ImageProcessor::TEffectSketch::ESketchColor(). The image below shows the difference to a standard image without and with the sketch-color mode effect applied.
ImageProcessor::TEffectSketch::ESketchColor() function applies a sketch effect to an image.
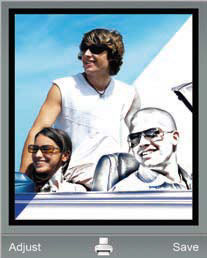
Cartoon
To apply the cartoon effect to an input-image call ImageProcessor::TEffectCartoon(). The image below shows the difference to a standard image without and with the cartoon effect applied.
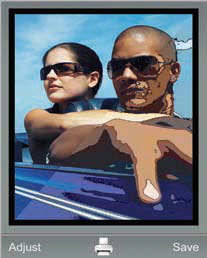
This effect makes an image looks like a cartoon. It is possible to choose if the edges should be accentuated or not.
Stamp
To apply the stamp effect to an input-image call ImageProcessor::TEffectStamp(). The image below shows the difference to a standard image without and with the stamp effect applied.
This effect applies a stamp effect to an image.
Emboss
To apply the emboss effect to an input-image call ImageProcessor::TEffectEmboss(). The image below shows the difference to a standard image without and with the emboss effect applied.

This effect applies an emboss effect to an image.
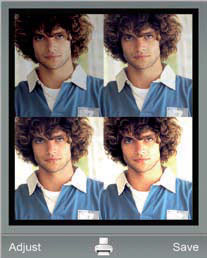
Rotation
To apply the rotation effect to an input-image call ImageProcessor::TEffectRotation(). The image below shows the stages of the rotation effect when applied to an image.
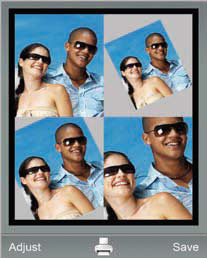
Thios effect rotates and crop an image in the steps of 360 degrees.
Geometric Operation
To apply the 90 degree direction (angle) rotation and crop effect to an input-image call ImageProcessor::TGeometricalOperation(). The image below shows the stages of the rotation-in-all-directions effect when applied to an image.
This effect rotates an image in the step of 90 degrees.
Note: This function should be used when the rotation is in steps of 90 degrees. It is significantly faster than the arbitrary rotation.
Color-boost
To apply the color-boost effect to an input-image call ImageProcessor::TEffectColorBoost(). The image below shows the difference to a standard image without and with the applied color-boost effect.
This effect amplifies the colours in an image.
Auto-level
To apply the auto-level effect to an input-image call ImageProcessor::TEffectAutoLevels(). The image below shows the difference to a standard image without and with the auto-level effect applied.
This effect applies auto level adjustment to an image.
Level
To apply the level effect to an input-image call ImageProcessor::TEffectLevels(). The image below shows the difference to a standard image without and with the level effect applied.
This effects applies level adjustement to the current sesion image.
White-balance
To apply the white-balance effect to an input-image call ImageProcessor::TEffectWhiteBalance(). The image below shows the difference to a standard image without and with the white-balance effect applied.
This effects performs white balance adjustement of an image.
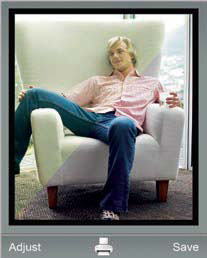
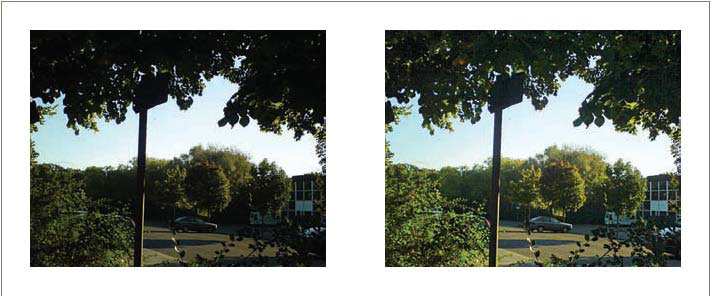
Local intensity-boost
To apply the local intensity-boost effect to an input-image call ImageProcessor::TEffectLocalBoost(). The image below shows the difference to a standard image without and with the local intensity-boost effect applied.
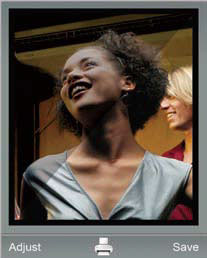
This effect enhances images taken in poor light environments.
The effects boosts the dark areas in the image while keeping the better illuminated ares. Simultaneously, it compensates for the colour distortion associated with the process.
This effect is especially useful when taking photos in direct light or for enhancing details in dark images. For example this effect is used in camera appliation.
Note: When an image is taken in direct light, the local intensity-boost effect can be used to compensate for any lost shadows and highlights. When boosting a bad image, dark areas are repaired by adding more ambient-light. The images below show the difference between a bad image and a boosted image:
Exposure
To apply the exposure effect to an input-image call ImageProcessor::TEffectExposure(). The image below shows the exposure effect applied in increasing amounts.
This effect controls the exposure of the image. A level 0.0, leaves the image unaffected. this effect can be used as a simplified gamma correction.