Animations
Unity's Animation System allows you to create beautifully animated skinned characters. The Animation System supports animation blending, mixing, additive animations, walk cycle time synchronization, animation layers, control over all aspects of the animation playback (time, speed, blend-weights), mesh skinning with 1, 2 or 4 bones per vertex and finally physically based ragdolls.
There are some best practices for creating a rigged character with optimal performance in Unity. It is recommended that you read about these techniques on the Modeling Optimized Characters page.
If you like, quickly jump to one of the topics covered on this page:
You can download an example demo showing pre-setup animated characters here.
Importing The Animations
First of all we have to import the character. Unity natively imports Maya (.mb or .ma) files, Cinema 4D (.c4d) files, and fbx files which can be exported from most animation packages. Click here to learn how to export from your modelling/animation package.
Importing Animations using Animation Splitting
The most convenient way for animators to work is to have a single model containing all animations. When importing the animated model, you can define which frames make up each part of the animation. Unity will automatically split the animation into the individual parts, called Animation Clips.
For example:
- walk animation during frames 1 - 33
- run animation during frames 41 - 57
- kick animation during frames 81 - 97
To import the animations you simply place the model in the Assets folder of your project. Unity will now automatically import it. Highlight it in the Project View and edit the Import Settings in the Inspector.

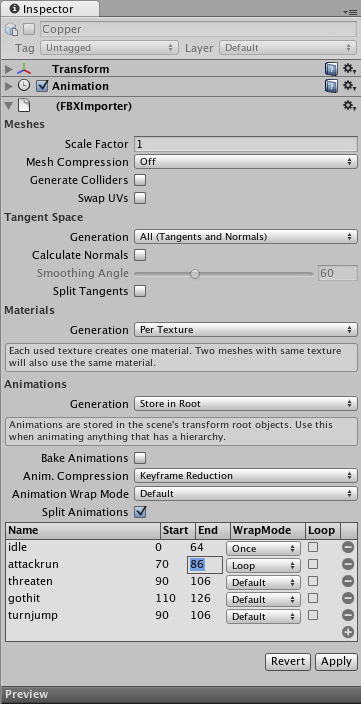
The Import Settings Dialog for a mesh
In the Import Settings, the Split Animations table is where you tell Unity which frames in your asset file make up which Animation Clip. The names you specify here are used to activate them in your game.
| name | Defines the Animation Clip's name within Unity. |
| start frame | The first frame of the animation. The frame number refers to the same frame as in the 3D program used to create the animation. |
| stop frame | The last frame of the animation. |
| WrapMode | Defines how should time beyond the playback range of the clip be treated (Once, Loop, PingPong, ClampForever). |
| loop frame | If enabled, an extra loop frame is inserted at the end of the animation. This frame matches the first frame in the clip. Use this if you want to make a looping animation and the first & last frames don't match up exactly. |
Importing Animations using multiple model files
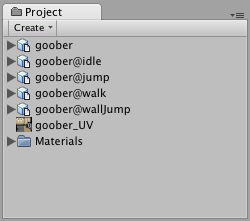
The other way to import animations is to follow the @ animation naming scheme. You create separate model files and use this naming convention: 'model name'@'animation name'.fbx

An example of four animation files for an animated character
Unity automatically imports all four files and collects all animations to the file without the @ sign in. In the example above, the goober.mb file will be set up to reference idle, jump, walk and wallJump automatically.
Importing Inverse Kinematics
When importing animated characters from Maya that are created using IK, you have to check the Bake IK & simulation box in the Import Settings. Otherwise, your character will not animate correctly.
Bringing the character into the Scene
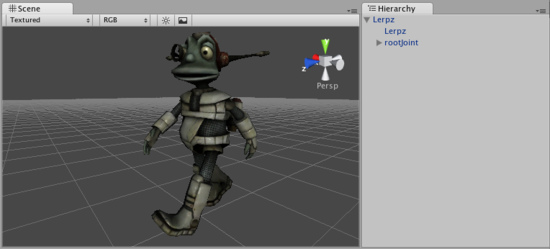
When you have imported your model you drag the object from the Project view into the Scene View or Hierarchy.

The animated character is added by dragging it into the scene
The character above has three animations in the animation list and no default animation. You can add more animations to the character by dragging animation clips from the Project View on to the character (in either the Hierarchy or Scene View). This will also set the default animation. When you hit Play, the default animation will be played.


