Importing Objects From 3D Studio Max
If you make your 3D objects in 3dsMax, you can save your .max files directly into your Project or export them into Unity using the Autodesk .FBX format. Saving them in the original .max format is recommended.
Unity currently imports from 3ds Max
- All nodes with position, rotation and scale. Pivot points and Names are also imported.
- Meshes with vertex colors, normals and one or two UV sets.
- Materials with diffuse texture and color. Multiple materials per mesh.
- Animations.
- Bone based animations.
To manually export to FBX from 3DS Max
- Download the latest fbx exporter from Autodesk website and install it.
- Export your scene ( or ) in .fbx format. Using default export options should be okay.
- Move the exported fbx file into your Unity project folder.
- When you switch back into Unity, the .fbx file is imported automatically.
- Drag the file from the Project View into the Scene View.
Exporter options
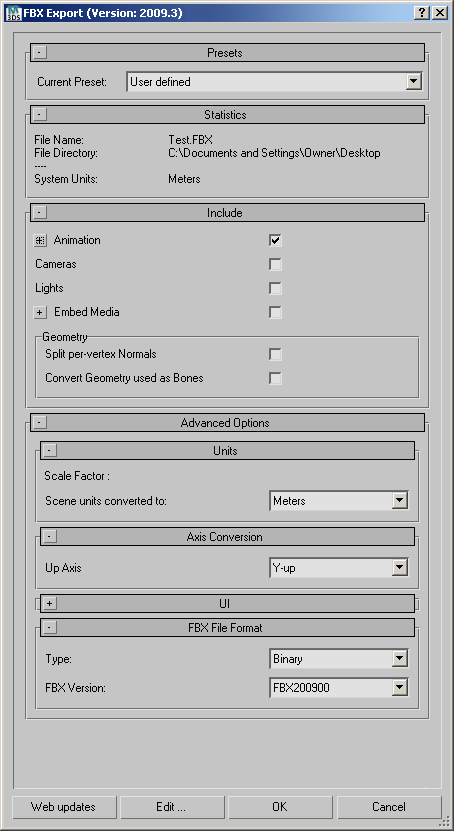
Using default FBX exporter options (that basically export everything) should be okay in all cases.

Default FBX exporter options (for fbx plugin version 2009.3)
Exporting Bone-based Animations
There is a procedure you should follow when you want to export bone-based animations:
- Set up the bone structure as you please.
- Create the animations you want, using FK and/or IK
- Select all bones and/or IK solvers
- Go to and press . Unity makes a key filter, so the amount of keys you export is irrelevant
- "Export" or "Export selected" as newest FBX format
- Drop the FBX file into Assets as usual
- In Unity you must reassign the Texture to the Material in the root bone
When exporting a bone hierarchy with mesh and animations from 3ds Max to Unity, the GameObject hierarchy produced will correspond to the hierarchy you can see in "Schematic view" in 3ds Max. One difference is Unity will place a GameObject as the new root, containing the animations, and will place the mesh and material information in the root bone.
If you prefer to have animation and mesh information in the same Unity GameObject, go to the Hierarchy view in 3ds Max, and parent the mesh node to a bone in the bone hierarchy.
Exporting Two UV Sets for Lightmapping
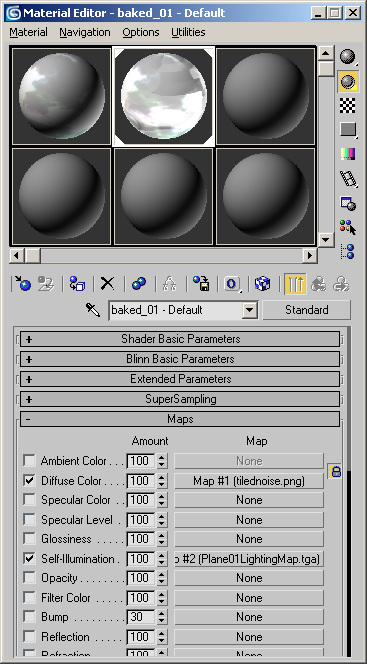
3ds Max' Render To Texture and automatic unwrapping functionality can be used to create lightmaps. Note that Unity has built-in lightmapper, but you might prefer using 3dsmax if that fits your workflow better. Usually one UV set is used for main texture and/or normal maps, and another UV set is used for the lightmap texture. For both UV sets to come through properly, the material in 3ds Max has to be Standard and both Diffuse (for main texture) and Self-Illumination (for lightmap) map slots have to be set up:

Material setup for Lightmapping in 3ds Max, using self-illumination map
Note that if object uses a Shell material type, then current Autodesk's FBX exporter will not export UVs correctly.
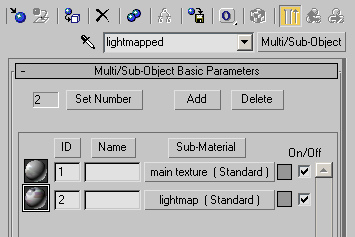
Alternatively, you can use Multi/Sub Object material type and setup two sub-materials, using the main texture and the lightmap in their diffuse map slots, like shown below. However, if faces in your model use different sub-material IDs, this will result in multiple materials being imported, which is not optimal for performance.

Alternate Material setup for Lightmapping in 3ds Max, using multi/sub object material
Troubleshooting
If you have any issues with importing some models: ensure that you have the latest FBX plugin installed. It can be downloaded Autodesk website.
Page last updated: 2010-09-16


