A very useful mechanism available in Wireshark is packet colorization. You can set-up Wireshark so that it will colorize packets according to a filter. This allows you to emphasize the packets you are (usually) interested in.
![[Tip]](wsug_graphics/tip.png) | Tip! |
|---|---|
You will find a lot of Coloring Rule examples at the Wireshark Wiki Coloring Rules page at http://wiki.wireshark.org/ColoringRules. |
There are two types of coloring rules in Wireshark; temporary ones that are only used until you quit the program, and permanent ones that will be saved to a preference file so that they are available on a next session.
Temporary coloring rules can be added by selecting a packet and pressing the <ctrl> key together with one of the number keys. This will create a coloring rule based on the currently selected conversation. It will try to create a conversation filter based on TCP first, then UDP, then IP and at last Ethernet. Temporary filters can also be created by selecting the "Colorize with Filter > Color X" menu items when rightclicking in the packet-detail pane.
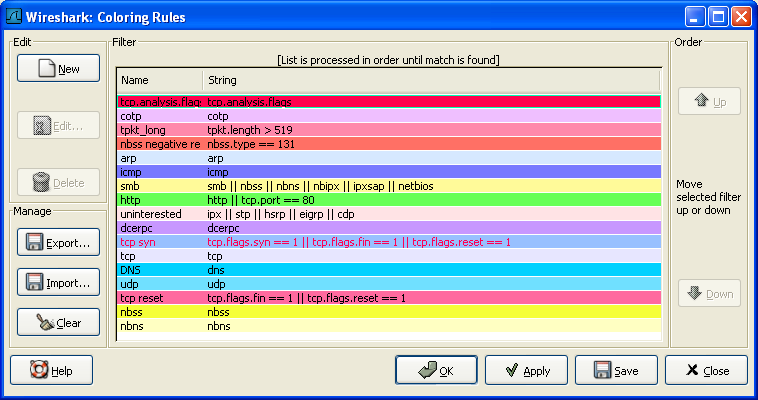
To permanently colorize packets, select the Coloring Rules... menu item from the View menu; Wireshark will pop up the "Coloring Rules" dialog box as shown in Figure 10.1, “The "Coloring Rules" dialog box”.
Once the Coloring Rules dialog box is up, there are a number of buttons you can use, depending on whether or not you have any color filters installed already.
![[Note]](wsug_graphics/note.png) | Note! |
|---|---|
You will need to carefully select the order the coloring rules are listed as they are applied in order from top to bottom. So, more specific rules need to be listed before more general rules. For example, if you have a color rule for UDP before the one for DNS, the color rule for DNS will never be applied (as DNS uses UDP, so the UDP rule will match first). |
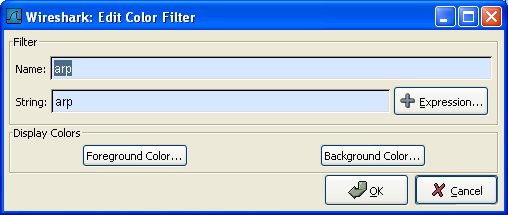
If this is the first time you have used Coloring Rules, click on the New button which will bring up the Edit color filter dialog box as shown in Figure 10.2, “The "Edit Color Filter" dialog box”.
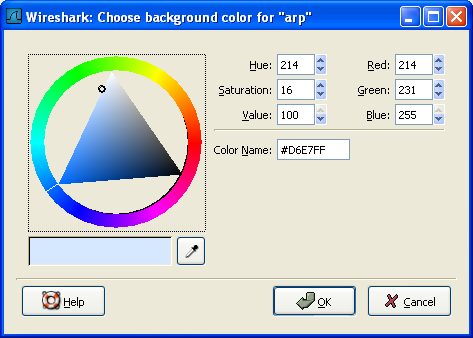
In the Edit Color dialog box, simply enter a name for the color filter, and enter a filter string in the Filter text field. Figure 10.2, “The "Edit Color Filter" dialog box” shows the values arp and arp which means that the name of the color filter is arp and the filter will select protocols of type arp. Once you have entered these values, you can choose a foreground and background color for packets that match the filter expression. Click on Foreground color... or Background color... to achieve this and Wireshark will pop up the Choose foreground/background color for protocol dialog box as shown in Figure 10.3, “The "Choose color" dialog box”.
Select the color you desire for the selected packets and click on OK.
![[Note]](wsug_graphics/note.png) | Note! |
|---|---|
You must select a color in the colorbar next to the colorwheel to load values into the RGB values. Alternatively, you can set the values to select the color you want. |
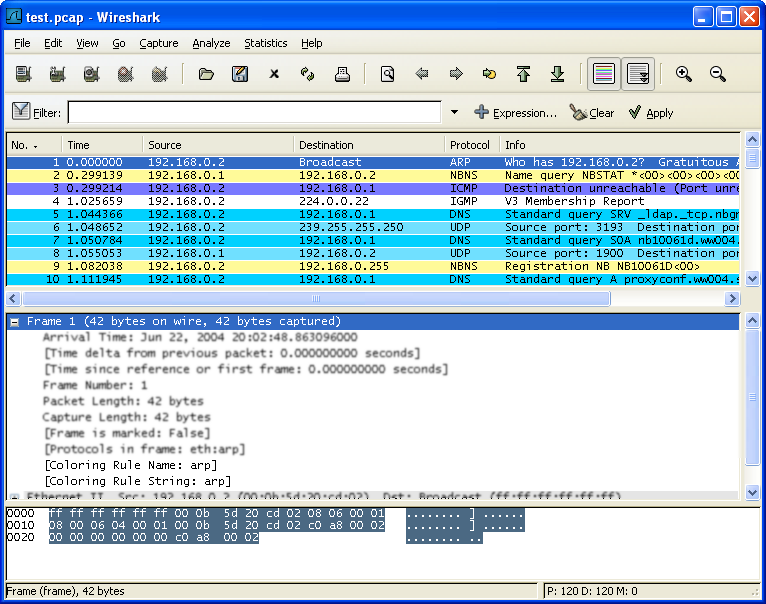
Figure 10.4, “Using color filters with Wireshark” shows an example of several color filters being used in Wireshark. You may not like the color choices, however, feel free to choose your own.
If you are uncertain which coloring rule actually took place for a specific packet, have a look at the [Coloring Rule Name: ...] and [Coloring Rule String: ...] fields.


