Skyboxes
Beginner Designer Programmer
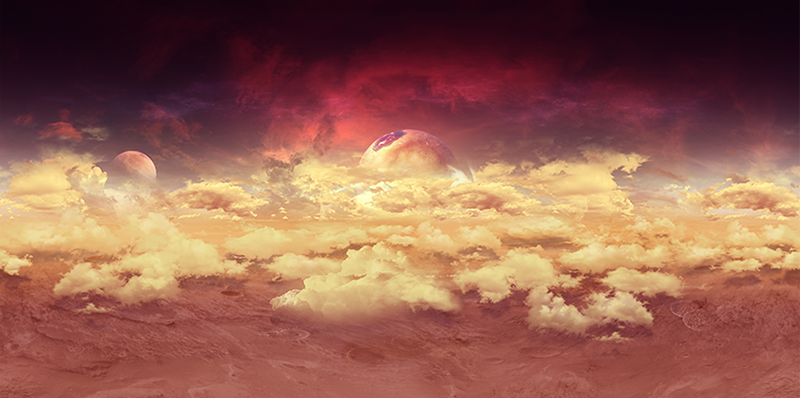
Skyboxes are backgrounds that create the illusion of space and distance. They're also reflected in reflective surfaces in your scene. Typical skybox backgrounds include skies, clouds, mountains, and other scenery. Skyboxes are pre-rendered, so require little GPU and CPU. You can also use skyboxes to light a scene.
Note
Currently, Xenko doesn't support skydomes or local skyboxes.
Cubemaps
To create a skybox, Xenko encloses the scene in a cube and maps a cubemap (a six-sided texture) on the cube's inner faces. This simulates three-dimensional surroundings that appear spacious.
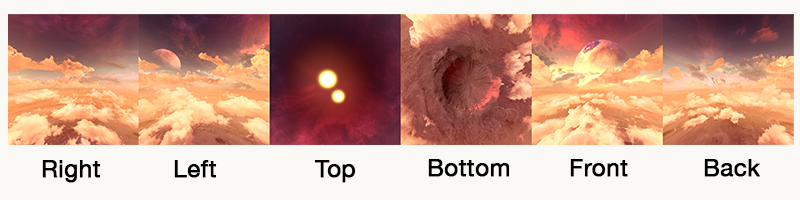
Currently, Game Studio can't convert image files to cuebemaps (.dds files). Use another application to create a cubemap from separate image files, such as:
Create a cubemap in Game Studio
You can capture a cubemap from a position in your scene.
In the scene editor, position the camera at the point where you want to capture the cubemap. The direction the camera faces doesn't matter, only the position.
Typically, you should capture cubemaps at the center of your scene to create the best all-round view.
In the scene editor toolbar, open the Lighting options menu.
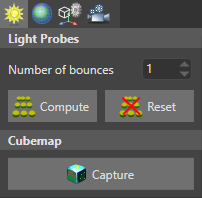
Under Cubemap, click Generate.
Browse to the location on disk you want to save the cubemap, specify a name, and click Save.
Tip
We recommend you save the cubemap in your project Resources folder. For more information, see Organize your files in version control.
Game Studio creates a cubemap .dds file in the location you specified.
Add a cubemap to a project
In the Asset view, click
 , select Textures > Color texture, and browse to the
 .ddsfile.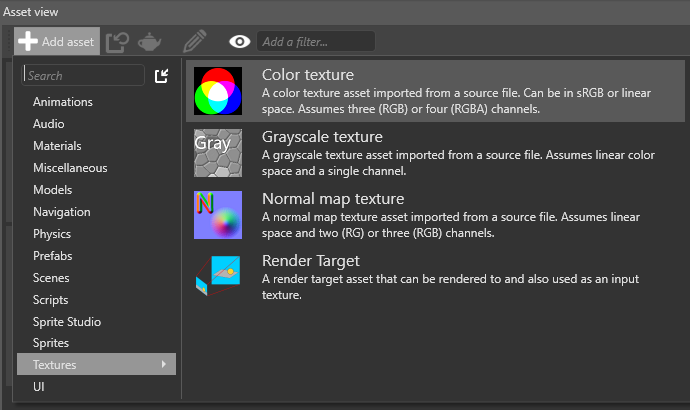
Alternatively, drag and drop a
.ddsfile from Windows Explorer to the Asset view, then select Color texture.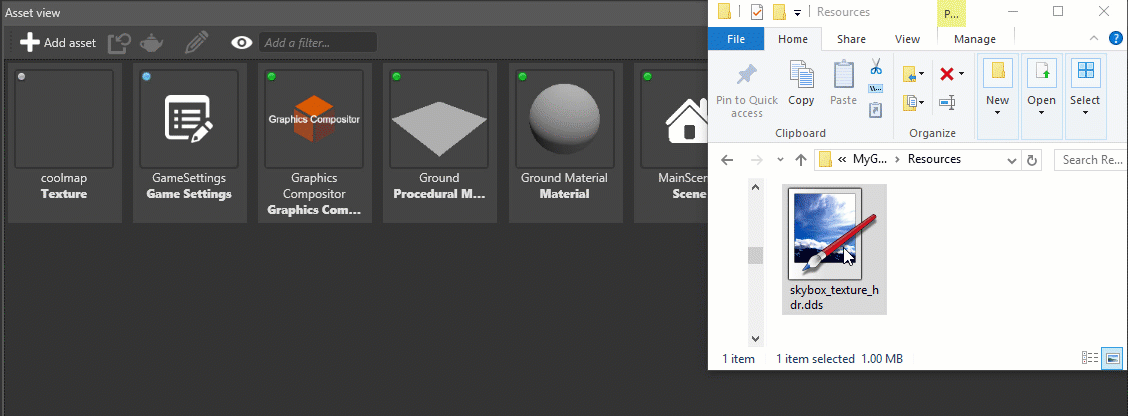
The cubemap is now available as an asset in your project.
Use a cubemap as a skybox
To use a cubemap as a skybox, add it to a background component.
Xenko includes an entity with a background component in the project by default. Only one background can be active in a scene at a time. If there are multiple backgrounds, Xenko only loads the first.
You can add background components to as many entities as you need. You might want to include more than one background, for example, if you want to switch skyboxes at runtime.
To add a cubemap to an entity:
In the Scene view, select the entity you want to add the component to.
This can be an empty entity. Its position in the scene doesn't matter.
In the Property grid (on the right by default), click Add component and select Background.
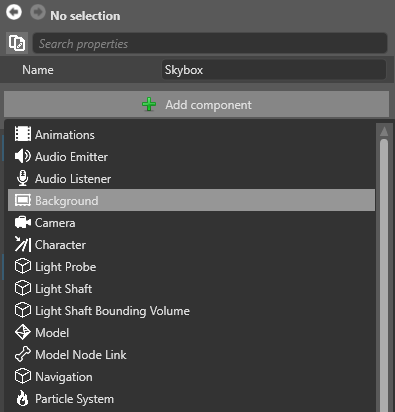
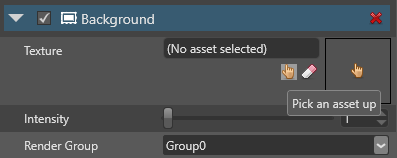
Under texture, specify the cubemap you want to use to create the skybox.
Xenko displays the skybox in the scene.
Change a the skybox at runtime
The following code changes the cubemap in a background:
public Texture cubemapTexture;
public void ChangeBackgroundParameters()
{
    // Get the background component from an entity
    var background = directionalLight.Get<BackgroundComponent>();

    // Replace the existing background
    background.Texture = cubemapTexture;

    // Change the background intensity
    background.Intensity = 1.5f;
}
Use a skybox as a light source
You can use a skybox to light the scene. Xenko analyzes the skybox texture and generates lighting using image-based lighting (Wikipedia). For more information, see Skybox lights.