Administration Guide
You can implement alerts to send email or pages based on events that Zenoss receives. Implemented by the zenactions daemon, Zenoss continuously evaluates each user's paging rules against the event database. Each user has his own set of alerting rules.
Read the following sections to learn about:
Setting SMTP settings for alerts
Creating alerting rules
Escalating alerts
Scheduling alerts
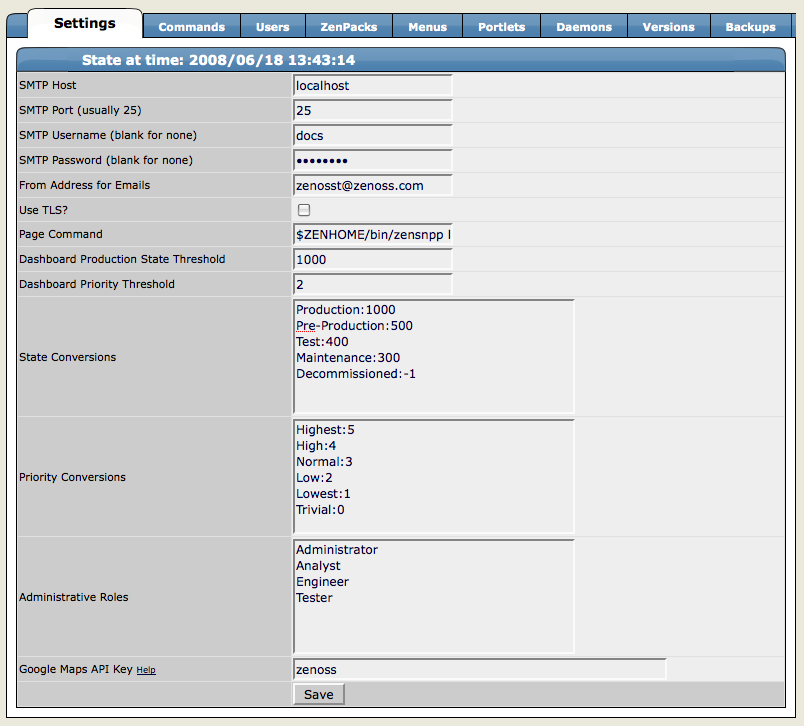
To use email and pager alerts, Zenoss must point to an SMTP relay with the proper settings.
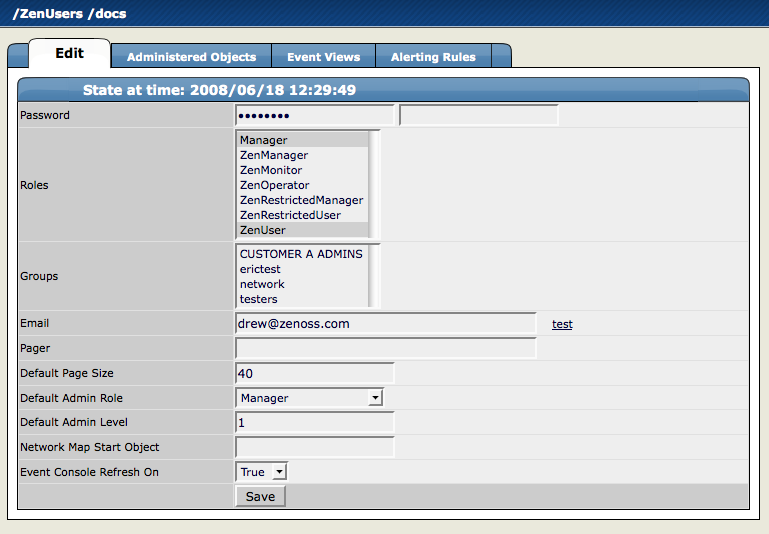
Alerting rules are created on a per user basis. You can add additional recipients for rules, but upon creation, the rules are tied to a user account.
From the upper right corner of the Zenoss Dashboard, click the Preferences link.
The Preferences page appears.
Select the Alerting Rules tab.
The Alerting Rules tab appears.
From the Alerting rule table menu, select Add Alerting Rule.
The Add Alerting Rule dialog appears.
In the ID field, enter a name for the alert.
Click OK.
The main Alerting Rules page appears, showing the alert you just created.
Click the name of the alert.
The Alert Details page appears.
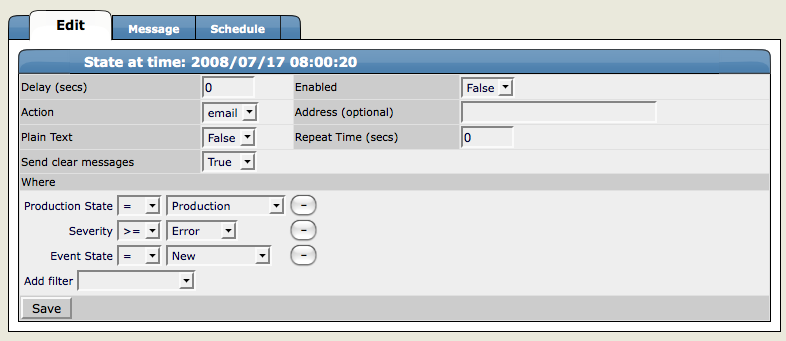
Set the attributes from the Alert Details page.
Use the Delay field to set the number of seconds to wait before sending the alert. If an event clears before delay time no alert is sent.
To enable the alert, set Enabled to True.
Use the Repeat Time to set the time for repeating the alert to send the alert every x seconds until the event is acknowledged.
In the Action field, select whether you want the system to send email or a page.
If action is defined as email the event will be emailed. If the default action is set to page, you must define and test the "Page Command" (from the Settings > Settings tab). Many wireless phone systems have SMTP to Simple Messaging Service (SMS) gateways, so in some cases, you also can use email to send pages.
By default, email alerts are sent to the email address for this user. Pager alerts go to the specified pager address. You can override this by filling in the Address (optional) field.
The Where area of the tab sets the thresholds for the Alert.
The default rule that is created contains the thresholds for an event occurrence where the Event State is “New," Severity is “greater than Error," and Production State is “Production." You can change these thresholds by changing the values in the pop-up menus.
You also can add more filters to the Where area by choosing a filter from the Add Filter menu. Adding a filter creates a pop-menu in the Where area from which you can choose additional values to filter the event. To Remove any of the filters for the alert, click the (-) minus button.
Click Save to save the values you entered on this tab.
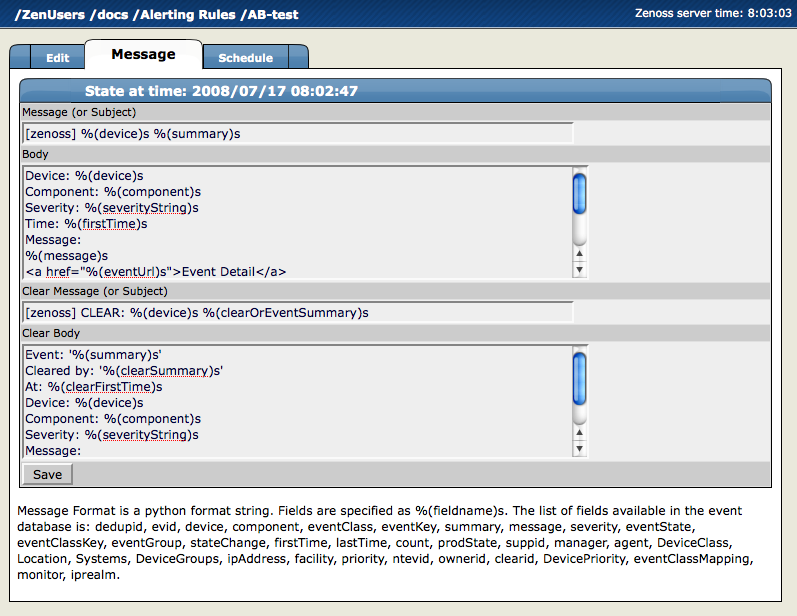
From the Alerting Rules Page, click the Message tab to customize the message that is sent to the specified address.
The Message tab appears.
Use the Message tab to specify the email message subject and body. You actually have two messages to create. The first (called Message) is the message to send when the thresholds for the alert are met or exceeded. The second message is the one to send when the event has cleared (called Clear Message).
The fields for the subject and message areas are python format strings.
Click Save to save the data you entered on this page.
From the Alerting Rules page, click the Schedule tab to set up a schedule for the alert.
The Schedule tab appears.
To add a new schedule for the alert, select Add Rule Window from the Active Periods table menu.
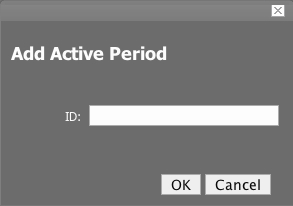
The Add Active Period dialog appears.
Enter a name for the schedule in the ID field, and then click OK.
The Schedule you added appears in the Active Periods list.
Click the name of the new Schedule to set the details for the schedule.
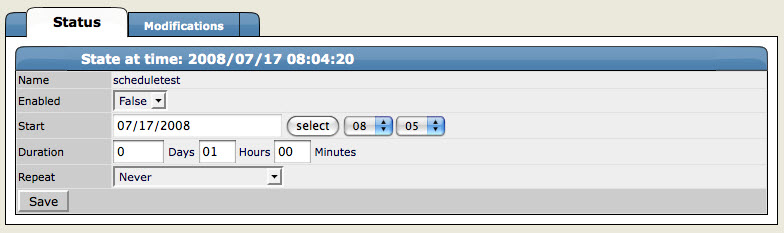
The Schedule Details page appears.
If you want to restrict this Alert to only monitor at certain times for certain durations, set the Enabled field to True.
In the Start area, enter the date you want the alert to start, or click the Select button to choose the date from a calendar.
In the fields to the right of the date, select an hour and minute for the Alert to start.
Use the Duration area to specify the length of time you want to Alert to be listening based on the start time.
If you want the Alerting period to repeat you can choose a time frame from the Repeat pop-up menu. You can choose from:
Never
Daily
Every Weekday
Weekly
Monthly
First Sunday of the Month
Choose a number of times to repeat the selected interval.
Click Save.
You have now saved all of the options for creating a new alert.
You can create a messaging hierarchy using some of the different managing tools available in Zenoss.
You can create an alert hierarchy based on event status and delays by using alerting rules.
Sample Scenario:
You want to set up alerting rules so if that "Person A" (the first person in the hierarchy responding to alerts) does not acknowledge or suppress an event of a specific priority within a specific length of time (changing the event status), then "Person B" is notified by email to respond.
Step 1: Create an Alerting Rule for the Default Case (Initial State)
The default case is "when any new event of any priority occurs, alert Person A."
Create an alerting rule with a Delay value of 0 (zero) seconds.
Step 2: Create an Alerting Rule for the Next Level
For the next level in the hierarchy, the case is "If Person A does not acknowledge or suppress the event within an hour, then send an alert to the next person in the hierarchy (Person B)."
Create an additional alerting rule for Person B. To do this, you can:
Create an additional rule for the currently logged-in User account.
Add Person B's email address to the Address field. This address overrides the User account email.
Set the value of Delay to the number of seconds you want to wait after an event has come in to Zenoss but whose status has not changed. In this example, the wait time is one hour (3600 seconds).
In the Add filter area, select Event State, and then select the event state that will keep this rule from being executed on all events (including those acknowledged by Person A). For this example, select New.
You can use delays when creating alerting rules to set up on-call schedules and elevation hierarchies. Using delays will allow you to specify that if an event is not acknowledged in a certain amount of time, then Zenoss should send email to the next person in the hierarchy. You accomplish this by filtering on event state ('New') and adding a delay. Create an alerting rule for the tier 1 support person that does not have a delay so they find out immediately and can acknowledge the event if possible.
Create a second alerting rule (this one will be for the tier 2 person in the hierarchy) and enable it.
Use the 'where' clause to indicate that this rule is in effect only for events that have not yet been acknowledged.
Delay = 300 (in seconds, 5 minutes)
In the Where area,
Production State = Production
Severity >= Error
Event State = New
This rule now says fire this alert if there is an event in the system that is New (not acknowledged) for 5 minutes send email to this user.
Click the Message tab and in the Message (or subject) field enter the following:
[Zenoss-delayed] %(device)s %(summary)s
In the Clear message (or Subject) area, enter the following.
[Zenoss-delayed] CLEAR: %(device)s %(clearOrEventSummary)s
Click the Schedule tab to edit the schedule. You can tell the rule to only be active when this user is on call (remember each alerting rule is user based).
In the Add field enter a name for the new schedule.
The new schedule appears in the list.
Click the name of the new schedule and set these values:
Name - Name of the new schedule.
Enabled - Set to True.
Start - Specify when you want the rule to start.
Duration - Specify how long you want the rule to be in effect.
Repeat - Specify the number of times to repeat the schedule.
Every - Specify how many time periods to repeat.
Click Save.