Software updates
Like any other software system, Zentyal server requires periodic updates, either to add new features or to fix defects or system failures.
Zentyal distributes its software as packages and it uses Ubuntu’s standard tool, APT [1]. However, in order to ease this task, it provides a web interface to simplify the process.[#]_
| [1] | Advanced Packaging Tool (APT) is a system for the management of software packages created by the Debian Project that greatly simplifies the installation and removal of programs on Linux http://wiki.debian.org/Apt |
| [2] | For a more extensive explanation on how to install software packages in Ubuntu, please read the chapter on package management in Ubuntu’s official documentation https://help.ubuntu.com/10.04/serverguide/C/package-management.html |
The web interface allows checking for new available versions of Zentyal components and installing them in a simple way. It also allows you to update the software supporting Zentyal, mainly to correct potential security flaws.
Management of Zentyal components
The management of Zentyal components allows you to install, update and delete Zentyal modules.
The component manager is a module, and like any other Zentyal module it must be enabled before being used. To manage Zentyal components you must access Software Management -> Zentyal components.
Management of Zentyal components
When entering this sections you will see the advanced view of the package manager, that you might have seen already in the installation process. This view has three tabs, each one for the actions of Installing, Updating and Deleting Zentyal components respectively.
On this view, you have an option to change to basic mode, on which you can install packages collections depending on the role of the server you are setting up.
Getting back to the advanced view, let’s see in detail the actions that are available.
Component installation
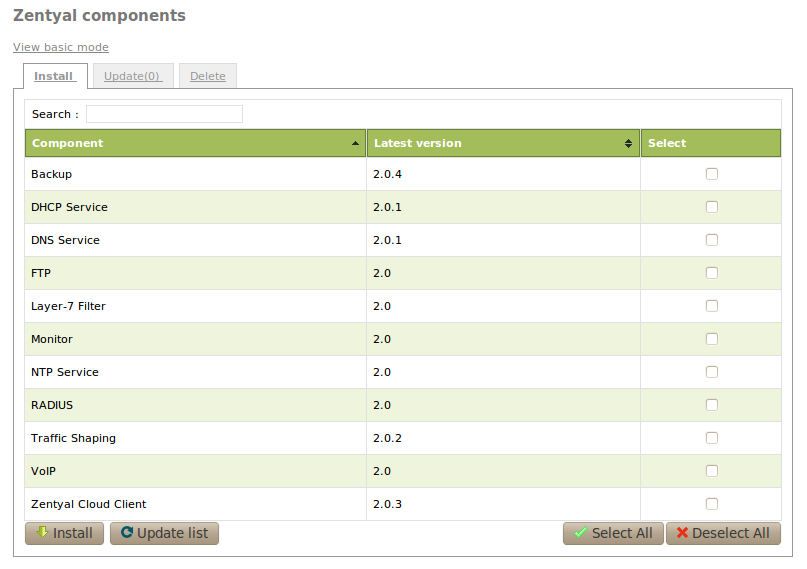
This is the visible tab when entering the component management section. Here you have three columns, one for the component name, another for the version currently available in the repositories and a third one to select the component. In the lower part of the table you can see the buttons to Install, Update list, Select all and Deselect all.
In order to install the components you want, you just need to select them and click on the Install button. You will access then a page with a complete list of the packages to be installed, as well as some recommendations that, although not being necessary dependencies, they can improve or increase the options of the installed components.
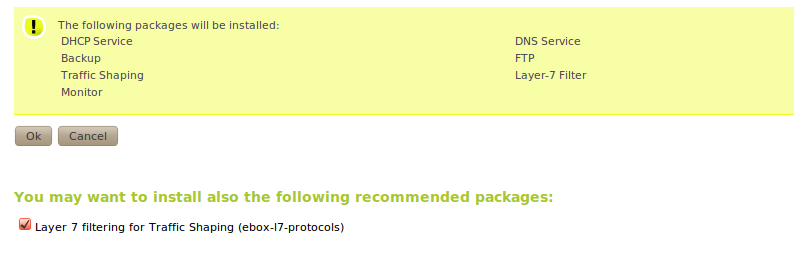
Confirm the installation and recommendations
The Update list button synchronizes the list of packets with the repositories.
Component update
The following tag, Update, shows between brackets the number of available updates. Apart from this feature, if you view this section, you can see that it is distributed in a manner very similar to the installation view, with only some minor differences. An additional column indicates the version currently installed and in the bottom of the table you can see a button to click once to select packages to upgrade. As with the installation of components, you will access a confirmation screen showing the packages to be installed.
Component deletion
The last tag, Delete, shows a table with the installed packages and their versions. In a similar way as with the previous view, you can select packages to uninstall and then click the Delete button in the lower left part of the table to complete the action.
Before performing the action, just like in the previous cases, Zentyal will ask for confirmation before deleting the selected packages and their dependencies.
System Updates
The system updates perform the updates of programs used by Zentyal. In order to carry out its function, Zentyal server integrates different system programs. These programs are referenced as dependencies, ensuring that when installing Zentyal, or any of the required modules, they are also installed guaranteeing the correct operation of the server. Similarly, these programs may have dependencies as well.
Usually the update of a dependency is not important enough to create a new Zentyal package with new dependencies, but it may be interesting to install it in order to use its improvements or its patches for security flaws.
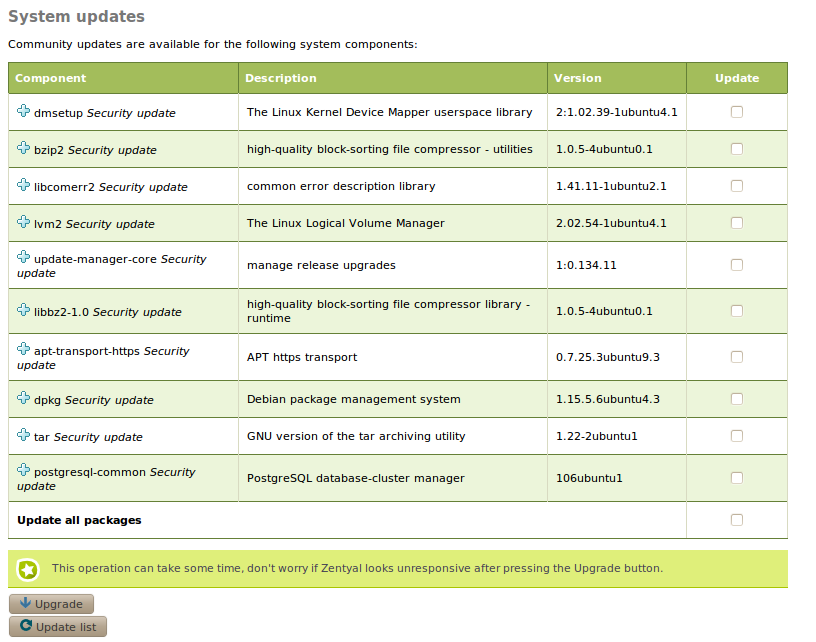
In order to see the system updates you must go to Software Management ‣ System Updates. You should see if your system is already updated or, otherwise, a list of packages that can be upgraded. If you install packages on the server without using the web interface, this data may be outdated. Therefore, every night a process is executed to search for available updates for the system. Such a search can be forced by clicking on the button Update list on the lower part of the page.
System Updates
For each update, you can determine whether it is a security update using the information icon. If it is a security update the details about the security flaw included in the package changelog will be displayed by clicking on the icon.
If you want to perform an update you should select the packages on which to perform the action and press the appropriate button. As a shortcut, you can use the button Update all packages. Status messages will be displayed during the update operation.
Automatic updates
Automatic updates allow Zentyal server to automatically install any updates available.
This feature can be activated by accessing the page Software Management -> Automatic Updates.
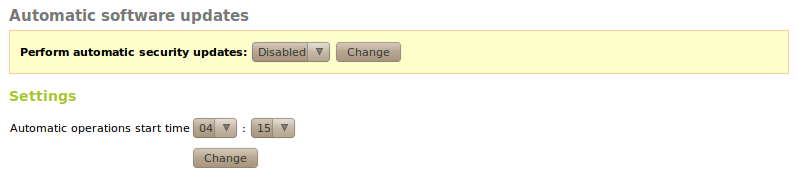
Automatic updates management
On that page you can also choose the time of the day in which these updates will be performed.
It is not advisable to use this option if the administrator wants to keep a higher level of security and control in the management of updates.