Getting started
This 20-minute getting started guide walks you through all of the things you can do with Anaconda Enterprise. We recommend that you do each step hands-on in Enterprise as you walk through this guide.
You can choose to deploy and share an existing Anaconda Project, or jump right into creating and editing a new project.
TIP: Download the Cheat Sheet for handy reference while you work through the steps.
Getting started steps
- Before you start
- Deploy a sample project
- Create an Anaconda Project
- Launch an Editing Session
- Add a notebook
- See how Anaconda Projects work
- Run the Notebook
- Deploy the Project
- Share your Deployment
- What’s next?
Before you start
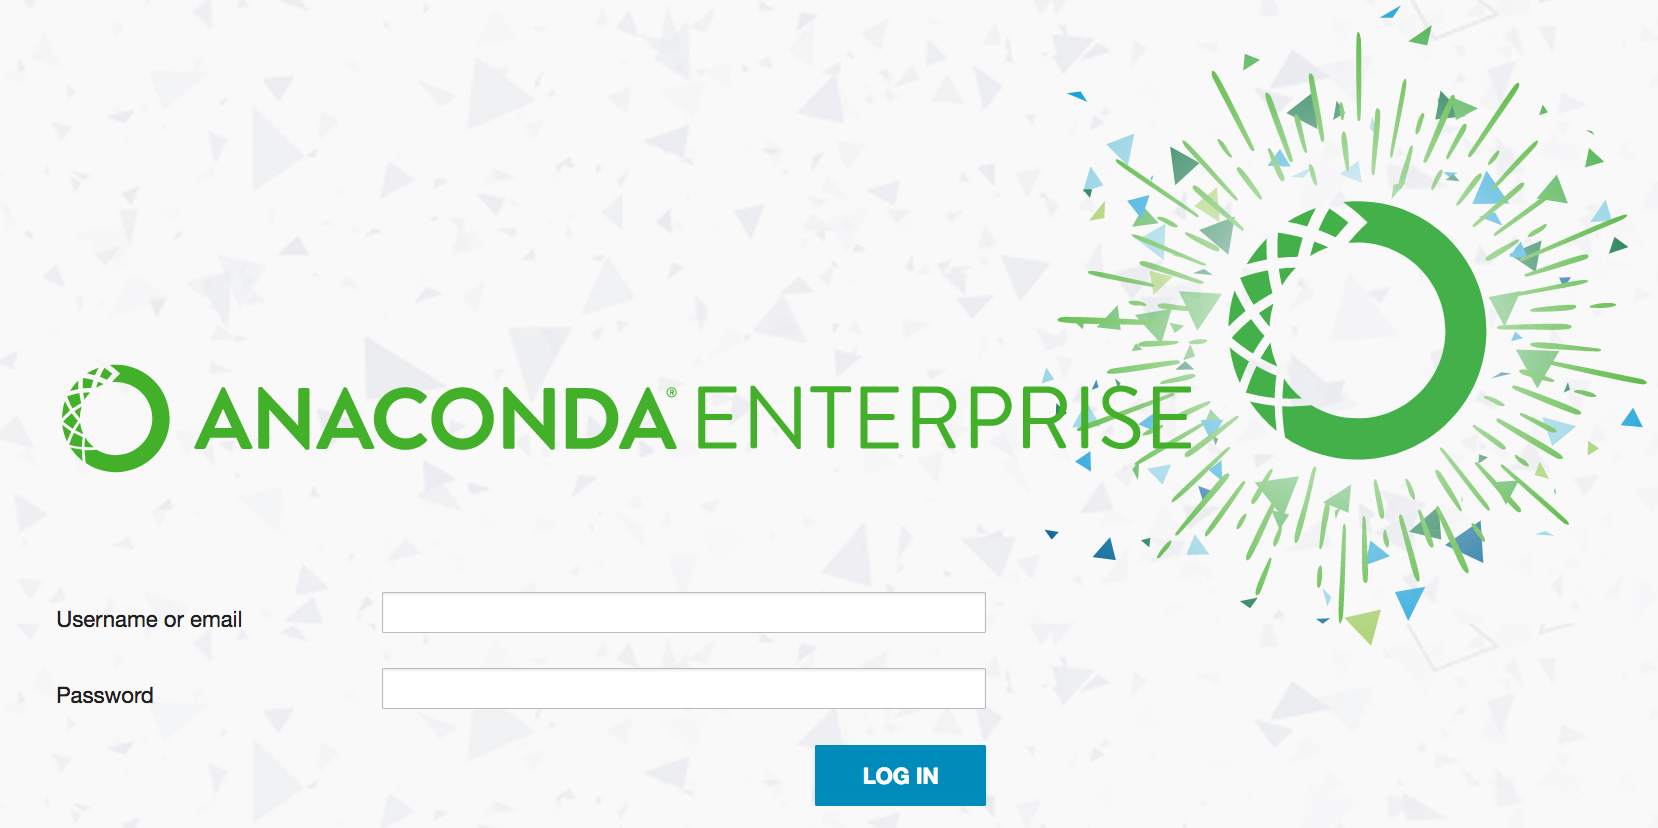
You will have already received a welcome email from your system administrator with a link to your Enterprise site, your username and password. Click the link and enter your username or email address and password, then click the Login button:
NOTE: If your administrator enabled self-registration, you can create your own username and password. Enter the following information to register:

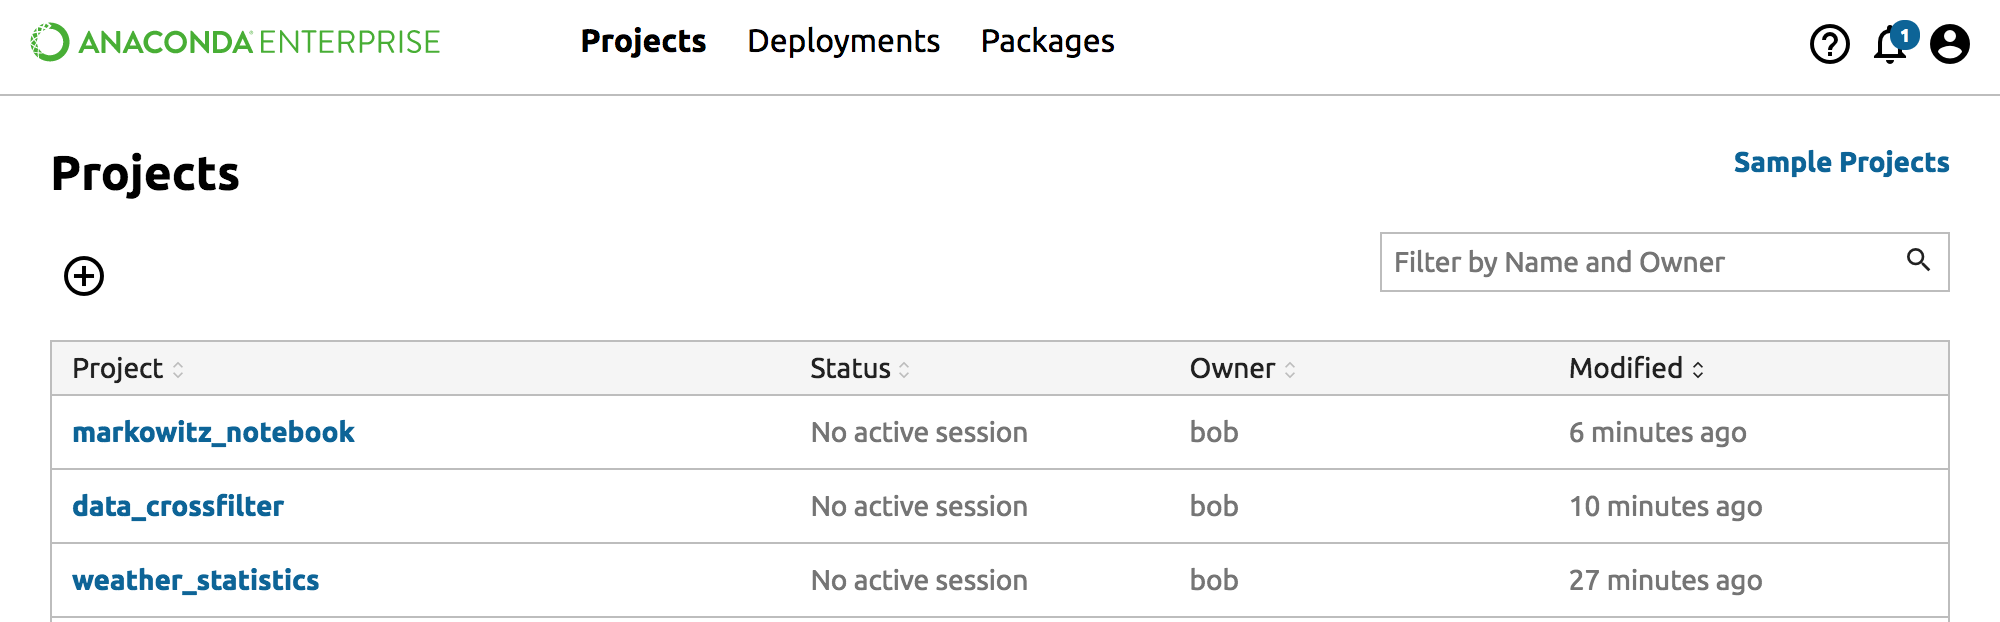
Now you are at the Anaconda Enterprise dashboard, which displays a list of all your Anaconda Projects.
Deploy a sample project
Enterprise includes many types of sample projects for you to use for testing and to use as recipes.
To open a sample project, click the top right “Sample Projects” link. Scroll to find the project named “data_crossfilter” and click the “Save to My Projects” link.
Then return to the Projects list by clicking the top left “Back to My Projects” link.
Select the Data Crossfilter project by clicking its name.
Deploy your Project
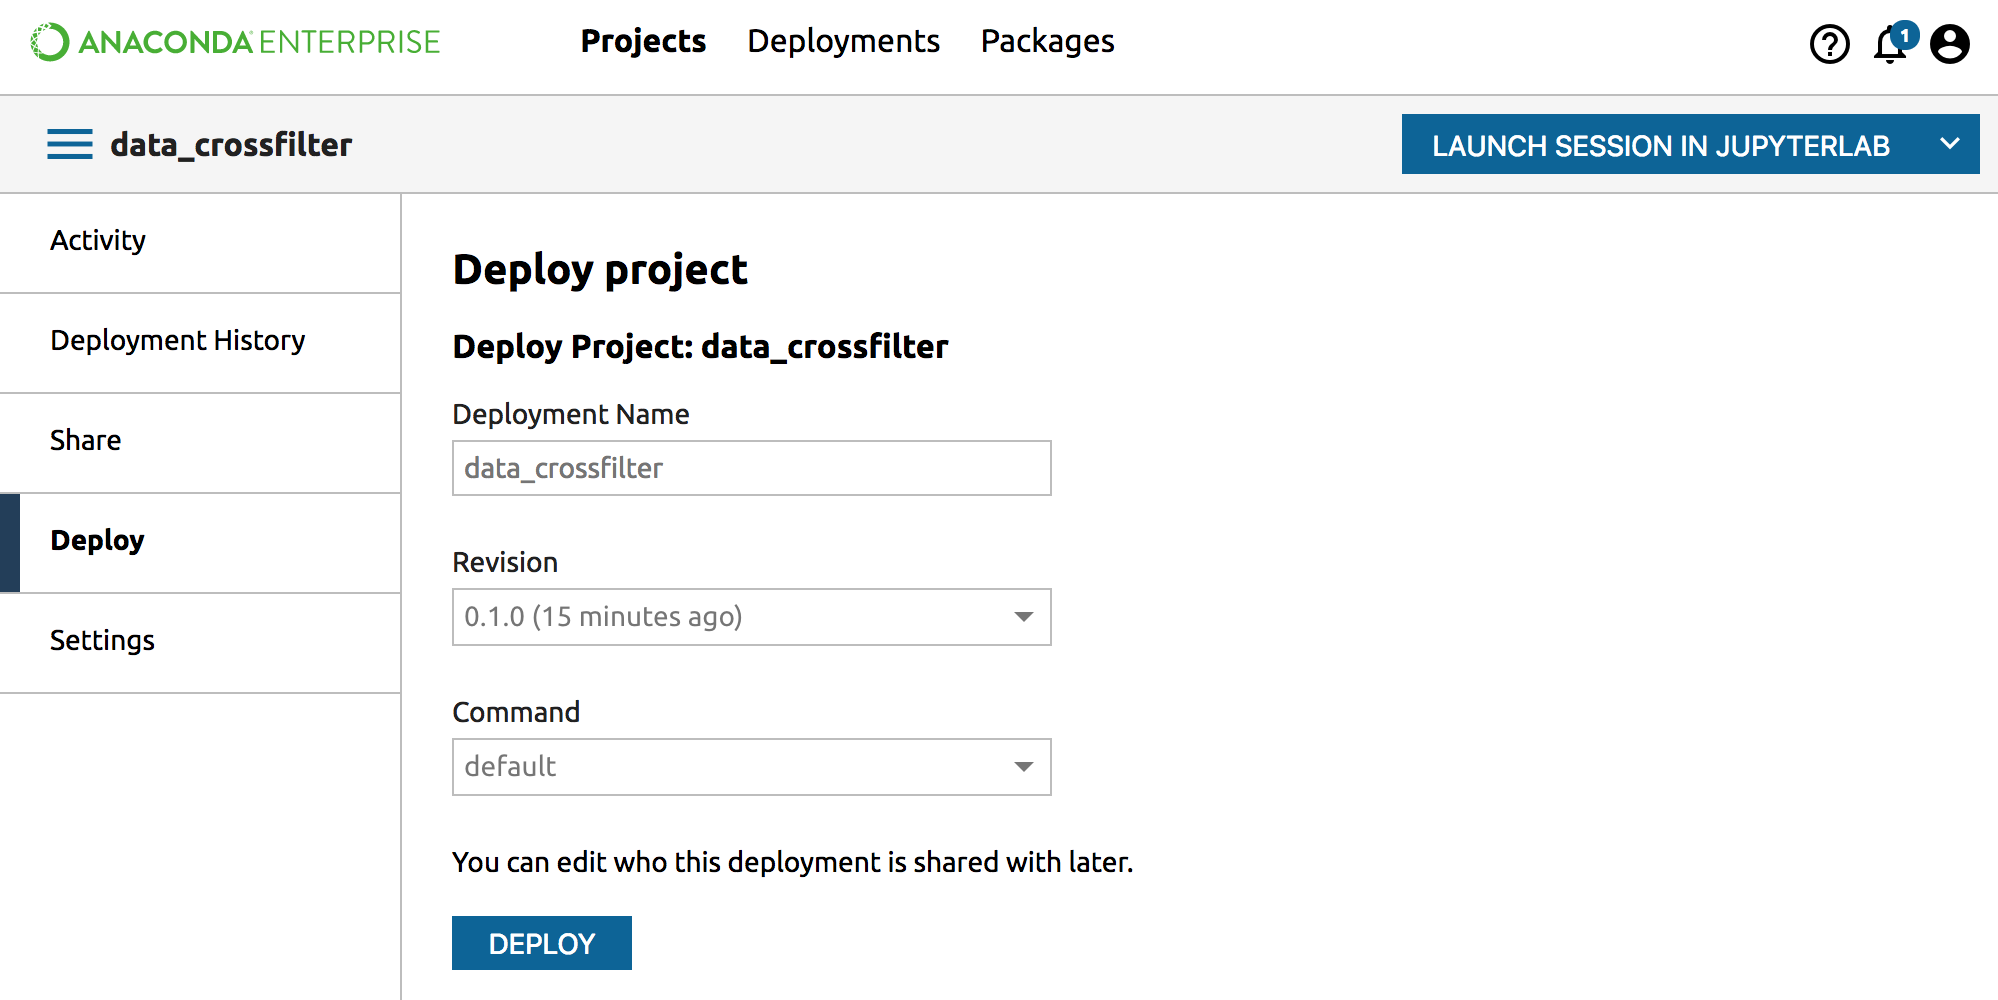
To Deploy the Data Crossfilter project, from the left navigation click the Deploy tab.
Accept the Project’s default settings by clicking the Deploy button.
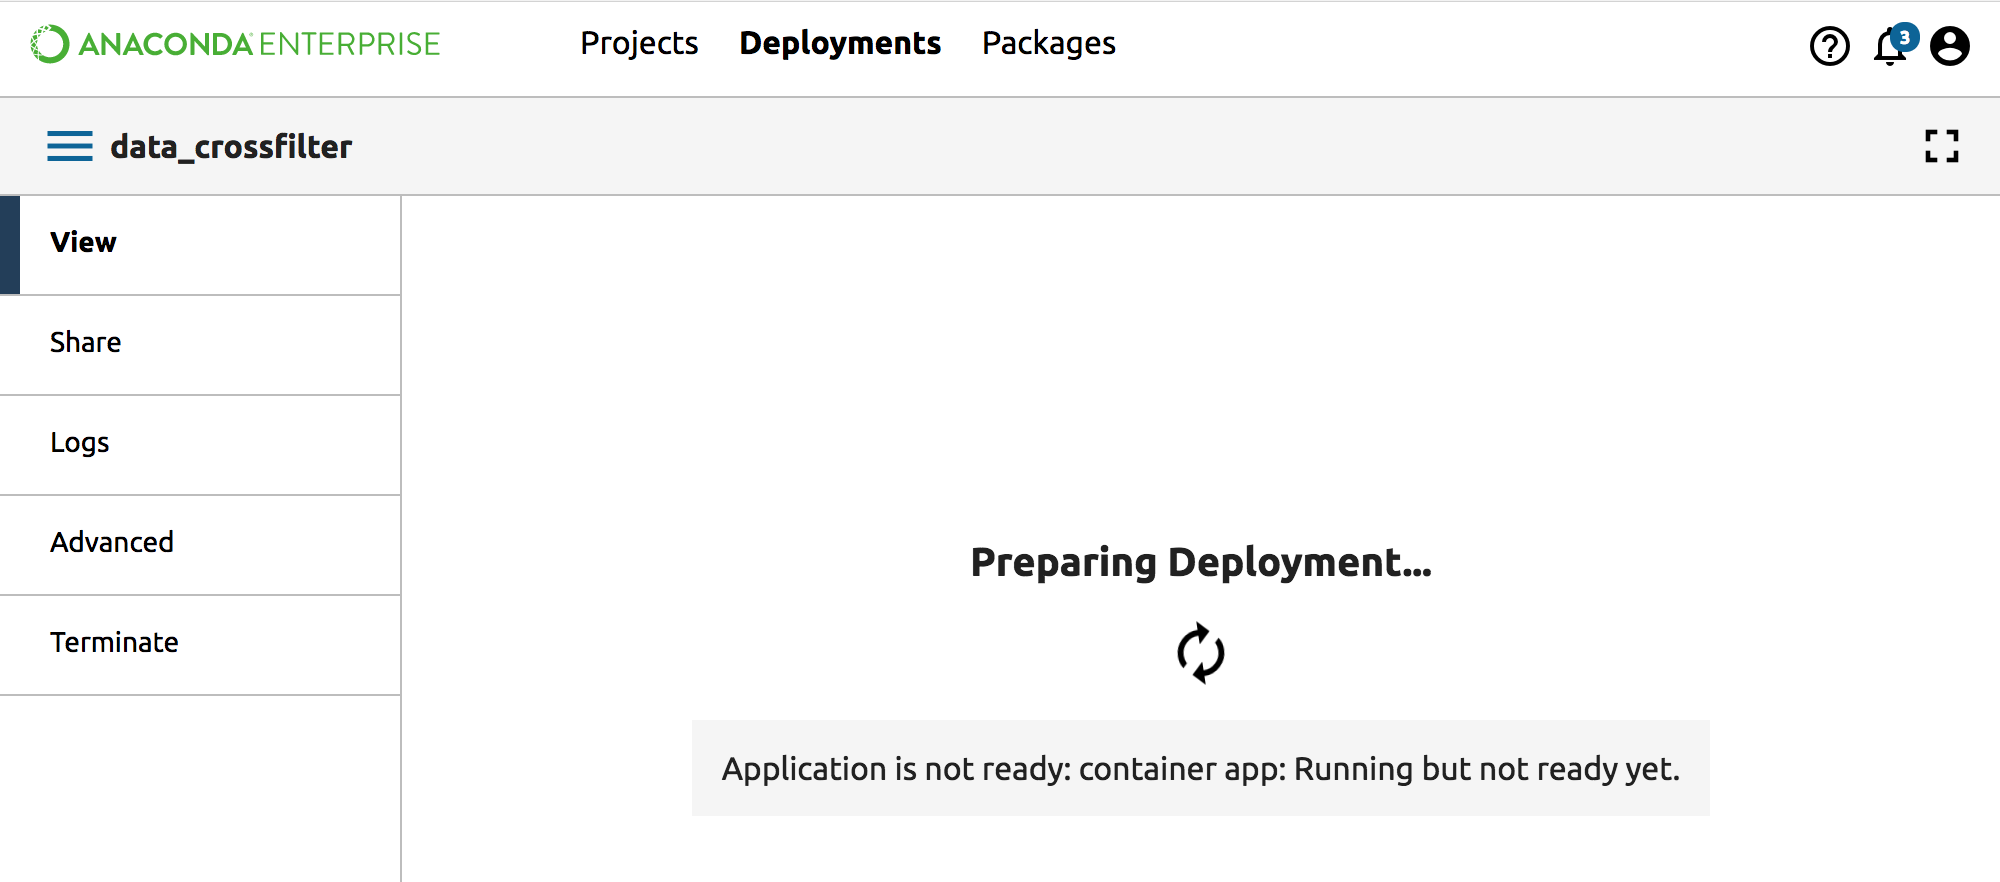
After Enterprise finishes deploying, click the Done button to view the deployment.
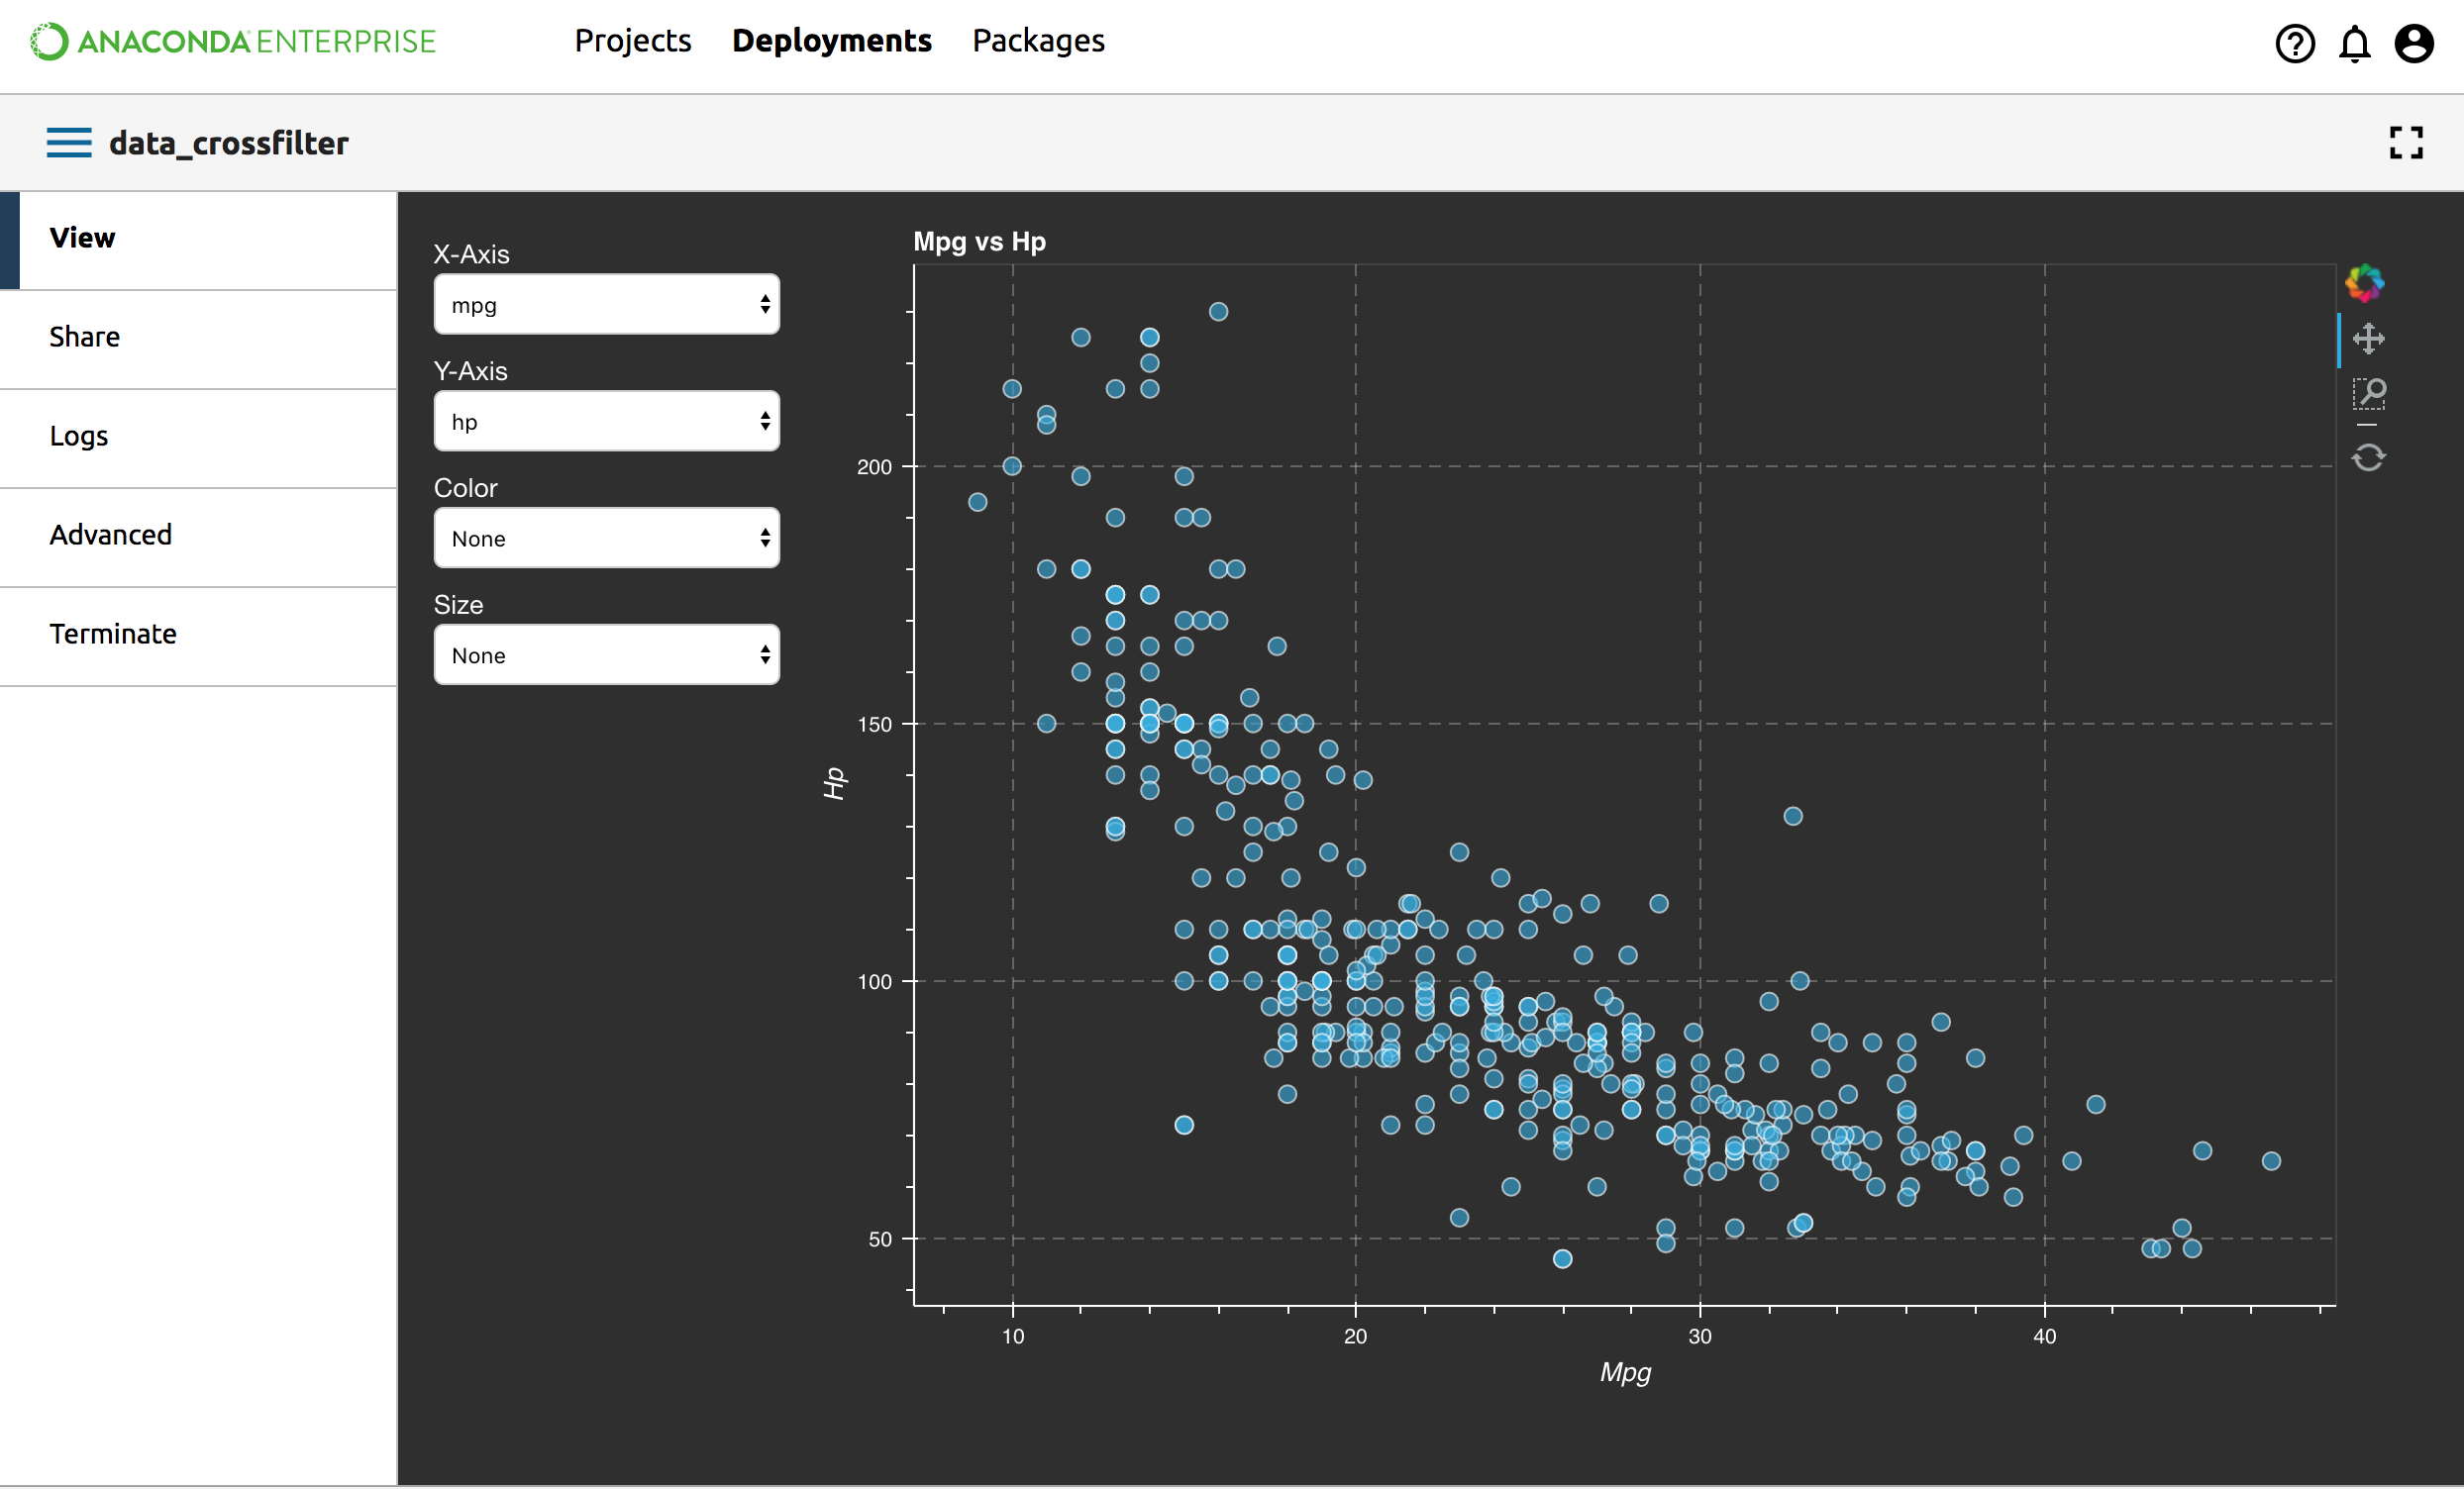
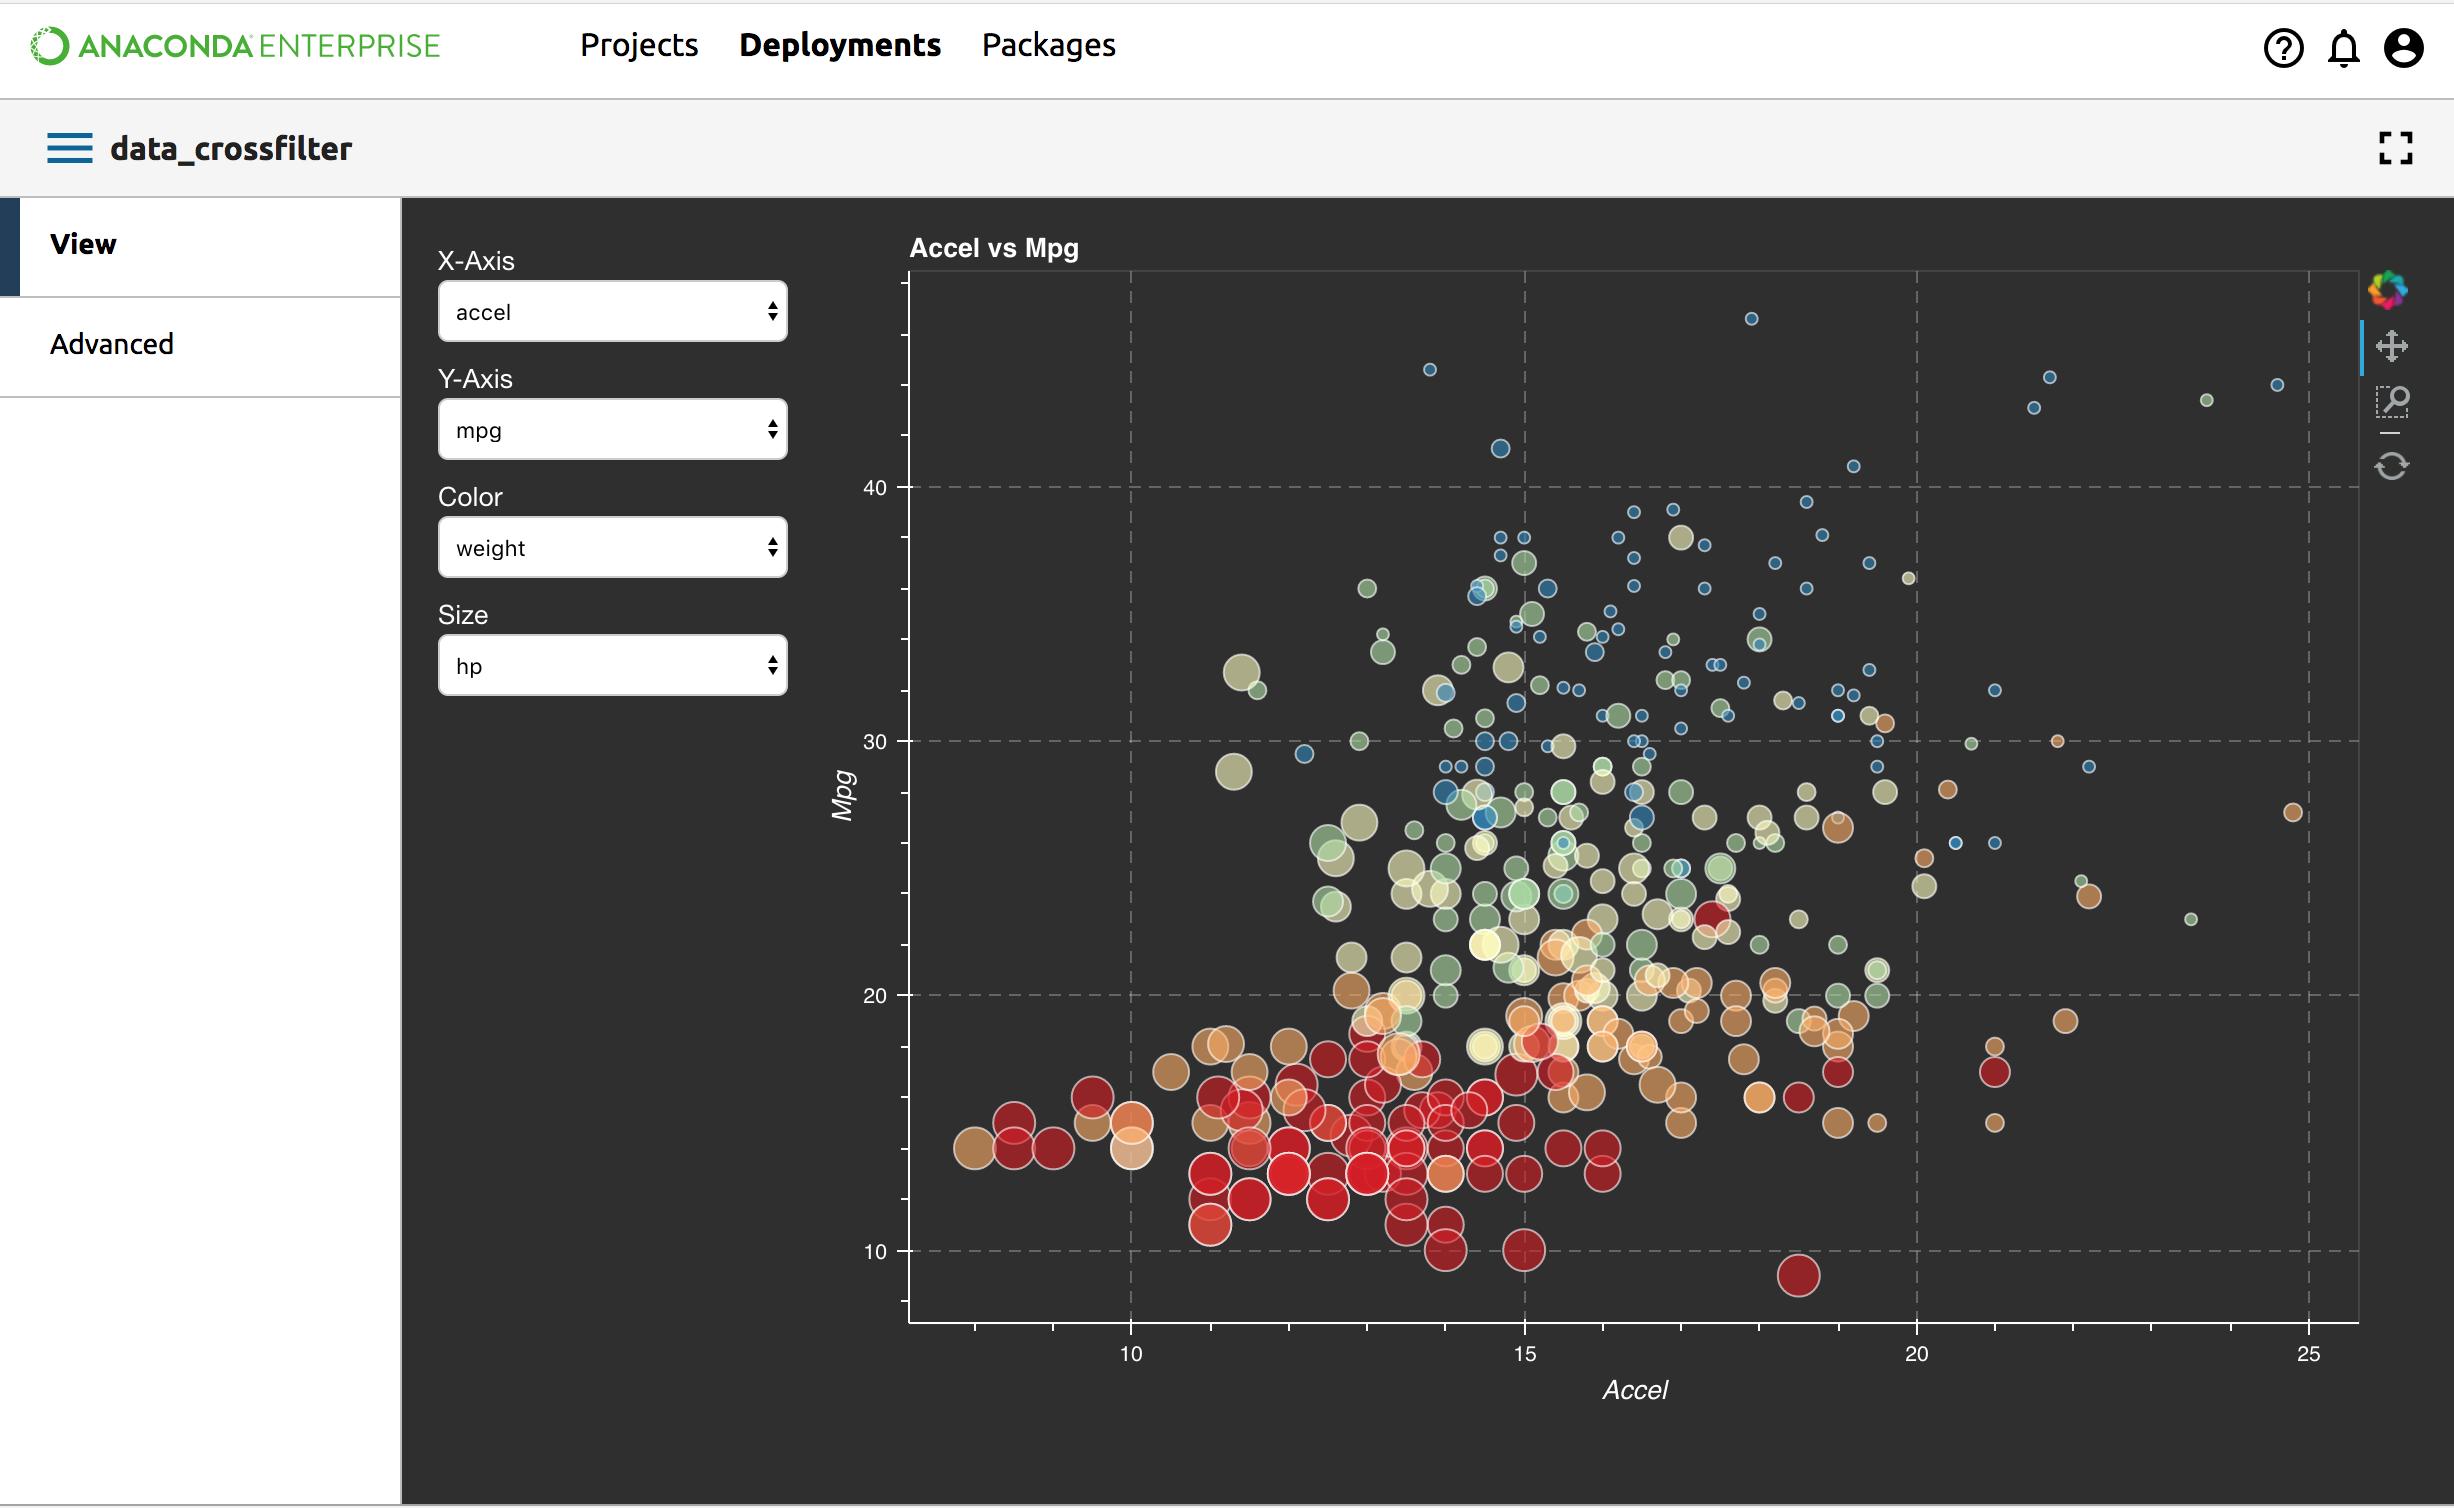
Interact with your Deployment
Immediately you can interact with your new Deployment.
You can interact with any widgets included in the Project. Change the color and size of the dots, or change the axes that are displayed.
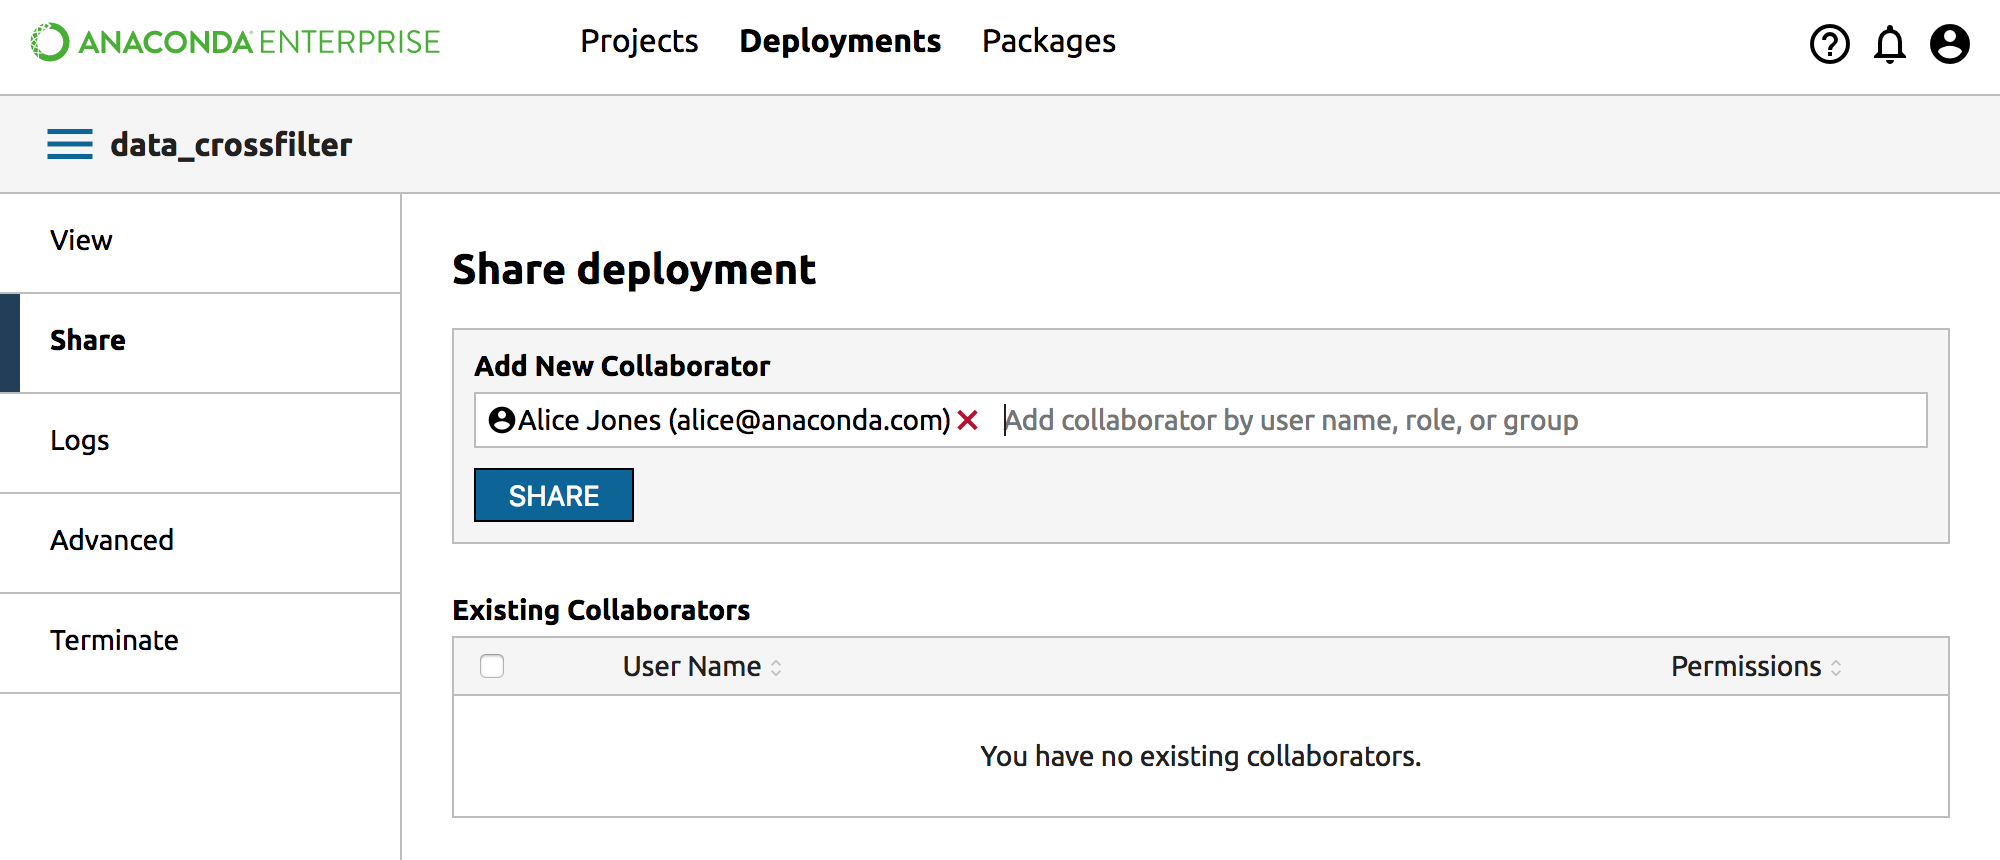
Share your Deployment with others
You can easily share your Deployment with other Enterprise users.
From the left menu click Share, then in the Add New Collaborator box begin typing the name of another Enterprise user. Select the name of the user with whom you want to share, then click the Share button.
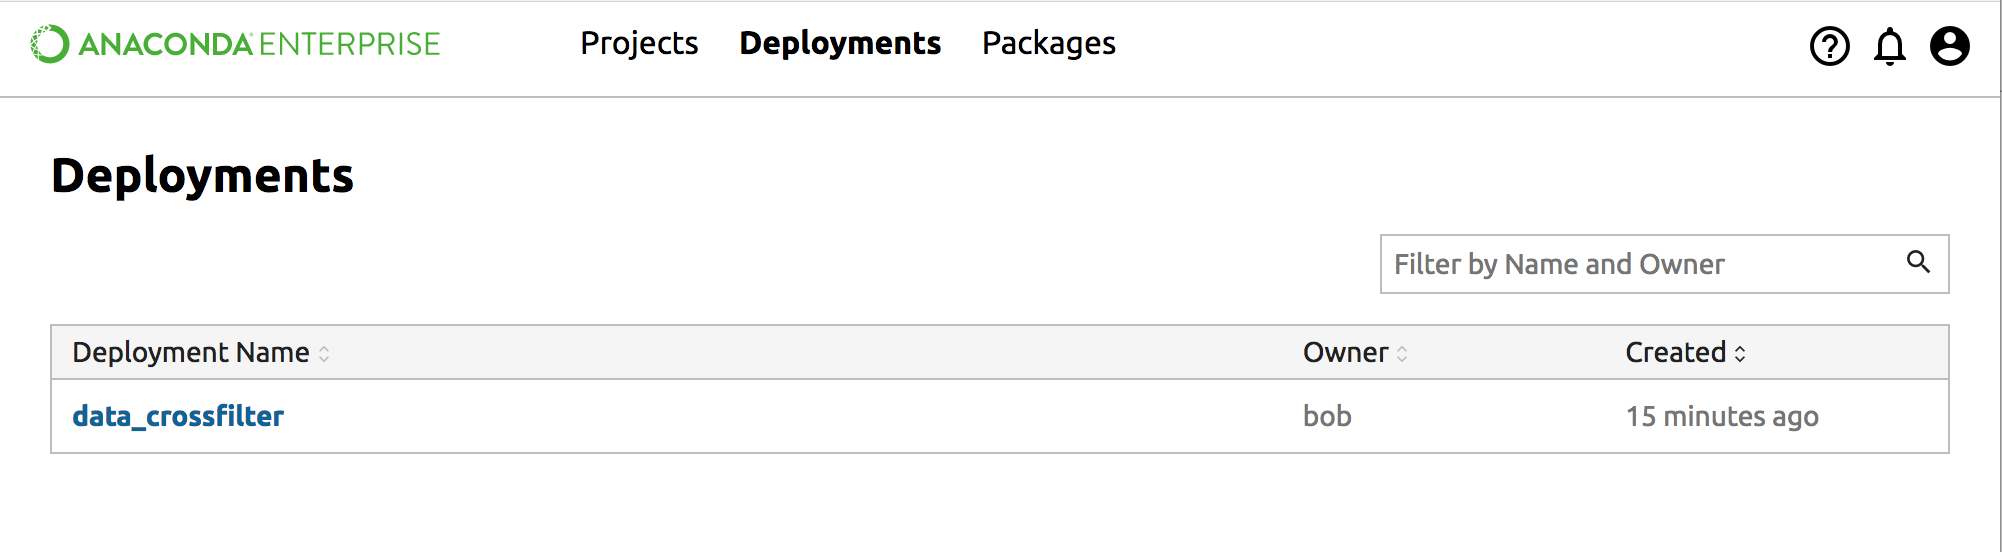
When your collaborator logs onto Enterprise, they will see the new Deployment in their Deployments list.
Clicking on the the deployment allows your collaborator to interact with widgets. They cannot share, view logs, or terminate the deployment.
NOTE: If you change the state of the widgets before sharing, the changed state is not shared between collaborators.
Create an Anaconda Project
In this exercise you will create a new Anaconda Project, open it in an editing session, and upload a notebook to your project.
Then you’ll take a peek at the file that governs your Project, the anaconda-project.yml.
After that you’ll use the Project interface to easily add a download, a channel and a package, prepare an environment and link the notebook to it.
Next you’ll add a deployable command, commit the changes, and run your project.
Finally you will deploy the project and share it with other Enterprise users.
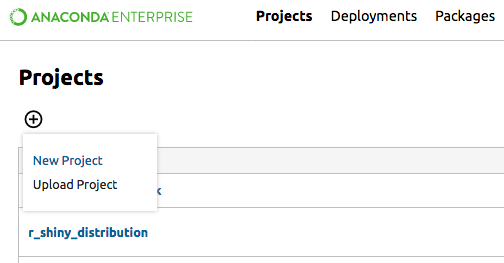
To get started, on the Projects list, click the top left Add (+) button and select New Project.
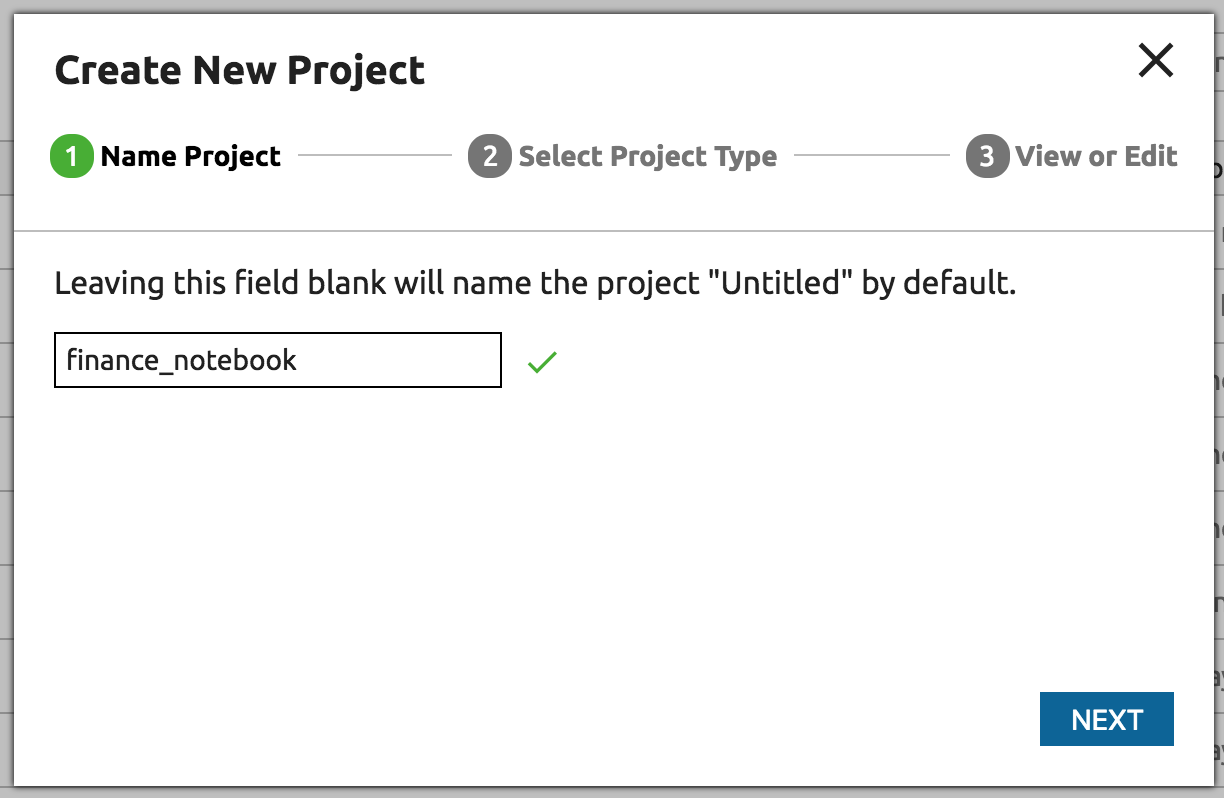
Name your new project “finance_notebook”. Click the Next button.
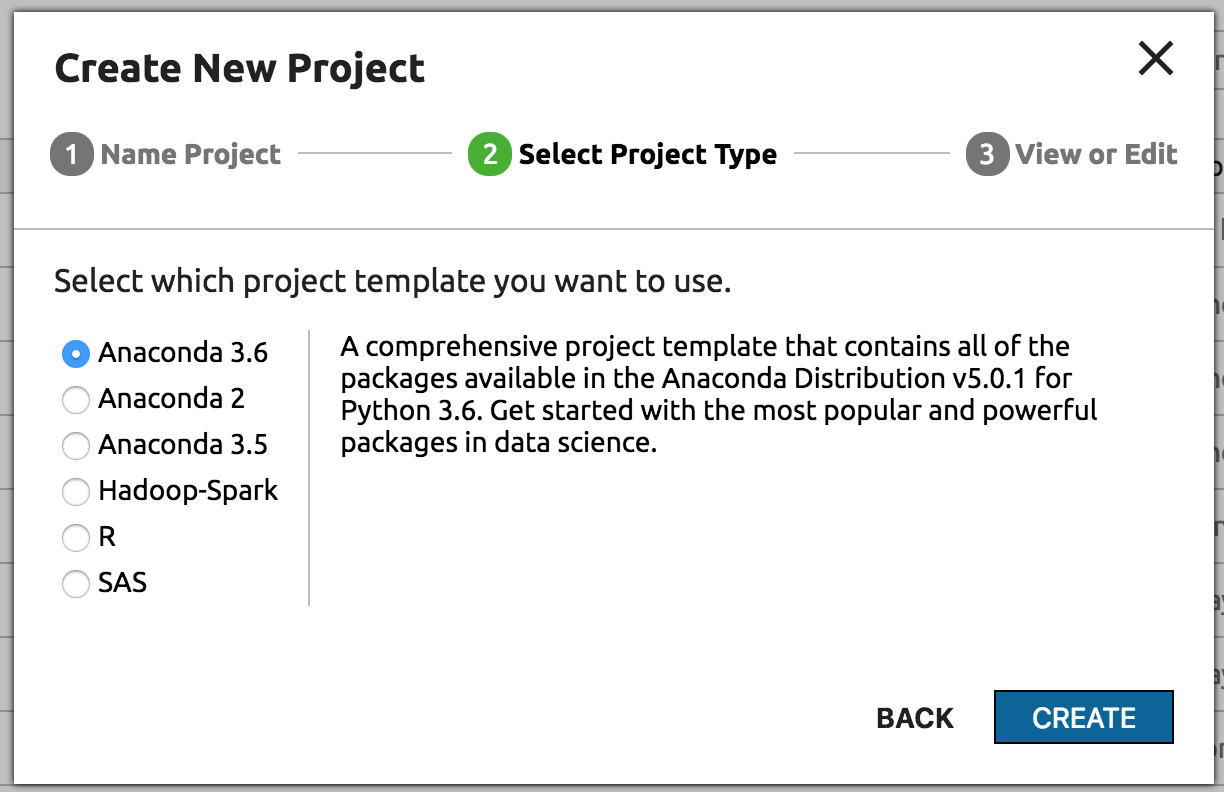
You can choose among several types of projects, including Anaconda 3, Anaconda 2, R Language, SAS and Spark.
Select Anaconda 3.6 and click the Create button.
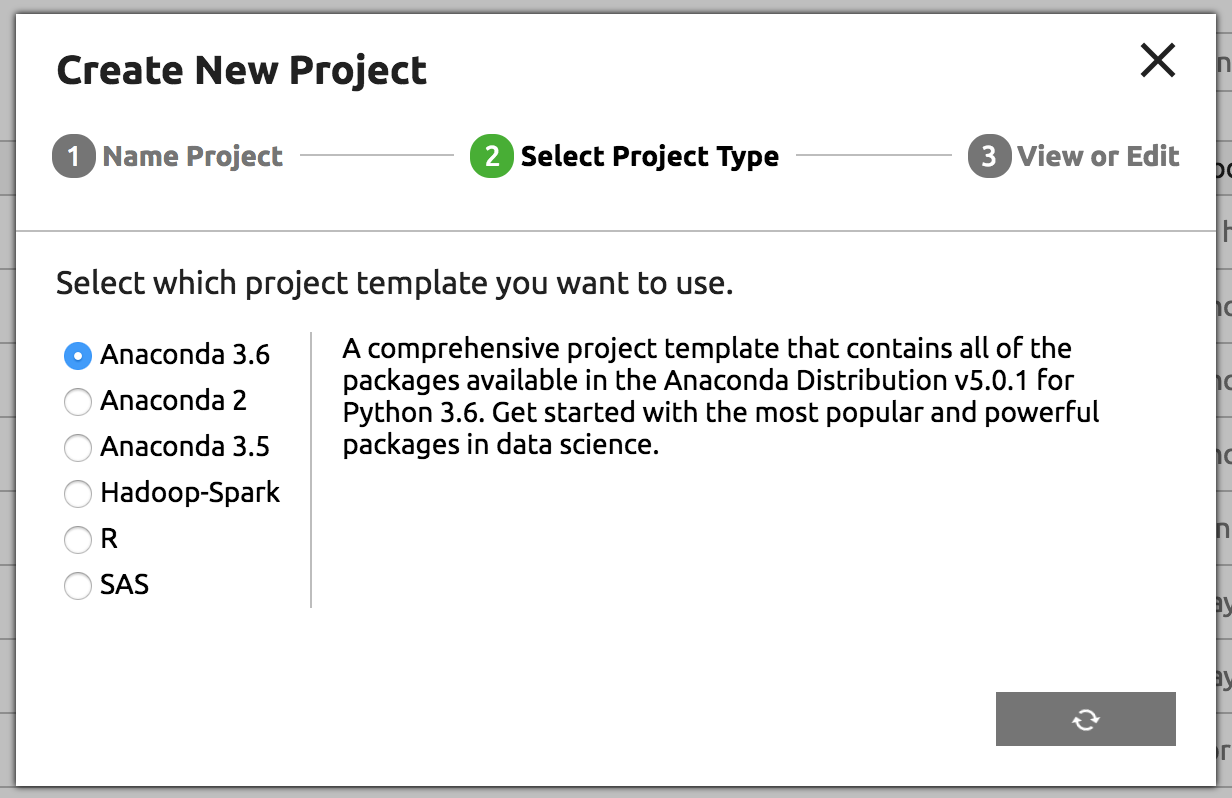
Anaconda Enterprise takes a minute to prepare your Project and copy in all the necessary files.
TIP: While it’s running, download and check out the handy
JupyterLab and Jupyter Notebook cheat sheet.

Add a notebook
You can use JupyterLab to create new notebooks or edit existing notebooks.
To see the data science capabilities of the Anaconda Enterprise, you can play with a large notebook that is already written for you. The Intro to Data Analysis Notebook is based on a classic titanic data analysis problem. Let’s say a friend or colleague gave you this notebook, and you want to add it to this project.
Click this link to download the Markowitz notebook
to your computer.
Next, upload the Markowitz notebook to your Project. Click the left Files tab, then click the Upload File(s) icon at the top:
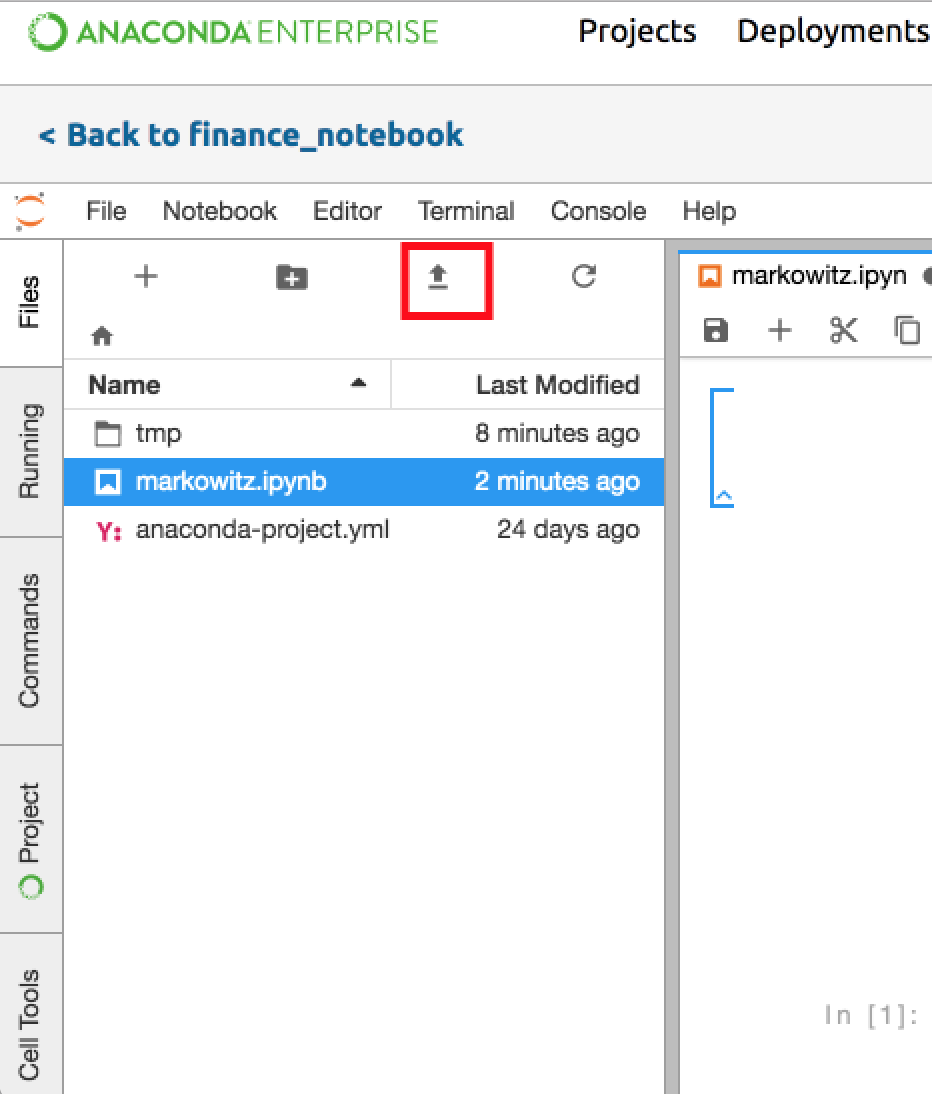
To see the uploaded file, click the left FILES tab. The uploaded Notebook appears in the file list.
See how Anaconda Projects work
Open the anaconda-project.yml configuration file now to take a look at it:
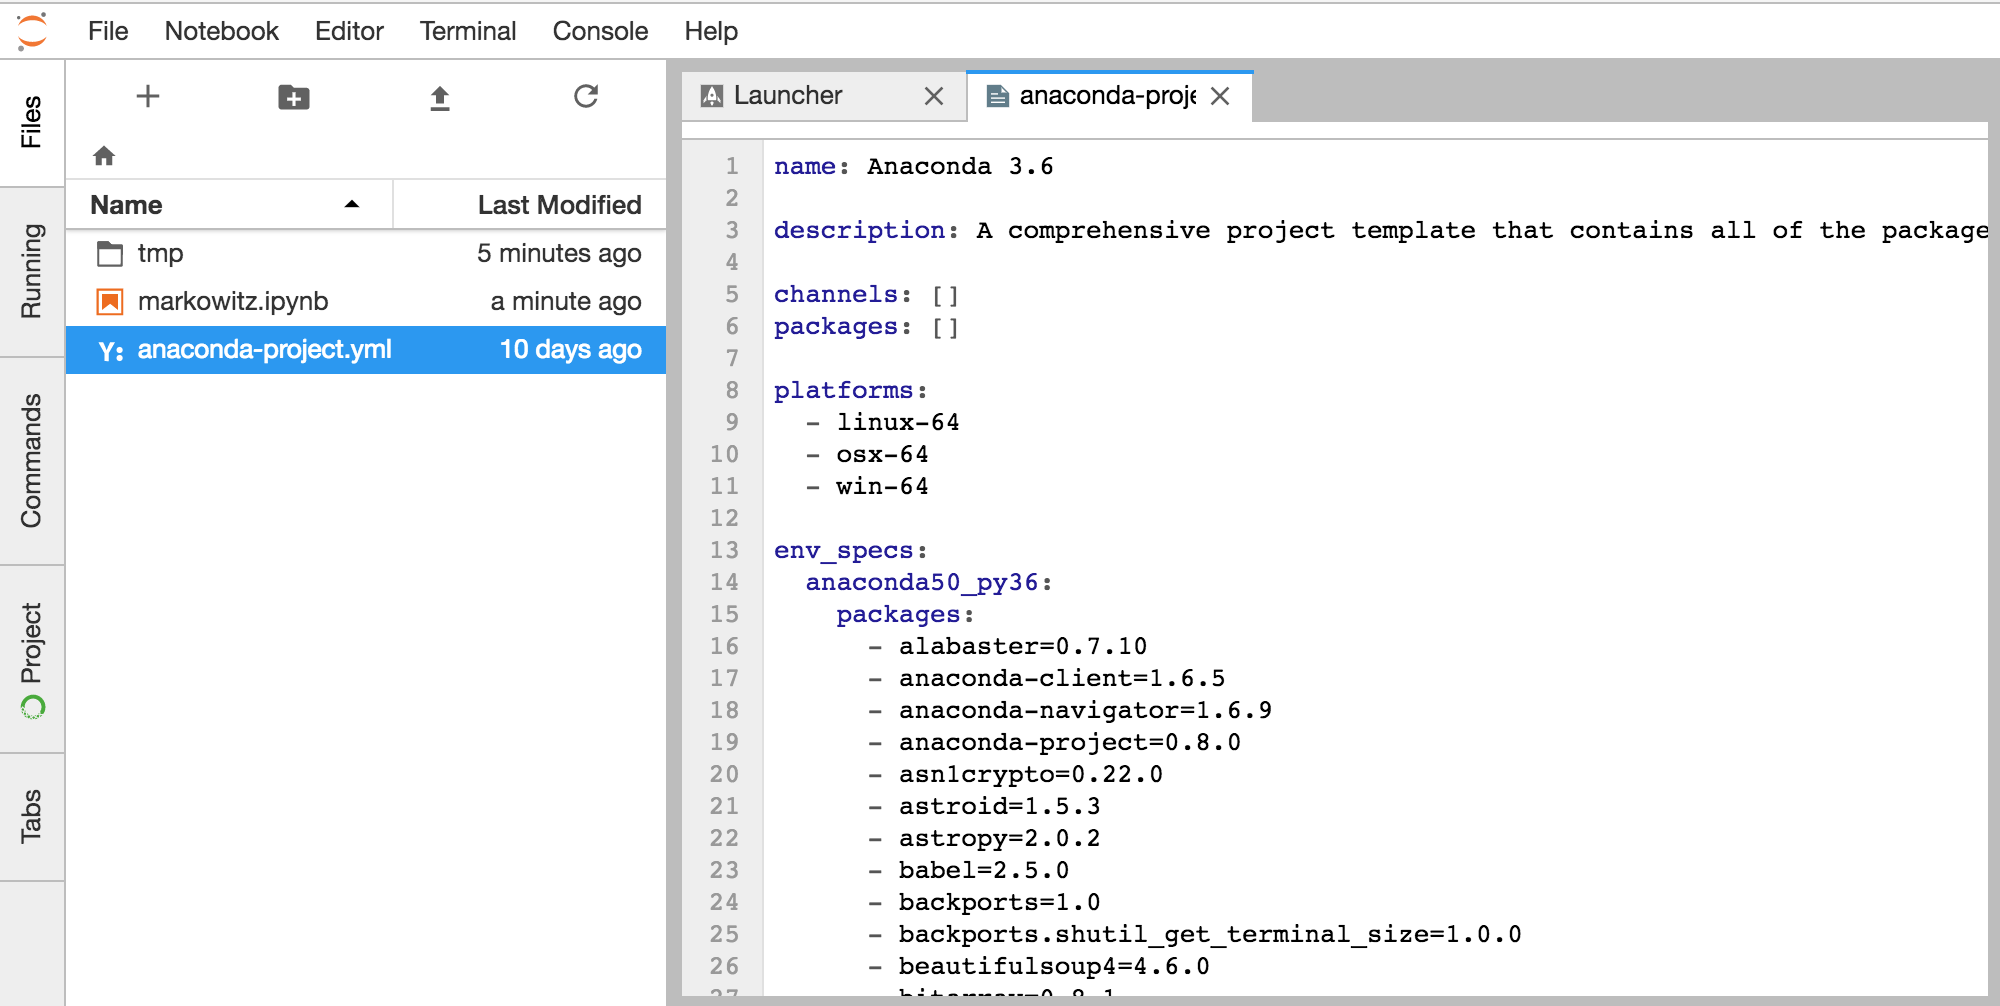
This file shows everything that was automatically created when you launched your new project.
If you wanted to make changes to your Project file, you would click the left Project tab.
Add a download
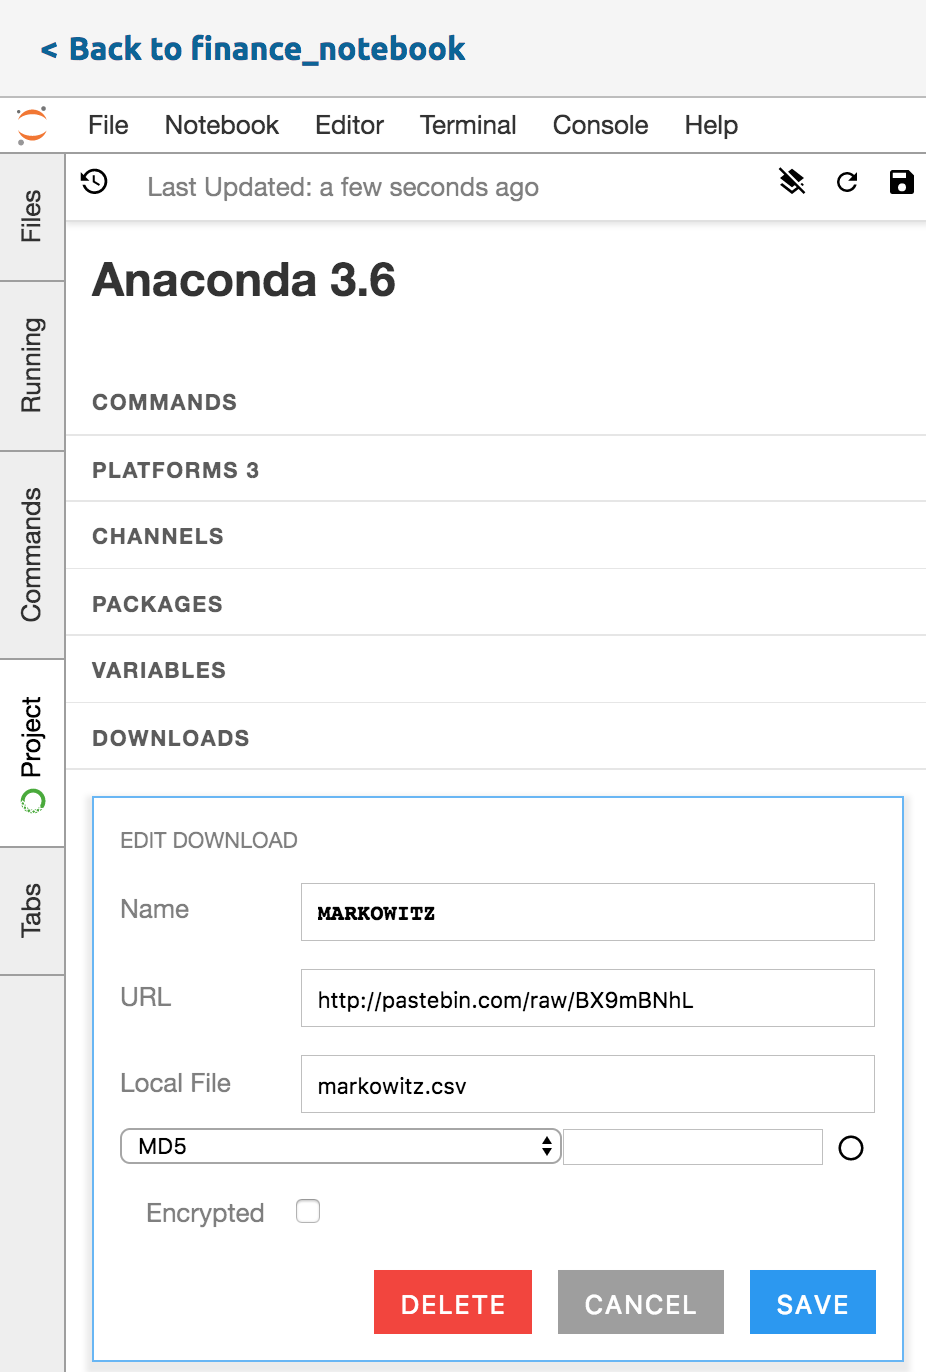
Now let’s say you want a file to be automatically downloaded when you run the notebook, so now you will add a download to this project.
On the left Project tab, find the “DOWNLOADS” field, click its Add (+) icon and add a file for the notebook to download.
Copy and paste this into the URL box: http://pastebin.com/raw/BX9mBNhL
In the Name box enter “MARKOWITZ” and in the local file box enter “markowitz.csv”. Click the Save button.
Save all your changes by clicking the blue-highlighted “Project Save” button at the top right of this pane.
NOTE: In an air gapped environment, click this link to download
the Markowitz data
to your computer and then upload it in the same way you did the notebook.
Add a channel
Add the R Language Channel to this Project so you can easily search, download and install packages from this specific channel when using this project.
In the left Project tab, open the CHANNELS field with the pencil icon next to it.
Then copy and paste this link: https://conda.anaconda.org/r
Click the Add (+) icon to add the channel, then click the blue-highlighted “Project Save” button at the top right of this pane.
Add packages
Add a Package to this project.
In the left Project tab, find the “PACKAGES” field and click its edit
icon, the pencil, to add packages. Adding packages here adds them to your
anaconda-project.yml configuration file. You may edit that file
directly if you prefer.
markowitz.ipynb uses the following packages which are already installed
with Anaconda 3.6. Optionally, the notebook can depend on R. If you set use_R = True
in the first cell, then you should add the following packages:
- r
- rpy2
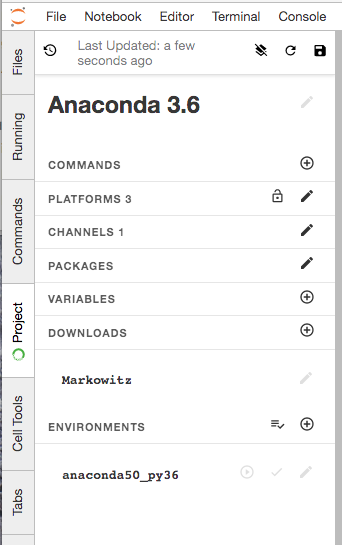
After adding packages, click the “Save Project Data” icon in your left panel on the top right corner. This saves your project locally.
Prepare all environments
Now that you’ve added all these goodies to your Project, it’s time to link the notebook to your Project environment.
Still on the left Project tab, find the ENVIRONMENTS field and click the “Prepare All Environments” button next to the Add (+) icon.

Run the Notebook
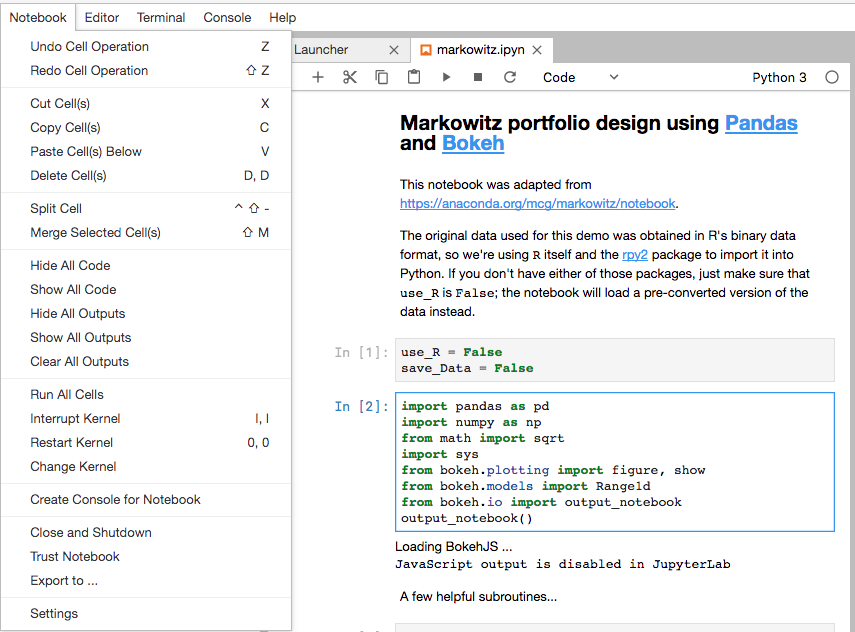
Click the left Files tab, then double-click “markowitz.ipynb” to open the notebook.
Link an environment to the notebook
When you open the notebook you will be prompted to select a kernel. From the drop-down list, select “[anaconda50_py36]Python 3”.
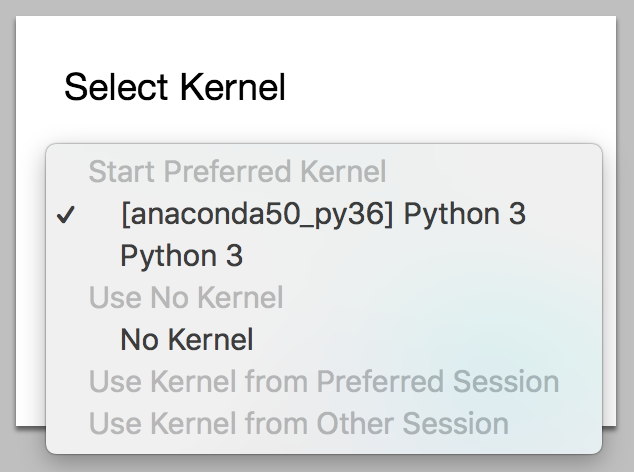
TIP: You can always change a notebook kernel from the top right corner of the notebook tab. Click the kernel name - for example “Python 3”, and select “[anaconda50_py36]Python 3” from the drop-down list.
Run Cells
Click the top “Notebook” menu, and from the drop-down select “Run All Cells”.
NOTE: You will get an import error if your notebook is not linked to the project environment.
Switch to Classic Notebook
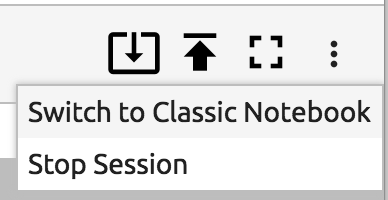
Since JupyterLab does not support inline Bokeh yet, we need to switch to Classic Notebook to view our plots.
Click the 3 dots at the top right and select “Switch to Classic Notebook”
Run Cells in Notebook
Click “markowitz_notebook” to open the notebook.
Click the top “Cell” menu, and from the drop-down select “Run All”.

Scroll down to see and interact with the plots that you just created.
Switch back to JupyterLab
Click the 3 dots at the top right and select “Switch to JupyterLab”.
Deploy the Project
To deploy your project, you will add a deployable command and commit the changes, then leave the editing session and deploy using the Anaconda Enterprise interface.
Add a deploy command
Any project you want to deploy needs to have a deployable command for it to run.
From the left Project tab (not Commands tab), find the “COMMANDS” field and click its Add (+) icon.
In the Type section click “Notebook”
In the Name box enter “default”
In the notebook box enter “markowitz.ipynb”
Click the Save button.

Commit changes and exit
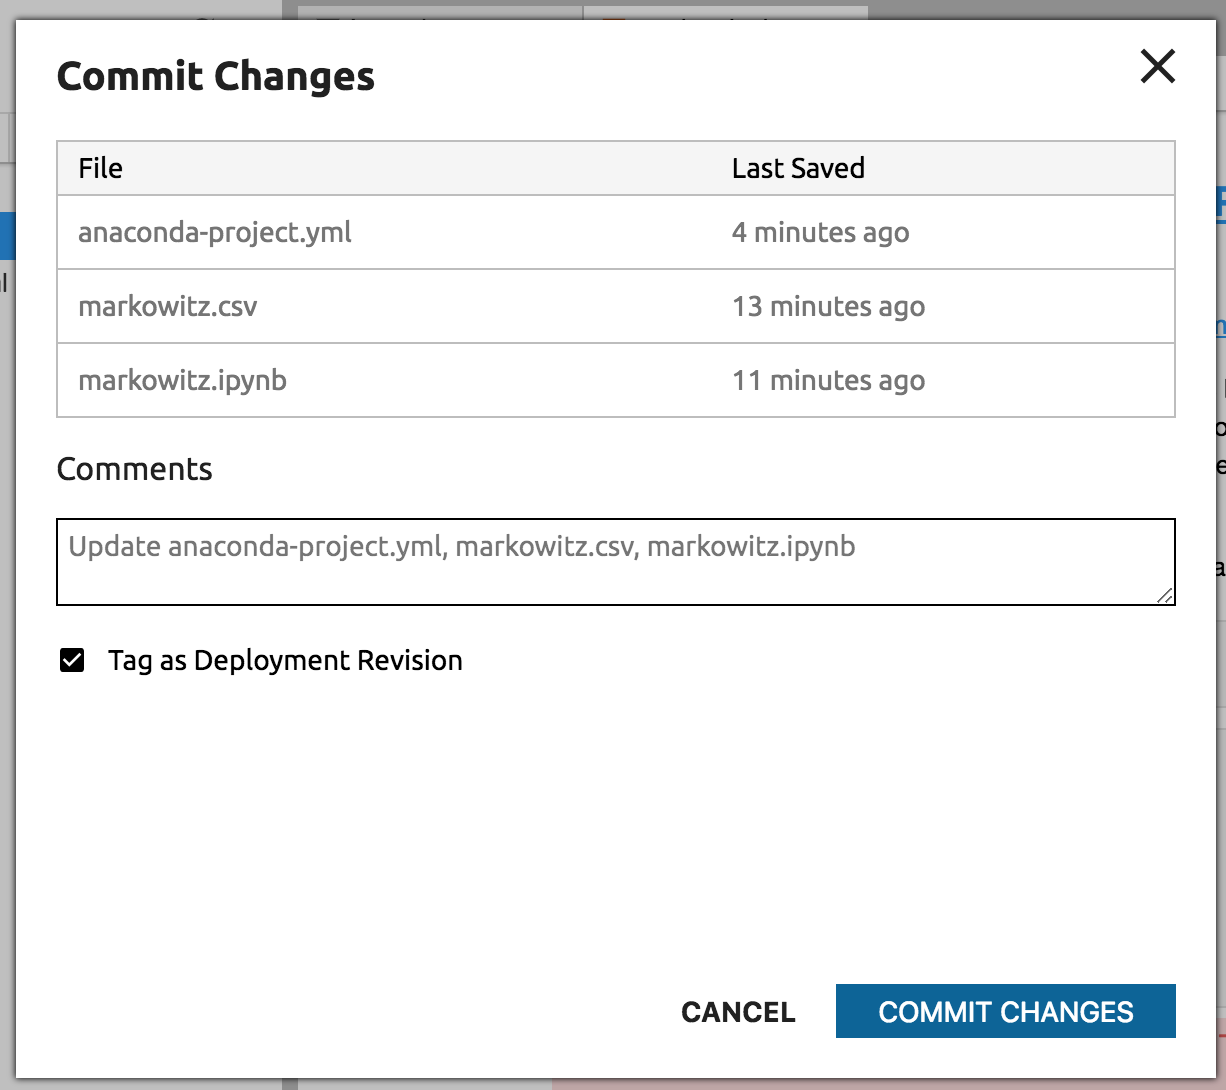
In the top navigation bar on the far right, click the Commit icon.
Check the “Tag as Deployable Revision” checkbox and click Commit Changes.
Then exit the Notebook with the “Back to finance_notebook” link on the top left corner. This brings you back to the Project Detail page.
Deploy it
Click the left Deploy tab, then click the Deploy button to deploy the Project.
While it is deploying, you can click the Deployment History tab to see a counter. A notification will tell you it has deployed.
Interact with Deployment
Time to play with your Deployment! In the Deployments list, click the name of your new Deployment to view and interact with it.
From the left View tab you can choose Cell, All Output, and Clear to clear the output. Then run all cells in your notebook with Cell and Run All.
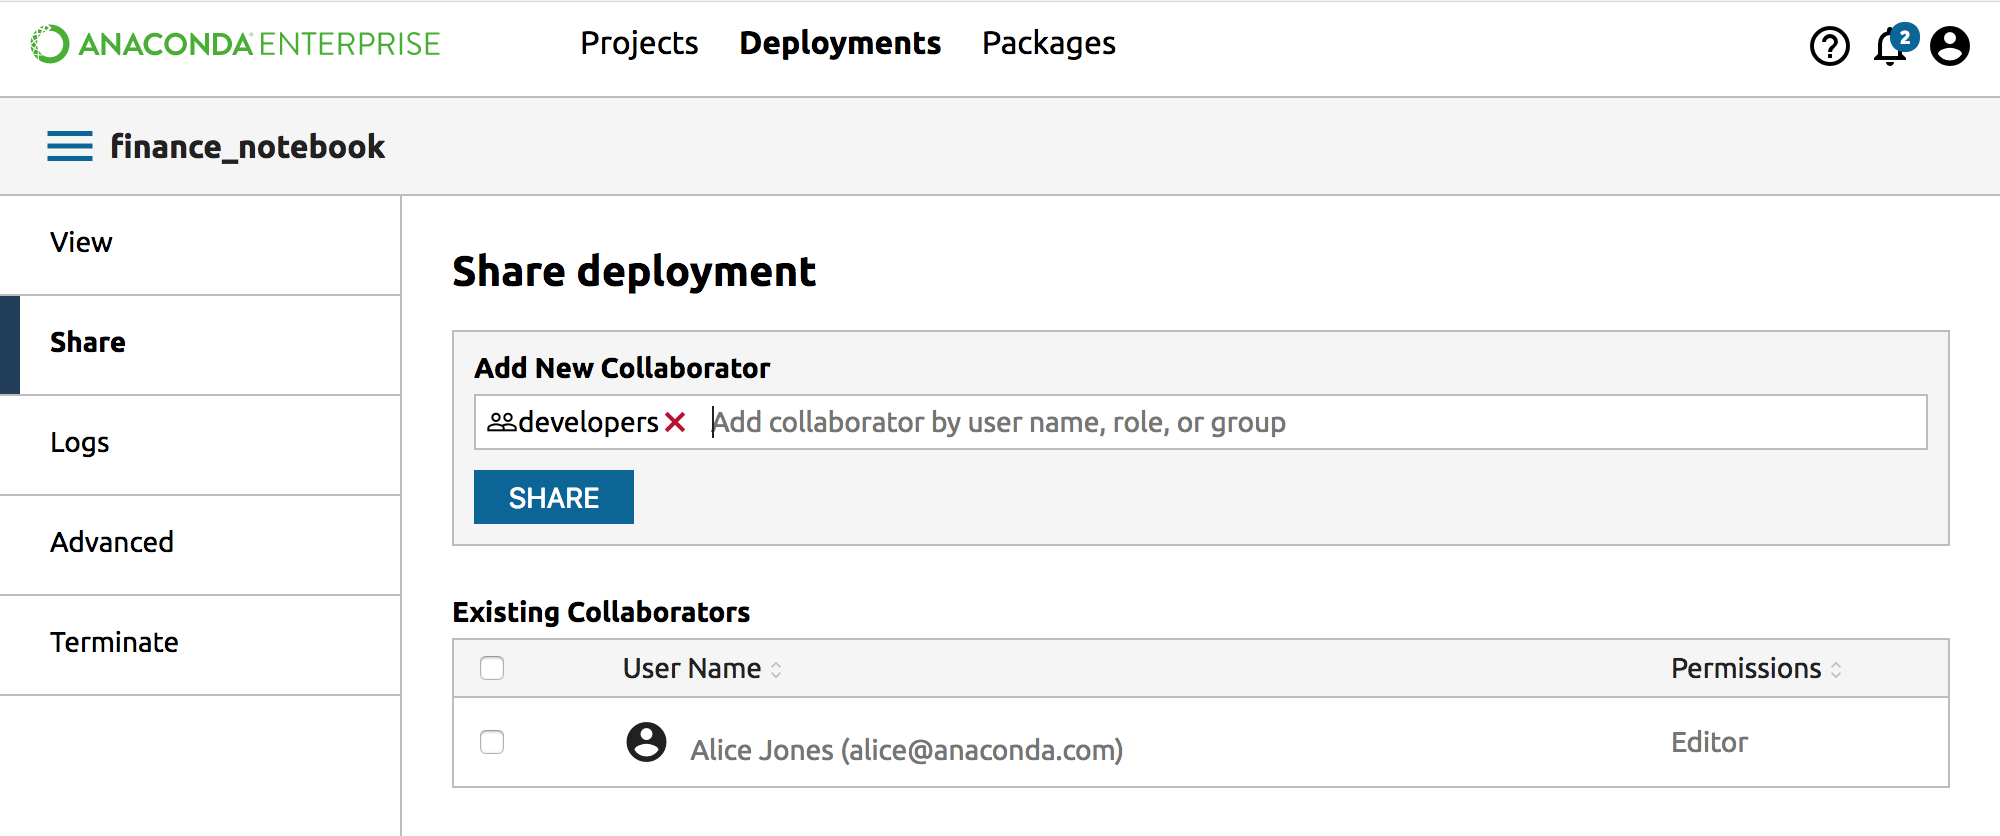
Share your Deployment
In the Deployments list, click the name of the Deployment to share, then click the Share tab. In the box that appears, begin typing the username of your collaborator with whom you wish to share, select their name from the drop-down list and click the Share button.
Your collaborator appears in the Existing Collaborators list below.
When your collaborator logs onto Enterprise, they will see the new Deployment in their Deployments list.