Alerts
Control Center provides functionality for detecting anomalous events in your monitoring data and performing actions when they occur.
Concepts
Detection of anomalous events (triggering) is decoupled from the actions that should be taken when they occur.
Each time interceptor data is received by Control Center, metric values (consumption difference and latency) of the corresponding time window(s) are updated to reflect the new data. All newly updated metric values are then checked against all configured triggers to determine whether the trigger should fire or not.
Note
Interceptors can conceivably report data related to any time - alerting works across all time windows not just those near real time.
Triggers can be associated with any number of actions. When a trigger fires, it will cause all associated actions to be executed for which the max send rate of the action has not been exceeded. If the max send rate of a particular action has been exceeded, the trigger event will be added to a list associated with the action and included in the action event the next time it is executed (actions report a set of triggers, not just one).
Because of normal lag in the system, time windows close to real time will frequently have associated metric values that would be cause for concern if the time window was further behind real time. For this reason, triggers have an associated buffer value.
A triggered event that is within buffer seconds of real time will not be registered against actions immediately - when the time window ultimately moves greater than buffer seconds behind real time, any associated metric value that would still cause a trigger to be fired will be registered against any appropriate actions then.
User Interface
The alerts user interface has three main sections, accessible via the sub menus at the top of the overview page:
- Historical Alert Log
- Trigger Management
- Action Management
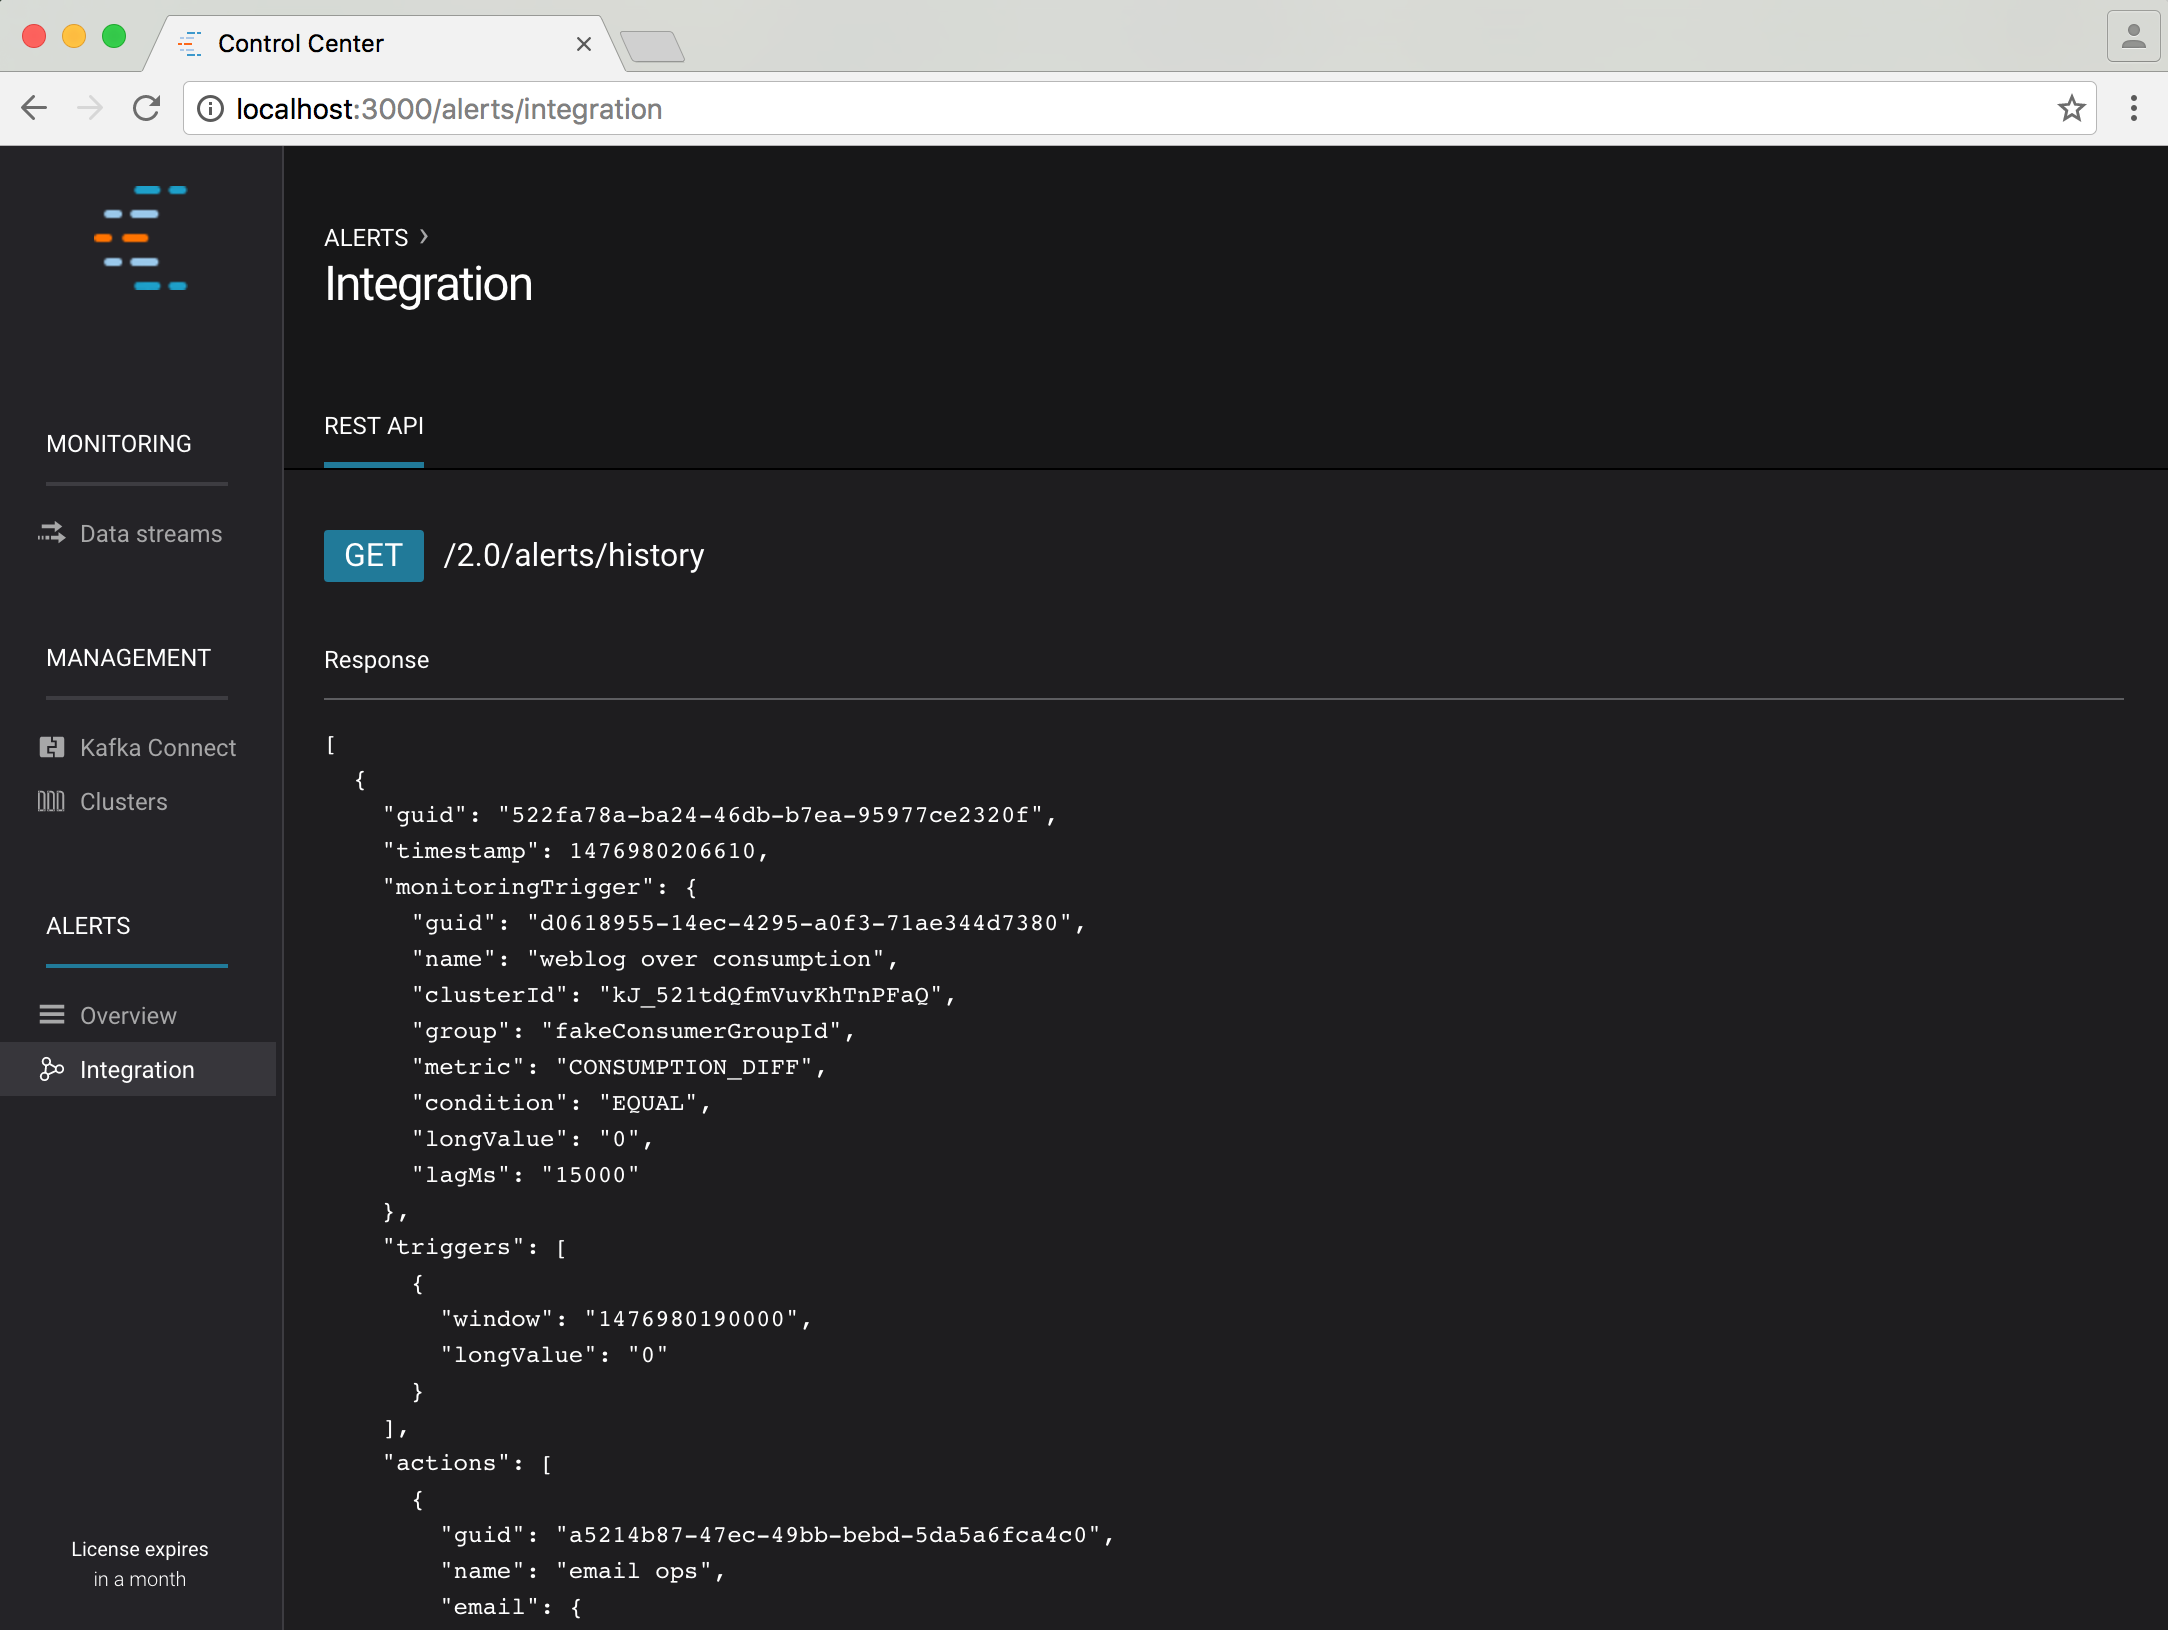
Additionally, there is a page that provides details of the alerts REST endpoint which can be used to programatically obtain historical alert information.
Trigger Management
Clicking on the triggers tab shows a summary of all configured triggers:
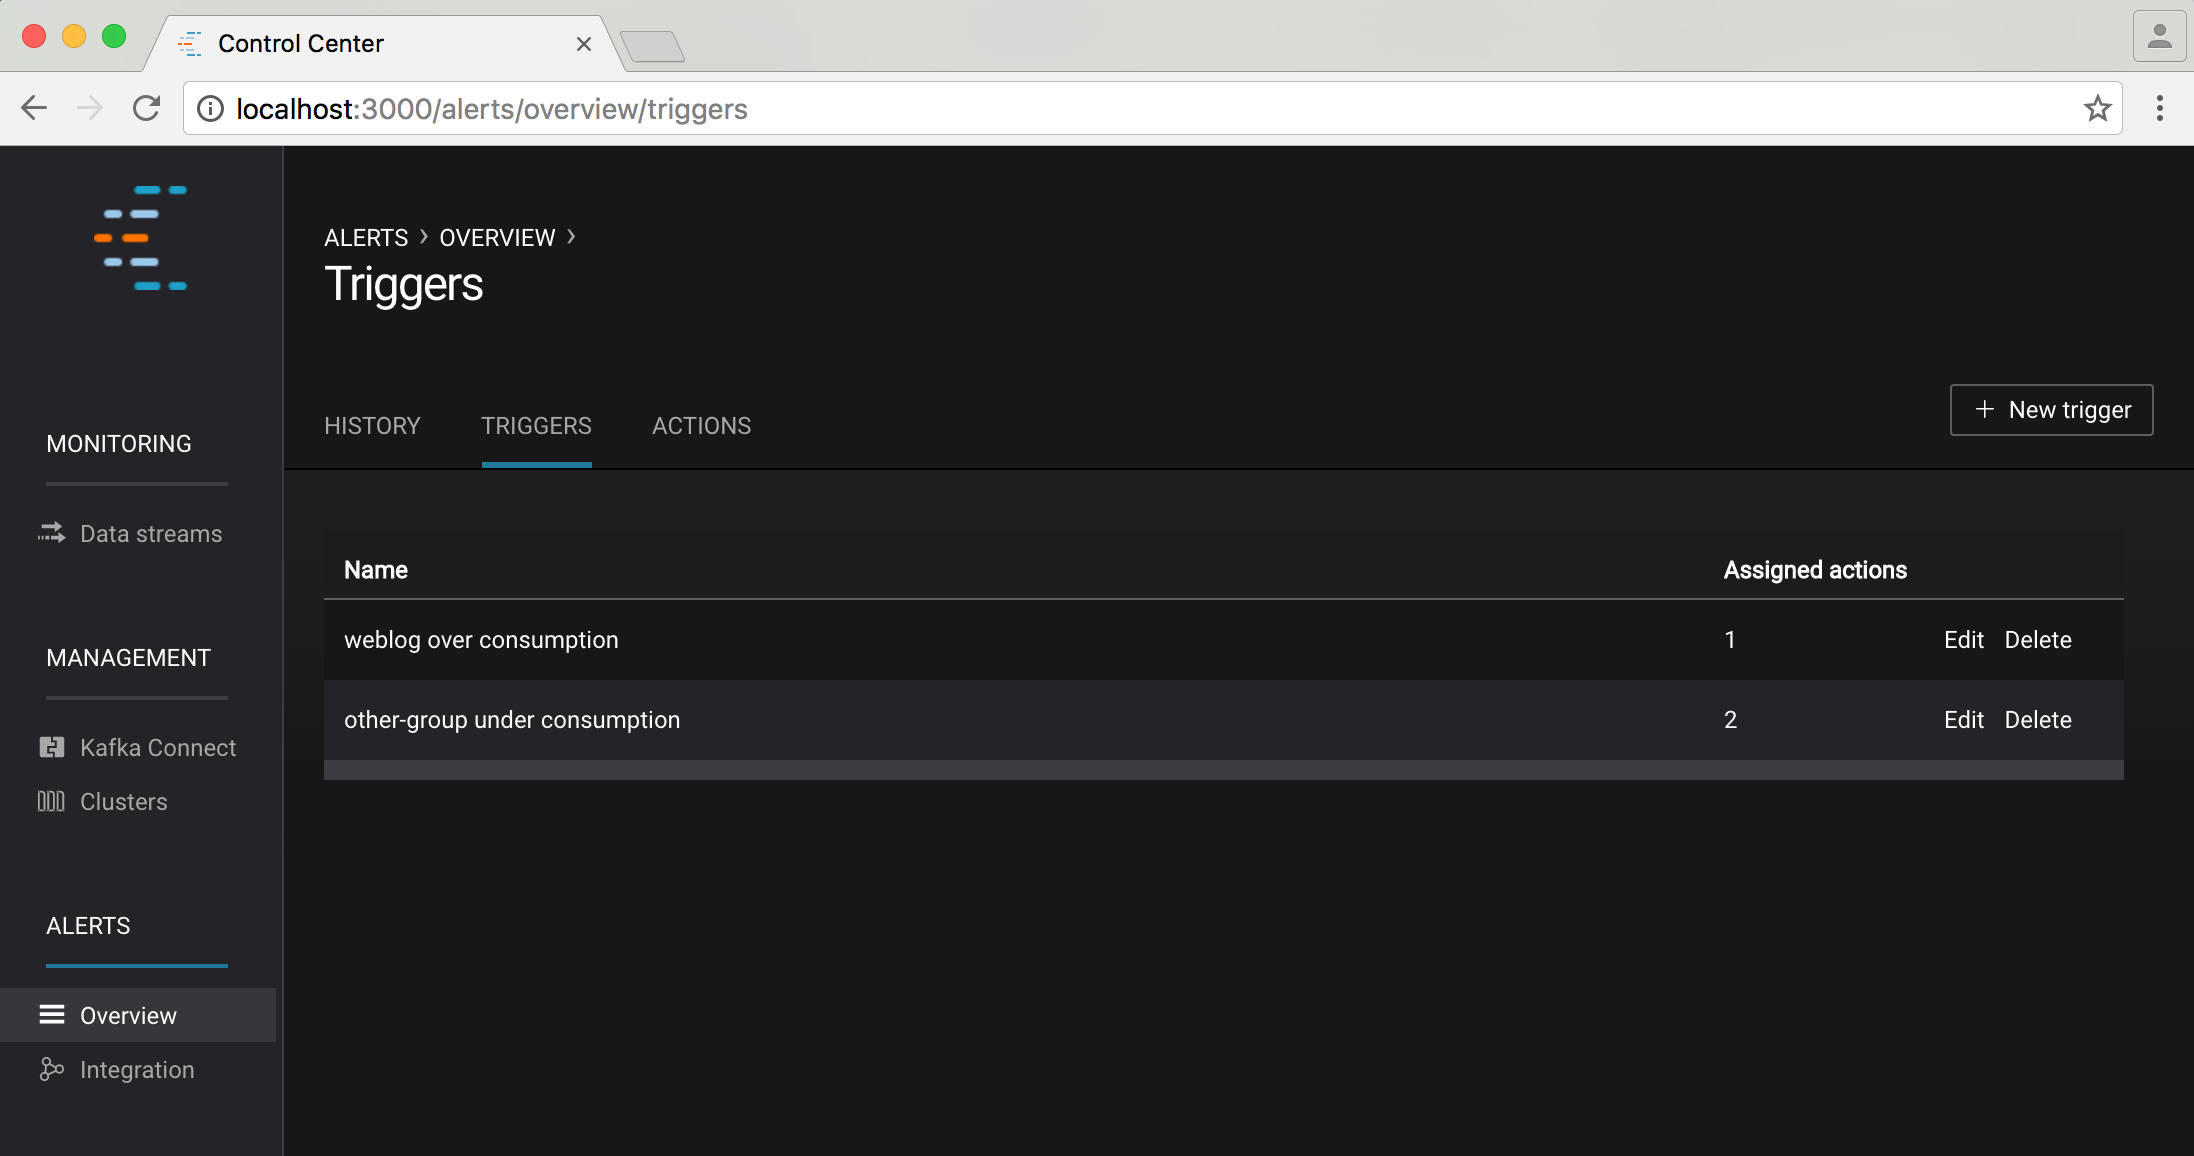
You can edit/delete an existing trigger using the edit/delete links in this table or create a new trigger via the “+ new trigger” button on the top right of the screen.
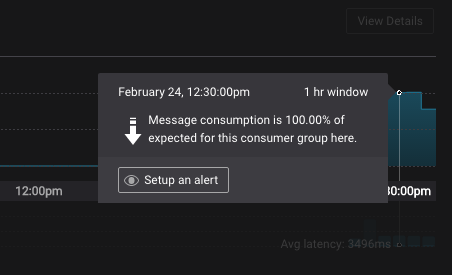
You can also initiate creation of a new trigger by clicking on a consumer group delivery or latency monitoring chart progress indicator, and clicking “setup alert” button. This will pre-populate the new trigger form with relevant information.
New/Edit Trigger Form
The form for creating and editing triggers is identical. When editing, the form is pre-populated with the current trigger values.
There are three types of triggers that can be created: topics, consumer groups or brokers.
Topic
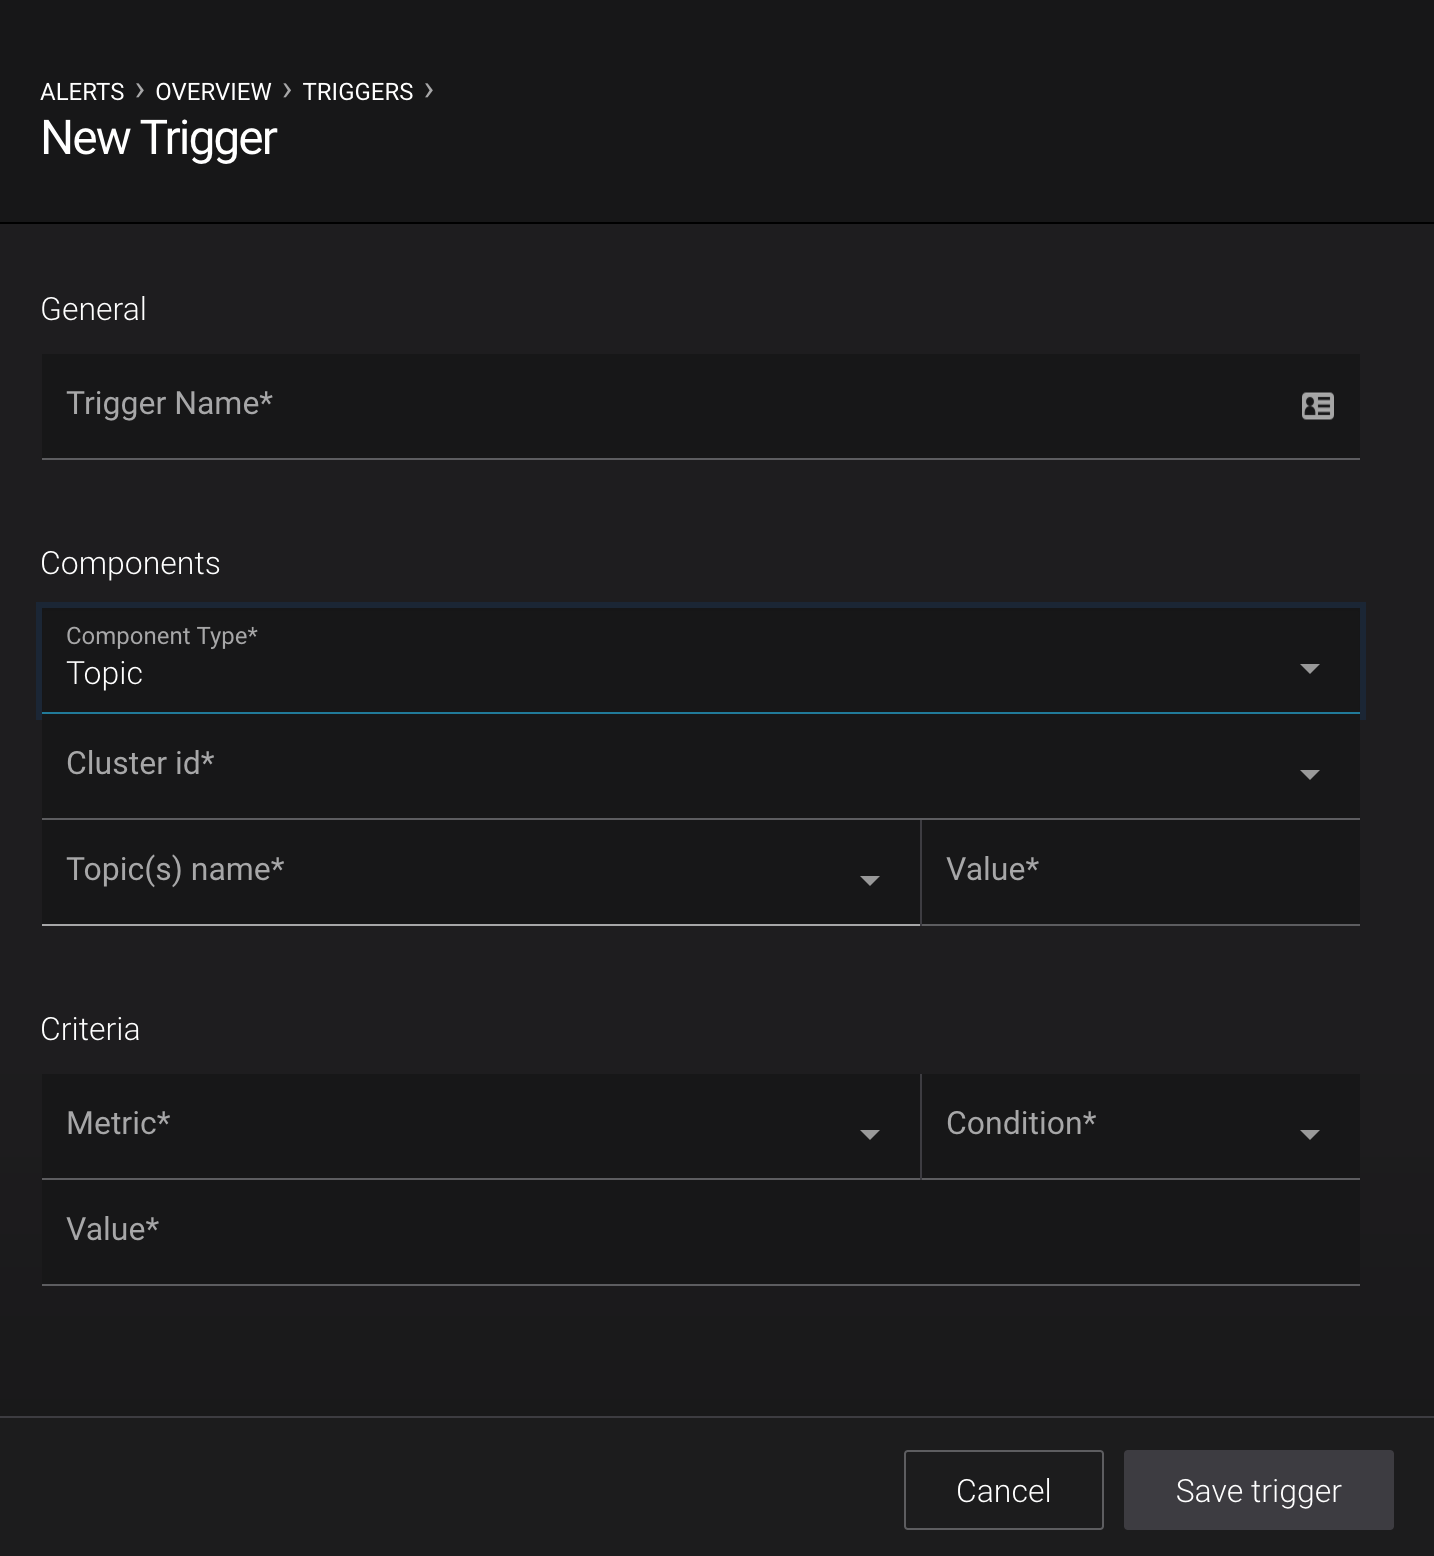
- Trigger Name
- A name used to identify the trigger (for example ‘<topic name> production requests’). Uniqueness is not enforced but you should use different names to avoid confusion for all triggers.
- Component Type
- Should be selected as Topic. If this is not the case, see the other form trigger documentation.
- Cluster id
- The trigger for a topic will be limited to a specific cluster id. If you require a topic to be triggered by multiple clusters, create independant triggers for each cluster.
- Topic(s) name
A select list of options for matching against the value field (below). The name of the topic can Equal, Begin with, End with or Contains a specified value.
Note
For example, selecting Contains and then entering ‘topic’ into the value field will match ‘my topic’, ‘topical’, and ‘topics with data’. If Begins with is selected, the trigger will only match ‘topical’ and ‘topics with data’, not ‘my topic’.
- Topics(s) name Value
The name or part of a topic name to be triggered against. Works in conjunction with Topic(s) Name in order to match against one or many topics.
Note
If multiple topics match against topic name, the trigger will be per topic, not aggregate. In the case where we have two topics that Begin with ‘topic’, and we set trigger Bytes in greater than 100, any topic will fire the trigger if they get > 100 Bytes In.
- Metric
The value to check for the trigger alert. The possible values for this dropdown are:
- Bytes in
- Amount of bytes per second coming in to a topic.
- Bytes out
- Amount of bytes per second going out from a topic.
- Out of sync replica count
- Total number of partition replicas that are in-sync
- Production request count
- Amount of production requests per second to a topic in a cluster.
- Under replicated topic partitions
- Amount of under replicated topic partitions. A use case for this metric would be wanting to know if a Kafka broker crashed while holding a specific topic partition.
- Condition
- The trigger will fire when Condition is true of the difference between the value of the metric being monitored and the value of the Value field. Possibly Greater than, Less than, Equal to, or Not equal to.
- Value
- The value to which the topic Metric is compared.
Consumer Groups
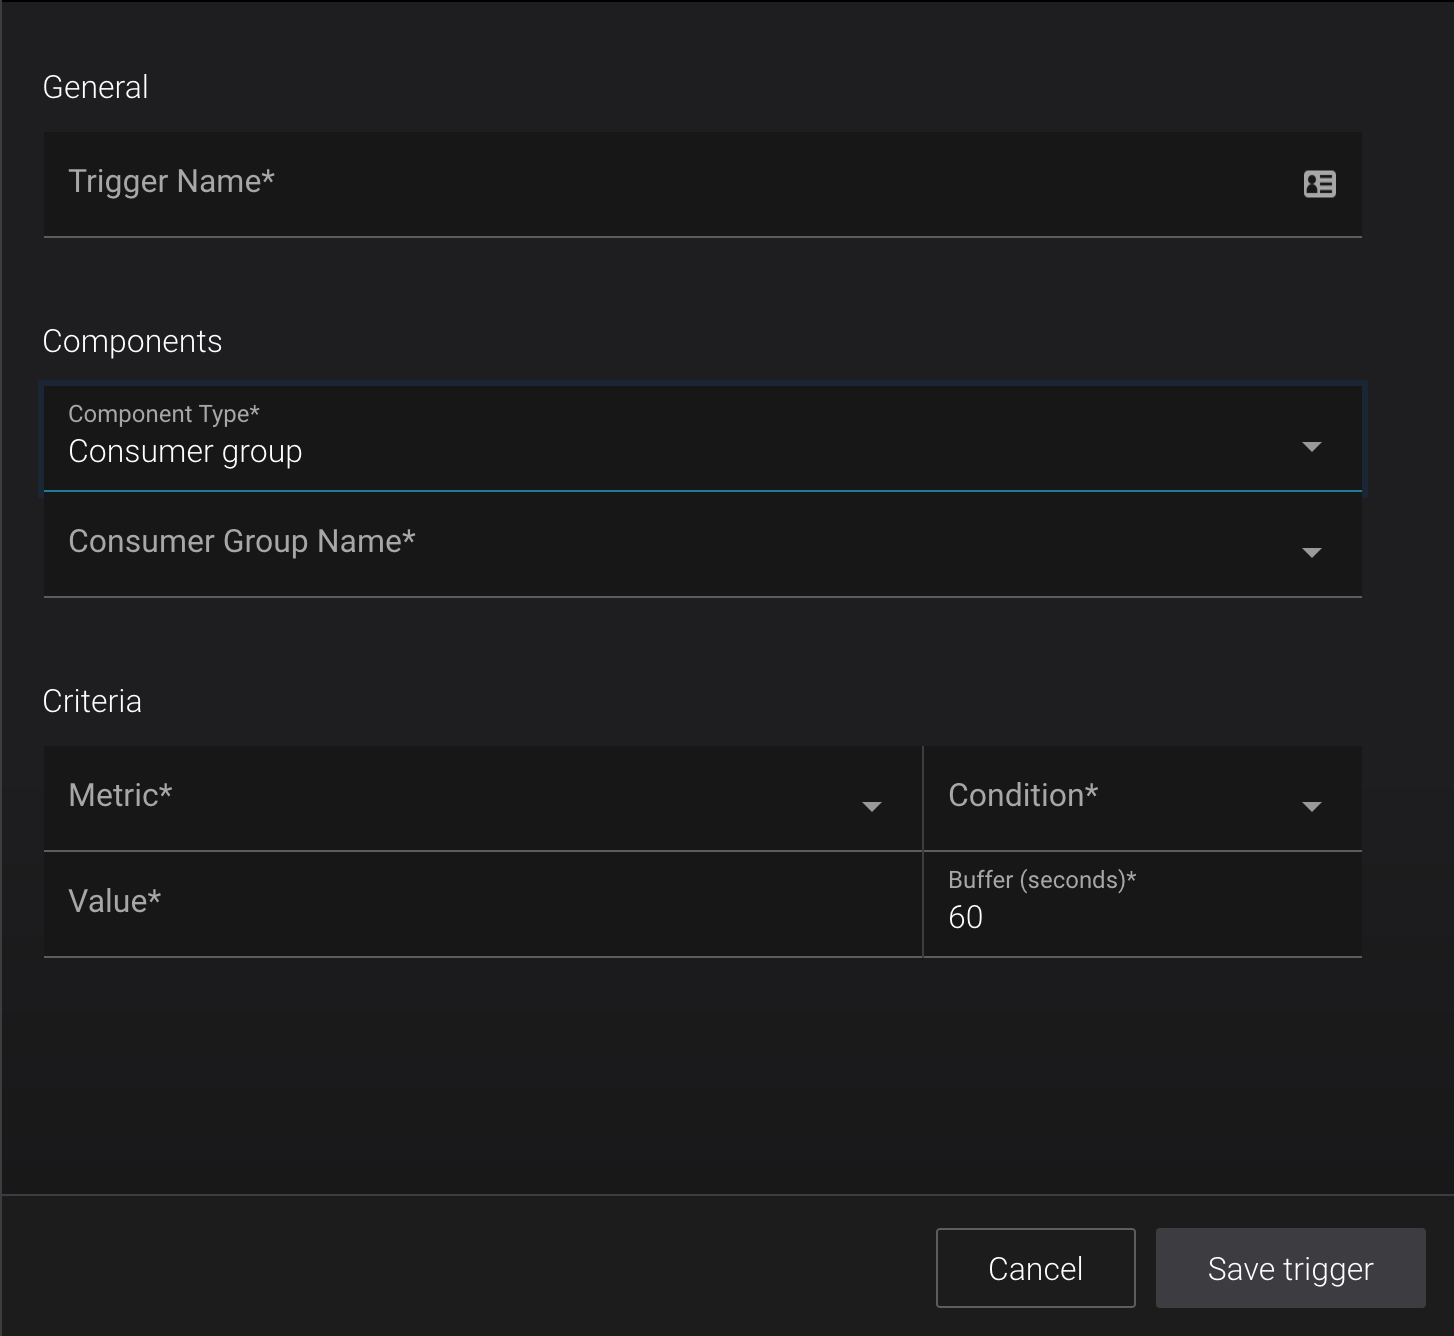
- Trigger Name
- A name used to identify the trigger (for example ‘<consumer group name> under consumption’). Uniqueness is not enforced but you should use different names to avoid confusion.
- Component Type
- Should be selected as ‘Consumer group’. If this is not the case, see the other form trigger documentation.
- Consumer Group Name
- The name of the consumer group to monitor for anomalies.
- Metric
- The metric to monitor. One of maximum latency (ms), average latency (ms) or consumption difference.
- Condition
- The trigger will fire when Condition is true of the difference between the value of the metric being monitored and the value of the Value field. Possibly Greater than, Less than, Equal to, or Not equal to.
- Value
- The value to which the monitored consumer group Metric is compared.
- Buffer
- The delay behind real time to wait until a time window is considered for triggering (refer to Concepts for more information).
Brokers
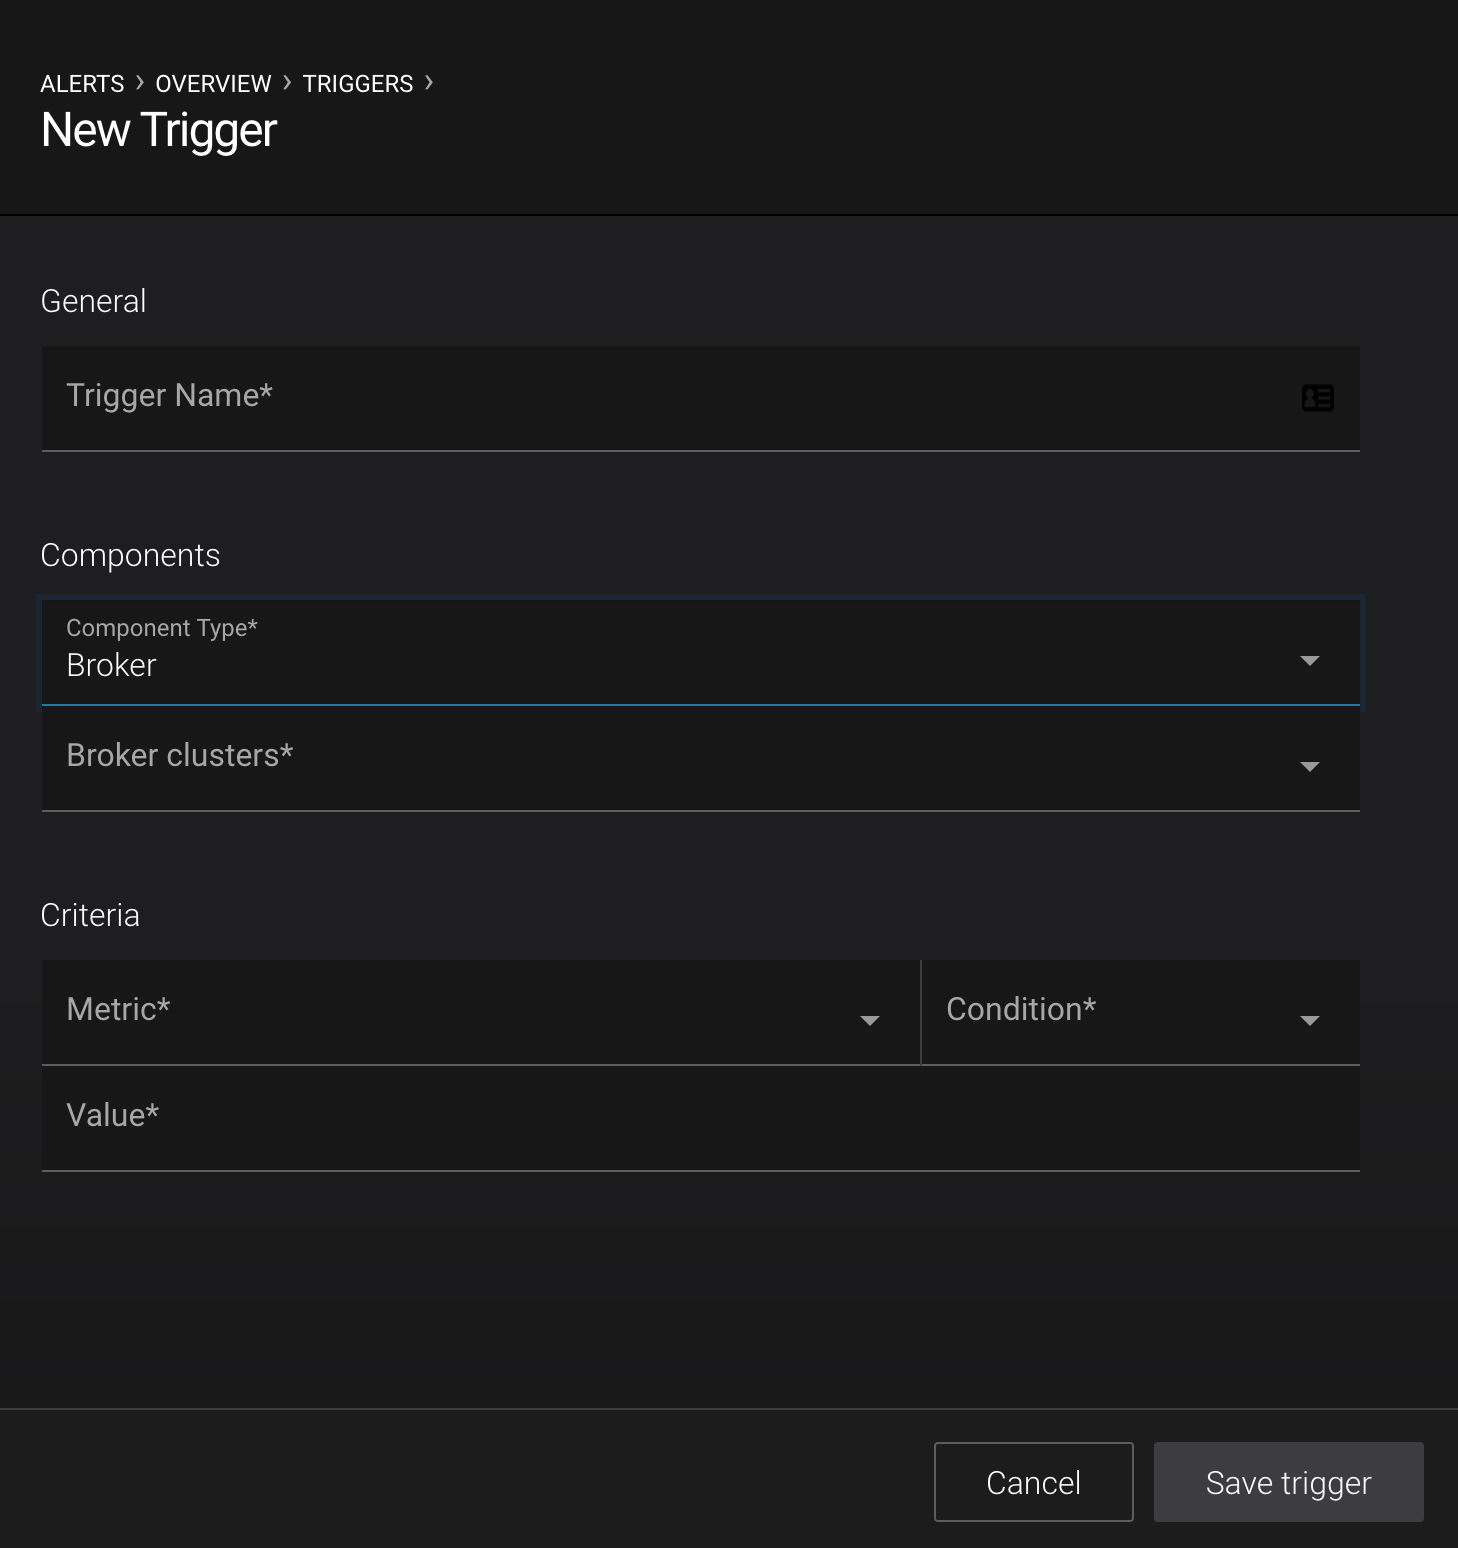
- Broker clusters
- The cluster(s) to look at for a specific broker metric.
- Trigger Name
- A name used to identify the trigger (for example ‘Broker zookeeper down’). Uniqueness is not enforced but you should use different names to avoid confusion.
- Broker clusters
One or many broker clusters to trigger based on conditions.
Note
If multiple clusters are selected, the trigger will be per cluster, not aggregate, but not in all cases. See below for more details.
- Metric
Some of the values in Metric are triggered on a per broker basis and some are only availbale cluster wide. The selection method in Broker clusters is by cluster, but there are specific metrics in the brokers of clusters that can cause triggers.
Important
Any broker that meets the Condition below will trigger discretely
- Bytes in
- Number of bytes per second produced to this broker
- Bytes out
- Number of bytes per second fetched from this broker (including from other brokers as part of replication)
- Production request latency
- Latency of produce requests to this broker at the median, 95th, 99th, or 99.9th percentile (in milliseconds)
- Production request count
- Total number of produce requests to this broker (requests per minute)
- Fetch request latency
- Latency of fetch requests to this broker at the median, 95th, 99th, or 99.9th percentile (in milliseconds)
Important
Any cluster that meets the Condition below will trigger
- Under replicated topic partitions
Total number of topic partitions that are under-replicated (i.e. partition with in-sync replicas < replication factor)
A trigger should be created for values
> 0- Offline topic partitions
Total number of partitions that are offline
A partition could be offline if for instance the number of available replicas for the partition is less than the configured minimum in-sync replicas.
A trigger should be created for values
> 0- Zookeeper status
- Are brokers able to connect to ZooKeeper? ‘Offline’ / ‘Online’ are possible values.
- Zookeeper expiration rate
- rate at which brokers are experiencing ZooKeeper session expirations (number of expirations per second)
- Active controller count
Number of brokers reporting as the active controller
A trigger should be created for values
!= 1- Leader election rate
- Number of partition leader elections
- Unclean election count
Number of unclean partition leader elections
When unclean leader election is held among out-of-sync replicas, there is a possibility of data loss if any messages were not synced prior to the loss of the former leader.
A trigger should be created for values
!= 0
- Condition
- The trigger will fire when Condition is true of the difference between the value of the metric being monitored and the value of the Value field. Possibly Greater than, Less than, Equal to, Not equal to, Online, or Offline, depending on the Metric selected.
- Value
- The value to which the broker Metric is compared.
Actions Management
After creating a trigger, you will be given the option to go to the action management page to associate it with one or more existing actions, or if none exist, create a new action.
Before being able to send email actions you will need to enable emails, and properly config Control Center to communicate with your SMTP server.
At the very least you will need to set
# this enables sending mail via c3
confluent.controlcenter.mail.enabled=true
# this is the host name of your mail server
confluent.controlcenter.mail.host.name=mymail.server
# this is the port your mail server is running on
confluent.controlcenter.mail.port=25
# we also recommend setting rest.listeners explicitly as well because
# this will control the Control Center link that is embedded in the
# body of any alert emails
confluent.controlcenter.rest.listeners=control-center.server
Clicking on the actions tab shows a summary of all configured actions:
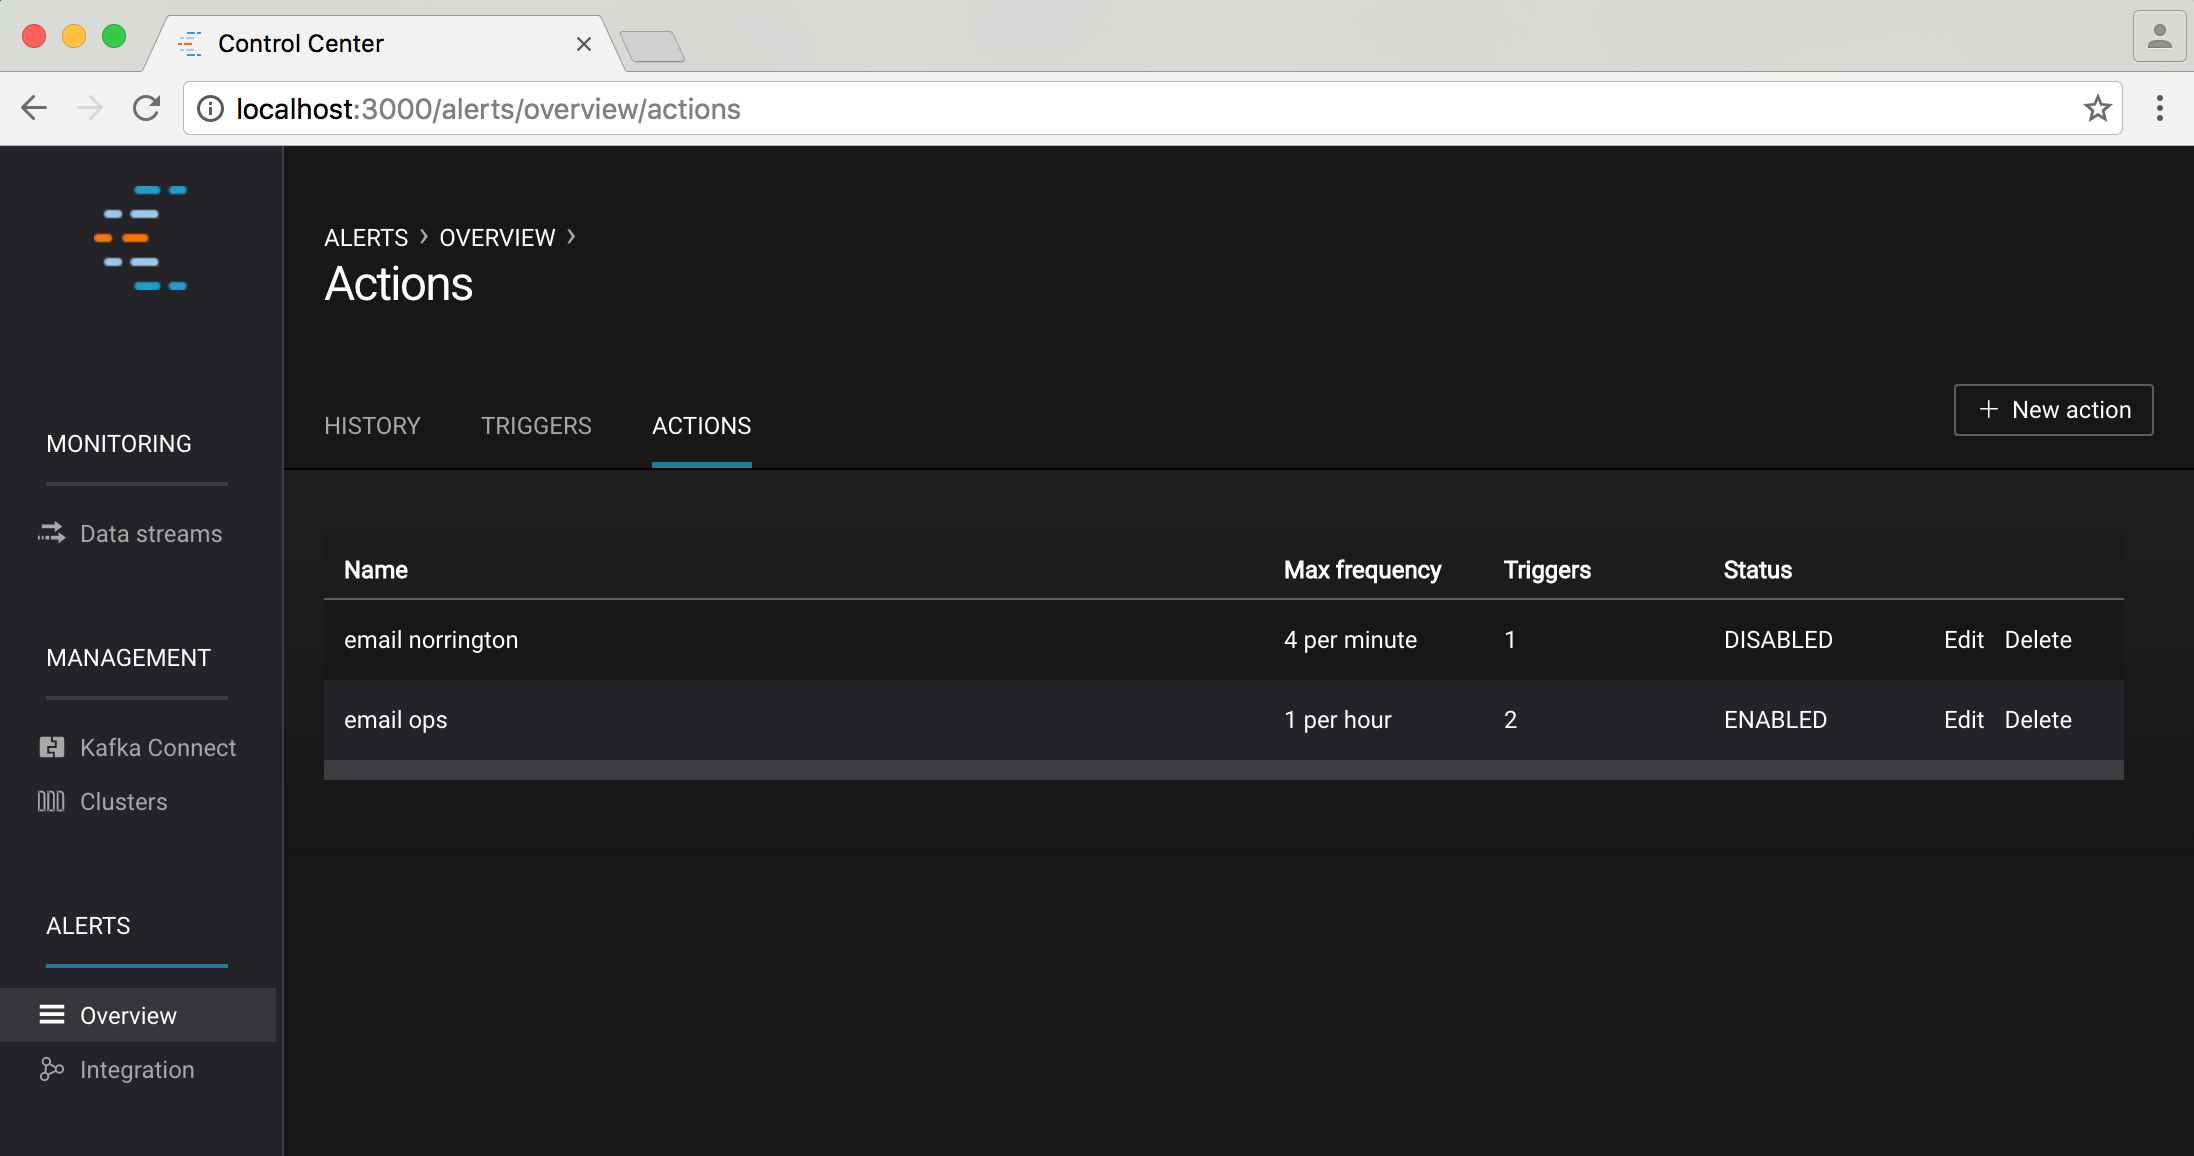
You can edit/delete an existing action using the edit/delete links in this table or create a new action via the “+ new action” button on the top right of the screen.
New/Edit Action Form
The form for creating and editing actions is identical. When editing, the form is pre-populated with the current action values.
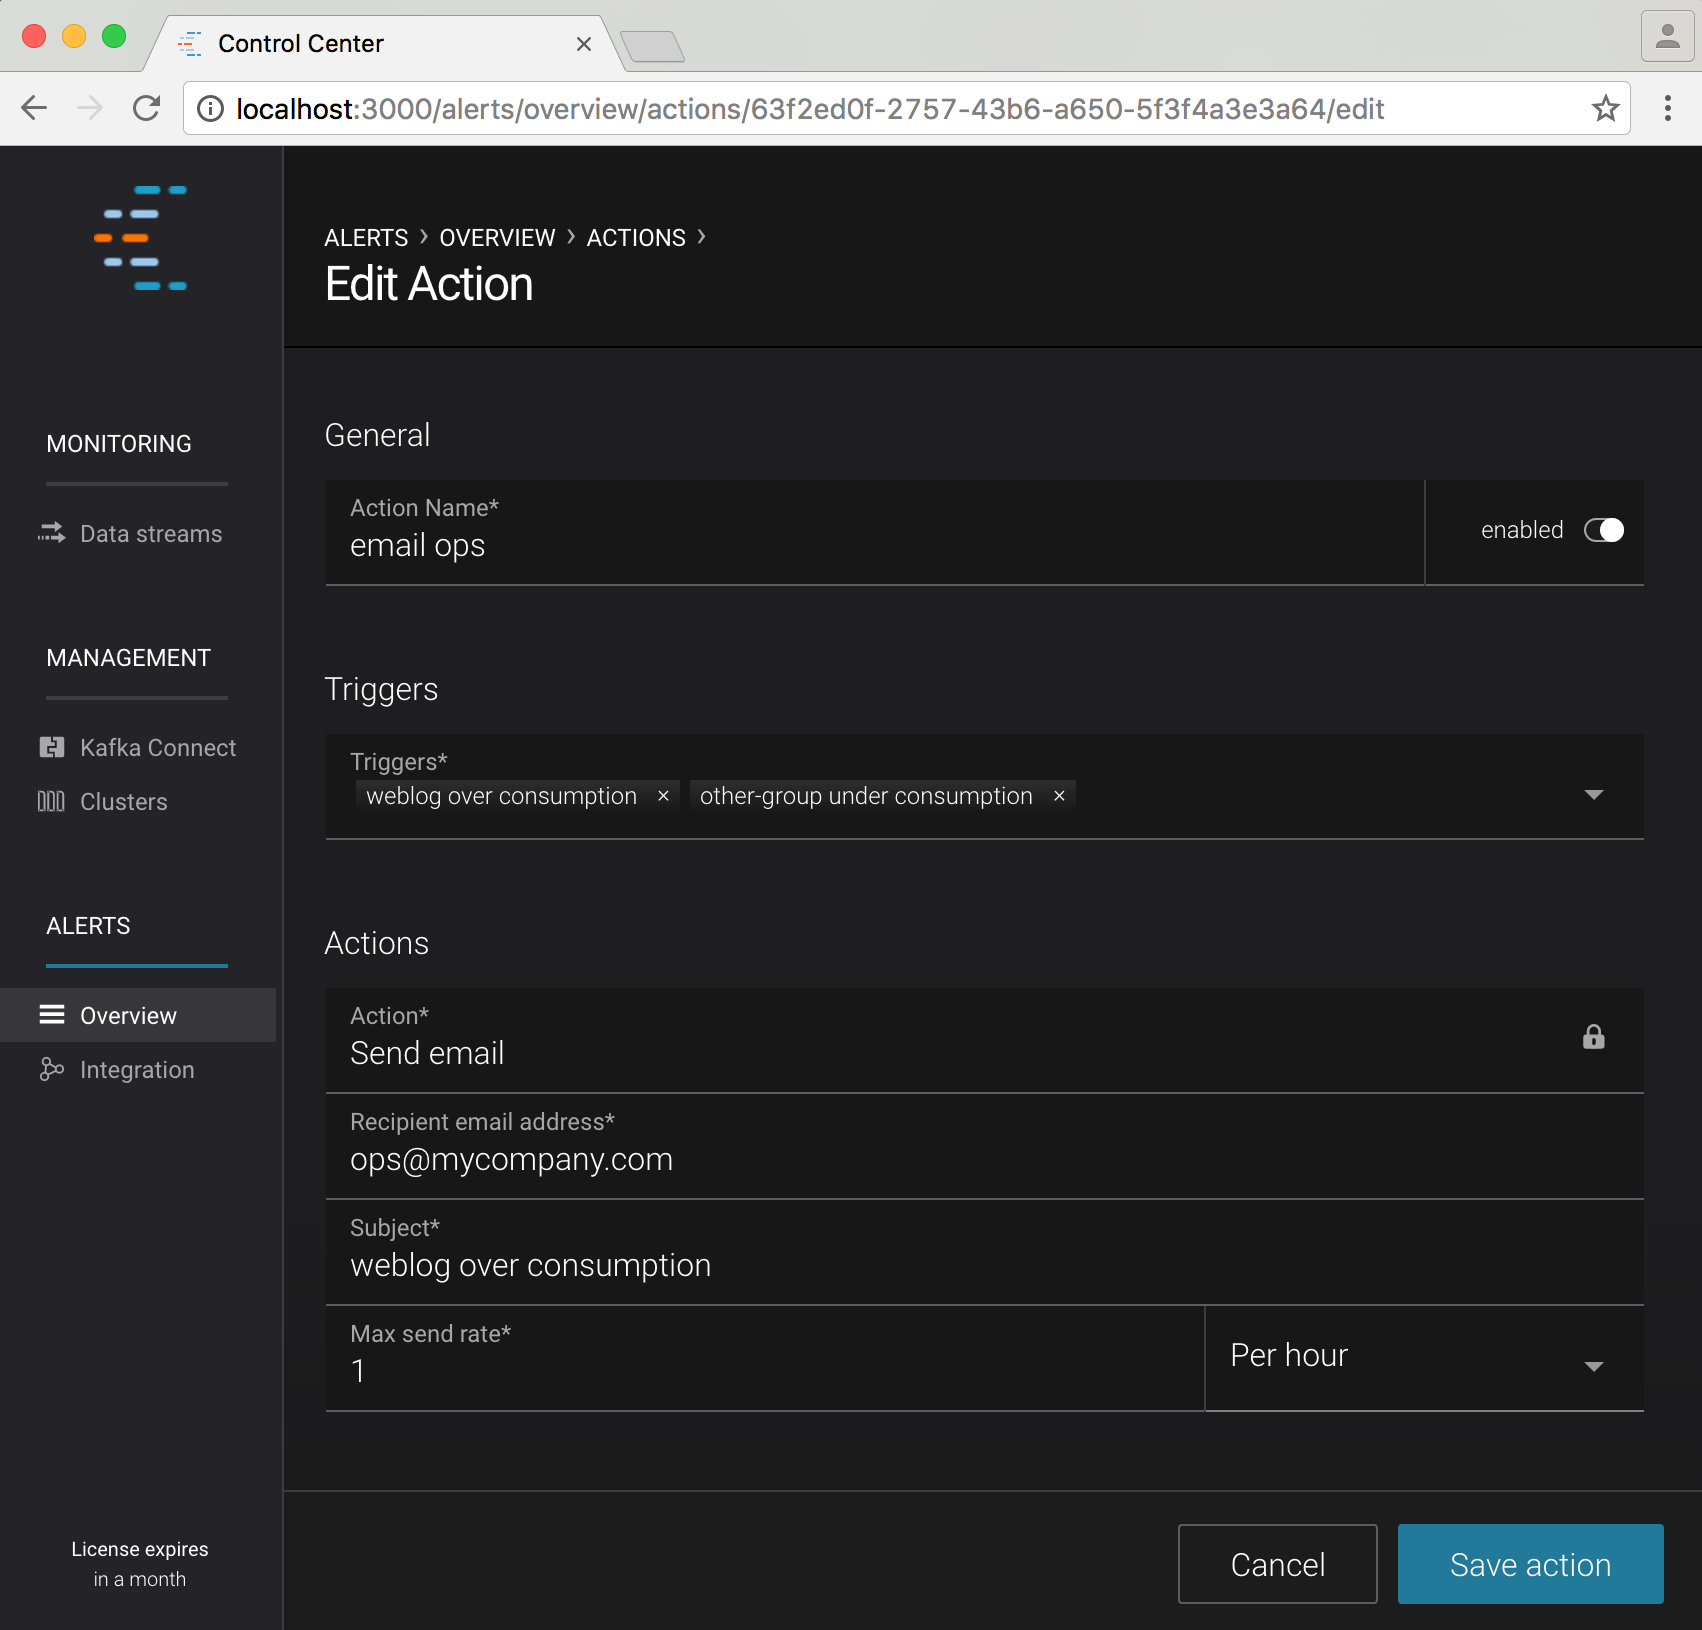
A description of each field follows (all fields are required):
- Action Name
- A name for the action (for example ‘email <ops person’>). Uniqueness is not enforced, but you should use different names to avoid confusion.
- Enabled/Disabled
- You may wish to temporarily disable actions. You can choose whether an action is currently enabled or disabled with this field.
- Triggers
- One or more triggers that will cause the action to be executed (refer to Concepts for more information).
- Action
- The type of action to perform. Currently we only support sending emails, but in the future we may support other action types.
- Recipient Email Address
- The email address associated with this action. A message will be sent to this address each time the action is executed.
- Subject
- The subject line of the email associated with this action.
- Max Send Rate
- The maximum rate at which the action may be executed (refer to Concepts for more information).
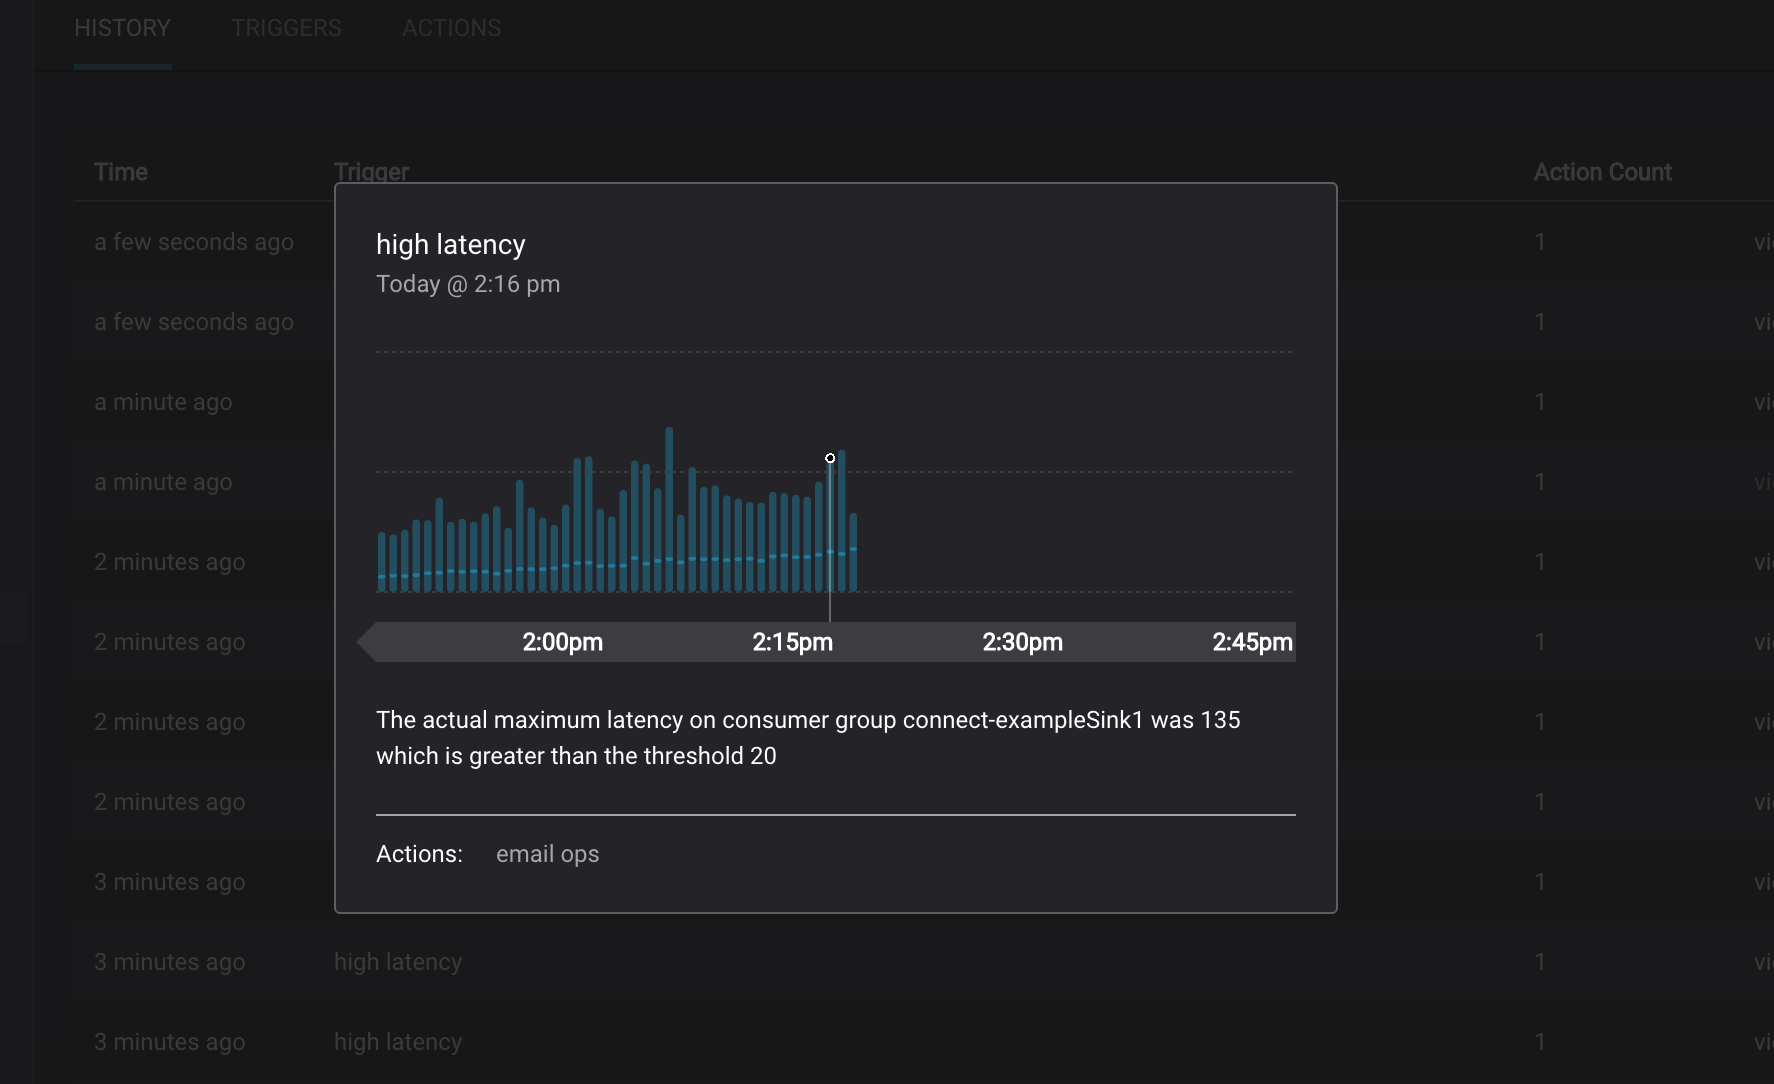
Alert History
Selecting the history tab shows a table summarizing every trigger that has fired that caused an action to be executed (note: it does not list every triggered event).
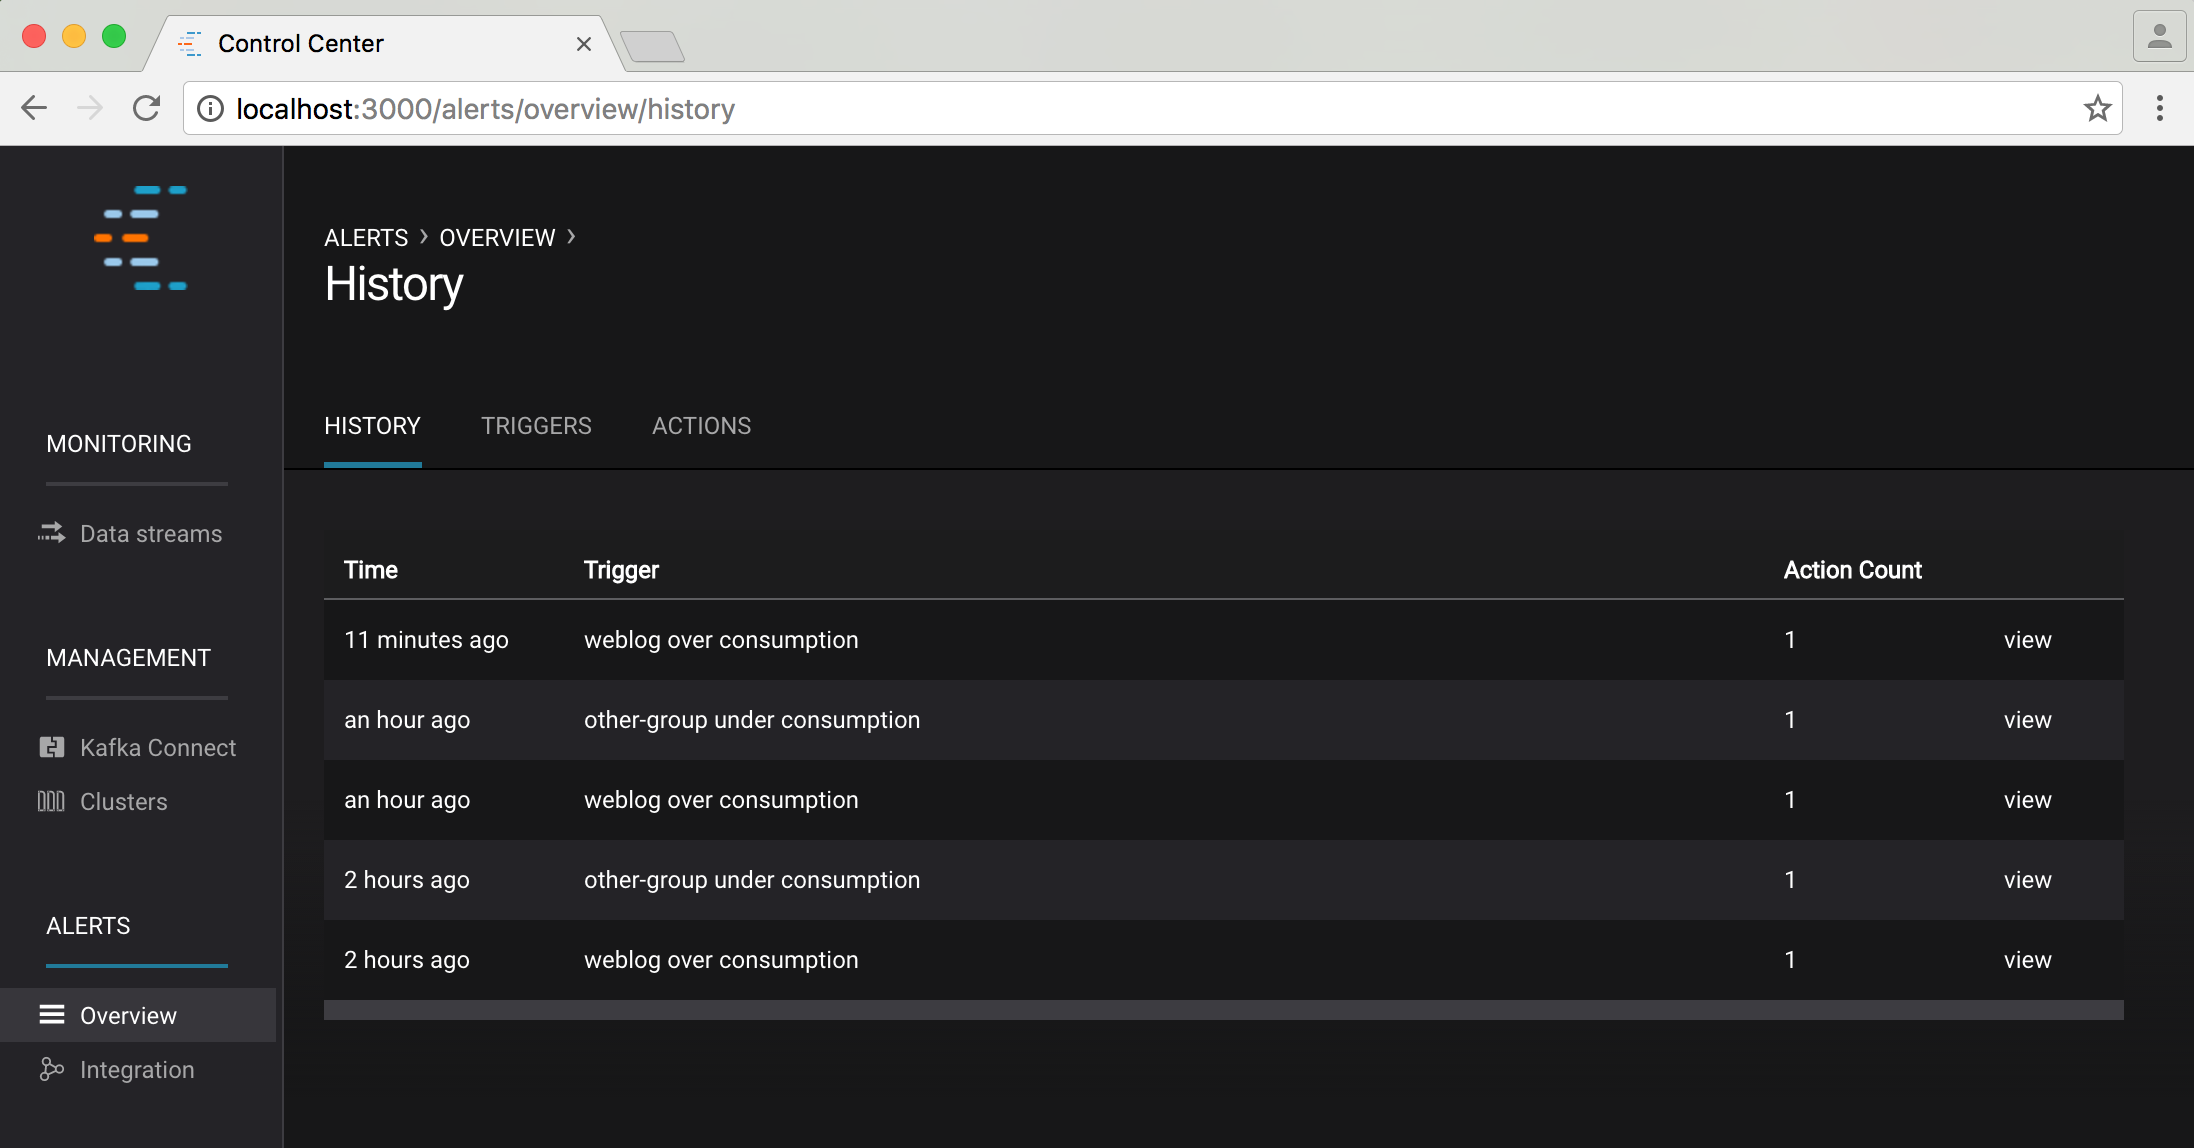
You can see contextual information for some items by clicking the “view” link, or in the case of broker alerts, the click will navigate to the ‘System Health’ page for further diagnostics.