by Kenneth Styrberg
Relevant to Blender v2.35
Curve Deform provides a simple but efficient
method of defining a deformation on a mesh. By parenting a mesh
object to a curve, you can deform the mesh up or down the curve by
moving the mesh along, or orthogonal to, the dominant axis.
The Curve Deform works on a dominant axis, X, Y,
or Z. This means that when you move your mesh in the dominant
direction, the mesh will traverse along the curve. Moving the mesh
in an orthogonal direction will move the mesh object closer or
further away from the curve. The default settings in Blender map
the Y axis to the dominant axis. When you move the object beyond
the curve endings the object will continue to deform based on the
direction vector of the curve endings.
Tip
Try to position your object over the curve while moving it around. This gives the best control over how the deformation works.
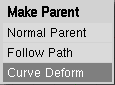
When parenting a mesh to a curve (CTRL-P), you
will be presented with a menu, Figure 9.37, “Make Parent menu.”.
By selecting Curve Deform you enable the
Curve Deform function on the mesh object.
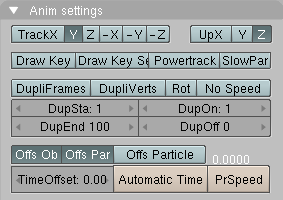
The dominant axis setting is set on the mesh object. By default the
dominant axis in Blender is Y. This can be changed
by selecting one of the Track X, Y
or Z buttons in the Anim Panel,
Figure 9.38, “Anim settings panel.”, in Object
Context (F7).
Cyclic curves work as expected where the object deformations traverse along the path in cycles.
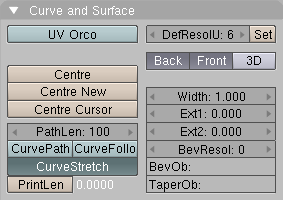
CurveStretch provides an option to let the mesh object
stretch, or squeeze, over the entire curve. This option is in
Edit Context (F9) for the curve.
See Figure 9.39, “Curve and Surface panel.”.
Let's make a simple example.
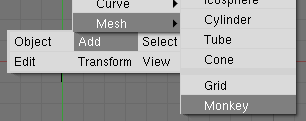
1. Remove default cube object from scene and add a Monkey! (SHIFT-A -> Add -> Mesh -> Monkey, Figure 9.40, “Add a Monkey!”).
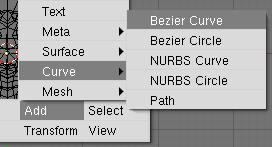
2. Now press TAB to exit
EditMode. Now add a curve.
(SHIFT-A -> Add -> Curve -> Bezier Curve,
Figure 9.41, “Add a Curve.”).
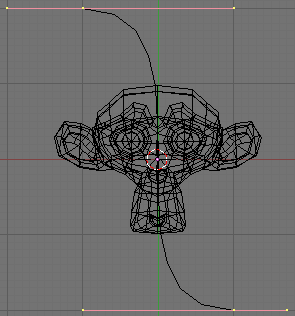
3. While in EditMode, move the control points of
the curve as shown in Figure 9.42, “Edit Curve.”, then
exit EditMode, (TAB).
4. Select the Monkey, (RMB), and
then shift select the curve, (SHIFT-RMB). Press
CTRL-P to open up the Make Parent
menu. Select Curve Deform. (Figure 9.37, “Make Parent menu.”).
The Monkey should be positioned on the curve as Figure 9.43, “Monkey on a Curve.”.
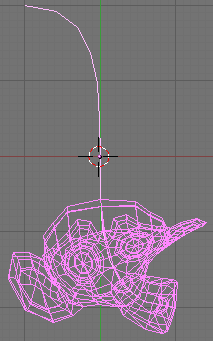
5. Now if you select the Monkey, (RMB), and move it, (G), in the Y-direction, (the dominant axis by default), the Monkey will deform nicely along the curve.
Tip
If you press MMB while moving the Monkey you will constrain the movement to one axis only.
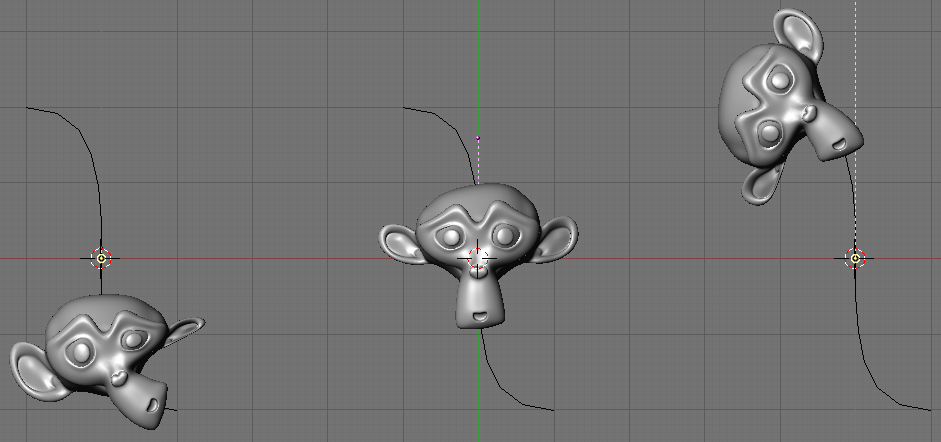
6. In Figure 9.44, “Monkey deformations.”, you
can see the Monkey at different positions along the curve. To get
a cleaner view over the deformation I have activated
SubSurf with Subdiv 2 and
Set Smooth on the Monkey mesh.
(F9 to get Edit options).
Tip
Moving the Monkey in directions other than the dominant axis will create some odd deformations. Sometimes this is what you want to achieve, so you'll need to experiment and try it out!