Creating a Simple Graph
After creating a new CloverETL graph, the graph has no components. Place the components, connect the components with edges, assign metadata to the edges, and configure the mandatory component attributes.
If you want to know what edges, metadata, connections, lookup tables, sequences or parameters are, see Part V, ETL Graphs for information.
Placing Components
Firstly, you shall place the components. The component can be placed from a palette of components, from a navigator or using a Shift+Space shortcut. We describe placing component from the palette.
Placing Components from Palette
Open the Palette of Components if it is not opened: click the triangle on the upper right corner of the Graph Editor pane. The Palette of Components will open.
Drag-and-drop the components you want to the Graph Editor pane.
For our tutorial purposes, select
FlatFileReader from Readers
ExtSort from Transformers
FlatFileWriter from Writers
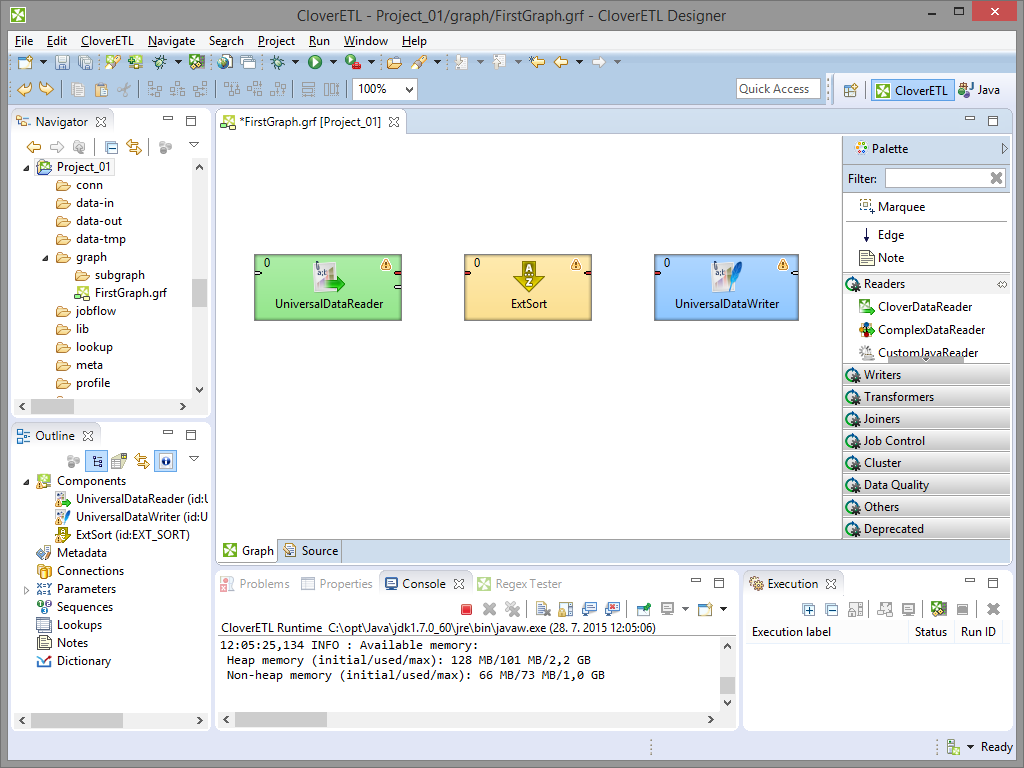 |
Figure 22.4. Components Selected from the Palette
Connecting Components with Edges
Once you have inserted the components to the Graph Editor pane, you need to connect them with edges. Select the Edge tool on the Palette and click the output port of one component and connect it with the input port of the following component by clicking again. Do the same with all selected components.
The newly connected edges are still dashed. Close the Palette by clicking the triangle at its upper right corner. (See Chapter 31, Edges for more information about Edges.)
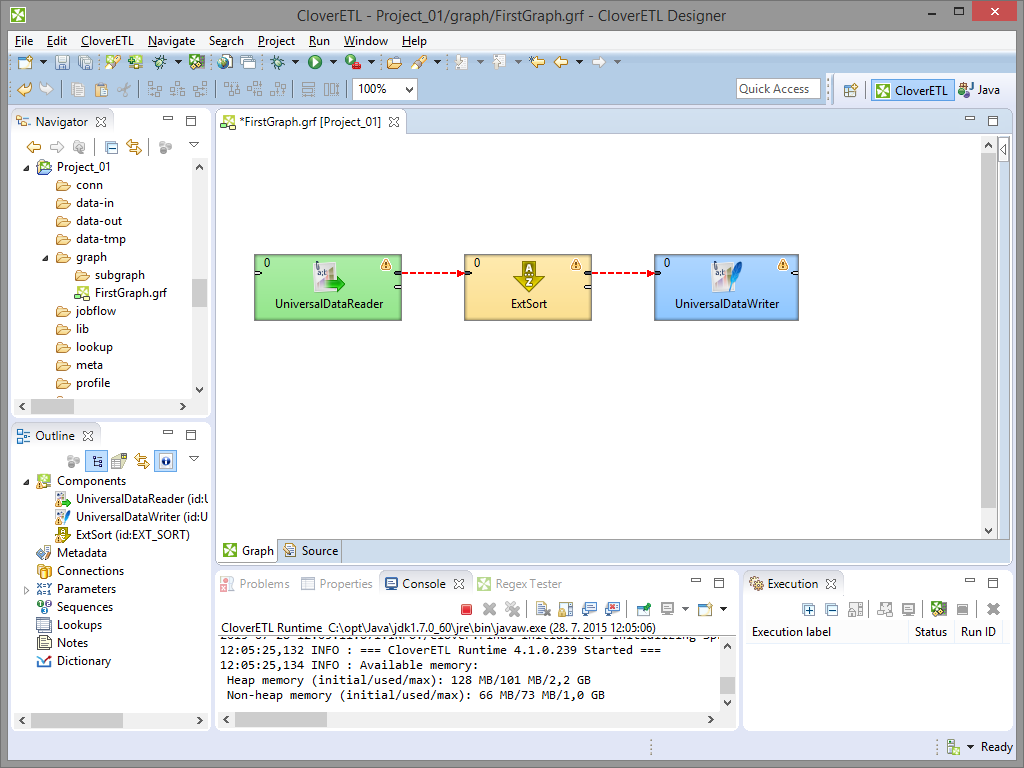 |
Figure 22.5. Components are Connected by Edges
Now you need to prepare some input file. Move to the
Navigator pane, which is on the left side of
Eclipse window. Right-click the
data-in folder of your project and select
→ .
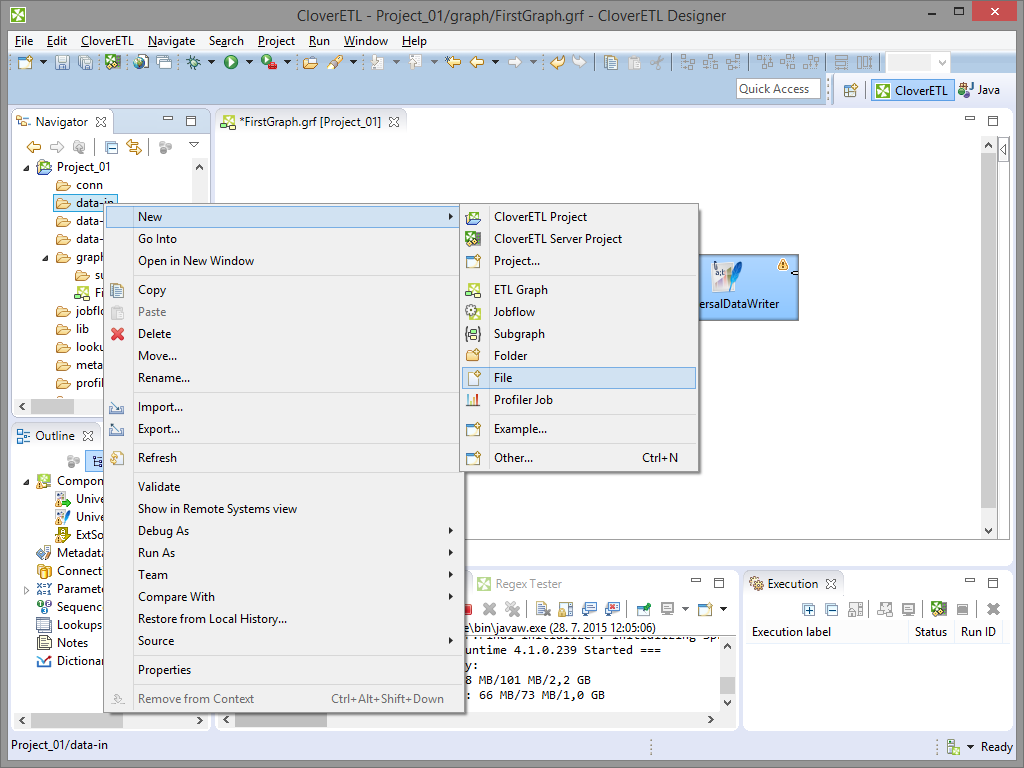 |
Figure 22.6. Creating an Input File
Once the new window appears, select the name of your input file
in this window. For example, its name can be
input.txt. Click .
The file will open in the Eclipse
window.
Type some data in this file, for example, you can type pairs of
firstname and surname like this: John|Brown. Type
more rows whose form should be similar. Do not forget to create also a
new empty row at the end. The rows (records) will look like
this:
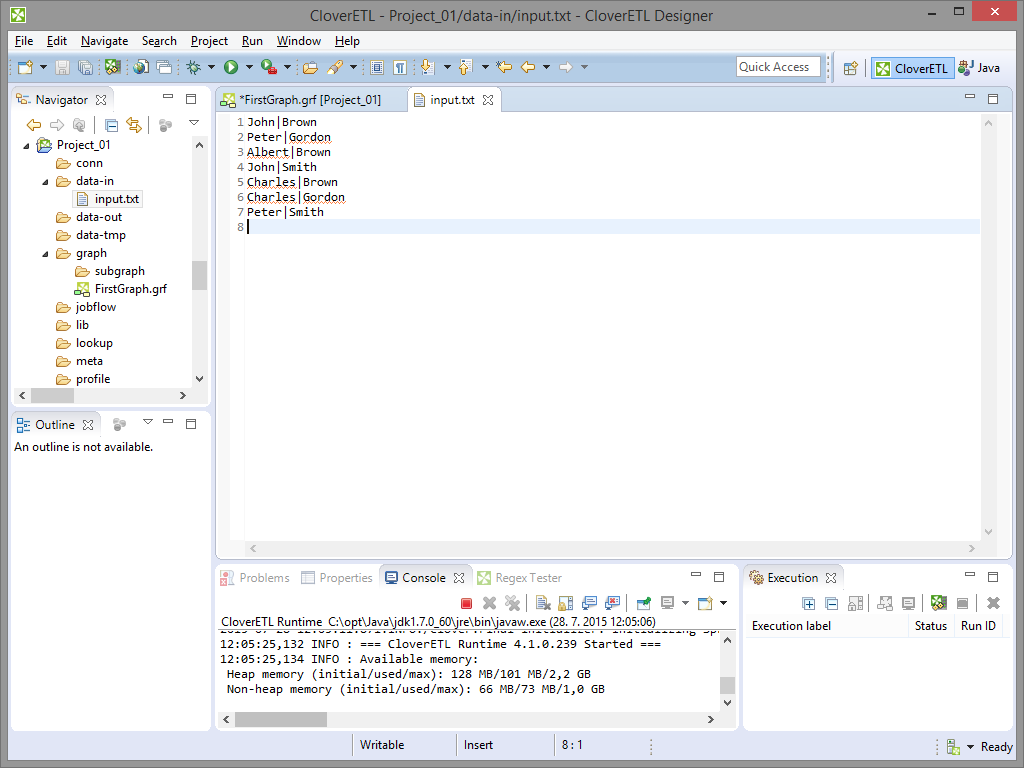 |
Figure 22.7. Creating the Contents of the Input File
You can copy in the following lines to avoid typing:
John|Brown
Peter|Gordon
Albert|Brown
John|Smith
Charles|Brown
Charlws|Gordon
Peter|Smith
You need to save the file by pressing Ctrl+S.
After that, double-click the first edge from the left and select Create metadata from the menu that appears beside the edge. In the Metadata editor, click the green button. Another (second) field appears. You can click any of the two fields and rename them. By clicking any of them, it turns blue, you can rename it and press . (See Chapter 32, Metadata for more information about creating Metadata.)
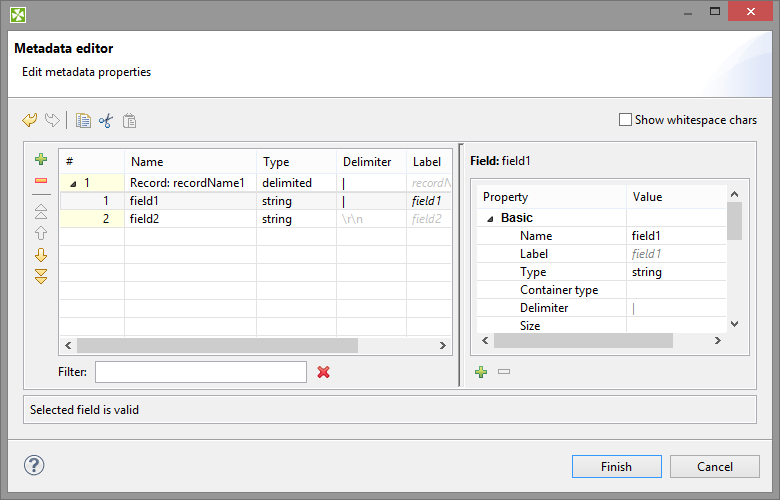 |
Figure 22.8. Metadata Editor with Default Names of the Fields
After doing that, the names of the two fields will be Firstname and Surname, respectively.
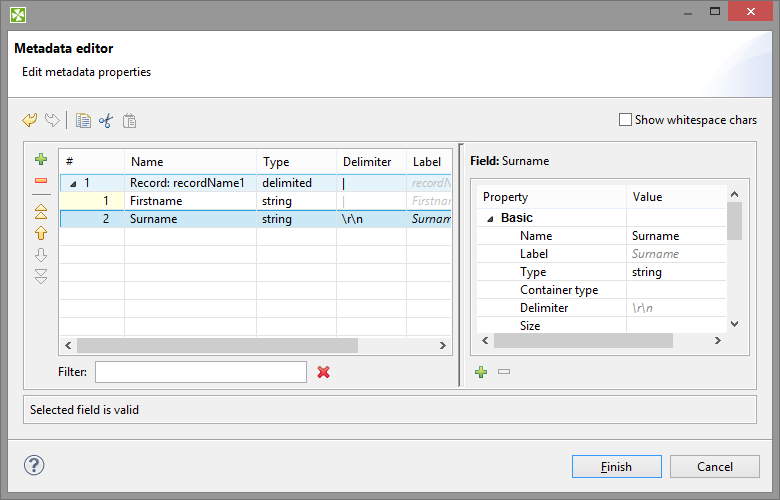 |
Figure 22.9. Metadata Editor with New Names of the Fields
After clicking , metadata is created and assigned to the edge. The edge is solid now.
The metadata on the second edge have been auto-propagated from the first edge.
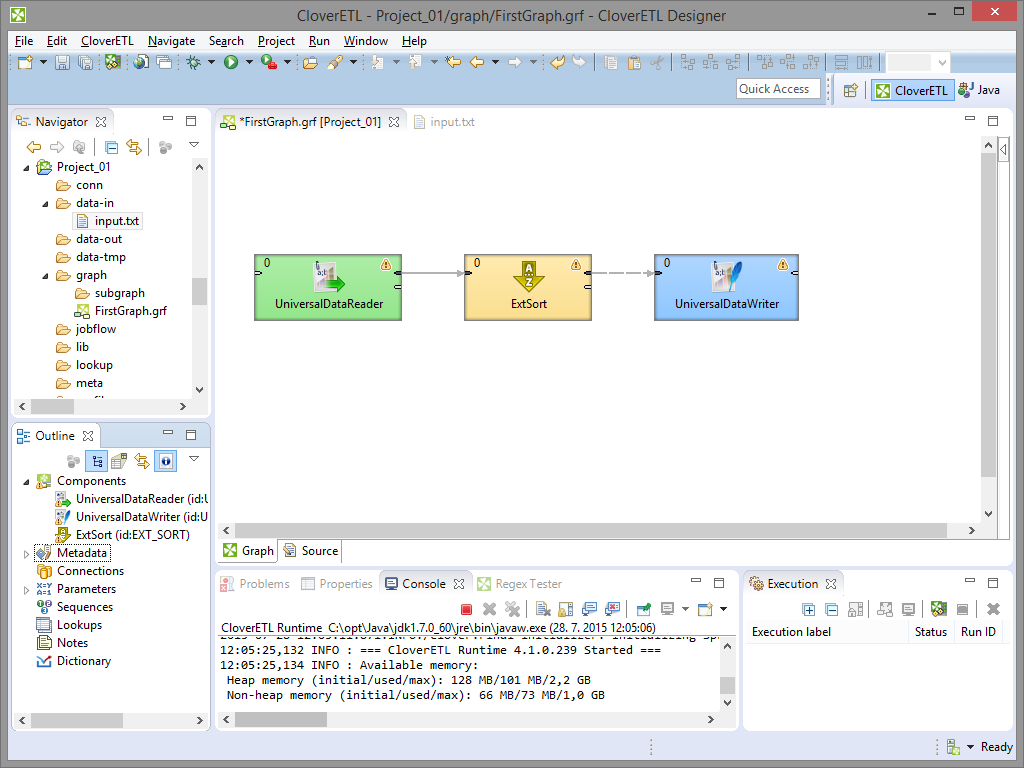 |
Figure 22.10. Edge Has Been Assigned Metadata
Now, double-click FlatFileReader, click the File URL attribute row and click the button that appears in this File URL attribute row.
(You can see UniversalDataReader for more information about FlatFileReader.)
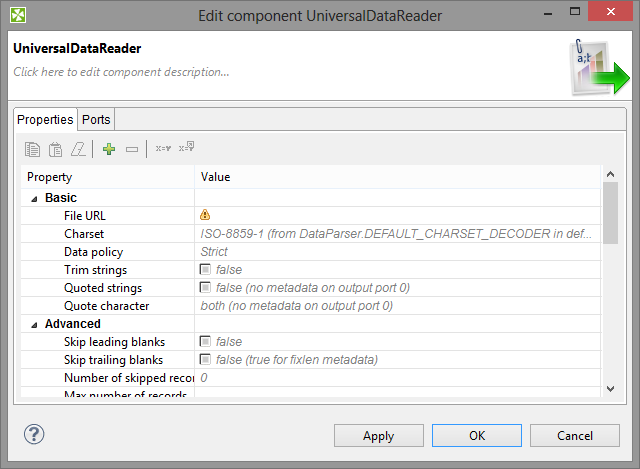 |
Figure 22.11. Opening the Attribute Row
After that, URL File Dialog will open. Double-click the
data-in folder and double-click the
input.txt file inside this folder. The file name
appears in the right pane.

Figure 22.12. Selecting the Input File
Then click . The File URL attribute row will look like this:
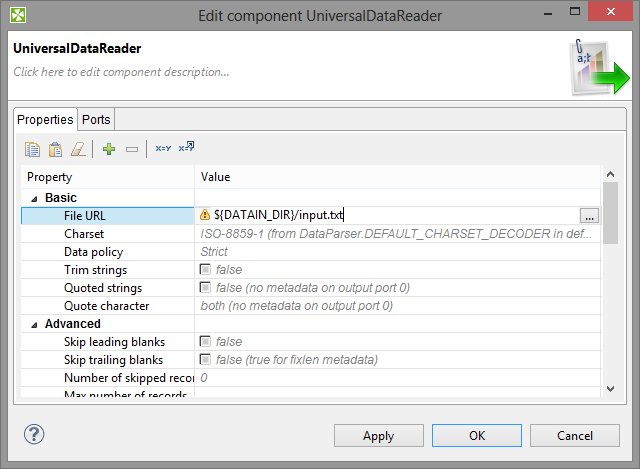 |
Figure 22.13. Input File URL Attribute Has Been Set
Click to close the FlatFileReader editor.
Then, double click FlatFileWriter.
(You can see FlatFileWriter for more information about FlatFileWriter.)
Click the File URL attribute row
and click the button that appears in this File URL attribute row.
After that, URL File Dialog will open.
Double-click data-out folder.
Then click .
The File URL attribute row will look like this:
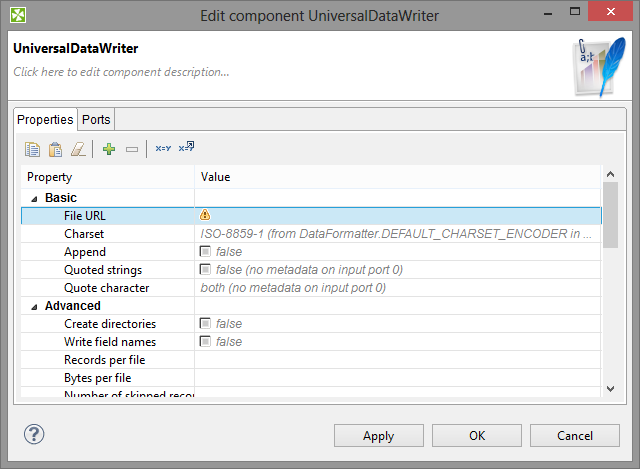 |
Figure 22.14. Output File URL without a File
Click twice the File URL attribute row and
type ${DATAOUT_DIR}/output.txt there. The result will be as
follows:
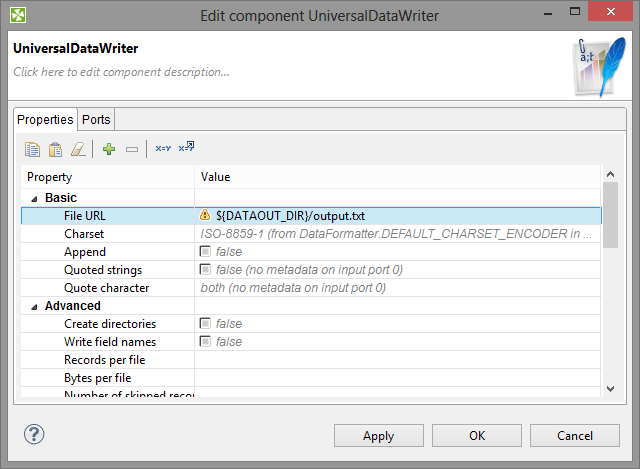 |
Figure 22.15. Output File URL with a File
Click to close the FlatFileWriter editor.
Now you only need to set up the ExtSort component.
(You can see ExtSort for more information about ExtSort.)
Double-click the component and its Sort key attribute row. After that, move the two metadata fields from the left pane (Fields) to the right pane (Key parts). Move Surname first, then move Firstname.
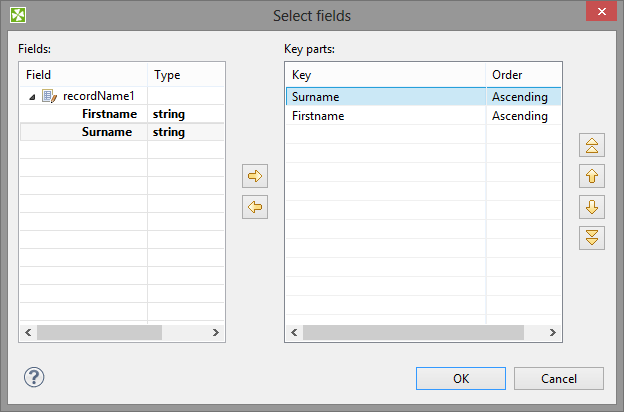
Figure 22.16. Defining a Sort Key
When you click , you will see the Sort key attribute row as follows:
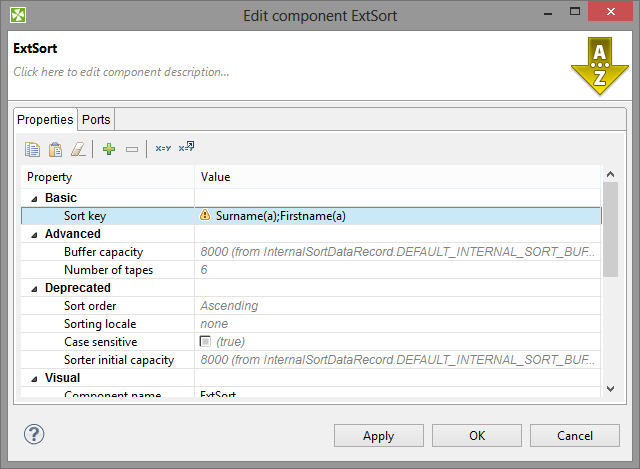 |
Figure 22.17. Sort Key Has Been Defined
Click to close the ExtSort editor and save the graph by pressing Ctrl+S.
Now right-click in any place of the Graph Editor (outside any component or edge) and select Run CloverETL Graph .
(Ways how graphs can be run are described in Chapter 23, Execution.)
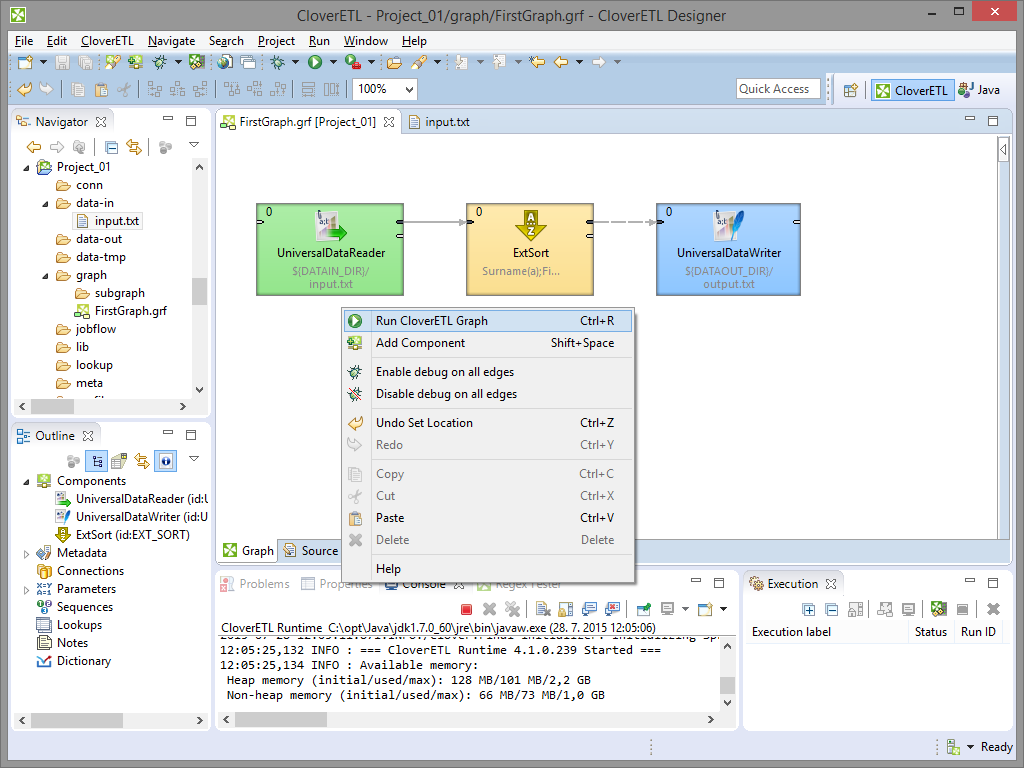 |
Figure 22.18. Running the Graph
Once graph runs successfully, blue circles are displayed on the components and numbers of parsed records can be seen below the edges:
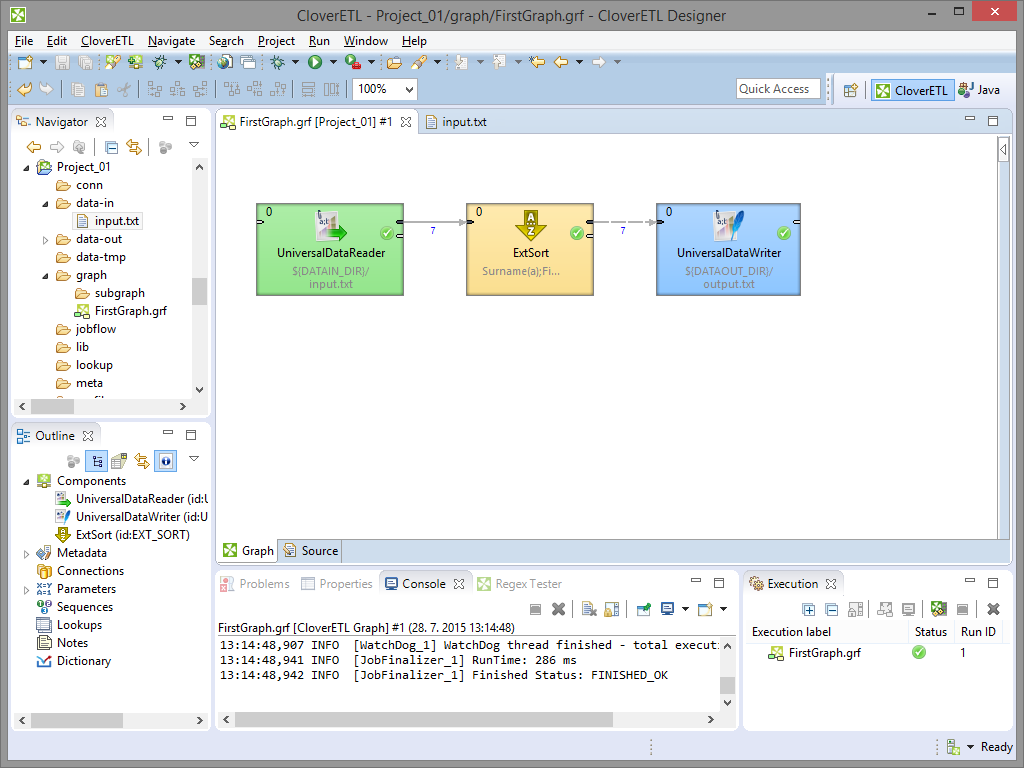 |
Figure 22.19. Result of Successful Run of the Graph
When you expand the data-out folder in the
Navigator pane and open the output file, you can
see the following contents of the file:
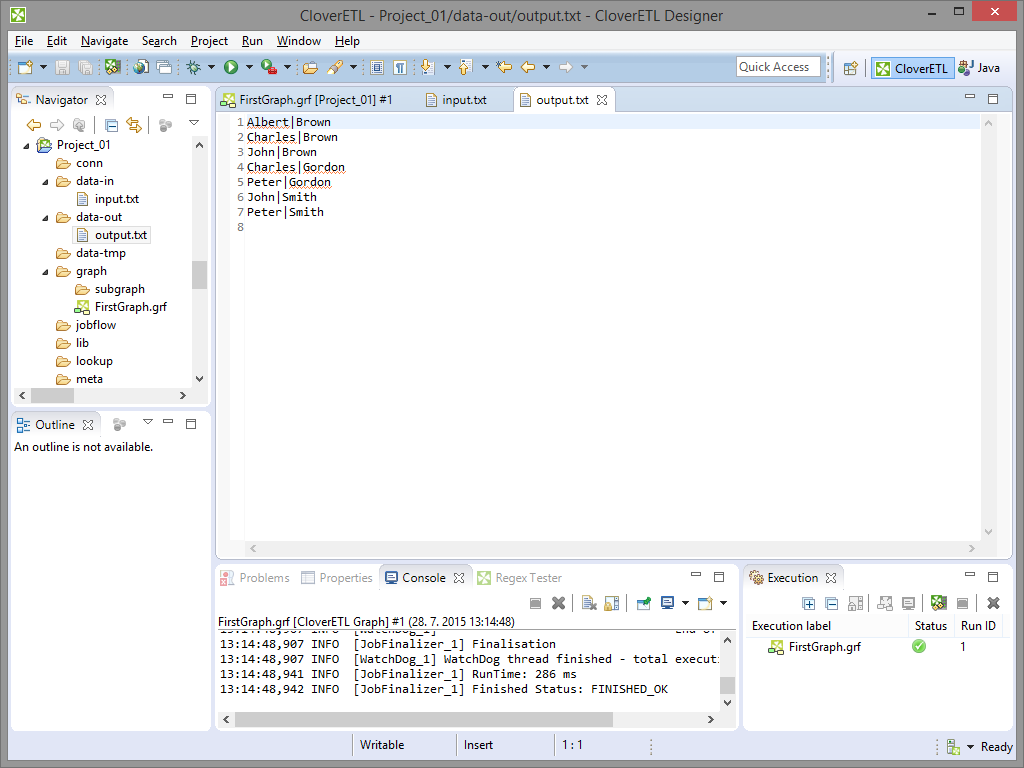 |
Figure 22.20. Contents of the Output File
You can see that all persons have been sorted alphabetically. Surnames first, firstnames last. This way, you have built and run your first graph.