Server Configuration Import
Import of CloverETL Server configuration merges the configuration exported from another server into the running server instance where the import was initiated. The configuration to be imported is loaded from an XML file created by export, see Server Configuration Export. Import of server configuration is performed from the Server Console - the screen for import can be found in Configuration > Import section.
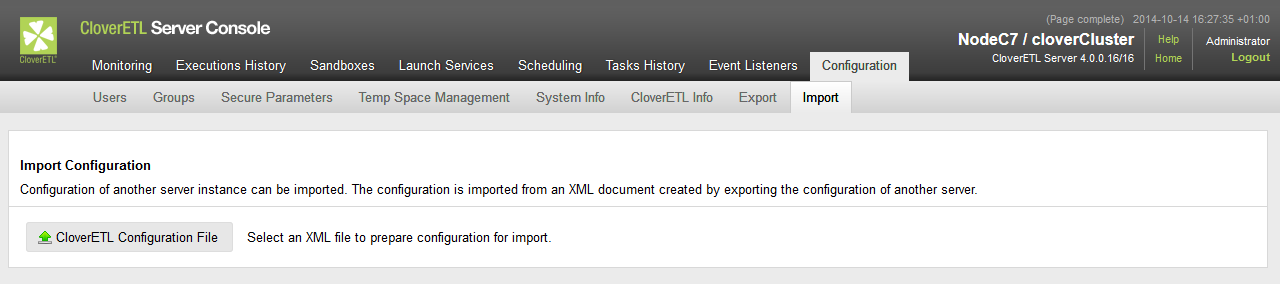 |
Figure 17.2. Server Configuration Import screen
The XML configuration file defines configuration items to be imported into the destination server. The items are matched against current configuration of the destination server. Depending on result of the matching, the items from the XML configuration are either added to the destination server or will update existing item with properties defined in the XML file. Matching of items is based on a key that depends on the item type:
- users - user code
- user groups - group code
- sandboxes - sandbox code
- job parameters - triplet (job parameter name, sandbox code, job file)
- event listeners - event listener name
- schedule - schedule description
- launch service - triplet (service name, server user, service user group)
- temp spaces - pair (temp space node ID, temp space path)
Configuration Import Process
Uploading Configuration
The first step in the configuration import is to upload the XML file to the CloverETL server. After clicking on CloverETL Configuration File button a window is opened where user can select an XML file with the configuration to import. The file is uploaded automatically after the dialog is closed. Once upload is finished the name of the uploaded file is shown in the toolbar along with CloverETL Configuration File button. In case reading of configuration from XML has finished without error, additional controls are displayed in the toolbar:
- Preview Import button to perform "dry run" of the configuration import
- Commit Import button to perform actual import of configuration to server's database
- Import Options section to further configure import process:
- New only option specifies that only new items will be imported leaving existing items on server untouched
- Import Items section to select what item types will be imported to the server
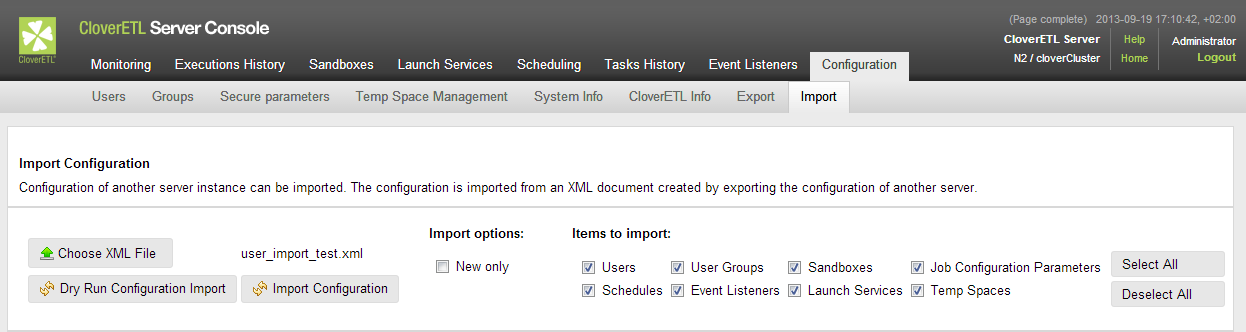 |
Figure 17.3. Server Configuration uploaded
![[Note]](figures/note.png) | Note |
|---|---|
| When transfering configuration from one server instance to another, it is important that these instances are of compatible, preferably the same, version. The user is notified when the source and target differ at at least minor version number (e.g. 3.4.1 and 3.5.0). It is also recommended not to transfer configuration between clustered and non-clustered server instances. |
Verifying Configuration
Once the configuration is uploaded, the system executes "dry run" of the configuration import automatically. The dry run performs configuration import, but no data is actually written do the server's database. The outcome of the operation is Import Log with messages related either to the configuration as a whole or to particular imported items (see Figure 17.4). There is also another view of Imported Items to list all added/updated items grouped into tables according to their types. Each item has an icon indicating result of the item import operation:
 - the item has been added as a new one
 - the item has been updated
 - the item has been updated, but none of its properties has changed
 - the item has been removed
For the updated items, the state of the item before update is shown in the lower of the rows with less contrast text color, the new values of item's properties are shown in upper of the rows with regular text color. Actual changes are highlighted by background color change on respective property and also on both rows. The Imported Items view can be filtered using radio buttons above it:
- Changes only button will display only items that have been either added or actually changed by update
- All updates button will display all of imported items, event those identical to already present ones
Example 17.1. Example of simple configuration defining one new server user.
<?xml version="1.0" encoding="UTF-8" standalone="yes"?>
<cloverServerConfiguration xmlns="http://cloveretl.com/server/data" timeZone="Europe/Berlin">
    <usersList>
        <user disabled="false">
            <username>johnsmith</username>
            <firstName>John</firstName>
            <lastName>Smith</lastName>
            <email>[email protected]</email>
            <domain>clover</domain>
            <password>SITx8e1pjoo4em17As3LNw==</password>
            <passwordA1Digest>70151bae7488da4159ac5ccec97d0995</passwordA1Digest>
            <userGroups>
                <groupCode>all_users</groupCode>
                <groupCode>job_managers</groupCode>
            </userGroups>
        </user>
    </usersList>
</cloverServerConfiguration>
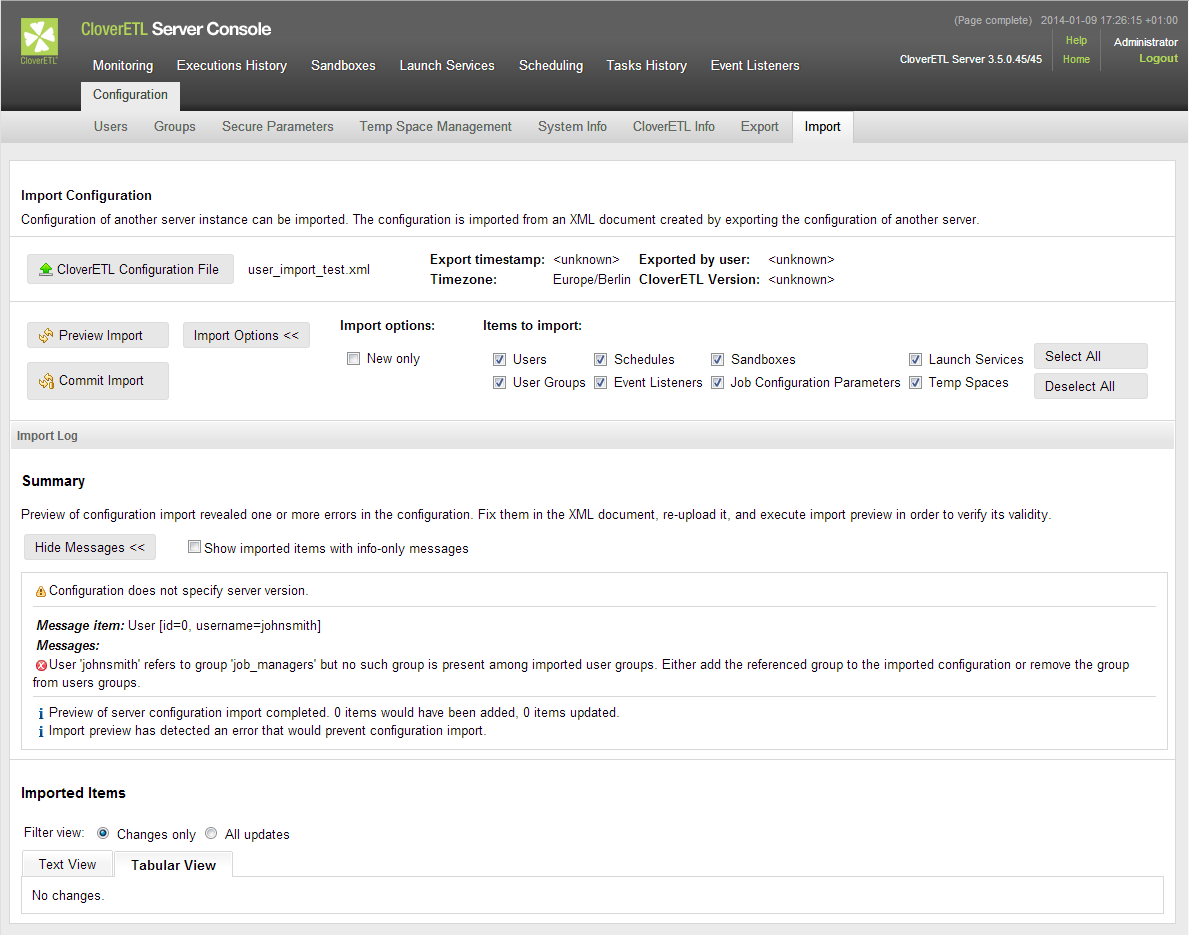 |
Figure 17.4. Outcome of the import preview for configuration from Example 17.1
The Summary in the Import Log says whether the dry run was successful. Should there by any problems with items imported, the item is displayed along with the cause of the error (see Figure 17.4) .
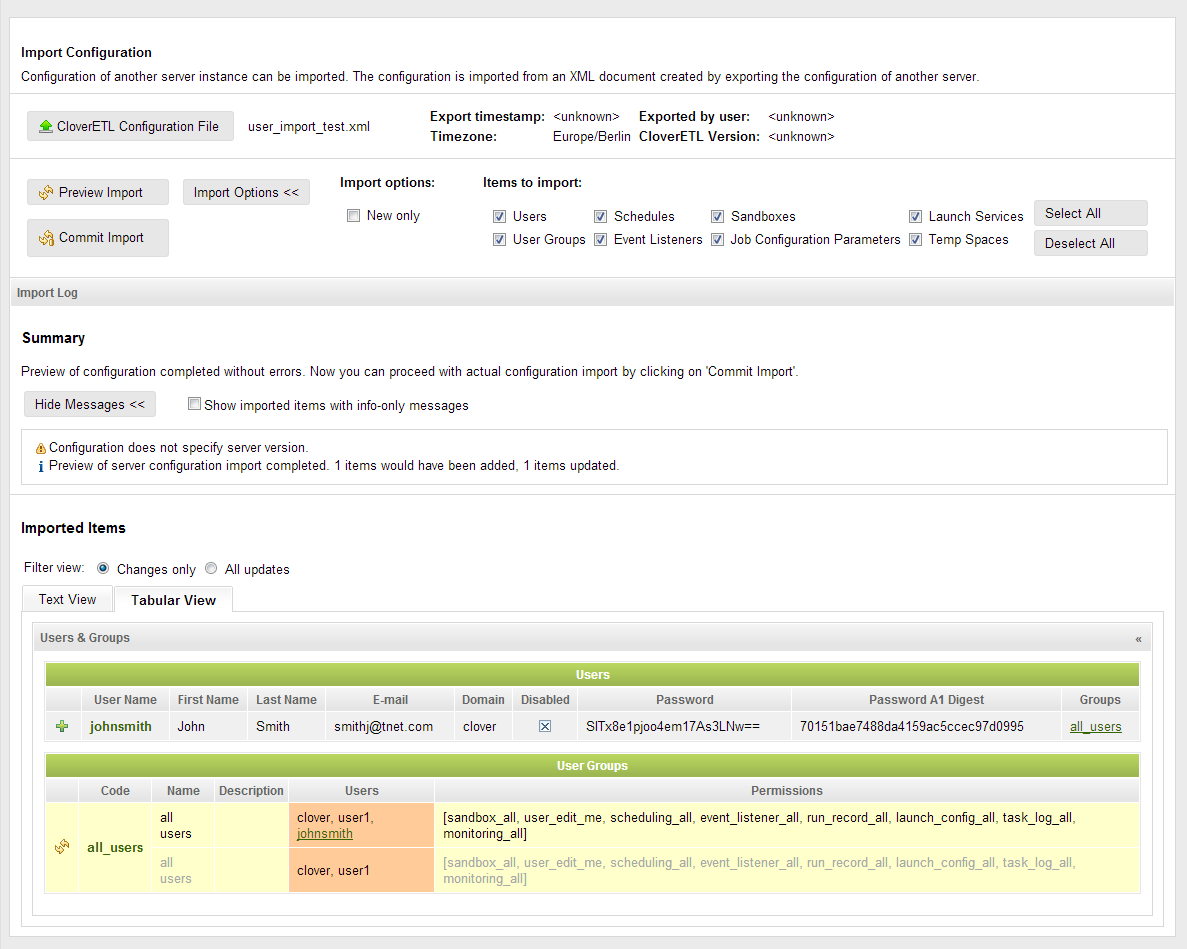 |
Figure 17.5. Outcome of import preview for configuration after fixing by removal of broken group reference.
User is expected follow the advices displayed in the Import Log and edit the XML until import preview has finished without errors.
Committing Import
Once the import preview has finished without problems, one can proceed with actual configuration import. This is performed by clicking on the Commit Import button. After confirmation, Import Log will display outcome of the operation.
It is possible that some items will not be initialized properly after they have been imported (e.g. their initialization requires presence of a cluster node that went down in the meantime). User is notified about these problems in Import Log with link to the problematic item. One should check such items in appropriate section of the CloverETL Server console and change their settings to fix the issue or remove them.