Most operating systems offer two ways to interact with your computer: a desktop and a command line.
In popular operating systems, the command line is usually de-emphasized. Progeny suggests that you take a mixed approach to Linux.
For routine work, the desktop is convenient and easy to learn. However, consider using the command line for complex work. The Linux command line takes longer to learn than a graphical interface, but in many circumstances it is easier and quicker to use.
The default graphical interface for Debian is gnome (gnu Network Object Model Environment). This chapter describes the features of gnome. However, you may also install kde (The K Desktop Environment) from the Extras CD. The two desktops have similar features and functionality.
Most modern computer users (at least those installing Linux) know the basics of using a desktop. For this reason, this chapter is written more to point out features than to explain them. Its main focuses are:
For more detail, see the gnome on-line help.
Unlike other popular operating systems, Linux lets you customize all the parts of your graphical interface.
Linux uses the X Window System (also called "X," but "X Windows"is considered insulting by many) to display graphics. The X Window System uses three parts to provide a graphical interface:
You can choose each of these parts separately. Only a few Linux users change the X server, but many change the window manager and desktop regularly. Some users prefer a window manager, but no desktop.
In addition, you can also change the look of a window manager or desktop by changing themes, the default colors and designs. Entire web sites are devoted to themes, notably www.themes.org.
The gnome desktop is similar to desktops on other operating systems. However, take the time to find where the parts of the desktop are. Some features may not be in the position you expect, while. others can be reached in more than one way.
You can add many features to the gnome desktop. However, the default desktop consists of:
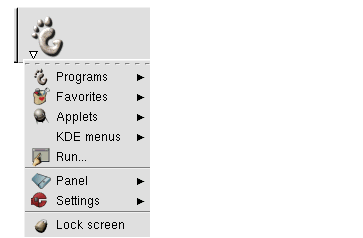
You can select a program to run by opening one of two menus:
[Note]
To have a menu or sub-menu stay open, double-click on the top part above the dotted line. The menu becomes a regular window. This feature is sometimes called a "tear-off menu."
The panel runs across the top of the desktop. It contains the menu, icons (or launchers), and commonly used tools. The default panel contains:
img/Desktop-9.png
Notice, too, the arrows on each side of the panel. Selecting an arrow slides the panel shut to give more room in the workspace. Selecting an arrow again slides the panel back into position. [Warning]
You can add other panels, or other items to the default panel as you need. Useful items include:
See Making the Desktop Your Own, Chapter 7.
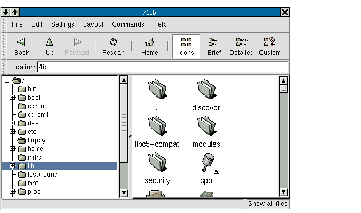
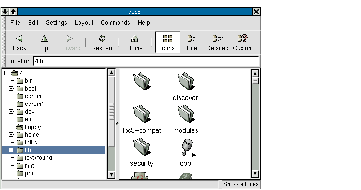
The default file manager is the gnome Midnight Commander. You can start it by:
Using gnome , you can create multiple or virtual desktops called workspaces. Each workspace can have columns or rows that help to position windows. See Making the Desktop Your Own, Chapter 7.
Multiple workspaces require more memory to run. However, they can be useful if:
If necessary, you can turn off multiple workspaces to save memory.
To move between workspaces, do one of the following:
or
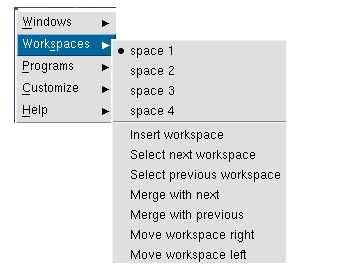
From the Workspace sub-menu, you can:
The gnome desktop works in much the same way as other desktops:
However, if you are new to Linux, some of its functions may be unfamiliar to you. Instead of repeating what you already know, this section concentrates on these unfamiliar functions.
Like other Linux desktops, gnome is designed for a three button mouse. If your mouse only has two buttons, then you can choose during the install to emulate a three-button mouse by pressing both buttons at the same time is the same as using the middle mouse button.
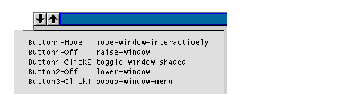
In most circumstances:
To see other functions for the mouse buttons, roll the mouse over a part of the desktop to see a pop-up list.
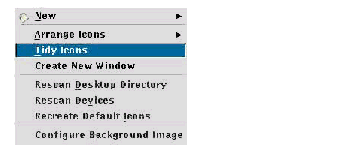
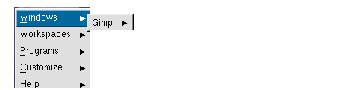
The panel, the menus, launchers, and the work space all have pop-up menus, However, the work space has two pop-up menus:
img/Desktop-18.png
img/Desktop-19.png
To save time, you can add keyboard shortcuts for basic desktop tasks by selecting Sawfish Window Manager, then Shortcuts from the Control Center.
Only a few shortcuts are defined by default. However, you can add a long list of keyboard shortcuts, or edit existing ones. See Making the Desktop Your Own, Chapter 7.
An open window in the default Debian theme has :
However, the window menu and the pop-up menu in the task list also let you manipulate an open window in ways that may be unfamiliar to you.
                   Ways to Manipulate Windows from the Menu
     +-------------------------------------------------------------------+
     |         To            |      Select from the window menu          |
     |-----------------------+-------------------------------------------|
     |                       |Toggle > Focusable                         |
     |Allow a window to be   |                                           |
     |active when cycling    |If the window is already focusable, then   |
     |through windows        |selecting this item again sets it to       |
     |                       |Ignored.                                   |
     |-----------------------+-------------------------------------------|
     |                       |Stacking                                   |
     |Change a window's      |                                           |
     |position in a stack of |You can position the window behind or above|
     |windows                |other open windows, depending on your      |
     |                       |choice from the sub-menu.                  |
     |-----------------------+-------------------------------------------|
     |                       |Close.                                     |
     |                       |                                           |
     |Close a window         |Any process that was displayed in the      |
     |                       |window still runs. You can also close a    |
     |                       |window from the pop-up menu of the task    |
     |                       |list.                                      |
     |-----------------------+-------------------------------------------|
     |                       |Toggle > Shaded                            |
     |                       |                                           |
     |                       |If the window is already shaded, this menu |
     |                       |item restores the window.                  |
     |Display only the title |                                           |
     |bar                    |You can also:                              |
     |                       |                                           |
     |                       |  * Left-click twice on the title bar.     |
     |                       |  * Selected Shaded from the pop-up menu on|
     |                       |    the task list.                         |
     |-----------------------+-------------------------------------------|
     |                       |Toggle > Ignored                           |
     |Ignore window when     |                                           |
     |cycling through windows|If the window is already Ignored, selecting|
     |                       |this menu item again sets it to Focusable. |
     |-----------------------+-------------------------------------------|
     |                       |Maximize.                                  |
     |Maximize a window      |                                           |
     |                       |You can also chose Restore from the pop-up |
     |                       |menu of the task list.                     |
     |-----------------------+-------------------------------------------|
     |                       |Minimize.                                  |
     |Minimize a window      |                                           |
     |                       |You can also choose iconify from the pop-up|
     |                       |menu of the task list.                     |
     |-----------------------+-------------------------------------------|
     |                       |Send window to                             |
     |Move or copy a window  |                                           |
     |in a workspace         |You can position the window or a copy of it|
     |                       |in a workspace, or in a cell of its current|
     |                       |workspace.                                 |
     |-----------------------+-------------------------------------------|
     |Position the window in |Toggle > Sticky                            |
     |the same place on every|                                           |
     |work space             |If a window is already sticky, this menu   |
     |                       |item makes it unsticky.                    |
     +-------------------------------------------------------------------+
You can add three main types of icons to the desktop:
No matter where they are - the work space, the menu, or the panel - all icons
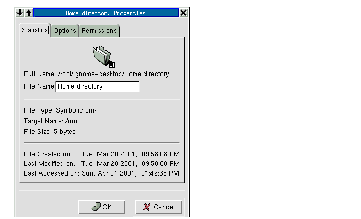
have the same properties. You can read an icon's properties by selecting
Properties from its pop-up menu to open the Properties window. img/Desktop-24.png
The Properties window includes three tabs:
[Note]
On the desktop, you can also select Directory or url Link by right-clicking on the work space and making a selection from the New menu.
                             Icon Properties Tabs
     +------------------------------------------------------------------+
     |    Tab    |                 Editable Information                 |
     |-----------+------------------------------------------------------|
     |           |Basic information about the icon.                     |
     |Statistics |                                                      |
     |           |You can change the icon text by editing the File Name.|
     |-----------+------------------------------------------------------|
     |           |The icon image.                                       |
     |Options    |                                                      |
     |           |Select the icon to change the icon.                   |
     |-----------+------------------------------------------------------|
     |           |Lists information about:                              |
     |           |                                                      |
     |Permissions|  * Who can use the file.                             |
     |   (***)   |  * How the file can be used.                         |
     |           |  * Who owns the file.                                |
     +------------------------------------------------------------------+
(***) See Changing Permissions, Section 9.19.
Early Linux development centered on the command line, and the graphical desktops are still being improved. As a result, you will find that your need for a command line increases as you gain in expertise.
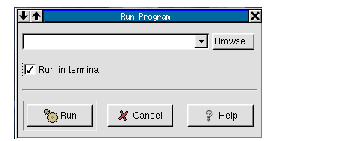
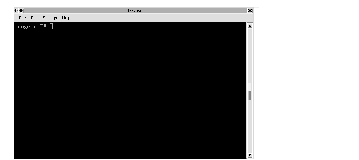
You can open a command line in a number of ways:
User's Guide