Debian automatically configures your system during installation. However, you may need to use other configuration methods if:
This chapter explains how to set up basic hardware, as well as many parts of your everyday working environment. It covers:
Linux includes dozens of configuration tools, from command line utilities that ask you questions to graphical interfaces. However, the most common in Debian are:
[Note]
Hardware connected with the graphical display including the monitor, video card, and pointer can be configured by editing the profiles in the /etc/X11/Xf86Config-4 file. In each section of the file, the first profile is used by default.
Debian includes the tools used to configure during the install as part of the gnome Control Center.
Most configuration files are found in the /etc/ directory. Configuration file can be changed in a text editor.
Dozens of text editors are available, but you should learn either a variant of vi or emacs . At least one of these editors should be available on any Linux system. By default, Debian uses vim (" vi improved") editor.
Manual configuration is especially useful if you are using single-user mode, or do not have the X Window System running.
For more information on your preferred text editor, see its on-line help.
[Note]
As an extra precaution, write down the changes you have made.
If changing settings may make your system unusable, you can recover by following these steps:
The backup the configuration file overwrites the damaged file.
[Note]
If you wrote down the changes you made, you can also edit the configuration file in a text editor.
The vim editor is an enhanced version of vi, one of the standard text editors. Like vi, vim has two modes:
Type vim to start. To open vim with a file, type vim file.
[Note]
Using these two modes may be confusing if you are unfamiliar with them, so practice using vim enough so that you are comfortable enough to use it in an emergency.
     +-------------------------------------------------------------------+
     |  Key   |                       What it Does                       |
     |Strokes |                                                          |
     |--------+----------------------------------------------------------|
     |/ text  |Searches for the text entered. The search starts from the |
     |        |cursor's position.                                        |
     |--------+----------------------------------------------------------|
     |: file  |Opens the file named.                                     |
     |--------+----------------------------------------------------------|
     |:q      |Quits vim without saving.                                 |
     |--------+----------------------------------------------------------|
     |:w      |Saves open file.                                          |
     |--------+----------------------------------------------------------|
     |^r      |Redo an action that was undone.                           |
     |--------+----------------------------------------------------------|
     |Esc     |Starts command mode.                                      |
     |--------+----------------------------------------------------------|
     |h       |Moves the cursor one character to the left.               |
     |--------+----------------------------------------------------------|
     |i       |Starts insert mode.                                       |
     |--------+----------------------------------------------------------|
     |j       |Move the cursor down to the next line.                    |
     |--------+----------------------------------------------------------|
     |k       |Moves the cursor up to the next line.                     |
     |--------+----------------------------------------------------------|
     |l       |Moves the cursor one character to the right.              |
     |--------+----------------------------------------------------------|
     |p       |Pastes to the clipboard.                                  |
     |--------+----------------------------------------------------------|
     |R       |Starts over writing.                                      |
     |--------+----------------------------------------------------------|
     |u       |Undo last action.                                         |
     |--------+----------------------------------------------------------|
     |x       |Deletes the character at the cursor.                      |
     |--------+----------------------------------------------------------|
     |yw      |Moves the current word to the clipboard.                  |
     |--------+----------------------------------------------------------|
     |yy      |Moves the current line to the clipboard.                  |
     +-------------------------------------------------------------------+
The Linux kernel contains the drivers for hardware, filesystems, and other features of the operating system. Since each piece of hardware or feature has its own module, you can make your operating system quicker and more efficient by only loading support for what is actually on your system.
You may need to reconfigure the kernel when you add or remove hardware or other features. You can also temporarily enable a module, with the modprobe command. However, if you reboot the system, you will need to use the command again.
Making permanent changes to the kernel consists of three steps:
However, before configuring the kernel, you should gather information about the present configuration, and prepare carefully so that you can recover from accidents.
If you are unsure of your kernel's name, check the boot manager entries.
The first step in configuring the kernel is to select the modules to enable:
The easiest tool to use is xconfig . However, it is not always current.
[Note]
To use one of these tools, unarchive /usr/src/kernel-source-2.2.18. tar.bz2.
Building or compiling the kernel is the second step in configuring the kernel.
The file /usr/src/linux/arch/i386/boot/zImage (or bzImage) is created.
The name of the directory below /arch may change, depending on what processor you enabled in the kernel.
This string includes two commands, make modules and make modules_install.
[Note]
You can install automate kernel building by installing the package called kernel-package .
Once it is installed, you only need to type: make -kpkg kernel_image
Installing a kernel is third step in configuring a kernel.
Traditionally, the kernel is vmlinuz .
If you have several versions of a kernel, add a suffix identifying the kernel version or some unique aspect of the kernel.
For instance, if only one kernel has scsi support, you could name it vmlinuz-scsi .
You can now start your system with the new kernel by selecting it from the boot manager when you start your computer.
If you have any problems, you can use the older kernel to start your system.
Linux hardware support is rapidly improving. However, Linux still cannot run as much hardware as some popular operating systems.
Before buying hardware for your Progeny Linux System, check that it runs under Linux. If the hardware is supported, Debian should generally detect it once it is added.
As a general rule, if Linux supports your scsi controller card, then you should be able to use any scsi software, including scanners, cd drives, and removable drives, including Iomega Bernoulli and Zip drives, and Syquest drives.
Support for ide hardware is more varied. In some cases, you need to install a driver or recompile the kernel before an ide device is usable.
usb support is just starting to become commonplace for Linux. For this reason, check compatibility before purchasing new software.
You can check the support for a particular piece of hardware by:
Once you add the hardware to your system, it should generally be detected automatically. However, in some cases, you may need to configure it.
This section outlines some of the more common hardware issues:
[Note]
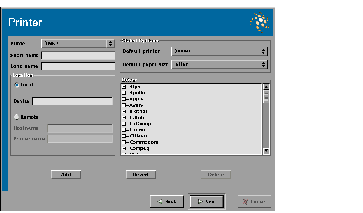
Because of the complexities of the Linux printing system manual configuration of printers is recommended only for experienced users.
In particular, because Debian uses magicfilter , direct editing of the /etc/printcap file could cause problems.
[Note]
If you are using the kde desktop, type /usr/bin/ printer-configlet-capplet at a command line.
The short name appears on the printer spool,which stores files before they are sent to the printer, and in configuration files. The long name is used mainly to help you identify the printer.
At some companies, printers are named with a theme, such as animals or famous people.
However, names based on some combination of the manufacturer, model, and or path name of the printer may be easier to work with.
If you do not have this information, consult your system administrator.
If your printer is not listed, it may be able to emulate one that is. Hewlett-Packard Laserjet drivers for both postscript and non-postscript printers work for many other makes and models of printers.
Debian detects most sound cards automatically. However, in some cases, you may need to configure sound support in the kernel. See Recompiling a Kernel, Section 13.1.3.
Before editing the kernel, you need to know your card's:
If your card is already installed, you can find information about it:
Instead of configuring the kernel, you can use a command tool to enable cards that support the Plug and Play standard:
Debian is not installed with support for personal information devicess. However, you can add this support by installing some packages.
Debian is not installed with the software needed for scanners. However, you can add support by installing one of several packages. Linux supports most scsi scanners. More recently, support for many usb scanners is also available.
See Installing, Removing, and Upgrading Software, Chapter 11.
[Note]
To run the gimp , right-click on the workspace, then select New > The gimp .
Linux users often spend more time configuring partitions than the users of other operating systems. Many users prefer to mount important directories on different partitions, either to control the space used by certain files, or to make recovery from disaster easier.
Even more have multiple operating systems on the same machine, and not only have to divide their hard drives into more partitions, but also need to use a boot loader to select a operating system when their computers start.
This section covers:
The fdisk and cfdisk commands are standard Linux utilities. However, these commands are limited by the fact that they cannot manipulate a partition while preserving data.
Instead, Progeny recommends that you use the parted ("partition editor") utility for manipulating partitions whenever possible.
Although a command line utility, parted has much of the functionality of commercial on-the-fly partitioning tools. The utility allows you to create, delete, resize, and move partitions. You can use it with a Linux native (ext2) partition, a swap partition, or a fat 32 partition.
While parted is generally safe to use, interruptions to your computer's problems or other accidents could destroy information.
This information is especially useful when you need to know the start and end point of a partition that you are creating.
[Warning]
If you are creating partitions, wait at least five minutes per partition to ensure that the partition is created. The parted utility does not indicate when it is finished.
[Note]
For information on how Linux names devices, See Reading Linux Device Names, Section 2.2.5.
     +-------------------------------------------------------------------+
     |   Command   |                       Action                        |
     |-------------+-----------------------------------------------------|
     |check        |Checks for bad blocks on the partition.              |
     |partition    |                                                     |
     |-------------+-----------------------------------------------------|
     |mklabel      |Give an existing partition a label.                  |
     |partition    |                                                     |
     |-------------+-----------------------------------------------------|
     |             |Formats an existing partition.                       |
     |             |                                                     |
     |             |Values for the filesystem are:                       |
     |mkfs         |                                                     |
     |partition    |  * ext2: The native Linux filesystem.               |
     |filesystem   |  * linux-swap : The Linux swap filesystem.          |
     |             |  * fat : fat 32, the Windows filesystem.            |
     |             |                                                     |
     |             |These values are different from the ones used in     |
     |             |mounting and unmounting filesystems.                 |
     |-------------+-----------------------------------------------------|
     |             |Creates a partition, and formats it. If you do not   |
     |             |specify the filesystem, then you create an           |
     |             |unformatted partition.                               |
     |             |                                                     |
     |             |Values for the type are:                             |
     |             |                                                     |
     |             |  * ext2 : The native Linux filesystem.              |
     |             |  * linux-swap : The Linux swap filesystem.          |
     |             |  * fat : fat 32, the Windows filesystem.            |
     |             |                                                     |
     |mkpart       |These values are different from the ones used in     |
     |filesystem   |mounting and unmounting filesystems.                 |
     |type start   |                                                     |
     |end          |Values for the type are logical or extended.         |
     |             |                                                     |
     |             |The start and end values are in megabytes measured   |
     |             |from the start of the partition. Refer to print for  |
     |             |the values for the start and end points of the       |
     |             |partition.                                           |
     |             |                                                     |
     |             |When parted creates the partitions, the values may   |
     |             |differ slightly from the ones you enter. These       |
     |             |differences are generally small enough that they are |
     |             |unimportant and can be ignored.                      |
     |-------------+-----------------------------------------------------|
     |move         |                                                     |
     |partition    |Moves the partition to a new location.               |
     |start end    |                                                     |
     |-------------+-----------------------------------------------------|
     |print        |Displays information about the current hard drive.   |
     |-------------+-----------------------------------------------------|
     |resize       |Resizes the partition.                               |
     |partition    |                                                     |
     |start end    |The start and end values are in megabytes measured   |
     |             |from the start of the partition.                     |
     |-------------+-----------------------------------------------------|
     |rm partition |Removes partition.                                   |
     |-------------+-----------------------------------------------------|
     |             |Set the hard drive to partition. By default, parted  |
     |select device|starts with the first hard drive located, usually hda|
     |             |.                                                    |
     +-------------------------------------------------------------------+
Mounting is the process of associating a filesystem with a directory on your system. A filesystem is a formatted partition or removable drive.
Filesystems listed in the /etc/fstab file are generally mounted when the system starts. The settings in fstab also control how users can access each filesystem.
You can also mount or unmount filesystems not listed in fstab. Removable drives must usually be mounted or unmounted each time you use them. However you can also set the automounter feature for removable drives.
You must always mount a floppy or cd drive before using it, and unmount it before switching to another floppy or cd .
At any time, you can see a list of currently mounted filesystems by opening /etc/mtab or by typing mount at a command line.
The /etc/fstab ("filesystem table") file lists filesystems that are mounted when your computer starts. You may choose to add other filesystems to fstab, but not mount them.
You need to edit fstab when:
Information about each filesystem is listed in six columns. For convenience, you can often copy and paste an existing filesystem definition and modify it for another one.
[Warning]
Do not edit the swap partition or /proc filesystem entries in /etc/ fstab.
The swap partition enables virtual memory, while the /proc filesystem is used to gather information for commands such as ps, which reports on active processes.
Most users should have no need to edit either entry.
     +-------------------------------------------------------------------+
     |Column|       Contents        |              Choices               |
     |------+-----------------------+------------------------------------|
     |1     |The partition that the |See Understanding Device Names.     |
     |      |filesystem is on.      |             (***)                  |
     |------+-----------------------+------------------------------------|
     |      |                       |Many users prefer to put /home/, /  |
     |      |                       |usr, and /var on separate           |
     |      |                       |partitions.                         |
     |      |                       |                                    |
     |      |                       |Other partitions are usually mounted|
     |      |                       |as a sub-directory of /mnt.         |
     |      |The directory on which |                                    |
     |2     |the filesystem is      |However, you can use any directory  |
     |      |mounted.               |for a mount point.                  |
     |      |                       |                                    |
     |      |                       |If you are running an operating     |
     |      |                       |system that uses a Windows-like     |
     |      |                       |naming convention, you might create |
     |      |                       |directories that use the convention,|
     |      |                       |such as /mnt/C.                     |
     |------+-----------------------+------------------------------------|
     |      |                       |Predefined choices are              |
     |      |                       |                                    |
     |      |                       |  * ext2 : The native Linux format. |
     |      |                       |  * sw : Linux swap file. Use only  |
     |      |The filesystem's       |    for the swap file.              |
     |      |format.                |  * vfat : fat 32. The format of    |
     |      |                       |    Windows 98, me , and the second |
     |      |Support for the format |    release of Windows 95.          |
     |3     |must be enabled in the |  * iso9660 : cd s.                 |
     |      |kernel.                |  * nfs : network file system.      |
     |      |                       |                                    |
     |      |                       |You can recompile the kernel to     |
     |      |                       |support other file systems.         |
     |      |                       |                                    |
     |      |                       |Network filesystems and several     |
     |      |                       |journalistic filesystems are also   |
     |      |                       |supported.                          |
     |------+-----------------------+------------------------------------|
     |      |                       |  * auto : The filesystem is mounted|
     |      |                       |    when the computer starts or when|
     |      |                       |    mount -a is typed.              |
     |      |                       |  * noauto : The filesystem is not  |
     |      |                       |    mounted when the computer starts|
     |      |                       |    or when or when mount -a is     |
     |      |                       |    typed.                          |
     |      |                       |  * exec : Users can run executable |
     |      |                       |    files.                          |
     |      |                       |  * no exec : Users cannot run      |
     |      |How the filesystem can |    executable files.               |
     |4     |be used, and by whom.  |  * nouser : Only the root user can |
     |      |                       |    access the filesystem.          |
     |      |                       |  * ro : Users can only view the    |
     |      |                       |    filesystem.                     |
     |      |                       |  * rw : Users can read and write to|
     |      |                       |    the filesystem.                 |
     |      |                       |  * user : Any user can mount the   |
     |      |                       |    file system                     |
     |      |                       |                                    |
     |      |                       |For unlimited access to the         |
     |      |                       |filesystem, use: user, auto, dev,   |
     |      |                       |exec, user, rw .                    |
     |------+-----------------------+------------------------------------|
     |      |Whether the filesystem |  * O : The device is not backed up |
     |      |should be backed up    |  * 1 : The device is backed up.    |
     |5     |when the dump command  |                                    |
     |      |is used.               |Since dump is not often used today, |
     |      |                       |most filesystems can be set to 0.   |
     |------+-----------------------+------------------------------------|
     |      |                       |  * 0: No check is done. This option|
     |      |The order in which     |    can start the system faster.    |
     |      |filesystems are checked|  * 1: The device is checked first. |
     |6     |for errors when the    |    The root partition should always|
     |      |system starts.         |    use this setting.               |
     |      |                       |  * 2: The device is checked after  |
     |      |                       |    any filesystems set to 1.       |
     +-------------------------------------------------------------------+
***) See Understanding Device Names, Section 2.2.1.
See the options for the 3rd column of /etc/fstab for common filesystems. See Column Settings in /etc/fstab (Mounting Filesystems), Section 13.3.2.2.
For permanent support of a filesystem, you may need to recompile your kernel.
         +---------------------------------------------------------------+
         |Option|     Action      |               Comment                |
         |------+-----------------+--------------------------------------|
         |      |Mounts all       |The only exception is that filesystems|
         |-a    |filesystems      |set to noauto in the fourth column of |
         |      |listed in /fstab.|fstab are not mounted.                |
         |------+-----------------+--------------------------------------|
         |      |                 |Options are mostly the same as for the|
         |      |                 |fourth column of fstab. See Column    |
         |      |Controls access  |Settings in /etc/fstab (Mounting      |
         |-o    |to the           |Filesystems).  (***)                  |
         |option|filesystem.      |                                      |
         |      |                 |You may want to use remount,          |
         |      |                 |especially if you are using more than |
         |      |                 |one removable drive.                  |
         |------+-----------------+--------------------------------------|
         |      |To mount the     |                                      |
         |-r    |filesystem as    |                                      |
         |      |read-only.       |                                      |
         |------+-----------------+--------------------------------------|
         |      |                 |Debian requires this option.  |
         |      |To mount all     |                                      |
         |-t    |filesystems of   |You must either use modprobe before   |
         |type  |one type.        |the mount command, or else have       |
         |      |                 |support for the filesystem type       |
         |      |                 |compiled in the kernel.               |
         |------+-----------------+--------------------------------------|
         |      |Displays progress|                                      |
         |-v    |while filesystems|                                      |
         |      |are mounted.     |                                      |
         |------+-----------------+--------------------------------------|
         |      |Lets all users   |                                      |
         |-w    |read and write to|                                      |
         |      |the filesystem.  |                                      |
         +---------------------------------------------------------------+
See Column Settings in /etc/fstab (Mounting Filesystems), Section 13.3.2.2.
Unmounting makes a filesystem inaccessible until the mount command is used again.
Only filesystems that are not currently in use can be unmounted. Unless you boot from a floppy, cd or other removable device, you cannot unmount:
You must unmount a removable filesystem before changing it.
Type: umount options mountpoint.
[Note]
The command is spelled umount , not unmount (no first "n"). For convenience, set up an alias so you can type "unmount."
     +-------------------------------------------------------------------+
     |Option|        Action        |               Comment               |
     |------+----------------------+-------------------------------------|
     |      |To unmount all        |Filesystems set to noauto in the     |
     |-a    |filesystems listed in |fourth column of fstab are not       |
     |      |/fstab                |unmounted.                           |
     |------+----------------------+-------------------------------------|
     |-t    |To unmount all        |                                     |
     |type  |filesystems of one    |                                     |
     |      |type.                 |                                     |
     +-------------------------------------------------------------------+
You may want to change a filesystem's mount point for several reasons:
To change a partition:
[Warning]
Always back up information before re-partitioning and choose your tools carefully. While parted can resize a partition without destroying data, fdisk cannot.
Debian creates a swap partition during installation. However, you may want to add another partition or change the partition. You may also choose to create a swap file, although a swap partition is usually more stable.
To activate swapping temporarily, type: swapon partition or swapon file .
To use a swap partition permanently, add an entry to /etc/fstab. You can copy the existing swap file entry. See Column Settings in /etc/fstab (Mounting Filesystems), Section 13.3.2.2.
[Note]
If you ever need to deactivate a swap partition or file, type: swapoff partition or swapoff file .
Debian can use the Grand Unified Boot Manager ( grub ). The boot manager is a program that lets you choose which operating system to use when you start your computer.
You can also use a boot manager to run different Linux kernels. In fact, if you recompile the kernel, you can guarantee that your system remains workable by making a copy of your kernel and adding an entry for the copy to the boot manager.
grub uses its own naming convention for hard drives and partitions. This convention is different from either the Linux or Windows conventions:
You can find complete information about grub by typing info grub at a command line.
grub files are in /boot/grub. You can edit the boot manager in three ways:
The configuration file for the boot manager is /boot/grub/menu.lst.
menu.lst is divided into groups of options, or stanzas. The first stanza contains global settings for grub . Each of the other stanzas contains the settings for one operating system or kernel.
Unless the default option is used in the global stanza, the default operating system is the first one after the global stanza.
Options are generally placed one per line, but this convention is not necessary. It exists only to make the file easier for people to read.
Enter options as they appear in the following table, filling in specific values for the variables.
     +-------------------------------------------------------------------+
     |           Option           |               Setting                |
     |----------------------------+--------------------------------------|
     |                            |Sets the colors that menu items and   |
     |                            |selected menu items display in.       |
     |                            |                                      |
     |                            |The available colors are: black, blue,|
     |                            |green, cyan, red, magenta, brown, and |
     |color menu_foreground/      |light gray.                           |
     |menu_background selected_   |                                      |
     |foreground/ selected_       |The foregrounds can also use          |
     |background                  |dark-gray, light-blue, light-green,   |
     |                            |light-cyan, light-red, light-magenta, |
     |                            |yellow and white.                     |
     |                            |                                      |
     |                            |You can also add blink to make the    |
     |                            |foreground flash.                     |
     |----------------------------+--------------------------------------|
     |                            |Sets the default operating system.    |
     |                            |                                      |
     |                            |0 is the operating system defined in  |
     |                            |the first stanza after the global one.|
     |                            |                                      |
     |default number              |If the default option is not used,    |
     |                            |then this stanza is automatically the |
     |                            |default.                              |
     |                            |                                      |
     |                            |If this stanza is not configured      |
     |                            |correctly, then the next corrected    |
     |                            |stanza is the default.                |
     |----------------------------+--------------------------------------|
     |                            |Sets the second default operating     |
     |                            |system.                               |
     |                            |                                      |
     |fallback number             |The fallback starts only if the       |
     |                            |default cannot.                       |
     |                            |                                      |
     |                            |There is no default fallback.         |
     |----------------------------+--------------------------------------|
     |timeout seconds             |Sets the time before the default      |
     |                            |operating system starts.              |
     +-------------------------------------------------------------------+
     +-------------------------------------------------------------------+
     |     Setting      |                    Comments                    |
     |------------------+------------------------------------------------|
     |initrd partition /|A symbolic link to the initrd file used by      |
     |boot/initrd.img   |Linux.                                          |
     |------------------+------------------------------------------------|
     |                  |The name that appears in the grub menu.         |
     |title name        |                                                |
     |                  |The distribution and version number is usually a|
     |                  |good choice.                                    |
     |------------------+------------------------------------------------|
     |                  |The Linux root partition, named using Linux's   |
     |                  |naming conventions.                             |
     |root = partition  |                                                |
     |                  |Do not confuse with grub 's root partition or   |
     |                  |use grub 's naming convention.                  |
     |------------------+------------------------------------------------|
     |                  |Use grub 's naming convention for the partition.|
     |                  |                                                |
     |kernel partition  |In Debian, a kernel is /boot/vmlinuz*,  |
     |kernel            |with a suffix that gives the version number.    |
     |                  |                                                |
     |                  |                                                |
     +-------------------------------------------------------------------+
     +-------------------------------------------------------------------+
     |  Setting  |                       Comments                        |
     |-----------+-------------------------------------------------------|
     |           |The name that appears in the grub menu.                |
     |title name |                                                       |
     |           |The operating system and version number is usually a   |
     |           |good choice.                                           |
     |-----------+-------------------------------------------------------|
     |root       |The partition that the operating system is on, named   |
     |partition  |using grub 's conventions.                             |
     |-----------+-------------------------------------------------------|
     |           |Makes the partition bootable.                          |
     |makeactive |                                                       |
     |           |The partition must be a primary one.                   |
     |-----------+-------------------------------------------------------|
     |           |Needed to use Window's own loader together with grub.  |
     |chainloader|                                                       |
     |+1         |grub installs at the start of the first sector of the  |
     |           |hard drive. When installed, it displaces the Windows   |
     |           |loader one sector from the start of the hard drive.    |
     +-------------------------------------------------------------------+
     +-------------------------------------------------------------------+
     |  Setting  |                       Comments                        |
     |-----------+-------------------------------------------------------|
     |title name |The name that appears in the grub menu.                |
     |-----------+-------------------------------------------------------|
     |           |The device that the operating system is on: generally, |
     |root fd0   |the first floppy drive. Use fd1 for the second floppy  |
     |           |drive.                                                 |
     |-----------+-------------------------------------------------------|
     |           |Needed to use a non- grub loader. The +1 looks for the |
     |chainloader|loader one sector from the start of the hard drive.    |
     |+1         |grub itself appears in the first sector of the hard    |
     |           |drive.                                                 |
     +-------------------------------------------------------------------+
grub generally reads from the first hard drive. For this reason, you sometimes need to temporarily remap additional hard drives to the first hard drive.
Add the following lines to each stanza that refers to an operating system on another hard drive:
map (hd0) other_hard_drive
map other_hard_drive (hd0)
Place these lines before the root or chainloader +1 options.
A boot disk is a basic recovery tool. To create a boot disk:
In Linux terms, the subject of networking includes not only a network of individual machines, but also internet connections.
This section covers the basics of Linux networking in Debian, starting with the hardware and how to configure a connection, and ending with how to configure e-mail:
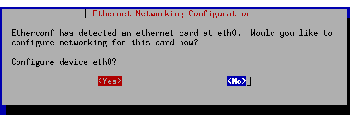
If your card is detected, the first screen notes the fact. If it is not, See Troubleshooting With a Network Card, Section 13.4.1.1.
If you do not know this information, consult your system administrator or Internet Provider.
Watch the command line for messages about this effort. If the connection is unsuccessful after several minutes, press Ctrl-Z, then Ctrl-C to stop the effort. Then check the network card.
Post-woody Debian should detect most network cards automatically. However, if you are having trouble establishing a connection:
Modems are useful for dialup connections to the internet, or for receiving faxes on your system.
Modems are probably the most difficult piece of hardware to work with under Linux. The problem is that many modems today, especially internal ones, are winmodems. That is, most of them require a running copy of Windows to work. While a few winmodems have Linux drivers available, these drivers are usually written for a specific kernel, and may not work if you upgrade the kernel.
An external modem or a pcmcia card should generally work. However, research brands on the internet to see if they are Linux compatible before you buy.
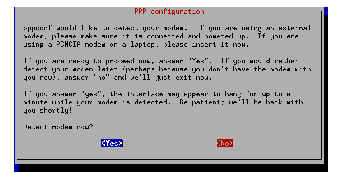
To check that Linux recognizes your modem, type dpkg-reconfigure pppconf at the command line. pppconf is a tool for setting up a dialup connection. It starts by detecting the modem, then going on to configure a dialup connection.
If your modem does not respond:
Debian does not automatically configure a fax modem for you. However, you can use the Debian package hylafax-server to receive faxes via a fax-modem. If you are a desktop user, then you might also install tkhylafax so that you have a graphical interface. Other fax packages are also available.
[Note]
Check that your modem is usable under Linux. See Configuring a Sound Card, Section 13.2.2.
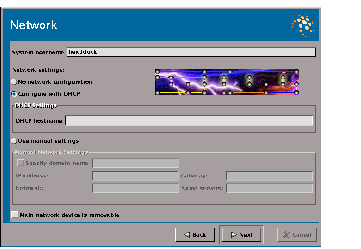
A Dynamic Host Configuration Protocol (DHCP) connection is the most common network connection today. In addition, a dhcp connection is also used for an adsl or cable internet connection.
Nowadays, the connection is generally through an ethernet card. However, another type of network interface card may also be used.
Before you start to configure the network, you need to know the type of card you use to connect to the internet.
On most modern computers, the card should be an ethernet card. If you are on a laptop, you are probably using an ethernet interface with a pcmcia card. Consult the documentation that comes with the card.
In addition, consult your system administrator or internet provider for:
Network configuration is used not only for a network, but also for a cable or dsl internet connection. If you are an end-user, ask your system administrator or internet provider for the settings you need.
[Note]
If you are using the kde desktop, type /usr/bin/ network-configlet-capplet at the command line.
[Note]
Check with your system administrator or Internet Server Production for the entries that you need.
You can use Linux commands to set up a temporary connection without editing files. This type of on-the-fly configuration is especially useful for testing configurations.
To setup a temporary connection:
If you log out, re-do the first two steps to re-create the temporary connection.
A dialup connection uses a modem and an unmodified telephone line. A dialup connection is also known as a Point-to-Point Protocol (ppp) connection.
Debian installs with a Group called dialout. Only members of this group can use the serial ports, or any device such as a modem that is attached to a serial port.
[Warning]
For greater security, use a regular user account for your connection. Never use the internet when logged in as root user.
If your modem is not connected, See Troubleshooting a Dialup Connection, Section 13.4.5.1.
If you are having trouble making a dial-up connection:
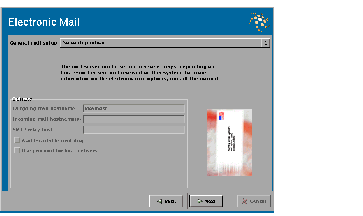
Unless set to local only, e-mail requires a network or dialup connection. You can configure a network during the install process or after. A dialup connection is not part of the install program, but you can set up one after the install process.
If you need help with the choices on this screen, consult your system administrator or Internet service provider.
[Note]
If you are using the kde desktop, type /usr/bin/ mail-configlet-capplet at the command line.
A world-writable mail drop allows users to receive mail directly, instead of only through your network's mail system. It is faster, but can be a security risk.
If in doubt, do not select world writable mail drop.
Procmail lets you filter incoming messages and deliver them to folders other than your Inbox.
You can use other tools to filter, so, if in doubt, do not use procmail.
You can use procmail to arrange your e-mail so that messages from a sources go into a particular directory.
In the .forward file, enter:
"IIFS=' ' && exec /usr/bin/procmail -f || exit 75 #user"
[Note]
For examples of .procmail files and more ideas of what you can do with them, see the sample files in the /usr/share/docs/procmail/ examples directory.
     +-------------------------------------------------------------------+
     |          Line           |              What It Does               |
     |-------------------------+-----------------------------------------|
     |path= usr/bin            |Defines the location of the utility.     |
     |-------------------------+-----------------------------------------|
     |                         |Defines the directory to which mail is   |
     |                         |sent.                                    |
     |maildir = directory      |                                         |
     |                         |If this directory does not already exist,|
     |                         |be sure to create it.                    |
     |-------------------------+-----------------------------------------|
     |pmdir =/ home /.procmail |Defines the directory in which procmail  |
     |                         |files are stored.                        |
     |-------------------------+-----------------------------------------|
     |logfile =/ home          |Defines the procmail log file.           |
     |/.procmail/log           |                                         |
     |-------------------------+-----------------------------------------|
     |                         |Defines the default location for mail.   |
     |default = maildirectory/ |                                         |
     |directory                |This setting is overridden by any        |
     |                         |includerc line.                          |
     |-------------------------+-----------------------------------------|
     |                         |Defines a sender whose mail you want to  |
     |includerc =/ home        |filter.                                  |
     |/.procmail/rc. filter    |                                         |
     |                         |Include one line for each sender.        |
     +-------------------------------------------------------------------+
     +-------------------------------------------------------------------+
     |   Filter    |                    What It Does                     |
     |-------------+-----------------------------------------------------|
     |:0:          |                                                     |
     |             |                                                     |
     |^Sender:.*   |Sends a message that contains the keyword to the     |
     |keyword      |specified directory.                                 |
     |             |                                                     |
     |directory    |                                                     |
     |-------------+-----------------------------------------------------|
     |:0:          |                                                     |
     |             |                                                     |
     |^From:.      |Sends a message from the e-mail address to the       |
     |address      |specified directory.                                 |
     |             |                                                     |
     |directory    |                                                     |
     |-------------+-----------------------------------------------------|
     |:0:          |                                                     |
     |             |                                                     |
     |^Subject:.*  |Sends a message whose subject contains the keyword to|
     |keyword      |the specified directory.                             |
     |             |                                                     |
     |directory    |                                                     |
     +-------------------------------------------------------------------+
You can configure basic display settings using Debian's tools, or by editing /etc/X11/XF86Config-4 in a text editor. You can also change the look of the display by changing desktops or window-managers.
This section discusses:
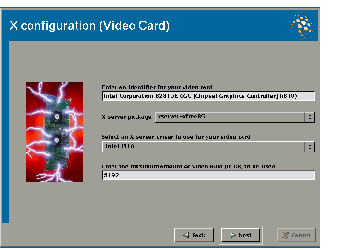
Information about your video card is detected automatically by the system. However, you can change this information if necessary.
[Warning]
Choosing settings that are not supported by your video card could damage it or the monitor.
[Note]
If you are using the kde desktop, type /usr/bin/ xserver-configlet-capplet at a command line.
If you have trouble choosing an X server package that works, try xserver-xfree86 or xserver-vga.
If you have trouble configuring the video card, use one of the generic settings at the bottom of the list.
Generic vga or Generic vesa should work with most cards.
[Note]
This setting is provided for older cards and for trouble shooting. Under most circumstances, Debian detects the video memory available.
You can configure your video card in the Screen section of /etc/X11/ XF86Config-4.
Entries consist of a series of settings. Below each entry is a list of resolutions and color depths that can be used with the video card. See Setting Display Settings Manually, Section 13.5.6.
     +-------------------------------------------------------------------+
     | Setting  |                        Comments                        |
     |----------+--------------------------------------------------------|
     |Identifier|The label for the video card profile.                   |
     |----------+--------------------------------------------------------|
     |Device    |The card's manufacturer and model.                      |
     |----------+--------------------------------------------------------|
     |Monitor   |The monitor profile used with the card, placed in double|
     |          |quotation marks.                                        |
     |----------+--------------------------------------------------------|
     |Default   |The color depth used by preference.                     |
     |Depth     |                                                        |
     +-------------------------------------------------------------------+
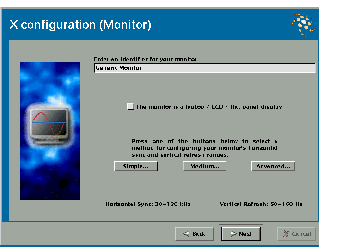
Information about your monitor is automatically detected. However, you can change these settings if necessary.
[Warning]
Choosing settings that are not supported by your monitor could damage it or the video card. Consult the monitor documentation for the correct settings.
[Note]
If you are using the kde desktop, type /usr/bin/ xserver-configlet-capplet at a command line.
Your choice should not exceed the highest resolution supported by both your monitor and your video card.
If you do not know these statistics, 30-130 for the Horizontal Sync and 60-160 for the Vertical Refresh should work for most monitors.
[Note]
Simple and Medium modes or the suggested Horizontal Sync Range and Vertical Refresh Rate may not always give the best settings for your monitor.
If necessary, you can change the settings after the install.
You can configure your monitor in the Monitor section of /etc/X11/ XF86Config-4.
Entries are in two columns, with the option in the first column and the setting in the second column.
The first three entries should always be the Identifier, Horizsync, and VertRefresh.
For a complete list of settings, see the man page for the XF86Config.
[Warning]
Never edit a monitor profile without consulting the monitor's documentation.
Settings that are too high for the monitor can damage it or prevent it from working.
     +-------------------------------------------------------------------+
     |  Setting  |                       Comments                        |
     |-----------+-------------------------------------------------------|
     |Identifier |The name for this monitor profile.                     |
     |-----------+-------------------------------------------------------|
     |           |The horizontal scanning frequency.                     |
     |HorizSync  |                                                       |
     |           |Usually, this is a range. 30-130 should work for most  |
     |           |monitors.                                              |
     |-----------+-------------------------------------------------------|
     |           |The vertical scanning frequency.                       |
     |VertRefresh|                                                       |
     |           |Usually, this is a range. 60-160 should work for most  |
     |           |monitors                                               |
     |-----------+-------------------------------------------------------|
     |           |Set the gamma correction for the monitor.              |
     |Gamma      |                                                       |
     |           |In order, settings are listed for red, green and blue, |
     |           |using rgb values.                                      |
     |-----------+-------------------------------------------------------|
     |dpms       |Add when using a flat or lcd screen.                   |
     |-----------+-------------------------------------------------------|
     |           |A display setting that your monitor can support.       |
     |           |                                                       |
     |Modeline   |Generally, you should not need to add a modeline.      |
     |           |                                                       |
     |           |However, you may want to comment one or more out so    |
     |           |that ordinary users cannot change the system settings. |
     +-------------------------------------------------------------------+
[Warning]
Choosing settings not supported by your monitor may damage it.
Refer to the monitor's manual when configuring and only choose settings that are within the range supported by your monitor.
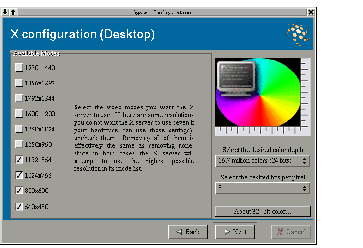
From the Desktop screen, you can set the resolution and color depth for the graphical display on your system.
Settings for the graphic display depend on the capabilities of your video card and monitor. If you did not collect this information before installing, See Gathering Hardware Information, Section 2.1.2.
[Warning]
Choosing settings that are not supported by both your video card and monitor could damage either piece of hardware.
[Note]
If you are using the kde desktop, type /usr/bin/ xserver-configlet-capplet at a command line.
[Warning]
Choosing settings that are not supported by both your video card and monitor may damage them.
Fewer colors mean a less realistic display of graphics, but a faster redraw time.
However, if you have a video card with more than 4 megabytes of memory, for most purposes you can use the highest available color depth without any trouble.
[Warning]
Choosing settings that are not supported by both your video card and monitor could damage either piece of hardware.
Fewer colors mean a less realistic display of graphics, but a faster response time.
However, if you have 128 megabytes of ram and/or a video card with more than 4 megabytes of memory, for most purposes you can use the highest available color depth without any trouble.
From the X Server screen, you can set advanced options for your graphical display. If you are unsure what these settings mean, use the defaults.
[Warning]
Changing the priority for your graphical display can seriously affect system performance. Do not change this setting from -10 unless you are sure what you are doing.
Settings for the graphical display are stored in the Display subsection of /etc/X11/XF86Config-4 in the main section Screen.
Entries in the Display subsection are arranged by color depth (Depth). Below each Depth are the resolutions (Modes) that can be used by each color depth.
When the video card profile defined in the Screen section is used, the system defaults to the highest color depth and resolution listed. You can change the default by:
From the desktop, you can toggle through the other resolution available by pressing Ctrl-Alt-+ (on the number pad).
[Warning]
Selecting color depths or resolutions unsupported by your monitor and video card can damage them. Refer to the hardware manuals while configuring the screen display.
     +-------------------------------------------------------------------+
     |Setting|                         Comments                          |
     |-------+-----------------------------------------------------------|
     |Depth  |The color depth, in bits. This setting ranges from 1 to 24 |
     |       |bits (up to 4 billion colors):.                            |
     |-------+-----------------------------------------------------------|
     |       |The screen resolution.                                     |
     |       |                                                           |
     |       |All resolutions supported by the driver and color depth are|
     |       |listed in the line, with the default one first.            |
     |       |                                                           |
     |Mode   |Resolutions usually range from 640 x 480 to 1600 x 1200.   |
     |       |Each resolution is surrounded by double quotation marks.   |
     |       |                                                           |
     |       |If you are in doubt, virtually all systems made in the last|
     |       |five years should support 640 x 480, no matter what the    |
     |       |difficulties.                                              |
     +-------------------------------------------------------------------+
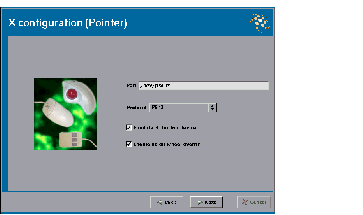
The pointer is usually a mouse. However, it can also be a trackball, a palette, or any other device that replaces a mouse.
If you have been using the mouse during the install, you can accept the settings listed. However, if your mouse is not working, you adjust the settings.
[Note]
If you are using the kde desktop, type /usr/bin/ xserver-configlet-capplet at a command line.
In most cases, it is /dev/ttyS0 (com1) or /dev/ttyS1 (com2) for a serial mouse, or /dev/psaux for a ps2 mouse.
If you are using a serial mouse, then select the name of the manufacturer from the drop-down list. Use ps2 for a generic ps2 mouse.
If you cannot find a protocol for your mouse or pointing device, select Auto to have it detected automatically.
You can also try different protocols to see if your mouse can use them.
With three button emulation, pressing both buttons on the pointer is the same as pressing the middle button on a three-button pointer.
Linux is designed for use with a three button mouse, so most users of two-button mouses should choose this option.
If your mouse has a scroll wheel, you probably want this option.
A pointer is usually a mouse, but can include trackballs and other devices used instead of a mouse.
To edit the pointer manually, edit the Input Device Section of the / etc/X11/XF86Config-4 file. Existing entries can help you make your own.
Entries are in three columns:
[Note]
All entries in all columns must be in straight, double quotation marks.
         +---------------------------------------------------------------+
         |   Setting    |                    Comments                    |
         |--------------+------------------------------------------------|
         |              |The label for this pointer configuration. By    |
         |Identifer     |default, it is "Configured Mouse" or "Generic   |
         |              |Mouse."                                         |
         |--------------+------------------------------------------------|
         |Driver        |Usually, just "mouse."                          |
         |--------------+------------------------------------------------|
         |              |The port that the mouse is connected to. In most|
         |Device        |cases, this setting is /dev/psaux or /dev/ttyS0 |
         |              |or /dev/ttyS1.                                  |
         |--------------+------------------------------------------------|
         |              |The driver for the pointer. The name of the     |
         |Protocol      |protocol is usually based on the manufacturer,  |
         |              |or on the type of mouse. See the man page for   |
         |              |the file for a complete set of options.         |
         |--------------+------------------------------------------------|
         |Emulate3Button|Set to "true" to enable three-button emulation. |
         |--------------+------------------------------------------------|
         |              |Makes the entry the primary pointer. Useful for |
         |              |laptops, which may have a built-in pointer, but |
         |Corepointer   |are also capable of using a plug-in mouse.      |
         |              |                                                |
         |              |No entry is needed for this option in the third |
         |              |column.                                         |
         |--------------+------------------------------------------------|
         |              |Use for a secondary pointer, such as a plug-in  |
         |SendCoreEvents|mouse on a laptop.                              |
         |              |                                                |
         |              |Set to "true" to the third column.              |
         |--------------+------------------------------------------------|
         |              |Enables the use of a scroll wheel.              |
         |ZAxisMapping  |                                                |
         |              |Set to "4 5" in the third column.               |
         +---------------------------------------------------------------+
Debian installs the gnome desktop by default. You can also install the kde desktop using the Extras cd . See Installing Software From the Extras CD, Section 3.5.
When either desktop is installed, you can choose which desktop to run by selecting it from the Sessions menu of the log in screen.
[Note]
When both are installed, you can run applications written for one desktop on the other.
Installed window manager files are generally in a sub-directory of /usr/share, with the executable in /usr/bin or /usr/X11R6.
If you decide to save the change later, check the Save current setup box as you log out.
If you lose the desktop background image, select Desktop > Background to restore it.
The default keyboard for Debian is the qwerty layout for the us language.
However, you can change the keyboard to a different layout or a different language.
For a complete change, you must change the keyboard mapping for both the command line and the desktop.
If it is not, then install the package before remapping.
The default setting for "XkbLayout" is "us".
However, you can change this setting using any layout listed in / usr/share/keymap/i386. The setting must be enclosed in double quotation marks.
Installed window manager files are generally in a sub-directory of /usr/share, with the executable in /usr/bin or /usr/X11R6.
When most of the window managers that come with Debian are installed, an entry for them is created in the Session menu of the login screen.
If the entry is not created, or if you install another window manager, you can create a Sessions menu item manually:
     #!/bin/sh

     exec / windowmanager
Identify the file with its absolute path. Usually, a window manager is installed in the /usr/bin directory.
The next time that a user logs in, the window manager is available as an item in the Sessions menu of the log in screen.
This section explains how to:
[Note]
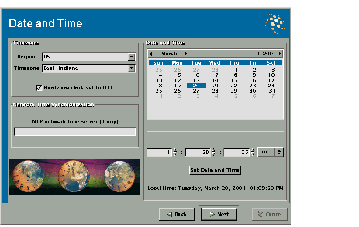
If you are using the kde desktop, type /usr/bin/ time-configlet-capplet at the command line.
The Time Zone list varies with the Region that you select.
The arrows on the left of the month and year display move the month or year backward, while the arrow on the right moves it forward.
If you move the month from December to January, the year changes automatically.
In each field, you can either enter highlight the current entry and over write it or else use the arrow keys to change it.
[Note]
If you prefer a 24 hour clock or to use Greenwich Mean Time, you can reset the date once you install.
As the root user, type date mm ddhhmmyy at the command line. MM is the month given as a two digit number, and mm is minutes. Hours should be in 24-hour format.
To set the time to Greenwich Mean Time, use the -u option.
[Note]
A desktop clock may take a moment to update.
For more information about the date command, see its on-line help.
Linux has many command line interfaces. These interfaces are called shells.
The default shell is bash (the Bourne Again Shell). This manual assumes that you are using it.
To change a shell temporarily, enter its name as a command. The next time you open a command line, you will be using bash again.
To change your default shell permanently:
         +---------------------------------------------------------------+
         |Shell|                       Description                       |
         |-----+---------------------------------------------------------|
         |ash  |A smaller shell than bash, very popular for writing      |
         |     |scripts.                                                 |
         |-----+---------------------------------------------------------|
         |csh  |The C shell. Popular with programmers because of its     |
         |     |familiar syntax.                                         |
         |-----+---------------------------------------------------------|
         |tcsh |An enhanced version of the csh shell. In addition to the |
         |     |features of other shells, it includes a spell checker.   |
         +---------------------------------------------------------------+
Linux can support a number of different font formats. The most commonly used are postscript (also called Type1 or Adobe) and TrueType font formats. Each format must be set up separately.
You can also setup fonts separately for programs that use their own printing systems, such as StarOffice or WordPerfect. However, when you do, the fonts are available only for the individual programs. Consult the documentation for these programs for more information.
Postscript is a printer language created by Adobe. Postscript fonts are ones that can be used by postscript without conversion. Postscript fonts are also called Type1 or Adobe fonts.
Each postscript font has several files associated with it. The files have the same name, but a different extension:
[Note]
Because installing fonts is so involved, install as many fonts as you can at one time.
If you receive a message that the foundry (the distributor of the font) is unknown, you can ignore it. It does not affect whether you can use the font.
A file called Fontmap is created in the directory. You need this file later during the installation of the fonts.
In either case, the postscript fonts are now available for on-screen use.
If you want to add more fonts later, follow steps 2 to 7.
[Note]
Some fonts do not display or print properly in Linux, or in some Linux applications. Dingbats and decorated initials are especially unlikely to work.
TrueType is a popular format for fonts, first introduced on Macinotosh computers, and later popularized by Windows. Originally, the postscript printing language did not support them, although that is no longer true.
TrueType fonts have the potential to display and print better than postscript fonts. In practice, however, they do not.
Aside from the fact that many free TrueType fonts are clumsy conversions from postscript, current printing and display technologies cannot take advantage of TrueType's potential.
Although many users believe that TrueType fonts display better than postscript fonts, really there is no reason to prefer either format over the other.
TrueType fonts include information about displaying and printing in a single file with a .ttf extension.
     Fontpath "unix/:7100"
     Fontpath "unix/:7101"
[Note]
Because installing fonts is so involved, install as many fonts as you can at one time.
In either case, the TrueType fonts are now available for on-screen use.
If you want to add more fonts later, follow steps 2-6.
[Note]
Some fonts do not display or print properly in Linux, or in some Linux applications. Dingbats and decorated initials are especially unlikely to work.
User's Guide