To keep your Debian system running smoothly, you need to do some routine tasks. These tasks usually need to be done more frequently on a network, but they are also important on standalone desktop machines.
The basic administration tasks are:
Only the root user can do all these tasks. Regular users can only do some of these tasks for their own accounts.
These tasks are generally done from the command line. Although desktop tools exist for some of them, few are as useful or as versatile as the commands that they are based on.
Linux is designed for multiple users. To use the system, you must log in with a user account. A user account consists of a user name, a password, and a number of saved settings.
User accounts are organized into groups of accounts with similar access to the system. The software and the hardware you can use depends on your user accounts and the groups that it is in. See Changing Individual Passwords, Section 12.1.4.
New users can be added by the root user. Setting up a new user means:
While you can configure files in a text editor, the easiest way to add a user is to use the useradd and passwd tools.
Log in as the root user. Then:
[Note]
To fully set up a typical new account, type useradd -mk user .
                    The useradd Command (Sets Up New User)
     +-------------------------------------------------------------------+
     | Option  |        Action         |            Comments             |
     |---------+-----------------------+---------------------------------|
     |         |Adds a home directory  |                                 |
     |         |that:                  |                                 |
     |         |                       |                                 |
     |         |  * Does not the same  |If you do not want a home        |
     |         |    name as the user   |directory with these features,   |
     |-d       |    name.              |use the -m option .              |
     |directory|                       |                                 |
     |         |    and/or             |If -d or -m is not used, then no |
     |         |                       |home directory is created.       |
     |         |  * Is not a           |                                 |
     |         |    sub-directory of / |                                 |
     |         |    home.              |                                 |
     |---------+-----------------------+---------------------------------|
     |-e date  |Adds an expiry date for|                                 |
     |         |the user account       |                                 |
     |---------+-----------------------+---------------------------------|
     |         |                       |Enter multiple groups by name or |
     |         |Adds groups in addition|group id ( gid) .                |
     |-G groups|to the default one.    |                                 |
     |         |                       |Separate the names with a comma  |
     |         |                       |and leave no blank spaces.       |
     |---------+-----------------------+---------------------------------|
     |         |Copies default files to|Use with the -m or -d option.    |
     |-k       |the user's home        |                                 |
     |directory|directory.             |By default, files are copied from|
     |         |                       |/etc/skel.                       |
     |---------+-----------------------+---------------------------------|
     |         |                       |The default features are:        |
     |         |                       |                                 |
     |         |                       |  * That has the same name as the|
     |         |                       |    user name.                   |
     |         |Creates a home         |                                 |
     |-m       |directory with the     |    and                          |
     |         |default features.      |                                 |
     |         |                       |  * Is a sub-directory of /home. |
     |         |                       |                                 |
     |         |                       |If you do not want both these    |
     |         |                       |features, then use the -d option.|
     |---------+-----------------------+---------------------------------|
     |         |Disables the account   |Use with the -e option, which    |
     |-f number|after the number of    |sets an expiry date.             |
     |         |days has passed.       |                                 |
     |---------+-----------------------+---------------------------------|
     |         |Changes the default    |If no group is specified, then a |
     |-g group |group.                 |group with the same name as the  |
     |         |                       |user name is created.            |
     |---------+-----------------------+---------------------------------|
     |-s shell |Sets the users' shell. |If no shell is specified, then   |
     |         |                       |the default bash is used.        |
     +-------------------------------------------------------------------+
[Warning]
The -r option removes the user's home directory and the files in it. If you want to keep the home directory, omit the -r option.
Log in as the root user. Then type: usermod options user .
The options are the features to edit. The options are similar to those of the useradd command.
                   The usermod Command (Edits User Accounts)
     +-------------------------------------------------------------------+
     | Option  |         Action          |            Comment            |
     |---------+-------------------------+-------------------------------|
     |         |                         |Enter multiple groups by name  |
     |-G groups|Adds groups in addition  |or gid . Separate the names    |
     |         |to the initial one.      |with a comma and leave no blank|
     |         |                         |spaces.                        |
     |---------+-------------------------+-------------------------------|
     |         |                         |Enter multiple groups by name  |
     |-g group |Changes the default      |or gid . Separate the names    |
     |         |group.                   |with a comma and leave no blank|
     |         |                         |spaces.                        |
     |---------+-------------------------+-------------------------------|
     |-d       |Changes the home         |                               |
     |directory|directory.               |                               |
     |---------+-------------------------+-------------------------------|
     |-l new_  |Changes the user name.   |The user must be logged out    |
     |name     |                         |when this option is used.      |
     |---------+-------------------------+-------------------------------|
     |-e date  |Sets an expiry date for  |                               |
     |         |the user account.        |                               |
     |---------+-------------------------+-------------------------------|
     |         |Sets the number of days  |                               |
     |-f number|after the expiry date    |Use with the -e option, which  |
     |         |that the account is      |sets an expiry date.           |
     |         |disabled.                |                               |
     |---------+-------------------------+-------------------------------|
     |         |                         |The user should not be         |
     |         |                         |executing any command when this|
     |         |                         |option is used.                |
     |         |                         |                               |
     |-u uid   |Sets the user id .       |Must be a unique id .          |
     |         |                         |                               |
     |         |                         |Files in the user's home       |
     |         |                         |directory are changed, but not |
     |         |                         |files elsewhere.               |
     |---------+-------------------------+-------------------------------|
     |-s shell |Sets the users' shell.   |If no shell is specified, then |
     |         |                         |the default bash is used.      |
     +-------------------------------------------------------------------+
The next time you log in to the account whose password you have changed, you must use the new password.
A good password is one that is hard to crack. That is, it is:
User groups can define:
Some of these features are defined when the group is created. Others are created by using permissions or configuration settings.
Groups are listed in the /etc/group file. Each group has a unique id ( gid ).
The /etc/group file lists all existing groups. By default, any user can view this file, but you must be logged in as the root user to edit it.
Each group is defined in a line in /etc/group. Columns are separated by a colon. Information is given in the following order:
group: encrypted password: group_id: users_in_group
Note:
You can edit /etc/group directly in a text editor. However, often, the command line tools are easier to use.
You can create a group without a group id by leaving out the option.
To save effort, select multiple files.
To save effort, select multiple files.
Linux includes a number of command line tools for administering printing. These commands are useful on networks, or for troubleshooting and managing printing on any system.
Each printer on a Linux system has its own spool or queue in the /var /spool/lpd directory. This spool uses the short name of the printer, which is created when the printer is first configured. When a file is printed, it becomes a job in the spool. Each job is stored in a spool until it is printed.
Printing tools generally start with lp (short for "line printer"). If you are familiar with other Linux commands, you can usually make a good guess at what the rest of the command should be. For example, lprm removes a print job from the spool
You can use the following tools for managing printing:
Type: lpq options user .
The command's name comes from the fact that a spool is sometimes called a "queue."
                         The lpq Command (Print Jobs)
     +-------------------------------------------------------------------+
     |Option |              Action              |        Comments        |
     |-------+----------------------------------+------------------------|
     |-l     |Prints information for each file  |                        |
     |       |in the printer queue.             |                        |
     |-------+----------------------------------+------------------------|
     |number |Checks the status of a job number.|                        |
     |-------+----------------------------------+------------------------|
     |-P     |Sets the printer that a job should|Not needed to use the   |
     |printer|use.                              |default printer.        |
     +-------------------------------------------------------------------+
Type: lprm options job user .
The command's name comes from the fact that it removes (rm) a job from a line printer (lp).
Only the root user can remove a job sent by another user.
Regular users can remove their own print jobs.
Use lpstat to find job numbers. See Reading the Status of a Printer Spool, Section 12.3.3.
                     The lprm Command (Remove Print Jobs)
     +-------------------------------------------------------------------+
     |Option |             Action              |        Comments         |
     |-------+---------------------------------+-------------------------|
     |-P     |Sets the printer to use.         |Not needed if the default|
     |printer|                                 |is used.                 |
     |-------+---------------------------------+-------------------------|
     |- user |Removes all jobs sent by the user|                         |
     |       |specified.                       |                         |
     +-------------------------------------------------------------------+
Type: lpstat -t options .
Type: lpr options files .
                            The lpr Command (Print)
     +-------------------------------------------------------------------+
     |Option |        Action         |             Comments              |
     |-------+-----------------------+-----------------------------------|
     |-P     |Selects the printer to |Otherwise, the system default is   |
     |printer|use.                   |used.                              |
     |-------+-----------------------+-----------------------------------|
     |       |Sends a symbolic link  |This option saves time and disk    |
     |-s     |to the printer instead |space for large files, but may     |
     |       |of the file.           |cause printing to be slower.       |
     +-------------------------------------------------------------------+
A process is a running program to which the Linux kernel has assigned a share of your system's resources or computing power. A process that starts when the system starts and runs in the backgrounduntil needed is a daemon. Because Linux is a multi-tasking operating system, dozens of processes of all sorts can be running at any one time.
Some of the reasons that you may want to check the processes that are running include:
Linux uses three basic types of processes:
You should also know:
Linux includes a number of tools for working with processes. See Viewing Intensive Processes, Section 12.4.4.
[Warning]
Be careful about killing a process or changing its priority. Unless you know what you are doing, you can easily crash your system. Be especially careful of daemons, which often manage important system services and resources.
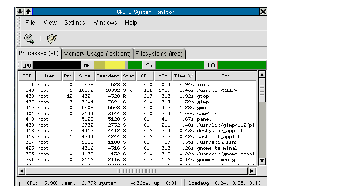
                       Understanding Process Statistics
     +-------------------------------------------------------------------+
     |Statistics|                     What It Means                      |
     |----------+--------------------------------------------------------|
     |command   |The command used to start the process                   |
     |----------+--------------------------------------------------------|
     |%cpu      |The percentage of processing power used by the process. |
     |----------+--------------------------------------------------------|
     |% mem     |The percentage of system memory used by the process.    |
     |----------+--------------------------------------------------------|
     |          |The process's nice scheduling priority. The higher the  |
     |ni        |number, the lower the priority.                         |
     |          |                                                        |
     |          |Negative numbers are highest of all.                    |
     |----------+--------------------------------------------------------|
     |pid       |Process id . Useful for killing a process.              |
     |----------+--------------------------------------------------------|
     |          |The process's scheduling priority. The higher the       |
     |pri       |number, the lower the priority.                         |
     |          |                                                        |
     |          |Negative numbers are highest of all.                    |
     |----------+--------------------------------------------------------|
     |rss       |The amount of ram memory in kilobytes.                  |
     |----------+--------------------------------------------------------|
     |shared    |The amount of shared memory used.                       |
     |----------+--------------------------------------------------------|
     |size      |The size of the virtual image.                          |
     |----------+--------------------------------------------------------|
     |start     |The date that the process was started.                  |
     |----------+--------------------------------------------------------|
     |          |The state that the process is in. Common states are:    |
     |          |                                                        |
     |          |  * S: Sleep.                                           |
     |stat      |  * T: Suspended, but running.                          |
     |          |  * R: Running                                          |
     |          |  * D: Asleep and not interruptible.                    |
     |          |  * Z: Zombie                                           |
     |----------+--------------------------------------------------------|
     |swap      |The amount of swap memory used, in kilobytes.           |
     |----------+--------------------------------------------------------|
     |time      |How much cpu time the process is using.                 |
     |----------+--------------------------------------------------------|
     |tty       |Controlling Terminal. Daemons do not have a terminal.   |
     |----------+--------------------------------------------------------|
     |user      |The user running the process                            |
     |----------+--------------------------------------------------------|
     |wchan     |The kernel function which controls the process.         |
     +-------------------------------------------------------------------+
Type: ps options .
[Note]
Unlike most commands, ps does not require one or two hyphens before the options.
For a complete view, you must be root user.
Once the display is running, you can use the O+ or O- options to add or subtract statistics from the display. The display you set by the keyboard is used in the terminal in which you are running the command as long as the terminal is open, or until you change it.
                        The ps Command (Process Screen)
     +-------------------------------------------------------------------+
     |Option |       Action       |               Comment                |
     |-------+--------------------+--------------------------------------|
     |l      |Displays in long    |                                      |
     |       |format              |                                      |
     |-------+--------------------+--------------------------------------|
     |u      |Displays user name  |                                      |
     |       |and start time      |                                      |
     |-------+--------------------+--------------------------------------|
     |       |Does not display of |                                      |
     |r      |processes that are  |                                      |
     |       |not running         |                                      |
     |-------+--------------------+--------------------------------------|
     |       |                    |A plus sign adds a column the next    |
     |  * O +|                    |time you use the command in the same  |
     |    key|                    |terminal.                             |
     |       |                    |                                      |
     |    or |Adjusts displays    |A minus sign makes the column not     |
     |       |                    |display the next time that the command|
     |  * O -|                    |is used in the same terminal.         |
     |    key|                    |                                      |
     |       |                    |See Display Options for the ps        |
     |       |                    |Command below.                        |
     +-------------------------------------------------------------------+
                      Display Options for the ps Command
     +-------------------------------------------------------------------+
     | Option  |          To display           |         Comment         |
     |---------+-------------------------------+-------------------------|
     |  * k    |The cpu time taken by the      |                         |
     |  * stime|process                        |                         |
     |---------+-------------------------------+-------------------------|
     |  * U    |The id of the process's user   |                         |
     |  * uid  |                               |                         |
     |---------+-------------------------------+-------------------------|
     |  * c    |The name of the processes'     |                         |
     |  * cmd  |binary file                    |                         |
     |---------+-------------------------------+-------------------------|
     |  * g    |The process's group            |                         |
     |  * pgrp |                               |                         |
     |---------+-------------------------------+-------------------------|
     |  * p    |The process's id               |                         |
     |  * if   |                               |                         |
     |---------+-------------------------------+-------------------------|
     |  * p    |The process's parent's id      |                         |
     |  * ppid |                               |                         |
     |---------+-------------------------------+-------------------------|
     |  * s    |The process's size             |The size is given in     |
     |  * size |                               |kilobytes                |
     +-------------------------------------------------------------------+
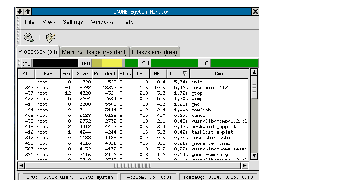
The top command shows a constantly updated summary of the processes that are using the most system resources. The figures given are relative to each other, rather than representing the actual amount of ram used.
Type: top options .
Once the display is running, you can use keyboard commands to:
                  The top Command (Views Intensive Processes)
         +---------------------------------------------------------------+
         |   Option   |                      Action                      |
         |------------+--------------------------------------------------|
         |-d seconds  |To set the interval between updatings of the      |
         |            |display.                                          |
         |------------+--------------------------------------------------|
         |-p          |To display only processes with a particular id .  |
         |process_id  |                                                  |
         +---------------------------------------------------------------+
Keyboard Shortcuts for the top Command
+---------------------------------------------------------------+
|Press.| To. . . |
| . . | |
|------+--------------------------------------------------------|
|c |Toggle the display of the command name or full command |
| |line. |
|------+--------------------------------------------------------|
|f |Select fields to display. |
|------+--------------------------------------------------------|
| |Open a prompt to enter a process id to kill and send a |
|k |signal to kill it. Unless you are the root user, you can|
| |only kill processes you started. |
|------+--------------------------------------------------------|
|l |Toggle the display of load average and uptime |
| |information. |
|------+--------------------------------------------------------|
|m |Toggle the display of memory information. |
|------+--------------------------------------------------------|
|M |Sort by the use of resident memory. |
|------+--------------------------------------------------------|
|N |Sort by process id . |
|------+--------------------------------------------------------|
|n |Set the number of processes to show. Selecting 0 |
|number|displays a screenful. |
|------+--------------------------------------------------------|
|q |Exit the display. |
|------+--------------------------------------------------------|
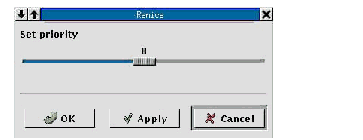
| |Set priority, as with the nice command. |
|r | |
| |See Setting the Priority for a Process From the Command |
| |Line. (***) |
|------+--------------------------------------------------------|
|space |Update the display. |
|bar | |
|------+--------------------------------------------------------|
|t |Toggle display of processes and cpu states. |
+---------------------------------------------------------------+
***) See Setting the Priority for a Process From the Command Line, Section 12.4.8.
[Warning]
Closing some proceses can crash your system or cause other problems.
You can stop a process from the command line in three ways:
Type: kill process_ids .
Unless you are root user, you can only kill processes that you started.
[Warning]
Closing a process can crash your system or cause other problems.
Type: killall options command .
Unless you are root user, you can only kill processes that you started.
[Warning]
Closing some processes can crash your system or cause other problems.
Type: killall options file .
A name with a forward slash in it is read as a file name. All processes that use that file are closed.
Unless you are root user, you can only kill processes that you started.
[Warning]
Closing some processes can crash your system or cause other problems.
                     The killall Command (Stops Processes)
     +-------------------------------------------------------------------+
     |Option|         Action          |             Comment              |
     |------+-------------------------+----------------------------------|
     |      |Stops only processes that|If this option is not used, all   |
     |-e    |are an exact match of    |processes are killed that match   |
     |      |what you enter.          |the first 15 characters.          |
     |------+-------------------------+----------------------------------|
     |-g    |Stops all parent         |                                  |
     |      |processes as well.       |                                  |
     |------+-------------------------+----------------------------------|
     |      |Enters a confirmation    |                                  |
     |-i    |before each process is   |                                  |
     |      |stopped.                 |                                  |
     |------+-------------------------+----------------------------------|
     |-v    |Displays progress        |                                  |
     |      |on-screen.               |                                  |
     +-------------------------------------------------------------------+
Linux assigns priorities for processes. However, you can set your own priorities:
Linux assigns priorities for processes. However, you can set your own priorities.
Type: nice -n adjustment command .
In this structure:
[Warning]
Changing a process's priority may cause problems on your system, especially on systems with limited hardware resources or a large number of users.
Regular back ups are a basic precaution against lost of date due to security leaks, power loss, or user carelessness.
[Note]
Use back up commands with crontab to have automatic, regularly scheduled backups. See Backing Up and Compressing Files, Section 12.5.
Debian supports most backup devices that use ide , scsi or usb standards, or use a parallel port. These devices include tape, zip and iomega drives, as well as removable hard drives. However, for some of these devices, you may need to install a package that is not installed by default. Be prepared to do some research before backing up to such devices.
Before doing a backup, plan it carefully. Consider:
Linux has several tools for backing up and restoring files:
Many commercial or free software back up tools are also available.
The cpio command is one of the most commonly used Linux back up tools.
The cpio command has two unusual features:
This feature means that cpio must be used as part of a multiple command or with a redirection pipe. Examples of this usage are shown in the tables below.
                     The cpio Command (Backup and Restore)
         +---------------------------------------------------------------+
         |  Flag   |  GNU Option  |             What it does             |
         |---------+--------------+--------------------------------------|
         |         |              |Restores files from an archive that   |
         |         |              |match the string.                     |
         |         |              |                                      |
         |-i       |              |Metacharacters can be used in the     |
         |options  |--extract     |string. See Using Metacharacters or   |
         |string   |              |Wild Cards. (***)                     |
         |         |              |                                      |
         |         |              |Strings should be surrounded by double|
         |         |              |quotation marks.                      |
         |---------+--------------+--------------------------------------|
         |-o       |--create      |Backs up files to an archive file.    |
         |options  |              |                                      |
         |---------+--------------+--------------------------------------|
         |         |              |Copies files to another directory on  |
         |-p       |              |the same system.                      |
         |options  |--pass-through|                                      |
         |directory|              |This option is useful for repeating a |
         |         |              |backup that is later burned to a cd . |
         +---------------------------------------------------------------+
***) See Using Metacharacters or Wild Cards, Section 5.3.6.
To do a backup, use cpio with a search command, such as find . See Searching for Files: Using the find Command, Section 8.4.1.
The basic structure is: find -name string -print | cpio -o options > directory .
In this example:
                The -o Flag in the cpio Command (Backup)
         +---------------------------------------------------------+
         |   Option    |              Action              |Comments|
         |-------------+----------------------------------+--------|
         |  * -A       |Adds files to an existing archive.|        |
         |  * --append |                                  |        |
         |-------------+----------------------------------+--------|
         |  * -v       |Displays progress on-screen.      |        |
         |  * --verbose|                                  |        |
         +---------------------------------------------------------+
To restore files from an archive file, use cpio with a redirection pipe. Type: cpio -i options string < target .
In this example:
                  The -i Flag for the cpio Command (Restore)
         +---------------------------------------------------------------+
         |        Option        |      Action       |      Comments      |
         |----------------------+-------------------+--------------------|
         |  * -f                |Copies all files   |                    |
         |  * --non-matching    |except those that  |                    |
         |                      |match the string.  |                    |
         |----------------------+-------------------+--------------------|
         |                      |Keeps previous     |                    |
         |-m                    |modification time  |                    |
         |                      |on restored files. |                    |
         |----------------------+-------------------+--------------------|
         |  * -d                |Makes needed       |                    |
         |  * --make-directories|directories.       |                    |
         |----------------------+-------------------+--------------------|
         |  * -u                |Over writes old    |                    |
         |  * --unconditional   |files.             |                    |
         |----------------------+-------------------+--------------------|
         |                      |                   |This option can only|
         |                      |                   |be used by the root |
         |                      |                   |user.               |
         |  * -R user group     |Reassigns file     |                    |
         |  * --owner user group|ownership.         |If no user is       |
         |                      |                   |specified, the root |
         |                      |                   |user becomes the    |
         |                      |                   |owner.              |
         |----------------------+-------------------+--------------------|
         |-r                    |Renames files.     |Provide new file    |
         |                      |                   |names when prompted.|
         |----------------------+-------------------+--------------------|
         |  * -t                |Displays files in  |Use with the -v     |
         |  * --list            |the archive.       |option to display   |
         |                      |                   |file attributes     |
         |----------------------+-------------------+--------------------|
         |  * -v                |Displays progress  |                    |
         |  * --verbose         |on-screen.         |                    |
         +---------------------------------------------------------------+
The -p option for cpio is useful when you do not want to copy files immediately to the backup device. You might want to prepare the backup first in order to see its size, or to compress the files before backup.
Similarly, if you are creating a cd , copying the files directly to the cd is unreliable or difficult with some cd burning software.
To do a copy for later backup, use cpio with a search command, such as find . See Searching for Files: Using the find Command, Section 8.4.1 .
The basic pattern is:
find -name string -print | cpio -p options > target .
In this example:
                The -o Flag in the cpio Command (Backup)
         +---------------------------------------------------------+
         |   Option    |              Action              |Comments|
         |-------------+----------------------------------+--------|
         |  * -A       |Adds files to an existing archive.|        |
         |  * --append |                                  |        |
         |-------------+----------------------------------+--------|
         |  * -v       |Displays progress on-screen.      |        |
         |  * --verbose|                                  |        |
         +---------------------------------------------------------+
               The -p Flag for the cpio Command (Delayed Backup)
         +---------------------------------------------------------------+
         |        Option         |      Action      |      Comment       |
         |-----------------------+------------------+--------------------|
         |  * -a                 |Resets            |                    |
         |  * --reset-access-time|modificationtimes.|                    |
         |-----------------------+------------------+--------------------|
         |  * -d                 |Makes directories |                    |
         |  * --make-directories |as needed.        |                    |
         |-----------------------+------------------+--------------------|
         |  * -f                 |Keeps previous    |                    |
         |  * --non-matching     |modification time |                    |
         |                       |on restored files.|                    |
         |-----------------------+------------------+--------------------|
         |                       |Keeps original    |                    |
         |-m                     |modification      |                    |
         |                       |times.            |                    |
         |-----------------------+------------------+--------------------|
         |                       |                  |Use as root user.   |
         |                       |Reassigns         |                    |
         |  * -R user group      |ownership of the  |If no user is       |
         |  * -- owner user group|file.             |specified, then the |
         |                       |                  |owner becomes the   |
         |                       |                  |root user.          |
         |-----------------------+------------------+--------------------|
         |  * -u                 |Overwrites old    |                    |
         |  * --unconditional    |files.            |                    |
         |-----------------------+------------------+--------------------|
         |  * -v                 |Displays progress |                    |
         |  * --verbose          |on-screen.        |                    |
         +---------------------------------------------------------------+
You can schedule a command or a script using two tools:
You can use the crontab command to run commands at regular times. For example, you could schedule a backup of your files every Friday. Commands can be scheduled to the minute.
[Note]
If you want to schedule a command to run only once, look into the at command.
The crontab command works by reading a crontab file. A crontab file is a plain text file that lists all the jobs you have scheduled.
Each line of the crontab file consists of the command with all its options and arguments, and the date and time to run it.
By default, all users can set up their own crontab files. However, the root user can use two files to control access:
All crontab files are stored in the /var/spool/cron/crontabs/ directory. However, since regular users do not have read or write permission to this directory, they must use the crontab command to schedule jobs.
In addition, many system administrators use three files to schedule jobs: etc/cron.daily, /etc/cron.weekly, and /etc/cron.monthly. As the names suggest, these directories contain regularly scheduled jobs that run at daily, weekly or monthly intervals.
To use a crontab file:
                       The crontab Command (Scheduling)
         +---------------------------------------------------------------+
         |Option|        Action         |            Comment             |
         |------+-----------------------+--------------------------------|
         |      |Opens a user's crontab |If no user is specified, the    |
         |-e    |file in the vi text    |crontab file opened is the      |
         |      |editor.                |current user's.                 |
         |------+-----------------------+--------------------------------|
         |file  |Creates a crontab file.|Mostly useful for placing the   |
         |      |                       |file in a non-standard location.|
         |------+-----------------------+--------------------------------|
         |-l    |Views a user's crontab |Usable only by the root user.   |
         |user  |file.                  |                                |
         |------+-----------------------+--------------------------------|
         |-r    |Removes a user's       |Usable only by the root user.   |
         |user  |crontab file.          |                                |
         |------+-----------------------+--------------------------------|
         |-u    |Sets which user's      |                                |
         |user  |crontab file is        |Usable only by the root user.   |
         |      |affected.              |                                |
         +---------------------------------------------------------------+
To edit a crontab, type crontab -e user . The file opens in the default editor for the current user.
Each line in a crontab file schedules a single task.
[Note]
If you need to use a percentage sign, put a back slash in front of it: % . Otherwise, it is read as the start of a new line, and the command does not run.
Each line consists of six columns, each one separated by a line or a tab.
Each of the first five columns is an option for setting the date and time. Each of the first five columns can specify:
See Column Entries in a Crontab File, Section 12.6.1.2.
The sixth column is the command to run, including options and arguments. No quotation marks are need to enclose the command.
For example, 0 12 * * * /usr/share/bin/alarm would run a script called alarm every day at noon.
[Note]
Jobs only run if the time and date match all column settings. Setting column 3 to 1 and column 5 to 1 would only run a job when the first of the month falls on a Monday.
[Note]
No validity check is made. Nothing stops yo, for example, from setting column 3 to 31 and column 4 to 2, setting the time to February 31.
     +-------------------------------------------------------------------+
     | Column or Option |Argument |               Comments               |
     |                  |         |                                      |
     |  (from left to   |         |                                      |
     |      right)      |         |                                      |
     |------------------+---------+--------------------------------------|
     | 1. 1 Minute      |0-59     |                                      |
     |------------------+---------+--------------------------------------|
     | 1. 2 Hour        |0-23     |0 is midnight.                        |
     |------------------+---------+--------------------------------------|
     | 1. 3 Day of the  |1-31     |                                      |
     |    month         |         |                                      |
     |------------------+---------+--------------------------------------|
     | 1. 4 Month       |1-12     |                                      |
     |------------------+---------+--------------------------------------|
     | 1. 5 Day of the  |0-6      |0 is Sunday.                          |
     |    week          |         |                                      |
     |------------------+---------+--------------------------------------|
     |                  |         |Options or arguments can be included. |
     | 1. 6 Job         |any      |                                      |
     |                  |command  |No quotation marks are needed around  |
     |                  |         |the string.                           |
     |------------------+---------+--------------------------------------|
     |                  |         |All possible entries.                 |
     |Any column        |*        |                                      |
     |                  |         |Use in the first five columns.        |
     |------------------+---------+--------------------------------------|
     |                  |         |No entry.                             |
     |Any column        |-        |                                      |
     |                  |         |Use in the first five columns.        |
     +-------------------------------------------------------------------+
You can use the at command to schedule a command or script to run a single time. The command includes several utilities. See Using the at Utilities, Section 12.6.2.1.
[Note]
If you want to schedule a command more than once, look into the crontab command.
By default, only the root user can use the at command. However, the root user can use two files to allow regular users the command:
The at command depends on a plain text file. This file lists commands or scripts, one per line. The end of the file must be marked by <EOT> on a line by itself.
The time for a task can be set using several formats. The simplest is a 24 hour clock in the hh:mm format, followed by the date in the mm: dd:yyyy format.
You can enter commands by entering:
                     The at Command (Scheduling): Options
         +---------------------------------------------------------------+
         |Option |                    Action                     |Comment|
         |-------+-----------------------------------------------+-------|
         |-c task|Displays listed tasks.                         |       |
         |-------+-----------------------------------------------+-------|
         |-d task|Deletes the specified tasks.                   |       |
         |-------+-----------------------------------------------+-------|
         |-f file|Read tasks from the file entered.              |       |
         |-------+-----------------------------------------------+-------|
         |-l     |Lists all tasks scheduled for the current user.|       |
         |-------+-----------------------------------------------+-------|
         |-m     |Sends mail to the user when the task is run.   |       |
         +---------------------------------------------------------------+
                   The at Command (Scheduling): Time Formats
         +---------------------------------------------------------------+
         | Option |          Action           |         Comment          |
         |--------+---------------------------+--------------------------|
         |        |                           |The day can be spelled out|
         |day     |Sets the day of the week.  |or abbreviated to its     |
         |        |                           |first three letters.      |
         |--------+---------------------------+--------------------------|
         |hh:mm   |                           |Use either a 24 hour clock|
         |modifier|Sets the time.             |or a 12 hour clock,       |
         |        |                           |modified by am or pm .    |
         |--------+---------------------------+--------------------------|
         |midnight|Sets the time to 12:00 am .|                          |
         |--------+---------------------------+--------------------------|
         |        |                           |If the month is before the|
         |mmddyyyy|Sets the date.             |current month, the command|
         |        |                           |runs next year.           |
         |--------+---------------------------+--------------------------|
         |noon    |Sets the time to 12:00 pm .|                          |
         |--------+---------------------------+--------------------------|
         |        |Runs the command           |                          |
         |now     |immediately or at the same |                          |
         |        |time on the specified day. |                          |
         |--------+---------------------------+--------------------------|
         |teatime |Sets the time to 4:00 pm . |                          |
         |--------+---------------------------+--------------------------|
         |today   |Runs the command today.    |                          |
         |--------+---------------------------+--------------------------|
         |tomorrow|Runs the command tomorrow. |                          |
         +---------------------------------------------------------------+
The at command can be controlled by two utilities:
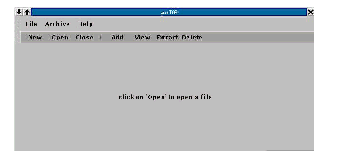
By default, Debian installs the gui tar program in the main menu. Despite the name, guitar uses the tar, gzip, and gzip2 utilities, as well as several others.
Compressing and archiving files are useful for making backups and e-mail attachments.
Compression reduces the size of files and places them in a single file. Archving creates a single file in which to store multiple files.
In both cases, the individual files cannot be accessed by file managers or normal commands for manipulating files. Instead, you must use special tools designed for the utility that you used for compression.
The processes of decompressing and unarchiving are both referred to as extracting. You can use special commands for extracting, or options in the same tools that you use for compressing or archiving.
Archived files are called tar files, tarred files, or tarballs.
Linux includes several tools for compressing and archiving:
In addition, Linux includes tools for viewing, searching, and comparing files compressed using gzip .
The tar command can compress as well as archive files. Its -z option is equivalent to using the gzip command.
An archive file has a .tar extension. An archive file that is also compressed has a .tgz extension. At times, an archived and compressed file will have a tar.gz extension
The tar command is some times used for back ups. However, cpio is often used instead, because it offers more control over back ups. See Checking or Repairing a File System, Section 12.9.
Type: tar options archive files .
The archive is the tar file to create or extract from. If it does not exist, it is created by the command.
Separate each file name by a space.
                           The tar Command (Archive)
     +-------------------------------------------------------------------+
     |          Option          |     Action     |        Comment        |
     |--------------------------+----------------+-----------------------|
     |                          |Keep original   |                       |
     |  * --atime-preserve      |time stamps on  |                       |
     |                          |extracted files.|                       |
     |--------------------------+----------------+-----------------------|
     |  * -c                    |Creates a new   |                       |
     |  * --create              |archive file.   |                       |
     |--------------------------+----------------+-----------------------|
     |  * -d tarfile files      |Compare the     |Missing files, sizes   |
     |  * --compares tarfile    |files in a tar  |and attributes are     |
     |    files                 |file with other |reported on.           |
     |                          |files.          |                       |
     |--------------------------+----------------+-----------------------|
     |                          |Excludes a file |                       |
     |  * --exclude file        |from archiving  |                       |
     |                          |or extracting.  |                       |
     |--------------------------+----------------+-----------------------|
     |                          |Extracts files  |                       |
     |  * -k                    |without         |An error message       |
     |  * --keep-old-files      |overwriting     |displays if there are  |
     |                          |files with the  |conflicts.             |
     |                          |same name.      |                       |
     |--------------------------+----------------+-----------------------|
     |                          |Splits over     |                       |
     |  * -M                    |multiple        |Works with tapes or    |
     |  * --multivolume         |removable       |floppies.              |
     |                          |devices.        |                       |
     |--------------------------+----------------+-----------------------|
     |                          |Excludes files  |                       |
     |  * -N date               |older than the  |                       |
     |  * --after-date date     |date entered    |                       |
     |                          |from the        |                       |
     |                          |archive.        |                       |
     |--------------------------+----------------+-----------------------|
     |  * -P                    |Keeps absolute  |See Understanding      |
     |  * --absolute-paths      |paths.          |Absolute and Relative  |
     |                          |                |File Paths. (***1)     |
     |--------------------------+----------------+-----------------------|
     |                          |Keeps           |                       |
     |  * -p                    |permissions of  |See Changing           |
     |  * --same-permissions    |files unchanged |Permissions. (***2)    |
     |  * --preserve-permissions|when they are   |                       |
     |                          |archived.       |                       |
     |--------------------------+----------------+-----------------------|
     |                          |Adds a tar file |The second file listed |
     |  * -r                    |to the end of   |in the command is added|
     |  * --append              |another one.    |to the end of the      |
     |                          |                |first.                 |
     |--------------------------+----------------+-----------------------|
     |                          |Removes files   |                       |
     |  * --remove-files        |after they are  |                       |
     |                          |added to a tar  |                       |
     |                          |file.           |                       |
     |--------------------------+----------------+-----------------------|
     |  * -t                    |Displays files  |                       |
     |  * --list                |in an archive.  |                       |
     |--------------------------+----------------+-----------------------|
     |                          |                |Files are only added if|
     |  * -u                    |Updates an      |they are new than files|
     |  * --update              |archive.        |of the same name that  |
     |                          |                |are already in the     |
     |                          |                |archive.               |
     |--------------------------+----------------+-----------------------|
     |  * -v                    |Displays actions|                       |
     |  * --verbose             |on-screen.      |                       |
     |--------------------------+----------------+-----------------------|
     |                          |Asks            |                       |
     |  * -w                    |confirmation    |Enter y for Yes, and n |
     |  * --interactive         |before working  |for No.                |
     |                          |with each file. |                       |
     |--------------------------+----------------+-----------------------|
     |                          |Checks for      |                       |
     |  * -W                    |errors in       |                       |
     |  * --verify              |archiving or    |                       |
     |                          |extracting.     |                       |
     |--------------------------+----------------+-----------------------|
     |  * -x                    |Extracts files  |                       |
     |  * --extract             |from an archive.|                       |
     |  * --get                 |                |                       |
     |--------------------------+----------------+-----------------------|
     |  * -z                    |Compress or     |--compress can also be |
     |  * -Z                    |uncopresses     |used to compress.      |
     |                          |using gzip.     |                       |
     +-------------------------------------------------------------------+
***1) See Understanding Absolute and Relative File Paths, Section 8.2.2. ***2) See Changing Permissions, Section 9.19.
The gzip command is one of the two Linux tools for compressing and decompressing files. The other is bzip2 . The bzip2 command can compress files more, but gzip is more common, and can sometimes read zipped files, or compressed files created with the obsolete tool compress .
A file compressed using gzip has a .gz extension.
Type: gzip options files .
Separate file names with a space.
The gzip command has several related utilities:
All these commands have the same format as gzip . They can use the same options as the versions of the commands used for uncompressed files.
                          The gzip Command (Compress)
     +-------------------------------------------------------------------+
     |     Option     |         Action         |         Comment         |
     |----------------+------------------------+-------------------------|
     |                |Sets the amount of      |The default setting is 6.|
     |                |compression to greatest |                         |
     |--best          |setting (on a scale of 1|When the compression is  |
     |                |to 9).                  |greatest, the speed of   |
     |                |                        |compression is slowest.  |
     |----------------+------------------------+-------------------------|
     |  * -d          |Extracts compressed     |                         |
     |  * --decompress|files.                  |                         |
     |  * --decompress|                        |                         |
     |----------------+------------------------+-------------------------|
     |                |Sets the compression to |When the speed of        |
     |--fastest       |the fastest setting (1  |compression is greatest, |
     |                |on a scale of 1 to 9).  |the amount of compression|
     |                |                        |is least.                |
     |----------------+------------------------+-------------------------|
     |  * -f          |Forces compression.     |                         |
     |  * --force     |                        |                         |
     |----------------+------------------------+-------------------------|
     |  * -N          |Keeps original name and |                         |
     |  * --name      |time stamp.             |                         |
     |----------------+------------------------+-------------------------|
     |  * -n          |Discards original name  |This is the default      |
     |  * --no-name   |and time stamp.         |setting for              |
     |                |                        |decompressing.           |
     |----------------+------------------------+-------------------------|
     |                |Sets the speed and      |1 is the fastest, 9 the  |
     |-number         |amount of compression on|most compressed.         |
     |                |a scale of 1 t0 9.      |                         |
     |                |                        |The default setting is 6.|
     |----------------+------------------------+-------------------------|
     |  * -r          |Includes sub-directories|                         |
     |  * --recursive |and their contents.     |                         |
     |----------------+------------------------+-------------------------|
     |  * -v          |Displays progress       |The file and the amount  |
     |  * --verbose   |on-screen.              |of compression display.  |
     +-------------------------------------------------------------------+
The bzip2 command is one of two tools for compressing and decompressing files. The other is gzip . The gzip command is more common, but bzip2 's compression is 10 to 20 percent greater, depending on the file.
Compressed files made with bzip2 have a .bz2 extension.
Type: bzip2 options files .
Separate each name with a space.
The bzip2 command has three related utilities:
All these utilities have the same command format as bzip2 .
                         The bzip2 Command (Compress)
     +-------------------------------------------------------------------+
     |     Option     |                 Action                  |Comments|
     |----------------+-----------------------------------------+--------|
     |  * -d          |Decompresses files.                      |        |
     |  * --decompress|                                         |        |
     |----------------+-----------------------------------------+--------|
     |  * -f          |Over writes existing files.              |        |
     |  * --force     |                                         |        |
     |----------------+-----------------------------------------+--------|
     |  * -k          |Keeps original files once a compressed   |        |
     |  * --keep      |file is made.                            |        |
     |----------------+-----------------------------------------+--------|
     |  * -v          |Displays progress on screen.             |        |
     |  * --verbose   |                                         |        |
     |----------------+-----------------------------------------+--------|
     |  * -z          |Compresses files.                        |        |
     |  * --compress  |                                         |        |
     +-------------------------------------------------------------------+
The native Linux filesystem (ext2) does not need to be defragmented. However, occasionally, you may need to check a partition's file allocation and make repairs.
Type: fsck options filesystem or fsck options mountpoint .
Note that:
[Note]
Linux partitions do not need defragmenting. fat 16 and fat 32 filesystems can be defragmented under another operating system.
                     The fsck Command (Checks Filesystems)
     +-------------------------------------------------------------------+
     |Option|           Action           |            Comment            |
     |------+----------------------------+-------------------------------|
     |-A    |Checks all filesystems      |                               |
     |      |listed in /etc/fstab.       |                               |
     |------+----------------------------+-------------------------------|
     |-r    |Prompts before each repairs |                               |
     |      |is done.                    |                               |
     |------+----------------------------+-------------------------------|
     |      |Checks all filesystems      |                               |
     |-R    |listed in /etc/fstab except |Use with -A.                   |
     |      |the root partition.         |                               |
     |------+----------------------------+-------------------------------|
     |      |                            |Common types are:              |
     |      |                            |                               |
     |      |                            |  * ext2 : The native Linux    |
     |      |                            |    format.                    |
     |-t    |To only check filesystems of|  * swap : Linux swap file. Use|
     |type  |a certain type              |    only for the swap file.    |
     |      |                            |  * vfat :The format for       |
     |      |                            |    Windows 98, me , and the   |
     |      |                            |    second release of Windows  |
     |      |                            |    95.                        |
     |      |                            |  * iso9660: cd drive          |
     +-------------------------------------------------------------------+
User's Guide