Copy a Page via the Persona Bar
Steps
-
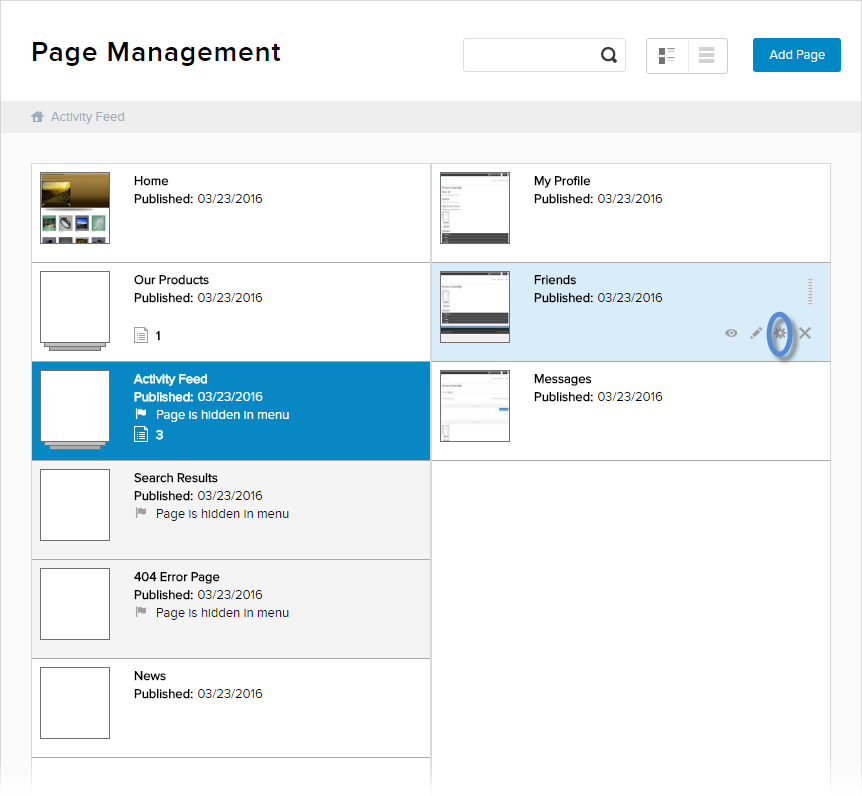
In the Page Management page, hover over the page to configure, then click/tap the gear icon.
-
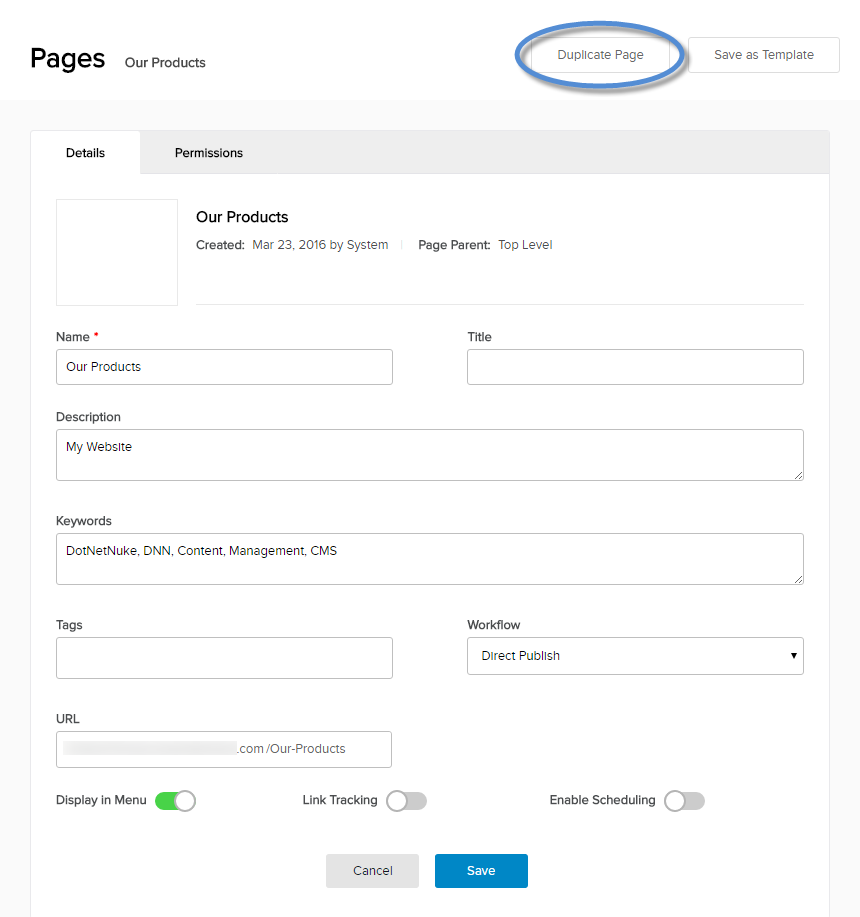
Click/Tap Duplicate Page.
-
In the Details tab, configure the page.
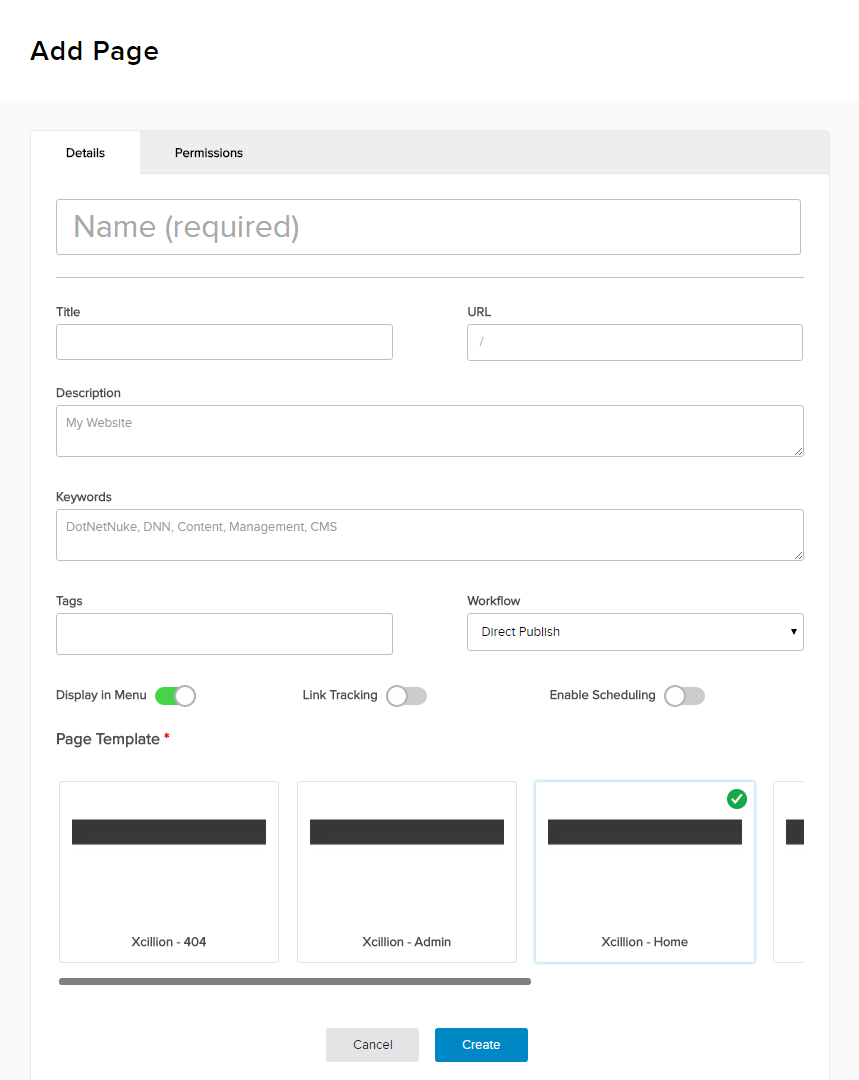
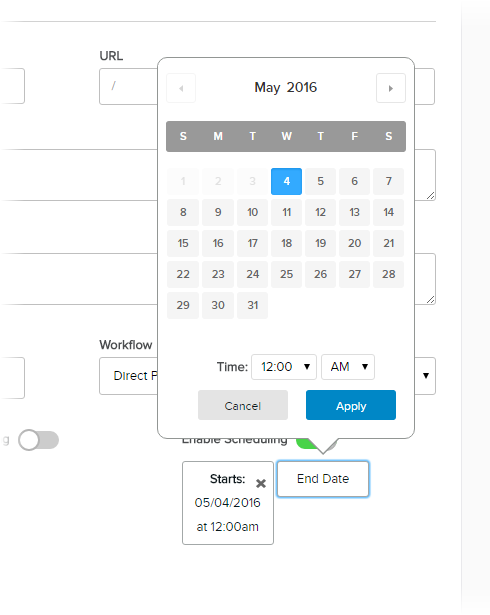
Field Description [Page] Name Required. Used in the navigation. [Page] Title Displayed as the browser window's title. Tip: The title is used by search engines to identify the information on the page. Include at least five highly descriptive words, and keep the title under 200 characters.[Page] URL Custom URL for the page. Keywords Comma-separated keywords that can be used by search engines to help index your site's pages. Tags Predefined tags that you can choose from the dropdown, if any are defined in the Taxonomy Manager. Workflow Predefined workflow states that you can choose from the dropdown. Display in Menu If enabled, the page is included in the main navigation menu. If the page is not included in the navigation menu, you can still link to it using its URL. Link Tracking If enabled, Enable Scheduling If enabled, the Start Date and End Date buttons appear below the switch. Click/Tap on either button to set the dates and times.
- The page is published after the specified start date. If Start Date is not set, the page is published immediately.
- The page is hidden after the specified end date. If End Date is not set, the page is visible indefinitely.
Page Template Required. The template layouts are defined by the theme used in the site. -
(Optional) In the Permissions tab, configure which roles can do which actions on this page.
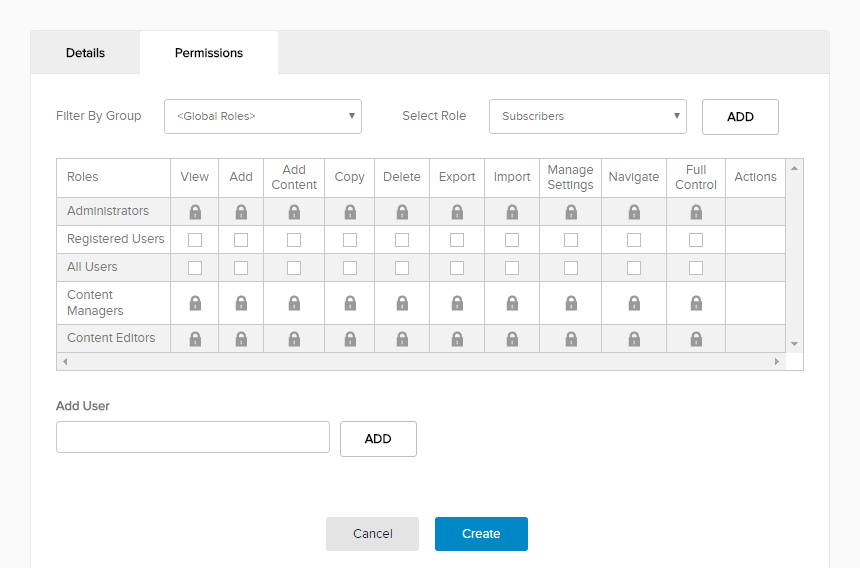
- To filter the displayed roles, select the role group from the Filter By Group dropdown.
- To add another role to the list, choose the additional role from the Select Role dropdown, and click/tap Add.
- To add a specific user to the list, enter part of their display name, select the correct user from the list, and click/tap Add.
- Check the appropriate checkboxes to enable each role to perform actions.
- Click/Tap Save.
-
Add the new page to the hierarchy of pages.
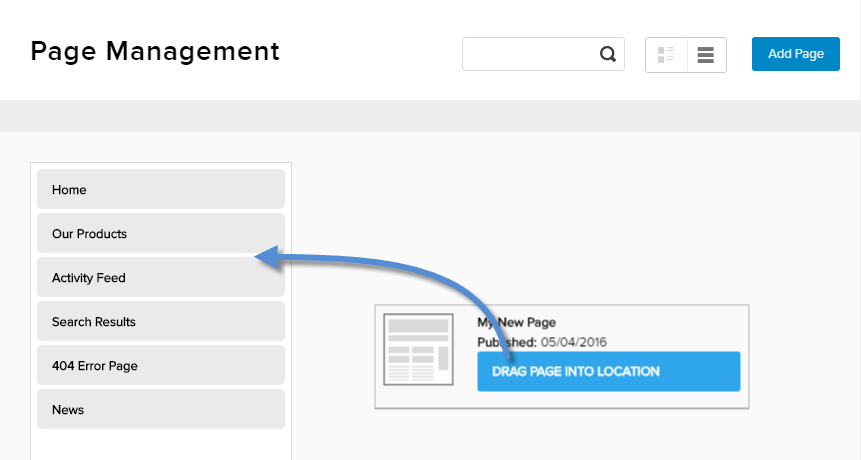
- Drag the floating Drag Page into Location box towards the column of pages.
- To insert at the same level, drag until the placeholder appears in the correct position.
- To insert at a lower level, hover above the intended parent until another column appears to the right, then drag until the placeholder appears in the correct position in the column of siblings.

