7.2. Working with Video Components
This section describes how to include videos as part of the content of your course.
You can also include an “about” video for your course. A course about video appears on learner dashboards to market your course. For more information, see Adding a Course About Video.
7.2.1. Overview
You can create videos and add them to a course to supplement active learning components, such as discussions and problems. Videos can be effective for a number of purposes, such as presenting motivating material, showing experiments, and reducing cognitive load for complex content.
For more information about how learners can interact with course videos, see Watching Videos on the edX Video Player in the EdX Learner’s Guide or Watching Videos on the edX Video Player in the Open edX Learner’s Guide.
7.2.1.1. When to Use a Video
Before creating video content, decide whether video is the best medium by asking the following questions.
- Should the content be conveyed through text?
- Through an interactive demonstration?
- By having learners work through a problem?
7.2.1.2. Video Length
Keep videos as short as possible.
Learners are more likely to finish watching a video if it is no more than 5-10 minutes long.
7.2.1.3. Video Accessibility
Be sure to review Create Accessible Media before you create videos for your course.
7.2.1.4. Allowing Learners to Download Videos
To help course teams protect video assets, the edX video player hides video URLs by default. This functionality is in effect for all video files, including YouTube videos and videos that are hosted in other locations.
You can allow learners to download videos by selecting the Video Download Allowed option for your video components.
For more information about posting videos to hosting sites other than YouTube, see Step 3. Post the Video Online.
For more information about options that you can set when you create a video component, see Setting Advanced Options under Step 4. Create a Video Component.
7.2.2. Step 1. Create the Video
Your videos can contain whatever content you want to include in the course. The Creating Videos section of edX101 Overview of Creating an edX Course has some helpful pointers for creating good video content.
When you create videos, follow Richard E. Mayer’s 12 Principles of Multimedia Learning. The principles in this document are based on extensive experimental research of student learning.
7.2.2.1. Recommended Compression Specifications
EdX recommends the following video compression specifications. These specifications are recommended but not required.
| Output | Publish to YouTube | Publish downloadable file to AWS S3 |
|---|---|---|
| Codec | H.264 .mp4 | H.264 .mp4 |
| Resolution & Frame Rate (see note) | 1920x1080, progressive, 29.97 fps | 1280x720, progressive, 29.97 fps |
| Aspect | 1.0 | 1.0 |
| Bit Rate | VBR, 2 pass | VBR, 2 pass |
| Target VBR | 5 mbps | 1 mbps |
| Max VBR | 7.5 mbps | 1.5 mbps |
| Audio | AAC 44.1 / 192 kbps | AAC 44.1 / 192 kbps |
Note
Typically you export at the same frame rate that was used when you created the media file. For example, if you create the file in a country that uses the PAL system, you export at 25 fps instead of the NTSC standard of 29.97 fps.
7.2.2.2. Supported Video Formats
The edX video player supports videos in .mp4, .mpeg, .webm, and .ogg format. However, to help make sure all standard browsers can play your video, edX strongly recommends that you use the .mp4 format.
7.2.3. Step 2. Create or Obtain a Video Transcript
Transcripts are required for your videos. Transcripts help learners with hearing impairments understand audio content, and they are helpful for learners who speak other languages. You can allow learners to download transcripts so that they can read them offline. You associate a transcript with a video when you create the video component.
Timed transcripts in the SubRip Text (.srt) format are strongly recommended. Learners can select the Show transcript (”) icon in the video player’s control bar to show the transcript next to the video. The transcript automatically scrolls as the video plays, and learners can select a line in the transcript to jump to the point in the video where that word is spoken.
Learners can also choose to show the transcript file as overlaid closed captions for the video by selecting the CC icon in the video player’s control bar.
To create or obtain a transcript in .srt format, you can work with a company that provides captioning services.
EdX works with 3Play Media and Cielo24. YouTube also provides captioning services.
When you upload an .srt file, a text (.txt) file is created automatically. You can allow learners to download these transcript files. If you allow your learners to download transcripts, the video player includes an option to download the video transcript as either an .srt file or a .txt file.
7.2.3.1. Naming SubRip Text Files
To prevent errors when you upload your video transcripts, edX recommends the following conventions for naming your transcript files.
- Each transcript file should have a unique identifying name. The name should be unique not only across the transcript files for your videos, but across all of your course uploads.
- File names that include special characters, such as ç, å, or ó, cause the upload option to result in an error. Before you upload a transcript, change the file name to remove the special characters.
- Make sure that the file type,
.srt, is in lower case. - Other than to separate the identifying name from the
.srtfile type, file names should not include periods.
7.2.3.2. Providing Transcripts in Other Formats
You can provide transcripts in formats other than the .srt format, such as .pdf, and you can provide additional transcript files in different languages. For more information about these options, see Add a Supplemental Downloadable Transcript.
Note
Historically, some courses used .sjson files for video transcripts. Use of .sjson files is no longer recommended; however, if transcripts in your course use this format, see Upload an .sjson File (Deprecated).
7.2.4. Step 3. Post the Video Online
All course videos should be posted to YouTube. By default, the edX video player accesses your YouTube videos.
Because YouTube is not available in all locations, however, edX recommends that you also post copies of your videos on a third-party hosting site such as Amazon S3. When a learner views a video in your course, if YouTube is not available in that learner’s location or if the YouTube video does not play, the video on the backup site starts playing automatically. You can also allow the learners to download the video from the backup site.
After you post your video online, make sure you have the URL for that copy of the video. If you post copies of your video in more than one place, make sure you have the URL for each video location.
7.2.4.2. Other Sites
You can use any video backup site that you want. However, keep in mind that the site where you post the videos might need to handle high traffic volume.
Note
The URL for the video that you post on a third-party site must end in .mp4, .mpeg, .webm, or .ogg. (To help make sure all standard browsers can play your video, edX strongly recommends that you use .mp4 format.) EdX cannot support videos that you post on sites such as Vimeo.
If you (or your beta testers or learners) encounter an error when you view a course video, it might be the result of one of these browser-related problems.
Verify that the viewer’s browser is up to date. For example, some older versions of the Mozilla Firefox browser did not play .mp4 video files. These problems do not occur in more recent browser versions.
For more information, see Media formats supported by the HTML audio and video elements.
Verify that file metadata, particularly the MIME type, is correctly set on the host site. For example, when edX offered support for Internet Explorer 10 browsers, it was found that videos did not play if the MIME type was not set. The HTTP header
Content-Typehad to be set to video/mp4 for an .mp4 file.As an example of how you might set metadata on a video backup site, the Console User Guide for the Amazon Simple Storage Service provides this information about editing object metadata.
7.2.5. Step 4. Create a Video Component
Note
If you are building a course to run on the edx.org site, in place of this step, you follow the Add the Video ID to a Video Component procedure. For more information, see the Adding Video Content section.
To add a video and its transcript to your course, follow these steps.
Under Add New Component, select Video.
When the new video component appears, select Edit. The video editor opens to the Basic page.

You replace the default values with your own.
In the Component Display Name field, enter an identifying name for this video. This name appears as a heading above the video in the LMS, and it identifies the video for you in Insights.
The default display name for new video components is “Video”. Changing the default to a unique, descriptive display name can help you and your learners identify different videos quickly and accurately. If you delete this default and do not enter an identifying name, the platform supplies “video” for you.
In the Default Video URL field, enter the URL of the video. Example URLs follow.
http://youtu.be/OEoXaMPEzfM
http://www.youtube.com/watch?v=OEoXaMPEzfM
https://s3.amazonaws.com/edx-course-videos/edx-edx101/EDXSPCPJSP13-G030300.mp4
Note
To be sure that all learners can access a video, you can create multiple versions that use different encodings or hosting services. After you post different versions on the Internet, you add each URL below the default video URL. These URLs cannot be YouTube URLs. To add a URL for another version, select Add URLs for additional versions. The first listed video that is compatible with the learner’s computer plays.
Next to Default Timed Transcript, select an option.
If edX already has a transcript for this video, Studio automatically finds the transcript and associates the transcript with the video. This situation can occur when you reuse a video from an existing course.
If you want to modify the transcript, select Download Transcript for Editing. You can then make your changes and upload the new file by selecting Upload New Transcript.
If edX does not have a transcript for the video, but YouTube has a transcript, Studio automatically finds the YouTube transcript and asks if you want to import it. To use this YouTube transcript, select Import YouTube Transcript. (If you want to modify the YouTube transcript, import the YouTube transcript into Studio, and then select Download Transcript for Editing. You can then make your changes and upload the new file by selecting Upload New Transcript.)
If both edX and YouTube have a transcript for your video, but the edX transcript is out of date, you receive a message asking if you want to replace the edX transcript with the YouTube transcript. To use the YouTube transcript, select Yes, replace the edX transcript with the YouTube transcript.
If neither edX nor YouTube has a transcript for your video, and your transcript uses the .srt format, select Upload New Transcript to upload the transcript file from your computer.
Note
- If you want to provide a transcript in a format such as .pdf, do not use this field to upload the transcript. For more information, see Add a Supplemental Downloadable Transcript.
- If your transcript uses the .sjson format, do not use this field. For more information, see Upload an .sjson File (Deprecated).
Optionally, select Advanced to set more options for the video. For a description of each option, see Setting Advanced Options.
Select Save.
7.2.5.1. Setting Advanced Options
The following options appear on the Advanced page of the video component.
| Component Display Name | The name that you want your learners to see. This is the same as the Display Name field on the Basic tab. |
| Default Timed Transcript | The name of the transcript file that was specified in the Default Timed Transcript field on the Basic page. You do not have to change this setting. |
| Download Transcript Allowed | Specifies whether you want to allow learners to download the timed transcript. If you select True, a link to download the file appears below the video. By default, Studio creates a .txt transcript when you upload an .srt transcript. Learners can download the .srt or .txt versions of the transcript when you set Download Transcript Allowed to True. If you want to provide the transcript for download in a different format as well, such as .pdf, upload a file to Studio by using the Upload Handout field. |
| Downloadable Transcript URL | The URL for a non-.srt version of the transcript file posted on the Files & Uploads page or on the Internet. Learners see a link to download the non-.srt transcript below the video. When you add a transcript to this field, only the transcript that you add is available for download. The .srt and .txt transcripts become unavailable. If you want to provide a downloadable transcript in a format other than .srt, edX recommends that you upload a handout for learners by using the Upload Handout field. For more information, see Add a Supplemental Downloadable Transcript. |
| EdX Video ID | An optional field used only by course teams that are working with edX to process and host video files. |
| License | Optionally, you can set the license for the video, if you want to release the video with a license different from the overall course license.
|
| Show Transcript | Specifies whether the transcript appears next to the video by default. |
| Transcript Languages | The transcript files for any additional languages. For more information, see Add a Transcript in Another Language. |
| Upload Handout | Allows you to upload a handout to accompany this video. Your handout can be in any format. Learners can download the handout by selecting Download Handout under the video. For more information, see Add a Supplemental Downloadable Transcript. |
| Video Available on Web Only | If you select True, learners are only allowed to play this video in a Web browser. If you select False, learners can use any compatible application to play the video, including Web browsers and mobile apps. |
| Video Download Allowed | Specifies whether learners can download versions of this video in different formats if they cannot use the edX video player or do not have access to YouTube. If you select True, you must add at least one non-YouTube URL in the Video File URLs field. |
| Video File URLs | The URL or URLs where you posted non-YouTube versions of the video. Every URL should end in .mp4, .mpeg, .webm, or .ogg and cannot be a YouTube URL. Each learners will be able to view the first listed video that is compatible with the his or her computer. To allow learners to download these videos, you must set Video Download Allowed to True. To help make sure all standard browsers can play your video, we strongly recommend that you use the .mp4 format. |
| Video ID | An optional field used only by course teams that are working with edX to process and host video files. |
| Video Start Time | The time you want the video to start if you do not want the entire video to play. Use HH:MM:SS format. The maximum value is 23:59:59. Note Learners who download and play the video in the mobile app see the entire video file. Only videos that play in a browser start playing at the specified start time. |
| Video Stop Time | The time you want the video to stop if you do not want the entire video to play. Use HH:MM:SS format. The maximum value is 23:59:59. Note Learners who download and play the video in the mobile app see the entire video file. Only videos that play in a browser stop playing at the specified stop time. |
| YouTube IDs | If you have uploaded separate video files to YouTube for different speeds of your video (YouTube ID for .75x speed, YouTube ID for 1.25x speed, YouTube ID for 1.5x speed), enter the YouTube IDs for these videos in these fields. These settings are optional, to support video play on older browsers. |
7.2.6. Including Optional Collateral
After you add a video component to your course, you can provide optional collateral to accompany the video.
7.2.6.1. Add a Supplemental Downloadable Transcript
By default, a .txt file is created when you upload an .srt file, and learners can download either the .srt or .txt transcript when you set Download Transcript Allowed to True. Options to download the transcript** appear below the video.
You can provide an additional downloadable transcript in a format such as .pdf along with the default .srt and .txt transcripts. To do this, you upload the additional transcript in the video player as a handout. Learners see an option to download the handout below the video.
To add another downloadable transcript, follow these steps.
- Create or obtain your transcript as a .pdf or in another format.
- In the video component, select Advanced.
- Locate Upload Handout, and then select Upload.
- In the Upload File dialog box, select Choose File.
- In the dialog box, select the file on your computer, and then select Open.
- In the Upload File dialog box, select Upload.
7.2.6.2. Add a Transcript in Another Language
You can provide transcripts for your video in more than one language. To do this, you work with a third-party service to obtain an .srt transcript file for each language, and then associate the .srt file with the video in Studio.
Before you add a transcript file, make sure that each file has a unique name. If you use the same transcript name more than once, only the most recently added transcript will appear for every video component that is set up to use a transcript with that name. To avoid this problem, a best practice is to name additional transcript files by appending the transcript’s language to the video file name.
For example, you have two videos, named video1.mp4 and video2.mp4, and their original transcripts are named video1.srt and video2.srt. When you add Spanish transcripts for these videos, you name them video1_ES.srt and video2_ES.srt. Later, when you add Russian transcripts for the videos, you name them video1_RU.srt and video2_RU.srt.
To add a transcript to a video component, follow these steps.
- After you obtain the .srt files for additional languages, open the video component for the video.
- On the Advanced tab, scroll down to Transcript Languages, and then select Add.
- Select the language for the transcript that you want to add.
- Select Upload, browse to the .srt file for the transcript in that language, and then select Open.
- In the Upload translation dialog box, select Upload.
- Repeat steps 2 - 5 for any additional languages.
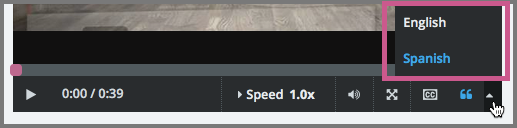
When your learners view the video, they can select the Language menu to select a language.
7.2.6.3. Upload an .sjson File (Deprecated)
If your course uses .sjson files, you upload the .sjson file for the video to the Files & Uploads page, and then specify the name of the .sjson file in the video component.
Note
Only older courses that have used .sjson files in the past should use .sjson files. All new courses should use .srt files.
Obtain the .sjson file from a media company such as 3Play.
Change the name of the .sjson file to use the following format.
subs_{video filename}.srt.sjsonFor example, if the name of your video is Lecture1a, the name of your .sjson file must be subs_Lecture1a.srt.sjson.
Upload the .sjson file for your video to the Files & Uploads page.
Edit or create the video component.
Select Advanced.
In the Default Timed Transcript field, enter the file name of your video. Do not include subs_ or .sjson. For the example in step 2, you would only enter Lecture1a.
Set the other options that you want.
Select Save.
7.2.7. Adding a Pre-Roll Video to Your edX Course
Note
Only courses that run on the edx.org website can include a pre-roll video. In addition, your organization must work with edX partner support to encode and host your video files. For more information, see Processing Video Files.
You can create a short video message and configure it to play before the other videos in your course. For example, a pre-roll video might provide learners with information about your organization, or about the next course in an XSeries. One pre-roll video can be included in each course.
7.2.7.1. How Learners Experience a Pre-Roll Video
When a learner selects any video in the course, the defined course pre-roll video might automatically begin to play before the selected video plays. The pre-roll video does not play every time a learner plays any of the course videos. Instead, it plays on an infrequent schedule.
While the pre-roll video plays, the video player includes these additional options for learners to select.
- Skip: The pre-roll video immediately stops playing and the course video selected by the learner begins playing.
- Do not show again: The learner opts out of viewing the pre-roll video. The pre-roll video does not play for that learner again.
The following constraints control delivery of the pre-roll video to learners.
- For each enrolled learner, the pre-roll video plays a maximum of once every seven days.
- The pre-roll video plays only in web browsers. It does not play in the edX mobile applications.
7.2.7.2. Preparing the Pre-Roll Video
To include a pre-roll video in your course, you prepare the video file and its transcript file or files and upload them to Studio. Because the pre-roll video is not part of the course that is defined in the course outline, you do not use a video component to add the pre-roll video to your course.
7.2.7.2.1. Guidelines for Creating Pre-Roll Videos
EdX encourages partners to consider these suggestions when deciding on the content for their pre-roll videos.
- Use the pre-roll video as a way to promote general awareness of your organization.
- For a course that has sponsors, use the pre-roll video to acknowledge the sponsors.
- Use pre-roll videos to engage learners by making timely announcements related to the course.
- Avoid messaging that encourages learners to leave the course website or participate in activities that are not related to the course content.
The following guidelines can help ensure that the video that you create reaches as many learners as possible.
- The optimum length for a pre-roll video is 5 to 10 seconds. The video player stops playing longer files after 35 seconds.
- Before you create a pre-roll video, be sure to review Create Accessible Media.
- The video must have at least one accompanying transcript.
- The video must be in .mp4 or .mov format. For more information, see Specifications for Successful Video Files in the Processing Video Files guide.
7.2.7.2.2. Upload the Pre-Roll Video File
After you create the file, you upload it on the Studio Video Uploads page. The file goes through the automated encoding and hosting process, and is given an identifying video ID. For more information, see Upload Video Files in the Processing Video Files guide.
7.2.7.2.3. Prepare Pre-Roll Video Transcript Files
You must provide at least one transcript file for your pre-roll video. You can provide additional transcript files in multiple languages.
- If you have transcript files in more than one language, edX recommends that you include identifying ISO 639-1 codes in your transcript file names.
- If you supply transcripts in Chinese, you can use supplemental codes to identify the character set used. For a Simplified Chinese transcript, use zh_HANS, and for a Traditional Chinese transcript, use zh_HANT.
To prepare transcript files for a pre-roll video, follow these steps.
On your local computer or network, locate the .srt transcript file or files for the pre-roll video.
If your transcription service delivers your .srt files to YouTube, you must download the files from YouTube and save them locally.
Verify that each transcript file has a unique name. If you have transcript files in more than one language, be sure to include the ISO 639-1 language code as part of the file name. Example file names follow.
edx_preroll_en.srt
edx_preroll_fr.srt
edx_preroll_ru.srt
edx_preroll_zh_HANS.srt
7.2.7.2.4. Upload Pre-Roll Video Transcript Files
To upload transcript files for a pre-roll video into Studio, follow these steps.
- Open your course in Studio.
- Select Content, and then Files & Uploads.
- Upload the files. For more information, see Adding Files to a Course.
7.2.7.3. Configuring a Pre-Roll Video for Your Course
To configure a pre-roll video and its transcript files for your course, you use an advanced setting in Studio. Because the pre-roll video is not part of the course that is defined in the course outline, you do not use a video component to add the pre-roll video.
You can identify only one file as the pre-roll video at a time, but you can replace the file with a new one, or delete the file, at any time.
7.2.7.3.1. Identify the Pre-Roll Video and Its Transcripts
You identify the pre-roll video for your course in Studio. To make finding and entering the information that you need on different pages in Studio easier, edX recommends that you use several browser windows.
To identify the pre-roll video for your course, follow these steps.
Open three browser windows, and open your course in Studio in each one.
In one of the browser windows, select Content, and then Video Uploads. On this page, locate the video ID of the pre-roll video file.
In another window, select Content, and then Files & Uploads. On this page, verify that each transcript file has a Studio URL.
In the last browser window, select Settings, and then Advanced Settings. On this page you configure the course pre-roll video.
Scroll down to the Video Pre-roll policy key.
Between the braces in this field, enter
"video_id":and then a space, followed by the ID value in quotation marks from the Video Uploads page.{"video_id": "83cef264-d6f5-4cf2-ad9d-0178ab8c92cd"}
After the closing quotation mark, add a comma and a space.
{"video_id": "83cef264-d6f5-4cf2-ad9d-0178ab8c92cd", }
After the comma and the space, enter
"transcripts": {}.Inside the pair of braces for the transcripts, you enter a value pair to identify the language of the transcript file and then its file name from the Files & Uploads page.
Note
You identify the language of each transcript file with an ISO 639-1 code or with zh_HANS or zh_HANT. If your transcript file names do not already include a language code, you will need a reference such as this list of ISO 639-1 codes.
{"video_id": "83cef264-d6f5-4cf2-ad9d-0178ab8c92cd", "transcripts": {"en": "edx_preroll_en.srt"}}
You add the language code in quotation marks, followed by a colon and a space, and then add the file name in quotation marks. To identify transcript files in Chinese, you can include
"zh_HANS"for Simplified Chinese or"zh_HANT"for Traditional Chinese. Note that you enter only the file name for each transcript, and not its complete Studio URL.- If you have other transcript files, you add them in comma separated pairs
after your first
"language": "URL"pair.{"video_id": "83cef264-d6f5-4cf2-ad9d-0178ab8c92cd", "transcripts": {"en": "edx_preroll_en.srt", "zh_HANS": "edx_preroll_zh_HANS.srt", "zh_HANT": "edx_preroll_zh_HANT.srt"}}
- Select Save Changes. Studio resequences and reformats your entry.
Scroll back to Video Pre-roll to verify that your entry was saved as you expect. Entries that do not contain all of the required punctuation characters revert to the previous value when you save, and no warning is presented.
{
    "transcripts": {
        "en": "edx_preroll_en.srt",
        "zh_HANS": "edx_preroll_zh_HANS.srt",
        "zh_HANT": "edx_preroll_zh_HANT.srt"
    },
    "video_id": "83cef264-d6f5-4cf2-ad9d-0178ab8c92cd"
}
7.2.7.3.2. Replace the Pre-Roll Video and Its Transcripts
You can change the pre-roll video for your course at any time.
Note
The replacement pre-roll video is not shown to learners who have already selected the Do not show again option.
To replace the pre-roll video for your course, follow these steps.
- Add the new pre-roll video file to your course on the Video Uploads page.
- Add the transcript files for the pre-roll video on the Files & Uploads page.
- On the Advanced Settings page, edit the Video Pre-roll policy key.
- Replace the previous video ID with the ID for the new pre-roll video file.
- Replace the previous transcript file names with the new names. If needed, be sure to update the language codes for the transcripts.
- Select Save Changes.
7.2.7.3.3. Remove the Pre-Roll Video
To remove the pre-roll file from your course, follow these steps.
On the Advanced Settings page, delete the contents of the Video Pre-roll field.
Enter a pair of braces in the field.
{}Select Save Changes.