Embedded DevKit Basics
The following documentation provides the basics about working with the Embedded DevKit's IDE, Source-Navigator. This documentation assumes that you have already configured your embedded environment; if you haven't, see Setting Up for Embedded Work, Creating a Target Filesystem Image, Configuring and Building the Kernel, and Setting Up Targets.
With Source-Navigator, there are essentially five steps to building your project:
-
Create a project and edit its source code.
-
Compile your source code with the GNU compiler into intermediate
object files.
-
Link your object files together with the GNU linker to produce an executable file.
-
For embedded development, download the kernel, your executable and the
gdbserver
utility to the board.
-
Debug the executable file with Insight to find any problems.
The Source-Navigator database stores all information about file names, symbol elements, and symbol relationships (functions and global variables are examples of symbols). The minimum requirements for building source code include specifying which source files should be included, the path to the directory in which the build should be stored, the linking rules used, the debugging and optimization flags used, and included paths.To create a project, see Creating a New Project. For more information about using Source-Navigator, see
User's Guide
from Source-Navigator's
Help
menu. After you understand how the interface components work, see Developing for Embedded Systems.
For help with new concepts and terms, see Glossary.
Creating a New Project
The following tutorial explains how to create a new project, while introducing you to working with Source-Navigator.
-
Create a directory in which to store your project files.
-
Launch Source-Navigator with the following command.
snedk
The first time you launch Source-Navigator,
an initial "splash screen" appears and then an empty
Projects
window opens (Projects window).
Projects
window
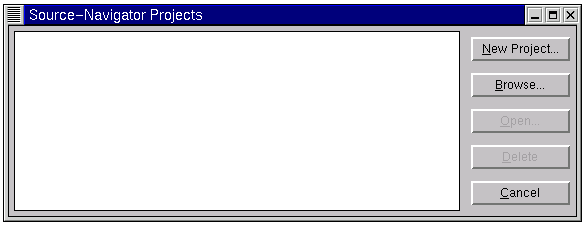
-
With the window active, click
New Project.
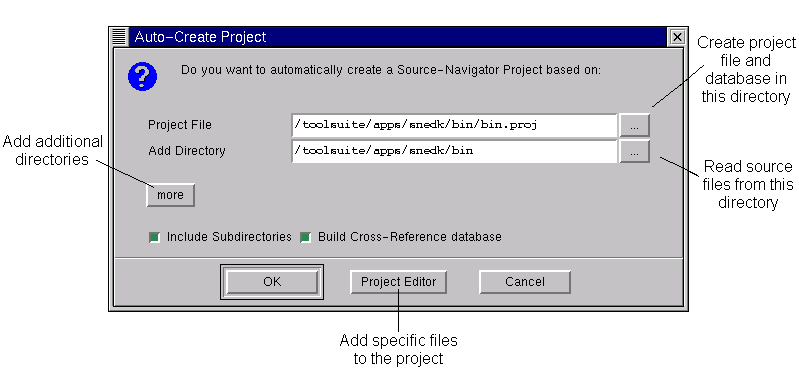
The
Auto-Create Project
dialog appears (see Auto-Create Project dialog).
Auto-Create Project
is a quick way to start a new project if all your project's source files already
reside in a single directory (or a small number of directories) and if you want all the files from that directory in your project. After you create a project, you will see it listed in the
Projects
window.
Auto-Create Project
dialog
-
Use the "..." button next to the
Project File
field to select the location of the project file, the directory that
you created in Step 1. The
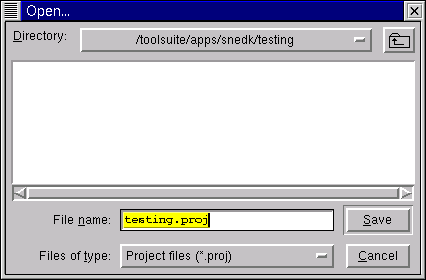
Open
dialog then appears (Open dialog)
for providing a name for the project file.
Open
dialog
-
Enter the name of your new project with its
.proj
file extension. Press
Enter. The
Open
dialog closes. The path and name of the project appears in the
Project File
field of the
Auto-Create Project
dialog. You can only set the path once for a project. If the
Add Directory
field of the
Auto-Create Project
dialog does not point to the project directory, use the
"..." button to navigate to it.
-
Click
OK
when done and the
Scanning Project
window appears (Scanning Project
window).
Scanning Project
window
-
After the scanning completes, the empty
Symbol Browser
appears (Empty Symbol Browser).
Empty
Symbol Browser
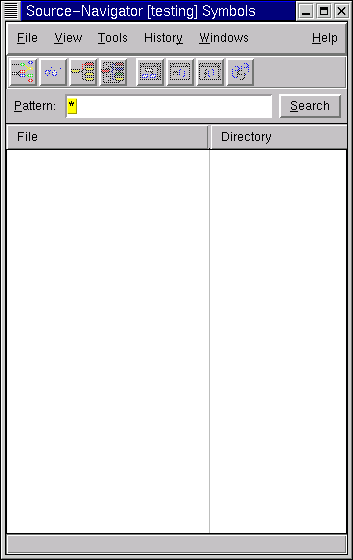
The
Symbol Browser
is empty because there are no files in the project. This window
normally lists files and symbols for the selected directories. For
more specific information, see Using the
Symbol Browser.
-
From the
Windows
menu, select
New View
->
Editor
to create a new file. The
Editor
appears.
-
Enter your code and save the file. Use
Save as
to update the
Symbol Browser
with the new file.
Fast Save
does not update the
Symbol Browser.
-
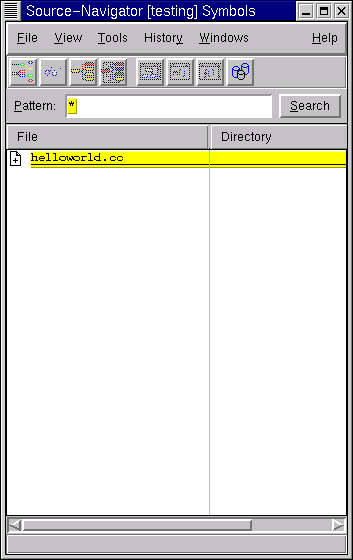
Click the
Symbol Browser
window to see the newly created file (helloworld.cc
in New file added in Symbol Browser).
New file added in
Symbol Browser
Working with a New Project
In the following tutorial, you will use
existing source code and create the
c++_demo.proj
project.
-
Change to the following directory:
/opt/redhat/edk-000221/snavigator/share/demos
-
Uncompress the archive by typing:
tar xvfz c++_demo.tar.gz
-
From the
Symbol Browser, select
File
->
New Project. The
Auto-Create Project
dialog appears (Auto-Create Project dialog).
-
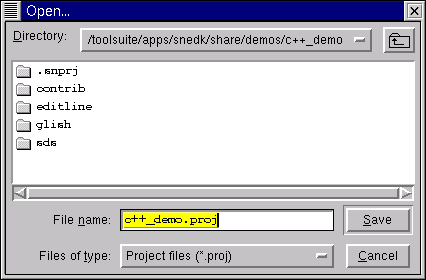
To create a new project from existing files,
click the "..." button next to the
Project File
field. The
Open
dialog appears (Open dialog).
Open
dialog
-
Enter
c++_demo.proj
as the name of the project. Navigate to:
/opt/redhat/edk-000221/snavigator/share/demos
Click Save.
- Click the
Add Directory button.
-
Select the
c++_demo
directory. Click
OK.
-
Click OK in the Auto-Create Project dialog.
-
Having created a project, the
Symbol Browser
opens. See Using the Symbol Browser and Source-Navigator's
Help
menu for information.
Using the Symbol Browser
After creating a project,
the
Symbol Browser
opens. The
Symbol Browser
provides a view of the
symbols
within the project.
Symbols refer to variables, labels, and procedures in a
program. Typically, every global function and variable in a C program will have a
symbol with which it associates.
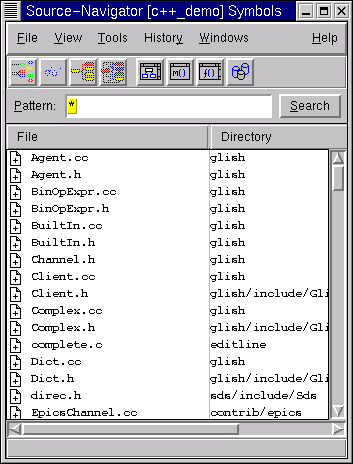
Sort a list in the
Symbol Browser
by symbol type or by a text string. Type it into the
Pattern:
field (see Symbol Browser for the files for the
c++_demo
project).
If you click on the icon to the left of the file or symbol name, you can expand the list view to a tree view of the file or symbol.
If you double-click on a file or symbol name, the
Editor
opens.
If you select a symbol in the source code, the selected file opens at the location of the symbol.
Symbol Browser
For the other browser windows, menus and
buttons accessible from Source-Navigator along with descriptions of their
functionality, see User's Guide from Source-Navigator's
Help menu for more details and the following documentation.
The
Symbol Browser
window has
browser
buttons (see Browser buttons and its
accompanying descriptions) and
filter
buttons (see Filter buttons and its accompanying descriptions).
Browser
buttons
|

|
The
Hierarchy Browser
button
helps you understand class hierarchy trees.
|
|

|
The
Class Browser
button lets you browse class hierarchies, access levels, and member types.
|
|

|
The
Cross-Referencer
button
shows relationships within the project's symbol database, such as the function call hierarchy tree.
|
|

|
The
Include Browser
button displays
Includes
and
Included By
relationships, simultaneously.
|
Filter buttons
|

|
The
Classes
button restricts the symbol list to display only classes.
|
|

|
The
Methods
button restricts the symbol list to display only methods.
|
|

|
The
Functions
button restricts the symbol list to display only functions.
|
|

|
The
Project Files
button restricts the symbol list to display only the project's files.
|
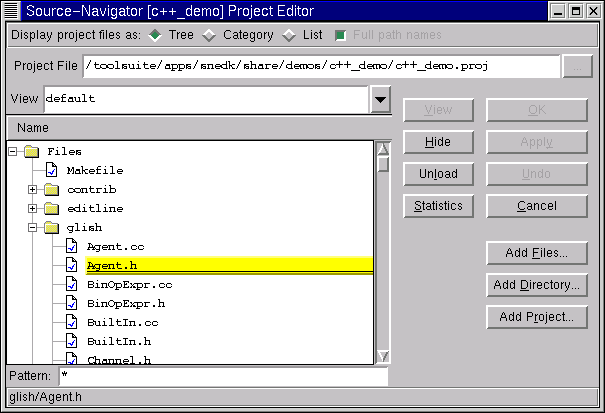
Using the Project Editor
Use the
Project Editor
to create a new project, to add files or directories to an existing project, or to delete files or directories from an existing project. With the
Project Editor, you can perform the following functions.
Add or remove files or directories from a project
Hide files or directories in the filesystem tree view
Import files from another project
To open the
Project Editor
from the
Symbol Browser, use
File
->
Project Editor. Project Editor shows the
Project Editor
with a source file selected (in Project Editor,
Agent.h).
Project Editor
See Source-Navigator's
Help
menu
for more information on the
Project Editor.
Using the Editor
Items in the project database are hyperlinked in the
Editor
(Using the Editor). When you double-click on a symbol anywhere within a project, the
Editor
displays the location of that selected symbol in your source code.
Using the
Editor
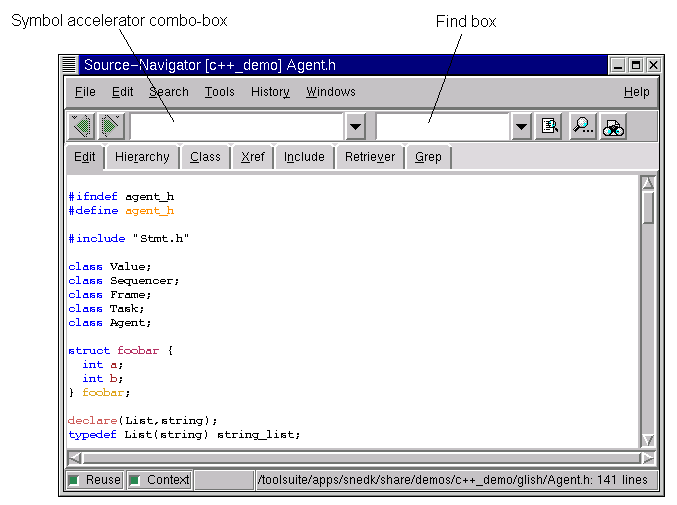
The
Symbol Accelerator
combo-box allows you to navigate quickly through the code. With the
Editor
open, the
Symbol Accelerator
lists all of the symbols either within the open file or within the entire project.
When other browsers are open, the
Symbol Accelerator
lists the components relative to that browser.
Complex Editor views
Use the Source-Navigator view tabs to have a different view of a selected symbol. For instance, if a class name is highlighted, and you select the
Xref
tab, you see a tree view of the
inheritance
line of that class. To combine multiple browsers into a single window, use the following steps.
-
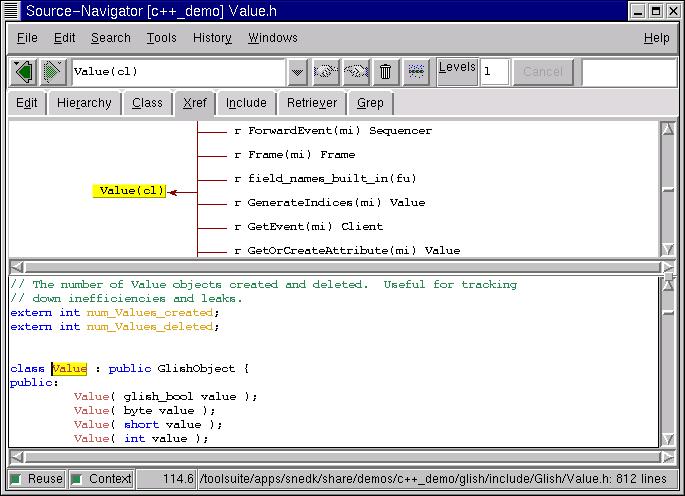
With the
Cross-Reference Browser
active, select
Windows
->
Add View
->
Editor. In the
Cross-Reference Browser, select a class from the sources to draw a hierarchy diagram referenced in the
Editor
(see Viewing sources in Cross-Reference Browser
and the Editor).
With this combined browser view, you can examine the code syntax in the
Editor
pane, and understand the project-wide context of the class in the
Cross-Reference Browser
pane.
Viewing sources in
Cross-Reference Browser
and the
Editor
-
To remove the
Editor, select
Windows
->
Add View
->
Delete Last View.
-
Combining any browser with any other browser, see any symbol in the context of another displayed in a single window. The number of simultaneous browsers is limited by your screen size.
Using the Cross-Reference Browser
The
Cross-Reference Browser
helps you to understand complex source code by showing the
Refers-to
and
Referred-by
relationships between symbols in a project, using their respective buttons (see Buttons that help show cross-referencing relationships).
Buttons that help show cross-referencing relationships
|

|
Refers-to
shown by arrow or finger pointing right
|
|

|
Referred-by
shown by arrow or finger pointing left
|
You can traverse the tree and expand or collapse the elements within the tree, using the following procedure.
-
Open the
Agent.h
file from the
Symbol Browser
.
-
Highlight the
Agent
class.
-
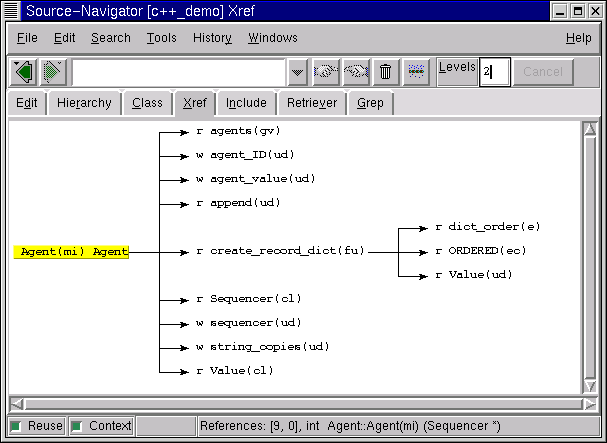
To display cross-references, select the
Xref
tab in the
Editor (Results of using the Refers-to button). From the
Cross-Reference Browser, list variables within a project. Selecting one shows which functions call it.
-
Click on the
create_record_dict(fu)
function and click the
Refers-to
button.
Results of using the
Refers-to
button
-
Click on different cross-referenced items and the
Refers-to
and
Referred-by
buttons in the toolbar become active.
