In this chapter we will get hands-on and create a few demo applications with [fleXive]. These applications are part of the binary and source distributions, but you can also download them as separate projects:
- helloworld is our canonical hello-world application,
- tutorial01-documentstore show some of the document-handling capabilities in [fleXive],
- products shows a localized frontend for a product database realized in [fleXive] that also has pretty URLs and a URL-based locale selector ("/de" and "/en"), and
- announcement-submission shows a basic security setup of a publishing application with two usergroups ("editors" and "users").
To run any of these, unzip them to a local directory. Unzip the [fleXive] distribution from the
download page in the same directory, remove the precompiled examples from
flexive-dist/applications,
and execute
ant
in the example directory. You can then deploy the
dist/[example-name].ear
file to your application server. For example (using Linux):
$ unzip flexive-dist.zip
$ unzip example-helloworld.zip
$ ls
flexive-dist helloworld

$ cd helloworld
$ ant
$ ls dist
helloworld.ear  helloworld-shared.jar  helloworld.war
Before setting out on your own, you might also want to read Chapter 4, Writing [fleXive] applications , which also explains how to use Apache Maven as your build tool.
Our first [fleXive] application implements a very simple blogging system with an input mask and a view for the submitted entries. We assume you have a flexive installation up and running on your local or on a remote machine. If not, follow the instructions in Chapter 2, Installing [fleXive]. The complete source code can be found here or in the subversion repository under src/examples/helloworld.
First we create a new [fleXive] project: go to the directory where you unpacked the distribution,
and execute
ant project.create.
You will be prompted for the name of the new project. Enter
helloworld
and confirm your input. If all went well, the output should look like the following:
/tmp/flexive-dist$ ant project.create
Buildfile: build.xml

check:

project.create:
    [input] Name of the project you want to create:
helloworld
  [flexive]
  [flexive] Please confirm your input:
  [flexive] Project name:        helloworld
  [flexive] Base directory:      ../helloworld
  [flexive]
    [input] Are these settings correct? ([y], n)
y
    [mkdir] Created dir: /tmp/helloworld
     [copy] Copying 13 files to /tmp/helloworld
     [copy] Copied 29 empty directories to 6 empty directories under /tmp/helloworld
     [copy] Copying 1 file to /tmp/helloworld
     [copy] Copying 1 file to /tmp/helloworld
     [echo] Project helloworld created successfully. The project root directory is
     [echo] ../helloworld

BUILD SUCCESSFUL
The new project is created in the parent directory of the distribution, i.e. in
../helloworld,
and looks like this:
flexive-dist
|-- ...

helloworld
|-- build.xml
|-- database.properties
|-- lib
|-- resources
|   |-- META-INF
|   |   |-- faces-config.xml
|   |   `-- web.xml
|   |-- messages
|   |-- scripts
|   |   |-- library
|   |   |-- runonce
|   |   `-- startup
|   `-- templates
|-- src
|   `-- java
|       |-- ejb
|       |   `-- ...
|       |-- shared
|       |   `-- ...
|       `-- war
|           `-- ...
`-- web
    `-- index.xhtml
-
helloworld/src/java -
contains the Java sources of the application.
-
helloworld/resources/scripts -
contains [fleXive] scripts that will be used to setup the data structures needed by the application.
-
helloworld/web -
contains the XHTML pages and the web configuration files.
We start with defining the data model of the application. Our blog entry consists of a
posting title and the actual text. To set up the data model when deploying the application,
we create a
run-once script
in the
resources/scripts/runonce/
directory,
hello001.groovy.
A straight-forward way of setting up [fleXive] structures is by using the
GroovyTypeBuilder
for [fleXive] types, using the Groovy scripting language.
import com.flexive.shared.scripting.groovy.* import com.flexive.shared.value.* import com.flexive.shared.structure.* new GroovyTypeBuilder().blogEntry(label: new FxString(true, "Blog Entry"), usePermissions: false) { //caption(assignment: "ROOT/CAPTION") entryTitle(multiplicity: FxMultiplicity.MULT_1_1, label: new FxString(true, "Title")) //
entryText(multiplicity: FxMultiplicity.MULT_1_1, label: new FxString(true, "Text"), multiline: true) //
}
|
The method call blogEntry(...) will create the [fleXive] type "BlogEntry" (type names are not case sensitive). For the first tutorial, we will disable [fleXive] security completely for this type by setting usePermissions to false. |
|
Create a new property assignment for the blog entry type that is referenced with the path "/entryTitle". The multiplicity of 1..1 indicates a mandatory field, the label will be shown in the input forms. |
|
The text property is created similar to the title, but we add a "multiline" option since we don't want to enter our blog text in a single line. |
The next step is to define a JSF bean that provides the blog postings
to be shown on the front page of our application. We create a managed bean under
src/java/war,
which will be automatically compiled and packaged into the WAR archive.
import com.flexive.faces.model.FxResultSetDataModel; import com.flexive.shared.exceptions.FxApplicationException; import com.flexive.shared.search.FxResultSet; import com.flexive.shared.search.SortDirection; import com.flexive.shared.search.query.SqlQueryBuilder; import javax.faces.model.DataModel; public class HelloWorldBean { private DataModel blogEntries; public DataModel getBlogEntries() throws FxApplicationException { if (blogEntries == null) { final FxResultSet result = new SqlQueryBuilder() .select("@pk", "entryTitle", "entryText", "created_at") //
|
We choose the columns to be selected for the result set:
|
|
To display the newest postings first, we order by descending creation date
( |
For the web interface of the application we use JSF 1.2, using Facelets for creating the JSF views (i.e. we use plain XHTML templates instead of JSP). [fleXive] includes components for rendering and editing [fleXive] contents in JSF applications, although you could also use other web framework like Struts or Tapestry - you'd just miss the convenient UI components that allow a rapid creation of web applications based on [fleXive].
If you are not familiar with JSF tag libraries please refer to the Tag Library Documentation or try the JSF section of the Java EE 5 Tutorial.
The main page renders all available blog entries and shows a link to a form
for creating new entries. Facelets'
<ui:repeat/>
tag is used to iterate over the rows of the datamodel returned by the JSF bean we created in the
previous
section. A row of the datamodel provides indexed access to the columns selected in the
search query of the previous section.
In this case,
#{columns[0]}
would be the content primary key
(@pk),
#{columns[1]}
returns the entry title, and so on. The source for this file can be found under
web/index.xhtml.
                <!DOCTYPE html PUBLIC "-//W3C//DTD XHTML 1.0 Transitional//EN"
        "http://www.w3.org/TR/xhtml1/DTD/xhtml1-transitional.dtd">
<html xmlns="http://www.w3.org/1999/xhtml"
      xmlns:ui="http://java.sun.com/jsf/facelets"
      xmlns:h="http://java.sun.com/jsf/html"
      xmlns:f="http://java.sun.com/jsf/core"
      xmlns:c="http://java.sun.com/jstl/core"
      xmlns:fx="http://www.flexive.com/jsf/core">
<head>
    <fx:includes/>
</head>

<body>

<h:outputLink value="create.xhtml">Create a new entry</h:outputLink>

<!-- Render available blog postings, as returned by helloWorldBean.blogEntries -->

<!-- The Facelets ui:repeat tag is used to iterate over arrays, lists and JSF datamodels -->
<ui:repeat value="#{helloWorldBean.blogEntries}" var="column">
    <h3>
        <!-- Entry title. Access the value of each column through the expression language
         and the column index -->
        #{column[1]}
    </h3>
        <pre>#{column[2]} <!-- Entry text -->

            <i>#{column[3]}</i> <!-- Creation date -->
        </pre>
</ui:repeat>

<p><h:outputLink
        onclick="window.open('http://wiki.flexive.org/confluence/display/FX/Listing+blog+entries', 'In_depth_explanation', 'width=950,height=600,left=50,top=200,scrollbars=yes,resizable=yes');"
        value="#">
    What happens on this page?
</h:outputLink>
</p>

</body>

</html>
The input form for creating new postings is placed in
web/create.xhtml
and uses the
<fx:content/>
and
<fx:value/>
components provided by [fleXive] to create a simple input form for [fleXive] contents.
All you need to provide is the name of the type you want to use as template
(blogEntry)
and the references to the properties to be rendered
(entryTitle,
entryText).
Finally, a JSF command link is used to render a button for saving the entered data.
The save command is executed by a [fleXive] system bean,
fxContentViewBean.
                <!DOCTYPE html PUBLIC "-//W3C//DTD XHTML 1.0 Transitional//EN"
        "http://www.w3.org/TR/xhtml1/DTD/xhtml1-transitional.dtd">
<html xmlns="http://www.w3.org/1999/xhtml"
      xmlns:ui="http://java.sun.com/jsf/facelets"
      xmlns:h="http://java.sun.com/jsf/html"
      xmlns:f="http://java.sun.com/jsf/core"
      xmlns:c="http://java.sun.com/jstl/core"
      xmlns:fx="http://www.flexive.com/jsf/core">
<head>
    <title>Flexive Helloworld Application</title>
    <fx:includes yui="true"/>
</head>

<body class="yui-skin-sam">

<h:form>
    <!-- Display all JSF messages -->
    <h:messages/>

    <p><h:outputLink value="index.xhtml">Back to blog</h:outputLink></p>

    <!-- The fx:content tag references our type "Blog Entry" -->
    <fx:content typeName="blogEntry" var="entry">

        <!-- This renders an html input field for the type's property "Entry Title" -->
        <fx:value property="entryTitle"/>

        <!-- This renders an html input field for the type's property "Entry Text" -->
        <fx:value property="entryText"/>

        <!-- Save content using the FxContentViewBean, pass the content instance
             stored in component_content via f:setPropertyActionListener -->
        <h:commandButton action="#{fxContentViewBean.save}" value="Publish">
            <f:setPropertyActionListener target="#{fxContentViewBean.content}" value="#{entry_content}"/>
        </h:commandButton>

    </fx:content>
</h:form>

<p><h:outputLink
        onclick="window.open('http://wiki.flexive.org/confluence/display/FX/Creating+a+blog+entry', 'In_depth_explanation', 'width=950,height=600,left=50,top=200,scrollbars=yes,resizable=yes');"
        value="#">
    What happens on this page?
</h:outputLink>
</p>

    <fx:yuiSetup/>

</body>
</html>
In the
resources/META-INF
directory you find the configuration files for the (web) application. Since the provided
web.xml
already uses sensible defaults for running [fleXive] applications, all you need to do
is register your JSF bean in
resources/META-INF/faces-config.xml
and add navigation rules between the overview and the create page:
    <managed-bean>
        <managed-bean-name>helloWorldBean</managed-bean-name>
        <managed-bean-class>HelloWorldBean</managed-bean-class>
        <managed-bean-scope>request</managed-bean-scope>
    </managed-bean>

    <!--  A navigation rule for our input mask, if the content is saved successfully,
     "success" is returned, which leads to a direct rendering and response
     of the index.xhtml view. The entries made via the input mask are shown
     in this view. -->
    <navigation-rule>
        <from-view-id>/create.xhtml</from-view-id>
        <navigation-case>
            <display-name>success</display-name>
            <from-outcome>success</from-outcome>
            <to-view-id>/index.xhtml</to-view-id>
        </navigation-case>
    </navigation-rule>
To compile and deploy the framework and the example application simply run
ant in the project directory (helloworld). If the compilation was successful,
you find your application packaged under
dist/helloworld.ear.
You can then deploy this EAR to your application server, assuming that you followed the
installation instructions.
If you already have a [fleXive] EAR deployed in this instance, be sure to undeploy it before
you deploy
helloworld.ear.
If you used the
Java-based installer, you can deploy and run the application with
ant deploy.jetty run.jetty.
If you need to setup or reset the database schema, update your database connection settings in
hello-world/database.properties
or
flexive-dist/database.properties
and run
ant db.create
in the corresponding directory.
After deploying the application, point your browser to http://localhost:8080/flexive/adm/ to open the administration GUI (default credentials: supervisor/supervisor), or http://localhost:8080/helloworld/ to open the application. Congratulations! You should see a link to the input mask.
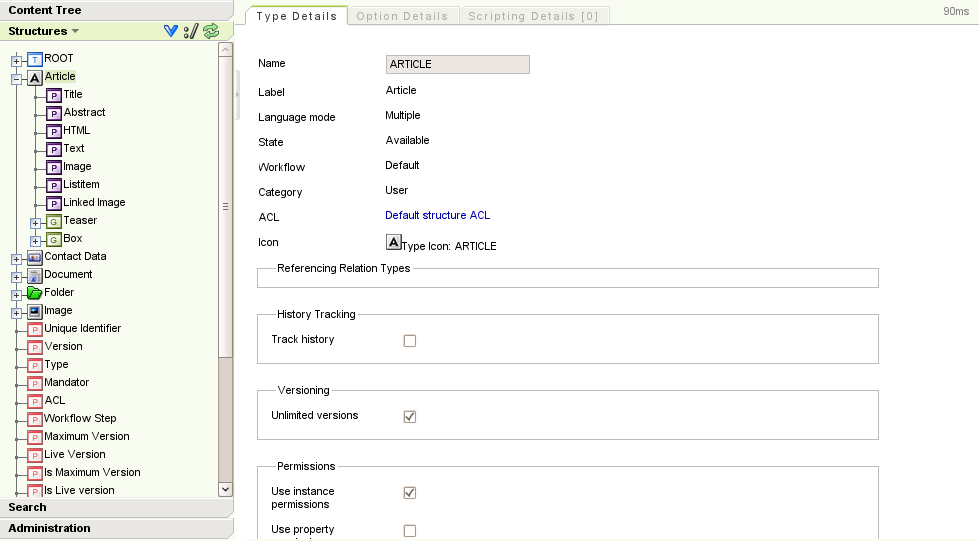
You can find the datastructures of the hello-world application in the administration GUI's structure editor. Log on to the administration GUI and expand the tab named "Structure". flexive/adm/ You should be able to see the type Blog Entry in the tree. Expand it and click on one of the properties. In the "Edit Property Assignment" tab in the right frame you can see the properties originally set in the hello001.groovy script.