
")

In this tutorial you will:
create a routing project
add endpoints to a route
connect two endpoints
configure endpoints
To create a Fuse IDE project:
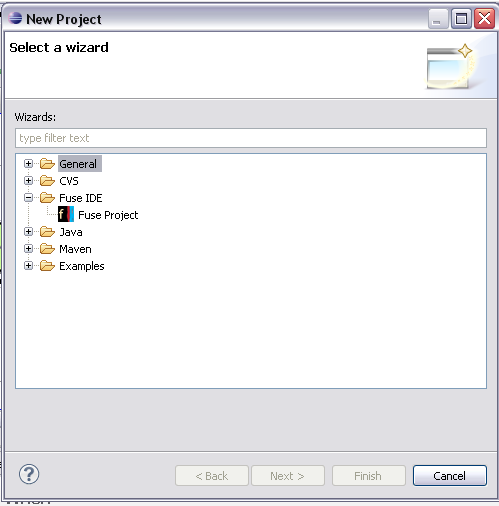
Select ||.
The Select a Wizard dialog, shown in Figure 1.1, opens.
Select |.
Click .
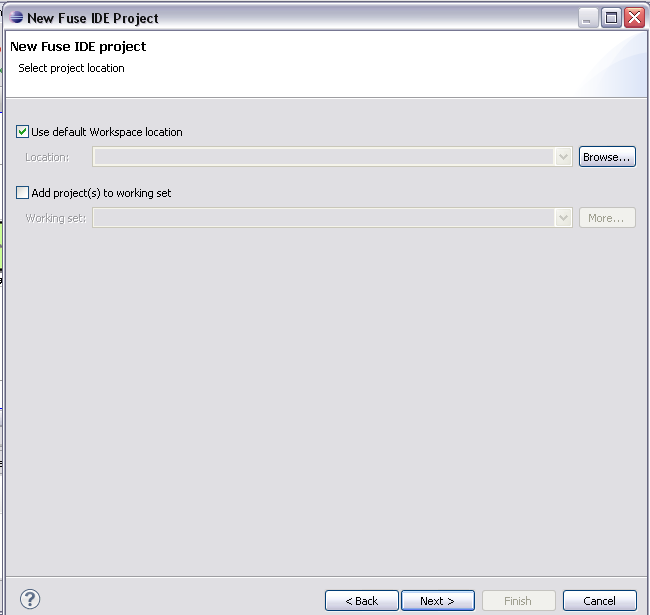
The New Fuse IDE Project wizard, shown in Figure 1.2, opens.
Click .
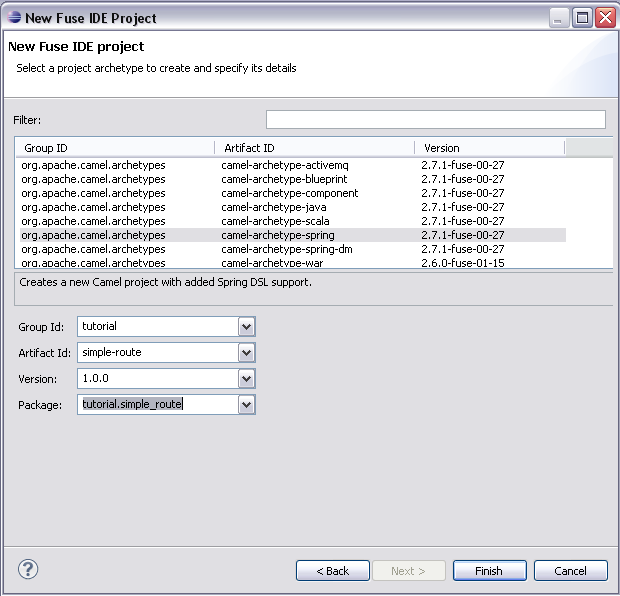
The Fuse IDE Project details page, shown in Figure 1.3, appears.
Select
camel-archetype-spring.Enter
tutorialin the Group Id: field.Enter
simple-routein the Artifact Id: field.Enter
1.0.0in the Version: field.Click .
This will create a Fuse IDE project that contains everything needed to create and run routes. The generated files include:
simple-route/pom.xml—the Maven project file.simple-route/src/main/resources/META-INF/spring/camel-context.xml— the Spring XML file containing the routing rules.
To create the new route:
Locate
simple-route/src/main/resources/META-INF/springin the Project Explorer.Delete the
camel-context.xmlfile.We are going to replace this with our own route.
Select
simple-route/src/main/resources/META-INF/springin the Project Explorer.Open the context menu.
Select |.
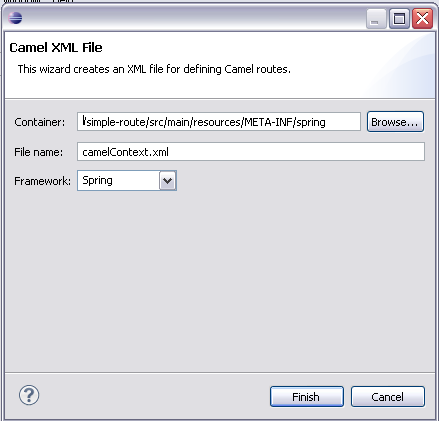
The Camel XML File wizard, shown in Figure 1.4, opens.
![[Tip]](imagesdb/tip.gif)
Tip If the option is not in the menu, you can find it by selecting | to open the New wizard filter. The Camel XML File wizard is under Other.
Enter
/simple-route/src/main/resources/META-INF/springin the Container: field.Tip The button opens a dialog listing all of the active projects and folders from which you can choose.
Enter
camelContext.xmlin the File Name: field.Select from the Framework drop down list.
Click .
The new file will open in the route editor as shown in Figure 1.5.
Drag an Endpoint element (
 ) from the pallet into the route square.
Drag a second Endpoint element from the pallet into the route square.
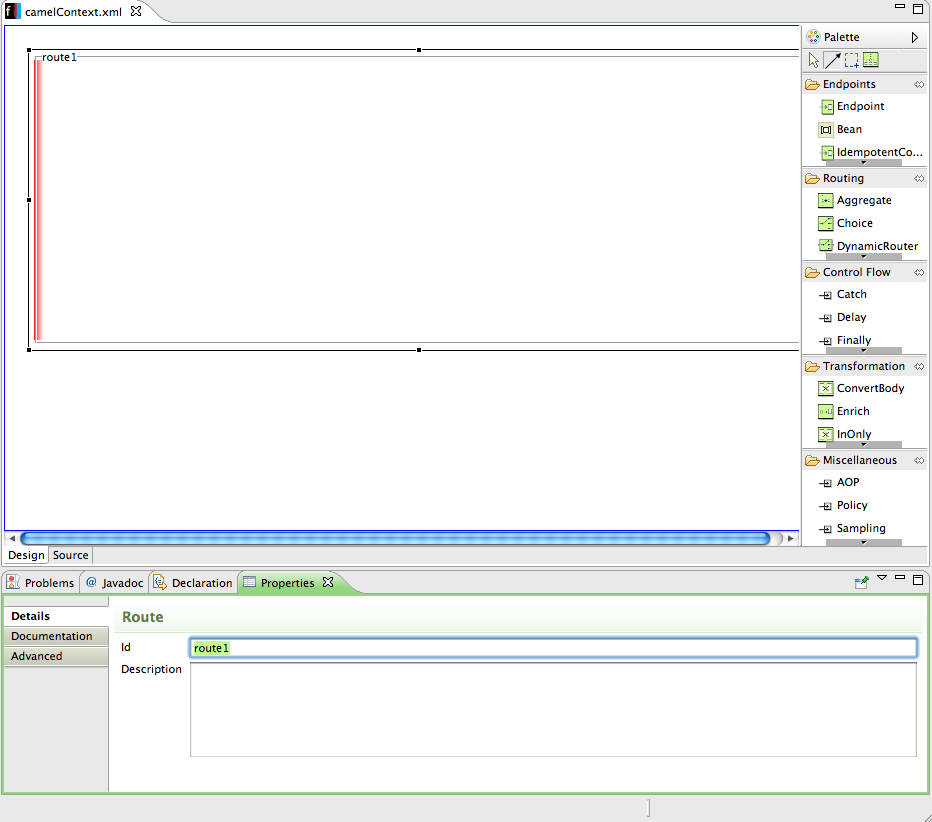
Select the first endpoint on the canvas.
The property editor below the canvas will change to accept endpoint properties as shown in Figure 1.6.
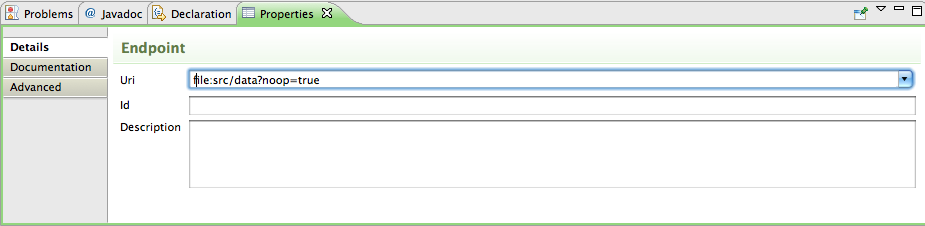
Enter
file:src/data?noop=truein the Uri field.Select the second endpoint on the canvas.
Enter
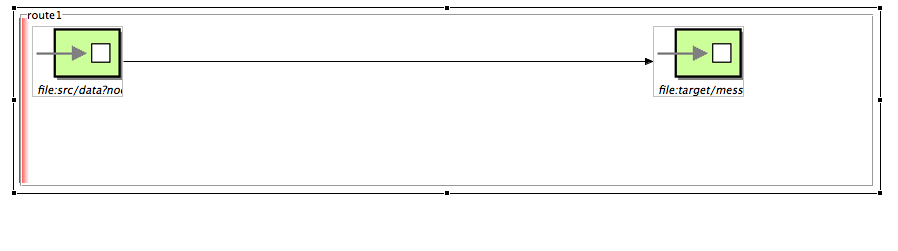
file:target/messages/othersin the Uri field.Click on the first endpoint and drag a connector to the second endpoint.
When you release the cursor on the second endpoint a line will connect the two endpoints as shown in Figure 1.7.
Select | to save the route.
Click the Source tab on the bottom of the editor canvas.
You will see the XML for the route. The
camelContextelement will look like Example 1.1.Example 1.1. XML for simple route
<camelContext xmlns="http://camel.apache.org/schema/spring" trace="false">
  <route>
    <from uri="file:src/data?noop=true"/>
    <to uri="file:target/messages/others"/>
  </route>
</camelContext>
After you have created and designed your route, you can run it by deploying it into your Apache Camel runtime as described in Running a Route.
To learn more about:
using the editor see Using Fuse IDE
Apache Camel endpoints see Component Reference.
 |  | |
 |
