

|
This section contains the following topics: |
|
|
|
A database can be created using Visual DBA, if available in your environment, or by using Ingres commands and SQL statements.
The process for creating a database is as follows:
Note: Examples used in this guide are from the Ingres demonstration database, demodb.
|
|
|
The Ingres Visual DBA suite of tools is available on Windows.
The process for creating a database using the Ingres visual tools is as follows:
|
|
|
Before you can create database objects, you must connect to Ingres.
To connect to Ingres using Visual DBA
The Ingres Visual DBA window is displayed.
All your virtual nodes for the Ingres instance are displayed.
You are connected to the node. The Database Object Manager (DOM) is displayed, which shows all database objects for the node.
|
|
|
To create a database using Visual DBA, use the Create Database dialog.
To create a database
 .
.The Create Database dialog appears.
The fields in this sample dialog are filled in as if creating the demodb database.
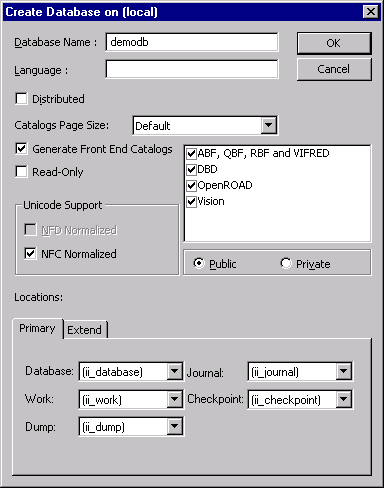
You are notified that the database has been created successfully.
|
|
|
After you create a database, you can create its tables, indexes, and other database objects.
To create a base table
.The Create Table dialog appears.
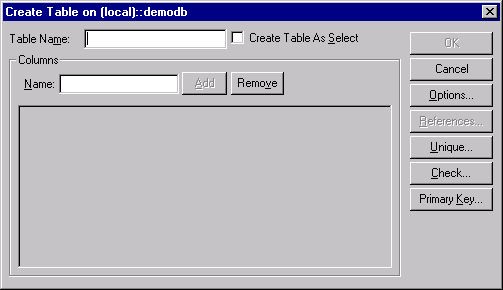
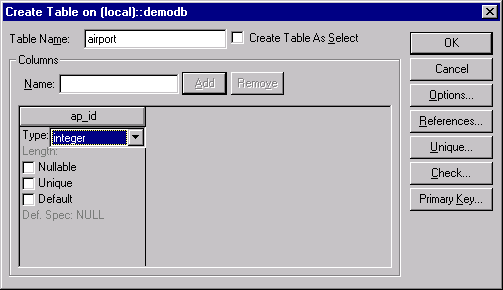
In the sample dialog below, the airport table in the demodb database is being created.
Note: You can create a table from another table by selecting the Create Table As Select check box. For detailed information about each option, see the Visual DBA online help.
A column is added to the column layout box.
The table is created and appears under the Tables object category branch, as shown in this example:
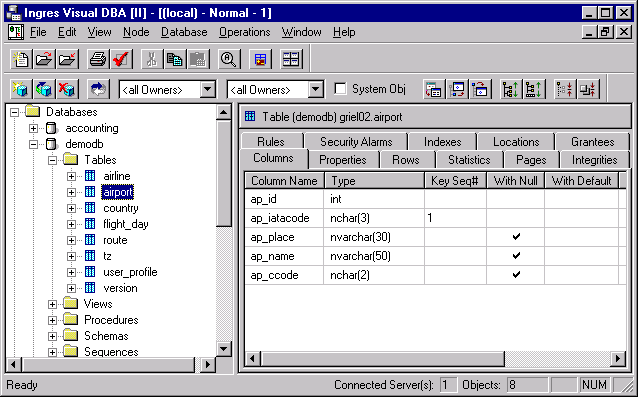
After a table and its columns are defined, you can then populate the table with data from a file. You can also create an index to improve query processing and define a view, or virtual table, to limit access to specific columns.
|
|
|
You can populate a table with data by importing the data from a file. The Ingres Import Assistant can import data from various file types.
In this example, we use a CSV file located in %II_SYSTEM%\ingres\demo\data\airport.csv.
Note: The airport table in the demodb is already populated. This sample procedure creates a new table called temp, which you can delete (drop) after this exercise.
To import data from a file using the Import Assistant
 on the toolbar in Visual Manager.
Step 1 of 4 of the Import Assistant is displayed.
Step 2 of 3 of the Import Assistant (File Format Identification) is displayed.
The Import Assistant displays each of its interpretations of the data as a tab.
Check the Tab corresponds to expected results box and press Next.
Step 3 of 4 of the Import Assistant (Column Properties) is displayed.
The utility assigns default values to column properties.
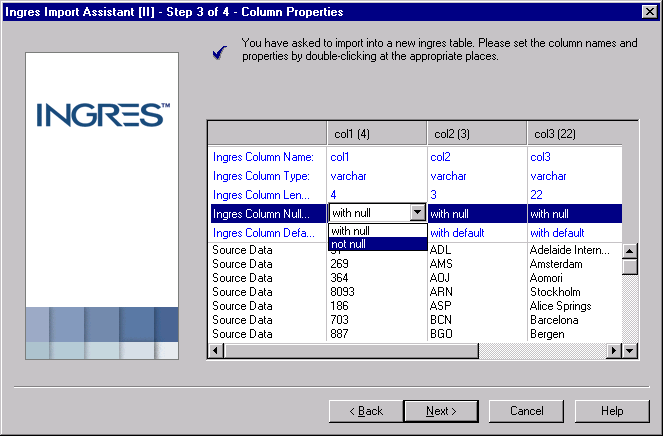
Change the properties of the other columns, as needed.
Note: When importing into Unicode columns, use the data type char or varchar. Ingres will coerce the values to Unicode using the appropriate Unicode mapping, indicated by the value of the Ingres environment variable II_CHARSET.
Press Next.
Step 4 of 4 of the Import Assistant (Import Preview) is displayed.
Note: If the file was large, you could commit every 1000 rows to avoid filling the transaction log file.
The new table is populated.
You are asked if you want to import another file.
The Import Assistant closes.