JGroups can be downloaded here. For this tutorial, I'm using the binary version of JGroups 2.5, so the ZIP file to download is JGroups-2.5.0.bin.zip. Note that JGroups 2.5 requires JDK 1.5 or higher.
Unzip JGroups-2.5.0.bin.zip into a directory JGroups-2.5.0.bin. The contents of the directory are
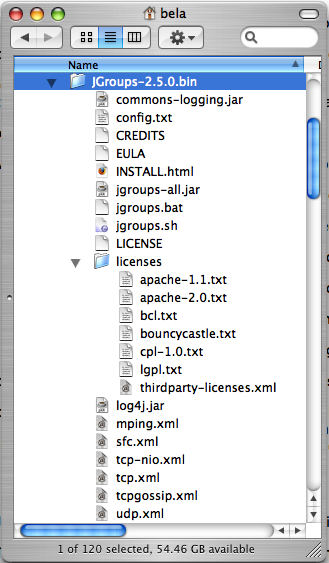
The most important files are:
- jgroups.bat and jgroups.sh: scripts to run a JGroups application (including the correct JARs and XML files)
- INSTALL.html: detailed configuration instructions plus trouble shooting
- commons-logging.jar: required JAR that provides general logging. This might get dropped in 3.0
- jgroups-all.jar (required): JGroups functionality, including demo and junit apps. If a smaller JAR is required, this can be done by downloading the source distribution and invoking the "jar" target, which creates a jgroups-core.jar file (ca 1MB).
- log4j.jar (optional): commons-logging can also use JDK logging
-
Various XML file: different JGroups configurations, e.g.
- mping.xml: TCP based stack with dynamic discovery
- sfc.xml: UDP (using IP multicasting) based stack with simple flow control
- tcp-nio.xml: TCP based stack with fixed configuration (list of nodes) using NIO (thread pool for all TCP connections)
- tcp-nio.xml: TCP based stack with fixed configuration (list of nodes) using plain TCP (1 thread / TCP connection)
- tcpgossip.xml: tunnel based configuration which routes messages to a remote GossipRouter, used to tunnel firewalls
- udp.xml: default IP multicast based configuration
- config.txt: configuration file for performance tests
Add jgroups-all.jar and commons-logging.jar to your CLASSPATH. If you use the log4j logging system, you also have to add log4j.jar (this is not necessary if you use the JDK logging system).
As an alternative, you can also use jgroups.bat. Note that jgroups.sh requires work, as it uses backslashes (developed under Cygwin/Windows), so it is currently not usable under UNIX as is.
To see whether your system can find the JGroups classes, execute the following command:
java org.jgroups.Version
or
java -jar jgroups-all.jar
You should see the following output (more or less) if the class is found:
            $ java -jar jgroups-all.jar

            Version:        2.5.0
            CVS:            $Id: installation.xml,v 1.3 2007/07/16 11:04:12 belaban Exp $
            History:        (see doc/history.txt for details)
To test whether JGroups works okay on your machine, run the following command twice:
java org.jgroups.demos.Draw
2 whiteboard windows should appear as shown in Figure 1.2, “Screenshot of 2 Draw instances”.
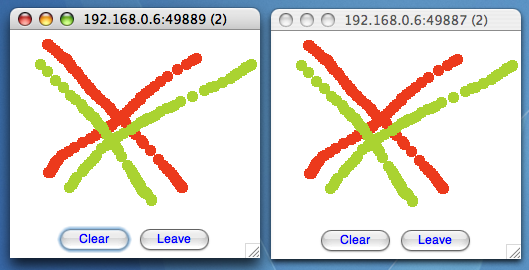
If you started them simultaneously, they could initially show a membership of 1 in their title bars. After some time, both windows should show 2. This means that the two instances found each other and formed a group.
When drawing in one window, the second instance should also be updated. As the default group transport uses IP multicast, make sure that - if you want start the 2 instances in different subnets - IP multicast is enabled. If this is not the case, the 2 instances won't 'find' each other and the sample won't work.
If the 2 instances find each other and form a cluster, you can skip ahead to the next chapter ("Writing a simple application").
(You may skip this section if the 2 instances found each other correctly in the previous section).
Sometimes there isn't a network connection (e.g. DSL modem is down), or we want to multicast only on the local machine. To do this, we can use the loopback device (127.0.0.1):
java -Djgroups.bind_addr=127.0.0.1 org.jgroups.demos.Draw
You should again see 2 instances of Draw which form a cluster. If this is not the case, you may have to add a multicast route to the loopback device (this requires superuser or admin privileges):
route add -net 224.0.0.0 netmask 240.0.0.0 dev lo
This means that all traffic directed to the 224.0.0.0 network will be sent to the loopback interface, which means it doesn't need any network to be running.
Typical home networks have a gateway/firewall with 2 NICs: the first (eth0) is connected to the outside world (Internet Service Provider), the second (eth1) to the internal network, with the gateway firewalling/masquerading traffic between the internal and external networks. If no route for multicast traffic is added, the default will be to use the fdefault gateway, which will typically direct the multicast traffic towards the ISP. To prevent this (e.g. ISP drops multicast traffic, or latency is too high), we recommend to add a route for multicast traffic which goes to the internal network (e.g. eth1).
If the 2 Draw instances don't find each other, read INSTALL.html, which comes with JGroups and has more detailed trouble shooting information. In a nutshell, there are multiple possible reasons the cluster doesn't form:
- A firewall discards packets. To verify this, turn the firewall off. If the cluster forms, then turn the firewall back on and selectively add rules to let JGroups traffic pass.
- Use of IPv6. JGroups does work with IPv6, but some JDK implementations still have issues with it, so you can turn IPv6 off by passing the "-Djava.net.preferIPv4Stack=true" system property to the JVM.
-
You don't use the right network interface (NIC): define the NIC with the jgroups.bind_addr system
property:
java -Djgroups.bind_addr=192.168.5.2 java.org.jgroups.demos.Draw - There is no multicast route for the chosen NIC.