Contents
| - | Tutorial Requirements |
| - | Creating the Sample Database |
| - | Creating a Partial Template |
| - | Adding Ajax Support |
| - | Adding RJS For Dynamic Updates |
| - | Doing More: Applying Visual Effects |

Contributed by Brian Leonard, maintained by Gail Chappell
December 2007 [Revision number: V6.0-4]
In this tutorial, you add Ajax support to a NetBeans Ruby on Rails project. The example shows how to dynamically append comments to a web log.
Contents
|
|
This tutorial requires the following technologies and resources:
mysqladmin -u root -p create rubyweblog_developmentNote: If the root user does not have a required password, omit the -p argument.
Open the rubyweblog project in the IDE.
Note: The first time that you open or create a Ruby project in the IDE, the IDE checks if you have any other Ruby installations in addition to the bundled JRuby software. If you do, the IDE displays a dialog box asking you to select which software to use. Choose JRuby if you want to use the bundled JRuby interpreter, or choose your Ruby installation if you prefer to use it instead. For more information, see Configuring the IDE to Use Your Own Ruby Installation in the Installing and Configuring Ruby tutorial.If your database requires a password, edit the database.yml file and provide the password under
the development configuration. Save the file.
database.yml file, press Alt+Shift+O (Ctrl+Shift+O on the Mac), type database.yml in the File Name text box, and press Enter.Right-click the rubyweblog node and choose Migrate Database > To Current Version.
This action updates the database to include the posts table and comments table. The Output window indicates when the migration is complete.Click Permalink and add a comment to the post.
Note that the entire page reloads when you add the comment.Currently in the rubyweblog project, whenever a reader adds a comment to the page, both the blog entry and comments are reloaded on the page. A better solution is to load the comments dynamically by using the Ajax support that is part of the Ruby on Rails framework. To prepare for using Ajax, you create a partial template in which to store the code for displaying the comments. The benefit of using a partial is that you can call the partial multiple times (once for each comment in the blog) without rendering the blog entry itself.
Right-click the rubyweblog node and choose New > RHTML file. Name the file _comments and place it in the app\views\blog folder.
The IDE creates the _comments file and opens it in the editing area. Note that the partial template begins with an underscore (_) to distinguish it from a
full template.
show.rhtml. In the next step, you remove this code from show.rhtml and paste it into the _comments.rhtml partial template. Go to the rubyweblog > Views > blog folder and open show.rhtml. Cut the code for displaying the comments (shown in Code Sample 1). Paste the code into _comments.rhtml,
replacing all existing content in the file.
Code Sample 1: Code to cut from show.rhtml and paste into _comments.rhtml |
<ul>
<% for comment in @post_comments %>
<li><%= comment.comment %><br>
  <div style="color: #999; font-size: 8pt">
      Posted on <%= comment.created_at.strftime("%B %d, %Y at %I:%M %p") %>
  </div>
</li>
<% end %>
</ul>
|
Return to the show.rhtml file and insert the following HTML <div> tag. Add the code under <h4>Comments</h4>, at the point where you previously removed the code.
Code Sample 2: <div> tag for show.rhtml |
<div id="comments">
    <%= render(:partial => "comments", :object => @post_comments) %>
</div>
|
@post_comments variable contains the comments that the _comments partial displays.Choose File > Save All, then run the application.
Click Permalink and add a comment to a post.
At this point, the application behaves exactly as it did before. However, now your application is designed so that you can start using Ajax support.The first step in adding Ajax support to your project is to include the JavaScript libraries, Prototype and script.aculo.us. These libraries are bundled with Ruby on Rails. The Prototype library provides the foundation for the Ajax implementation in Ruby on Rails, while the script.aculo.us library provides visual effects that you can add to your application.
blog.rhtml file. Add the following
line of code, below the line containing stylesheet_link_tag:
<%= javascript_include_tag :defaults %>
This code includes the JavaScript libraries, Prototype and script.aculo.us, which are bundled with Ruby on Rails.
The next step is to create a form_remote_tag to trigger the Ajax action.
show.rhtml file. Remove the existing form_tag, which performs a HTTP POST, and replace it with the following form_remote_tag,
which performs an XMLHTTPRequest.
<% form_remote_tag :url => {:action => "post_comment"} do %>
This code triggers the Ajax action for the post_comment action in the blog.controller.rb file. At this point, the entire page still reloads when a reader submits a comment. The post_comment action forces the reload by calling the show action. The final step is to edit the blog_controller.rb file to remove the call. blog_controller.rb file.post_comment action and comment out the redirect_to call.
# redirect_to :action => 'show', :id => flash[:post_id]If you now run the application and add a comment, the comment is not displayed. You must next insert a Ruby JavaScript (RJS) template to handle the XMLHTTPRequest.
The final step is to use the built-in RJS support to dynamically update comments on the blog.
Under the Views node, right-click the blog node and choose New -> Empty RJS Template.
post_comment and place it in the app\views\blog folder.
Remove the existing page object and insert the following page object in its place.
  page.replace_html "comments", :partial => "comments", :object => @post_comments
  page[:comment_comment].clear
Recall that the show.rhtml file includes an HTML div tag
named comments (see Code Sample 2). In the first line of code, replace_html uses DHTML to dynamically replace the portion of the
HTML code that falls between the div tags in show.rhtml with the HTML code in the partial _comments.rhtml. The @post_comments variable contains the comments that the _comments partial
displays. The second line of code clears the text box after the user submits a comment.
@post_comments is nil. If you look again at the blog_controller.rb file, @post_comments is set in the show action, which you no longer call. So now you must edit the blog_controller.rb file.Open the blog_controller.rb file and add the following three lines after the redirect you commented out earlier in the post_comment action:
Code Sample 3: Update for the blog_controller.rb File |
#redirect_to :action => 'show', :id => flash[:post_id] @post = Post.find(flash[:post_id]) @post_comments = @post.comments.collect flash[:post_id] = @post.id #Store the post.id back in the flash |
The first line of code calls flash,
which is similar to an HTTP session, but across a single request.
When you put an item in the flash, that item is available for the next request,
but then is gone (hence the term "flash").
This code gets the post_id from the flash (which is 1, 2, or so on) and uses
it to find the blog post associated with that id.
The second line of code pulls the entire collection of comments for that post into the
@post_comments variable, which is then passed to the _comments partial.
post_id back into the flash so it is ready for the next comment a reader submits.
Run the project and verify that the comments are dynamically updated.
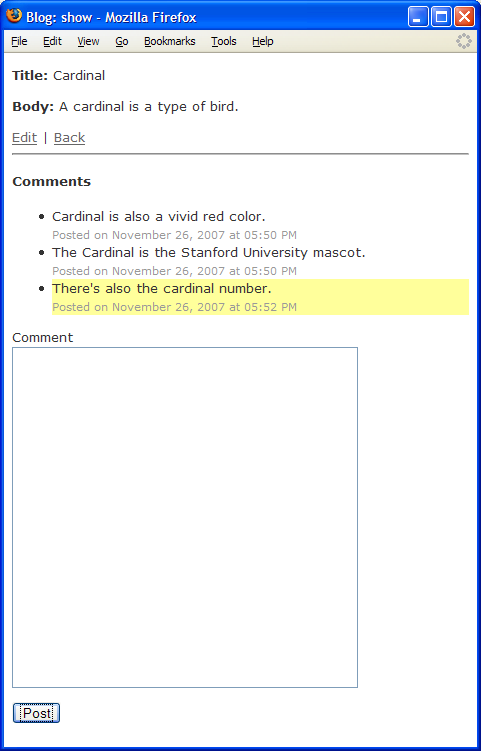
The script.aculo.us library, which you included earlier in your project, provides visual effects that you can use to enhance the look and feel of your application. Here you apply an effect to highlight the most-recent comment in the blog. After you apply this effect, you can easily swap in and try out other effects in the script.aculo.us library.
Open the _comments.rhtml file and replace the line <li> <%= comment.comment %><br> with the following block of code:
| Code Sample 4: Code to Determine Most Recent comment |
<% if @post_comments.index(comment) == @post_comments.length-1 %>
        <li id="new_comment"><%=h comment.comment %><br>
    <% else%>
        <li><%=h comment.comment %><br>
    <% end %>
|
new_comment because it is the one to which you want to apply the visual effect.
Switch to the post_comment.rjs file and add the following line, which highlights the new comment:
page[:new_comment].visual_effect :highlight
Choose File > Save All, then refresh the browser. Add a comment and note how the new comment is briefly highlighted.
Figure 1: View of Comment Model, With Highlighting
To obtain support and stay informed of the latest changes to the NetBeans Ruby development features, join the [email protected] and [email protected] mailing lists.