| December, 2007 [Revision number: V6.0] |
In this tutorial, you use NetBeans IDE 6.0 to create an application that includes two page fragments. One fragment holds the application's logo. The second fragment holds links for navigating between the pages in the application. |
Expected duration: 20 minutes
Contents |
|
Sample company logo used in this tutorial |
» sky.jpg |
This tutorial works with the following technologies and resources:
| JavaServer Faces Components/ Java EE Platform |
||||
| Travel Database | ||||
* To take advantage of NetBeans IDE 6.0's Java EE 5 capabilities, use an application server that is fully compliant with the Java EE 5 specification, such as GlassFish.
This tutorial has been tailored for use with the GlassFish v2 Application Server. If you are using a different server, consult the Release Notes and FAQs for known problems and workarounds. For detailed information about the supported servers and Java EE platform, see the Release Notes.
A page fragment is a portion of a page, such as a header, footer, or navigation bar, that can be reused in other pages. For example, you might put a common element such as a graphic or a Search field in a page fragment and then include that fragment as a header in all pages in the application. You might also include your company name and copyright information in a page fragment and use that fragment as your application's footer. Like a main page, a page fragment is a JSP page with its own associated page bean; however, the file extension of a page fragment is jspf instead of jsp.
Create a new web application project and call it FragmentExample. Enable the Visual Web JavaServer Faces framework.
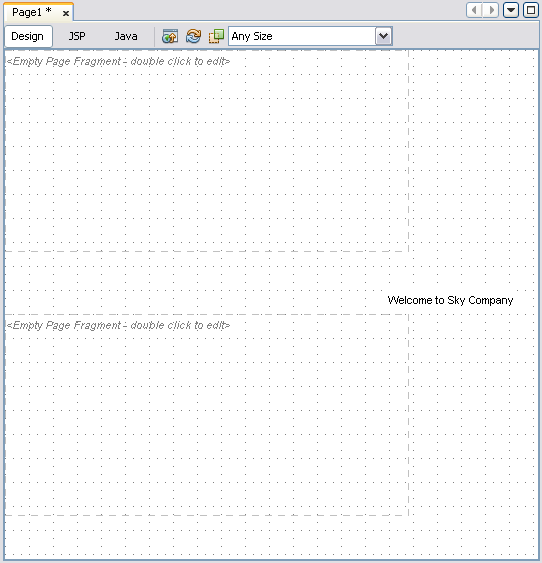
Figure 1 shows the page that you will create in the steps that follow:
 Figure 1: Application Home Page
 |
From the Layout section of the Components Palette, drag a Page Fragment Box component onto the upper left corner of the page.
The Select Page Fragment dialog box opens.Click Create New Page Fragment. Type CompanyLogo in the Name field and click OK.
<div> block in the Navigator window.Click Close to close the Select Page Fragment dialog box.
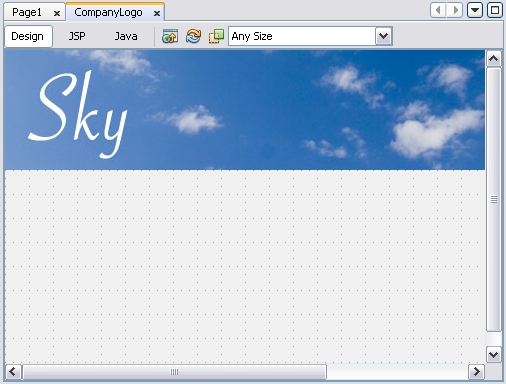
The dotted line in the Visual Designer shows the size of the page fragment. The default size is 400 pixels wide by 200 pixels high.Navigation.Welcome to Sky Company.Title property to Sky Company Home. Now you define the content of the CompanyLogo fragment, as shown in Figure 2. Any changes you make to a fragment must be made in the fragment itself, and not in the page.
 Figure 2: CompanyLogo Page Fragment
 |
Open the CompanyLogo fragment by double-clicking the component in the Visual Designer.
The white background shows the size of the page fragment.Width property to 720px and the Height property to 120px.In the Properties window, click the ellipsis button ![]() for the Image's
for the Image's url property. Add the company logo to the page fragment as follows:
sky.jpg, and select the image.sky.jpg to position it within the page fragment's borders. Next you define the content of the navigation fragment as shown in Figure 3.
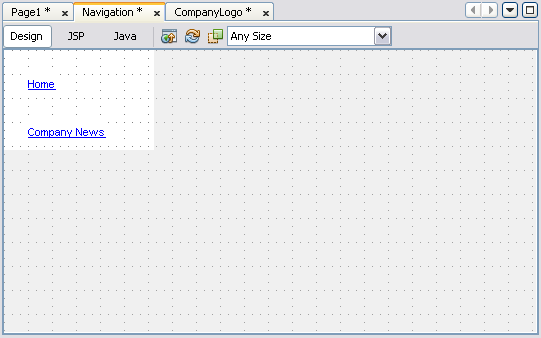
 Figure 3: Navigation Fragment
 |
Width property to 150px and the Height property to 100px.Home.id property to homeLink and the url property to /faces/Page1.jsp.Company News.Set the Hyperlink's id property to newsLink and the url property to /faces/News.jsp.
In the Projects window, right-click the FragmentExample > Web Pages node and choose New > Visual Web JSF Page. Name the new page News and click Finish.
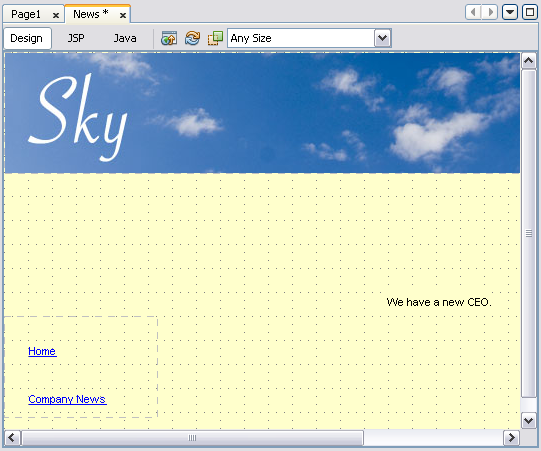
The News page opens in the Visual Designer. You will design the page shown in the figure below.
 Figure 4: News Page
 |
div elements and the Static Text component. Be sure you select the div elements themselves and not just their jsp:directive.include child elements.form1 and select Paste. The components you copied from Page1.jsp appear in the Visual Designer. We have a new CEO.Title property to Sky Company News. Click the ellipsis button ![]() for the
for the Background property and use the color chooser to set the color to light yellow. At runtime you will be able to see a clear distinction between the Sky Company News page and the Sky Company Home page.
Add the following code to the prerender method:
| Code Sample 1: Code to Disable the Link for the Current Page |
public void prerender() {
    Navigation navigationFragmentBean = (Navigation)getBean("Navigation");
    Hyperlink homeLink = navigationFragmentBean.getHomeLink();
    homeLink.setDisabled(true);
} |
Right-click in the Java Editor and choose Fix Imports. The IDE adds the following import statement:
import com.sun.webui.jsf.component.Hyperlink;Add the following code to the prerender method.
| Code Sample 2: Code to Disable the Link for the Current Page |
public void prerender() {
    Navigation navigationFragmentBean = (Navigation)getBean("Navigation");
    Hyperlink newsLink = navigationFragmentBean.getNewsLink();
    newsLink.setDisabled(true);
} |
Right-click in the Java Editor and choose Fix Imports. The IDE adds the following import statement:
import com.sun.webui.jsf.component.Hyperlink;Click the Run Main Project button
![]() to run the application.
to run the application.
This tutorial demonstrates how to use page fragments in a simple two-page application. A real application typically has more pages.
Try It. Add a third page to the FragmentExample application. Be sure to add another Hyperlink component in the Navigation page fragment and set the Hyperlink's url property.
Try It. Another common use for a page fragment is to include a company's copyright information. Add a page fragment at the bottom of each page with width of 720px and height of 100px. Include copyright information such as Copyright 1994-2007 Sky Company.
Here are some things to consider when using page fragments:
The example in this tutorial uses Hyperlink components with their url property set. This approach is recommended for its simplicity, because it does not require you to set the immediate property or set up page navigation. An alternative is to create a page fragment containing a Button or Hyperlink component with its action property set. In this case, you must set the immediate property and also set up the page navigation for each page that uses the fragment.
<from-view-id> tag (for example /Page1.jsp) with a wildcard value such as /*.See Also: