Contents |
|
Installing the Software
Before you begin, you need to install the following software on your computer:
- NetBeans IDE 6.0.
- Java Standard Development Kit (JDK™) version 5.0 or version 6.0
This document takes you through the basics of using NetBeans IDE 6.0 to develop web applications. This document is designed to get you going as quickly as possible. For more information on working with NetBeans IDE, see the Support and Docs page on the NetBeans website. You create, deploy, and execute a simple web application. The application uses a JavaServer Pages™ page to ask you to input your name. It then uses a JavaBeans™ component to persist the name during the HTTP session and repeats the name on another JavaServer Pages page.
Contents |
|
Before you begin, you need to install the following software on your computer:
Leave the Set as Main Project checkbox selected. Click Finish.
The IDE creates the $PROJECTHOME/HelloWeb project folder. The project folder contains all of your sources and project metadata, such as the project's Ant build script. The HelloWeb project opens in the IDE. You can view its logical structure in the Projects window and its file structure in the Files window.Creating and editing source files is the most important function that the IDE serves. After all, that's probably what you spend most of your day doing. The IDE provides a wide range of tools that can compliment any developer's personal style, whether you prefer to code everything by hand or want the IDE to generate large chunks of code for you.
String name;
public NameHandler()
name = null;
    package org.me.hello;

    /**
     *
     * @author Administrator
     */

    public class NameHandler {

	private String name;

        /** Creates a new instance of NameHandler */
        public NameHandler() {
           name = null;
        }

        public String getName() {
           return name;
        }

        public void setName(String name) {
           this.name = name;
        }

    }
In the Palette on the right side of the Source Editor, expand HTML Forms and drag a Form item below the <h2> tags in the Source Editor.
The Insert Form dialog box appears:
Set the following values:
Click OK. The Form is added to the index.jsp file.
Set the following values:
Click OK. The Text Input is added between the <form> tags.
Set the following values:
Click OK. The Button is added between the <form> tags.
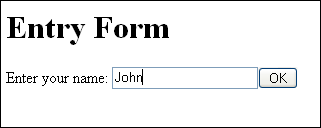
h2 tags to Entry Form. The tags between the <body> tags now look as follows:
<h2>Entry Form</h2><form name="Name Input Form" action="response.jsp" method="GET">
Enter your name: <input type="text" name="name" value="" />
<input type="submit" value="OK" /></form>
The new response.jsp opens in the Source Editor.
Set the following values:
Click OK. The Use Bean is added below the <body> tag.
<h2>Hello, !</h2>
<h2> tags. <jsp:useBean id="mybean" scope="session" class="org.me.hello.NameHandler" /> <jsp:setProperty name="mybean" property="*" /> <h2>Hello, <jsp:getProperty name="mybean" property="name" />!</h2>
The IDE uses an Ant build script to build and run your web applications. The IDE generates the build script based on the options you enter in the New Project wizard and the project's Project Properties dialog box.
The IDE builds the web application and deploys it, using the server you specified when creating the project.
Click OK. The response.jsp page should open and greet you:

For more information about developing web applications in NetBeans IDE 6.0, see the following resources:
To send comments and suggestions, get support, and keep informed on the latest developments on the NetBeans IDE Java EE development features, join the [email protected] mailing list.