Table of Contents
- 3.1. Introduction
- 3.2. The installation process
- 3.3. Keyboard layout
- 3.4. Starting the installation
- 3.5. MBR partitions
- 3.6. Disklabel partitions
- 3.7. Setting the disk name
- 3.8. Last chance!
- 3.9. The disk preparation process
- 3.10. Choosing the installation media
- 3.11. Extracting sets
- 3.12. System configuration
- 3.13. Finishing the installation
This chapter will guide you through the installation process. The concepts presented here apply to all installation methods. The only difference is in the way the distribution sets are fetched by the installer. Some details of the installation differ depending on the NetBSD release: The examples from this chapter were created with NetBSD 5.0.
Note
The following install screens are just examples. Do not simply copy them, as your hardware and configuration details may be different!
The installation process is divided logically in two parts. In the first part you create a partition for NetBSD and write the disklabel for that partition. In the second part you decide which distribution sets (subsets of the operating system) you want to install and then extract the files into the newly created partition(s).
The NetBSD install program sysinst allows you to change the keyboard layout during the installation. If for some reason this does not work for you, you can use the map in the following table.
| US | IT | DE | FR |
|---|---|---|---|
| - | ' | ß | ) |
| / | - | - | ! |
| = | ì | ' | - |
| : | ç | Ö | M |
| ; | ò | ö | m |
| # | £ | § | 3 |
| " | ° | Ä | % |
| * | ( | ( | 8 |
| ( | ) | ) | 9 |
| ) | = | = | 0 |
| ' | à | ä | ù |
| ` | \ | ^ | @ |
| \ | ù | # | ` |
To start the installation of NetBSD, insert your chosen boot media (CD/DVD, USB drive, floppy, etc.) and reboot the computer. The kernel on the installation medium will be booted and start displaying a lot of messages on the screen about hardware being detected.
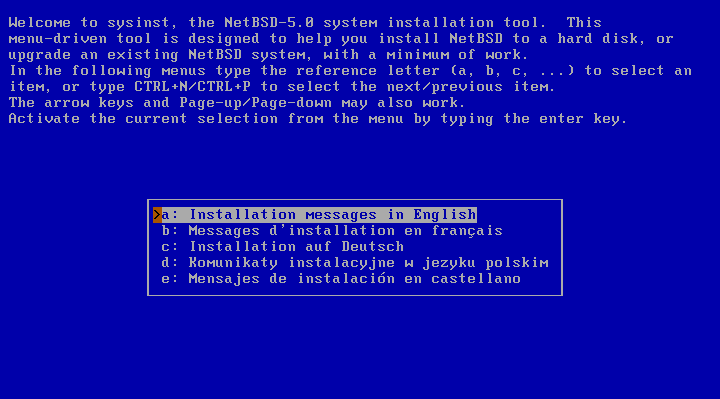
When the kernel has booted you will find yourself in the NetBSD
installation program, sysinst, shown in
Figure 3.1, “Selecting the language”.
From here on you should follow the instructions displayed on the
screen, using the INSTALL document as a companion
reference. You will find the INSTALL document in various
formats in the root directory of the NetBSD release.
The sysinst screens all have more or less
the same layout: the upper part of the screen shows a short
description of the current operation or a short help message, and the
rest of the screen is made up of interactive menus and prompts.
To make a choice, use the cursor keys, the
“Ctrl+N” (next) and “Ctrl+P”
(previous) keys, or press one of the letters displayed left of
each choice. Confirm your choice by pressing the Return
key.
Start by selecting the language you prefer to use for the installation process.
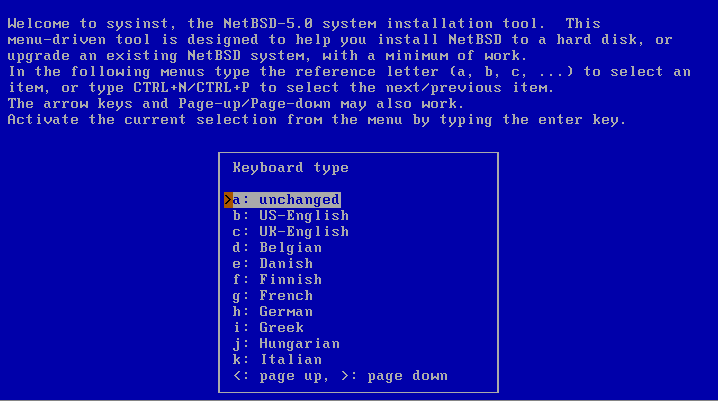
The next screen Figure 3.2, “Selecting a keyboard type” will allow you to select a suitable keyboard type.
This will bring you to the main menu of the installation program (Figure 3.3, “The sysinst main menu”).
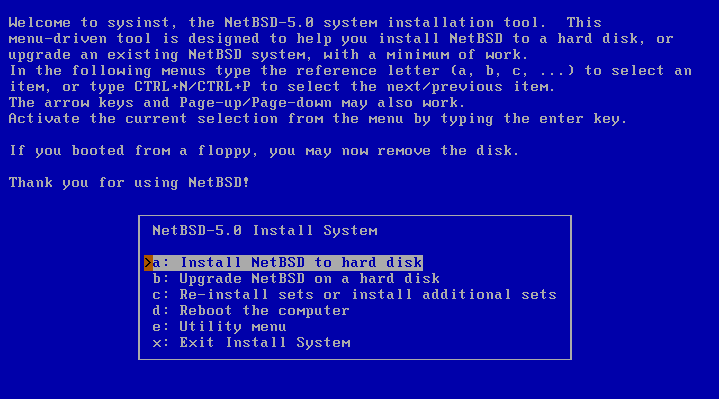
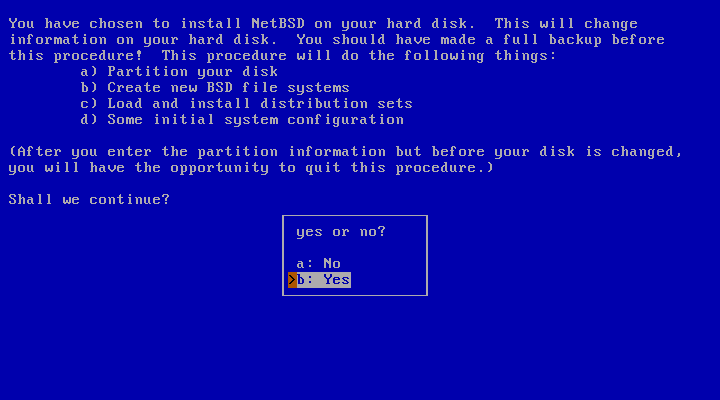
Choosing the “Install NetBSD to hard disk” option brings you to the next screen (Figure 3.4, “Confirming to install NetBSD”), where you need to confirm that you want to continue the installation.
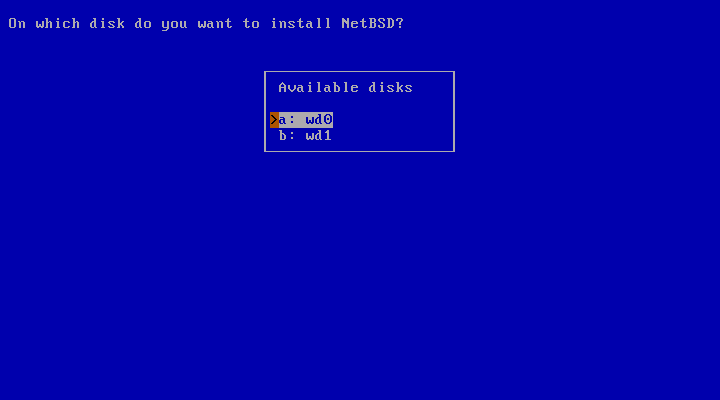
After choosing “Yes” to continue, sysinst displays a list of one or more disks and asks which one you want to install NetBSD on. In the example given in Figure 3.5, “Choosing a hard disk”, there are two disks, and NetBSD will be installed on “wd0”, the first IDE disk found. If you use SCSI or external USB disks, the first will be named “sd0”, the second “sd1” and so on.
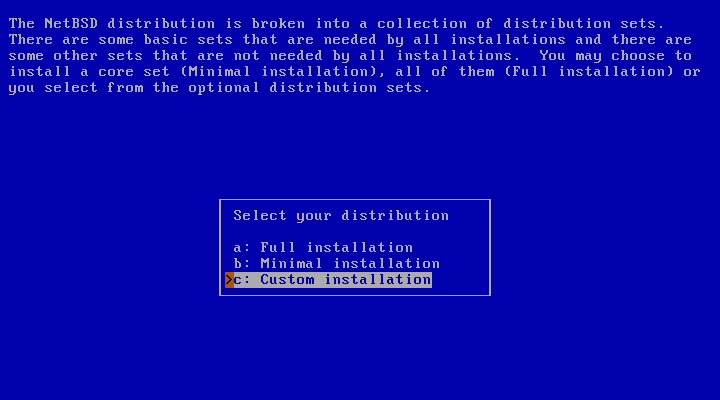
The installer will then ask whether you want to do a full, minimal or custom installation. NetBSD is broken into a collection of distributions sets. “Full installation” is the default and will install all sets; “Minimal installation” will only install a small core set, the minimum of what is needed for a working system. If you select “Custom installation” you can select which sets you would like to have installed. This step is shown in Figure 3.6, “Full or custom installation”.
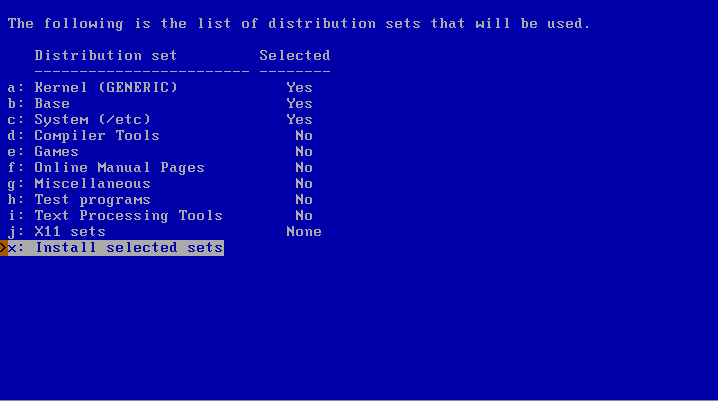
If you choose to do a custom installation, sysinst will allow you to choose which distribution sets to install, as shown in Figure 3.7, “Selecting distribution sets”. At a minimum, you must select a kernel and the “Base” and “System (/etc)” sets.
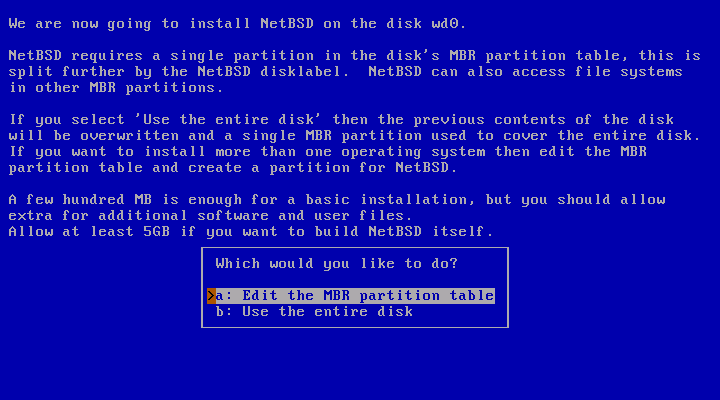
The first important step of the installation has come: the partitioning of the hard disk. First, you need to specify whether NetBSD will use a partition (suggested choice) or the whole disk. In the former case it is still possible to create a partition that uses the whole hard disk (Figure 3.8, “Choosing the partitioning scheme”) so we recommend that you select this option as it keeps the BIOS partition table in a format which is compatible with other operating systems.
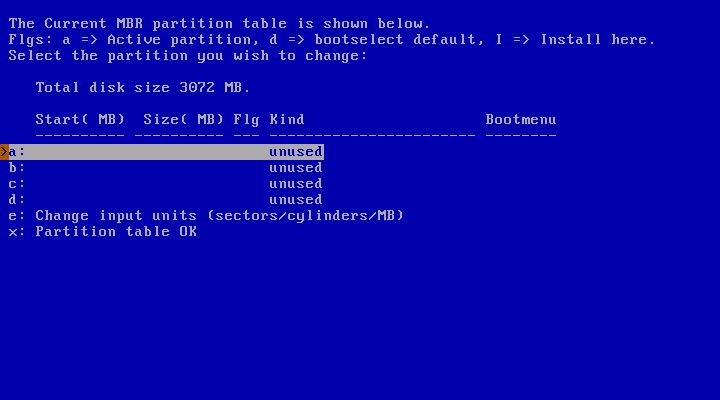
The next screen shows the current state of the MBR partition table on the hard disk before the installation of NetBSD. There are four primary partitions, and as you can see, this example disk is currently empty. If you do have other partitions you can leave them around and install NetBSD on a partition that is currently unused, or you can overwrite a partition to use it for NetBSD.
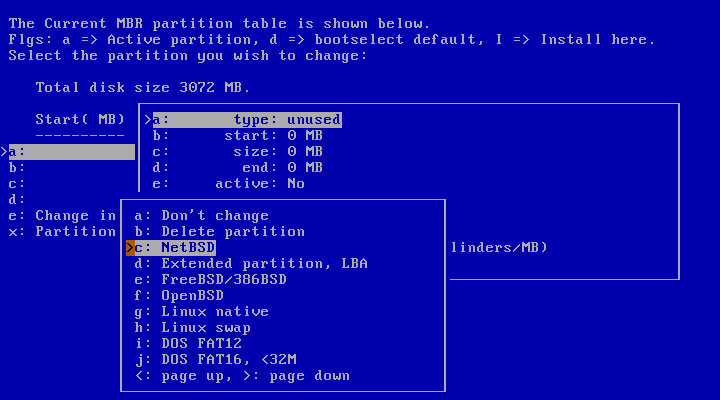
Deleting a partition is simple: after selecting the partition, a menu with options for that partition will appear (Figure 3.10, “Partition options”). Change the partition kind to “Delete partition” to remove the partition. Of course, if you want to use the partition for NetBSD you can set the partition kind to “NetBSD”.
You can create a partition for NetBSD by selecting the partition you want to install NetBSD to. The partition names “a” to “d” correspond to the four primary partitions on other operating systems. After selecting a partition, a menu with options for that partition will appear, as shown in Figure 3.10, “Partition options”.
To create a new partition, the following information must be supplied:
the type (kind) of the new partition
the first (start) sector of the new partition
the size of the new partition
Choose the partition type “NetBSD” for the new partition (using the “type” option). The installation program will try to guess the “start” position based on the end of the preceding partition. Change this value if necessary. The same thing applies to the “size” option; the installation program will try to fill in the space that is available until the next partition or the end of the disk (depending on which comes first). You can change this value if it is incorrect, or if you do not want NetBSD to use the suggested amount of space.
After you have chosen the partition type, start position, and size, it is a good idea to set the name that should be used in the boot menu. You can do this by selecting the “bootmenu” option and providing a label, e.g., “NetBSD”. It is a good idea to repeat this step for other bootable partitions so you can boot both NetBSD and a Windows system (or other operating systems) using the NetBSD bootselector. If you are satisfied with the partition options, confirm your choice by selecting “Partition OK”. Choose “Partition table OK” to leave the MBR partition table editor.
If you have made an error in partitioning (for example you have created overlapping partitions) sysinst will display a message and suggest that you go back to the MBR partition editor (but you are also allowed to continue). If the data is correct but the NetBSD partition lies outside the range of sectors which is bootable by the BIOS, sysinst will warn you and ask if you want to proceed anyway. Doing so may lead to problems on older PCs.
Note
This is not a limitation of NetBSD. Some old BIOSes cannot boot a partition which lies outside the first 1024 cylinders. To fully understand the problem you should study the different type of BIOSes and the many addressing schemes that they use (physical CHS, logical CHS, LBA, ...). These topics are not described in this guide.
On modern computers (those with support for int13 extensions), it is possible to install NetBSD in partitions that live outside the first 8 GB of the hard disk, provided that the NetBSD boot selector is installed.
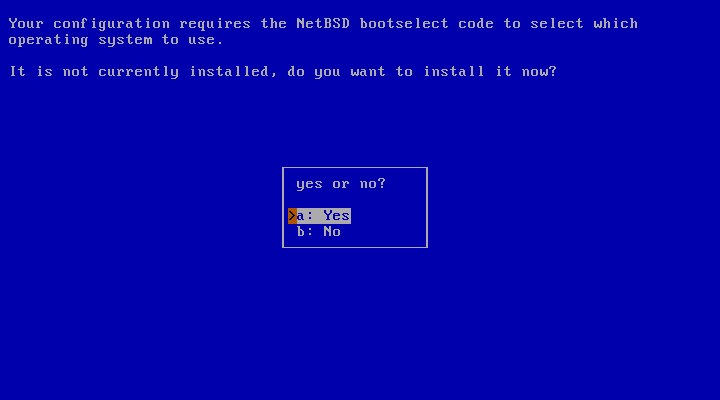
Next, sysinst will offer to install a boot selector on the hard disk. This screen is shown in Figure 3.11, “Installing the boot selector”.
At this point, the BIOS partitions (called slices on BSD systems) have been created. They are also called PC BIOS partitions, MBR partitions or fdisk partitions.
Note
Do not confuse the slices or BIOS partitions with the BSD partitions, which are different things.
Some platforms, like PC systems (amd64 and i386), use DOS-style MBR partitions to separate file systems. The MBR partition you created earlier in the installation process is necessary to make sure that other operating systems do not overwrite the diskspace that you allocated to NetBSD.
NetBSD uses its own partition scheme, called a disklabel, which is stored at the start of the MBR partition. In the next few steps you will create a disklabel(5) and set the sizes of the NetBSD partitions, or use existing partition sizes, as shown in Figure 3.12, “Edit partitions?”.
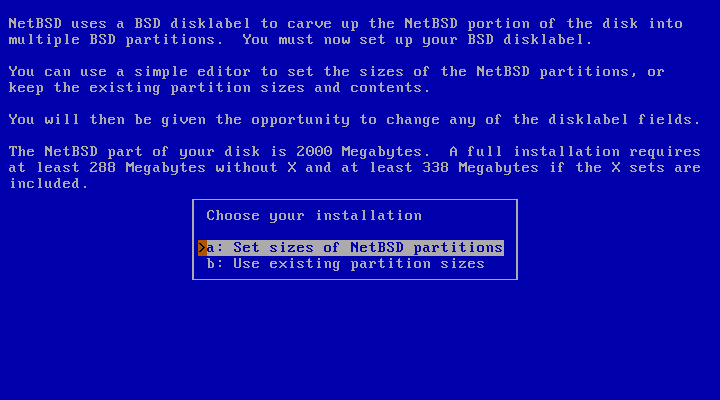
When you choose to set the sizes of the NetBSD partitions you can define the partitions you would like to create. The installation program will generate a disklabel based on these settings. This installation screen is shown in Figure 3.13, “Setting partition sizes”.
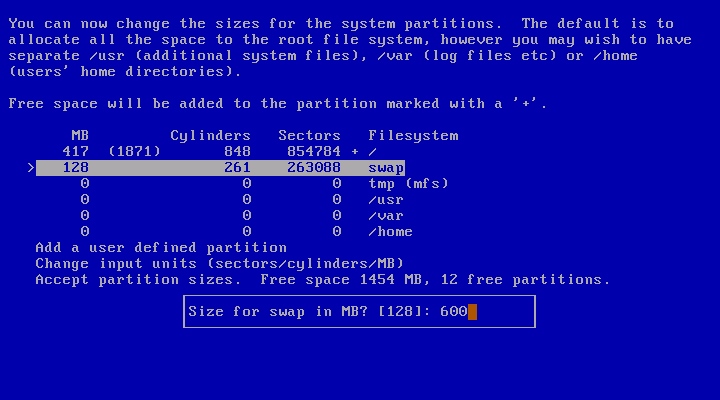
The default partition scheme of just using a big
/ (root) file system (plus swap) works
fine with NetBSD, and there is little need to change this.
Figure 3.13, “Setting partition sizes” shows how to change the
size of the swap partition to 600 MB.
Changing /tmp to reside on a
RAM disk
(mfs(8)) for extra speed may be a good idea. Other partition
schemes may use separate partitions for
/var, /usr and/or
/home, but you should use your own
experience to decide if you need this.
The next step is to create the disklabel and edit its partitions, if necessary, using the disklabel editor (Figure 3.14, “The disklabel editor”). If you predefined the partition sizes in the previous step, the resulting disklabel will probably fit your wishes. In that case you can complete the process immediately by selecting “Partition sizes ok”.
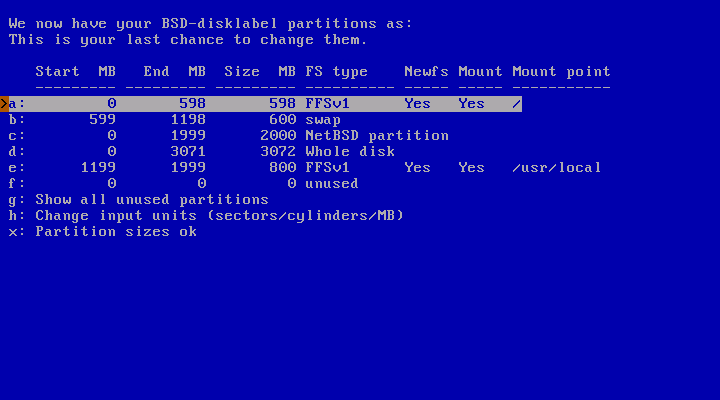
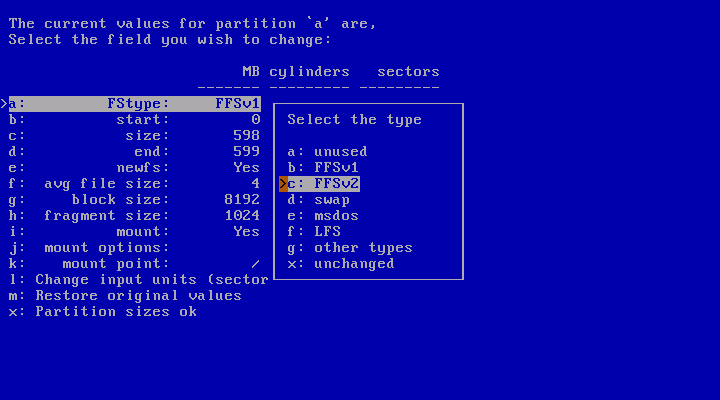
There are two reserved partitions, “c”, representing the NetBSD partition, and “d”, representing the whole disk. You can edit all other partitions by using the cursor keys and pressing the return key. You can add a partition by selecting an unused slot and setting parameters for that partition. The partition editing screen is shown in Figure 3.15, “Disklabel partition editing”.
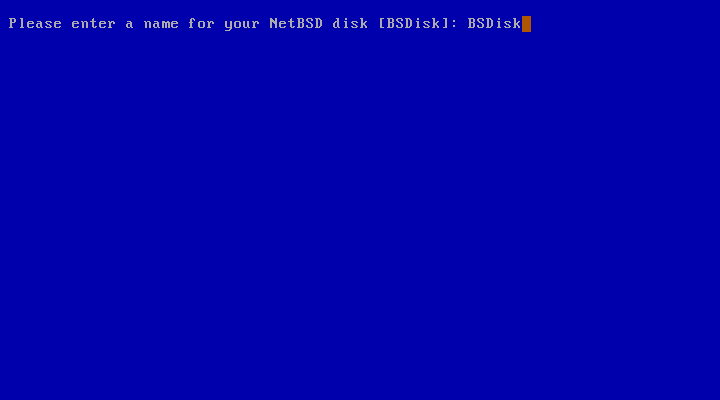
After defining the partitions in the new disklabel, the last item is to enter a name for the NetBSD disk as shown in Figure 3.16, “Naming the NetBSD disk”. This can be used later to distinguish between disklabels of otherwise identical disks.
The installer now has all the data it needs to prepare the disk. Nothing has been written to the disk at this point but, and now is your last chance to abort the installation process before actually writing data to the disk. Choose “no” to abort the installation process and return to the main menu, or continue by selecting “yes”.

After confirming that sysinst should prepare the disk, it will run disklabel(8) to create the NetBSD partition layout and newfs(8) to create the file systems on the disk.
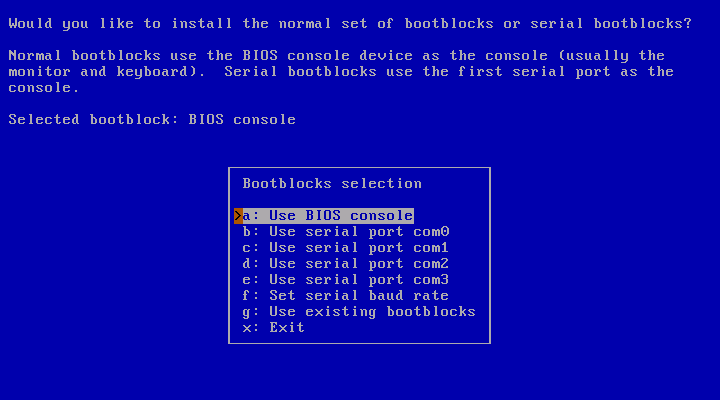
After preparing the NetBSD partitions and their filesystems, the next question (shown in Figure 3.18, “Selecting bootblocks”) is which bootblocks to install. Usually you will choose the default of BIOS console, i.e., show boot messages on your computer's display.
If you run a farm of machines without monitor, it may be more convenient to use a serial console running on one of the serial ports. The menu also allows changing the serial port's baud rate from the default of 9600 baud, 8 data bits, no parity and one stopbit.
At this point, you have finished the first and most difficult part of the installation!
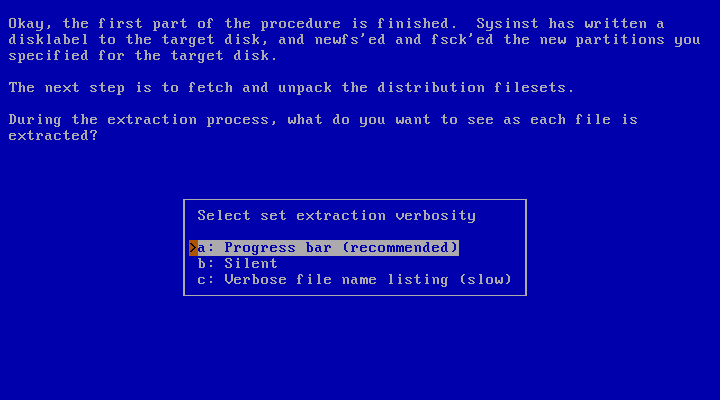
The second half of the installation process consists of populating the file systems by extracting the distribution sets that you selected earlier (base, compiler tools, games, etc). Before unpacking the sets, sysinst asks what information you would like to see during that process, as shown in Figure 3.19, “Choosing the verbosity of the extraction process”. You can choose between a progress bar, a display of the name of each extracted file, or nothing.
Now sysinst needs to find the NetBSD
sets and you must tell it where to find them. The menu offers several
choices, as shown in
Figure 3.20, “Installation media”. The options are explained in
detail in the INSTALL documents.

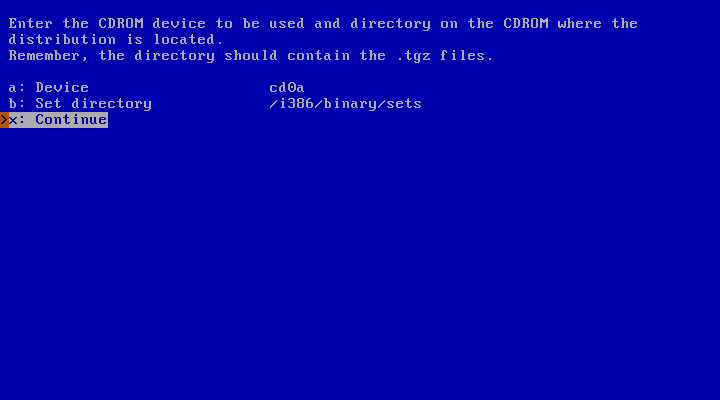
When selecting “CD-ROM / DVD”,
sysinst asks the name of the CD-ROM
or DVD device and the directory in which the set files are
stored, see Figure 3.21, “CD-ROM/DVD installation”. The device is usually
cd0 for the first CD-ROM or DVD drive,
regardless of whether it is IDE or SCSI (or even USB or FireWire).
The CD-ROM/DVD device name
If you don't know the name of the CD-ROM/DVD device, you can find by doing the following:
Press Ctrl-Z to pause sysinst and go to the shell prompt.
-
Type the command:
#dmesgThis will show the kernel startup messages, including the name of the CD-ROM device, for example cd0.
-
If the display scrolls too quickly, you can also use more:
#dmesg | more -
Go back to the installation program with the command:
#fg
Figure 3.22, “Mounting a file system” shows the menu to install NetBSD from an unmounted file system. It is necessary to specify the device ("Device"), the file system of the device ("File system") and the path to the install sets ("Set directory"). The setting for the "Base directory" is optional and can be kept blank.
In the following example the install sets are stored on a MSDOS file system, on partition "e" on the device "sd0".
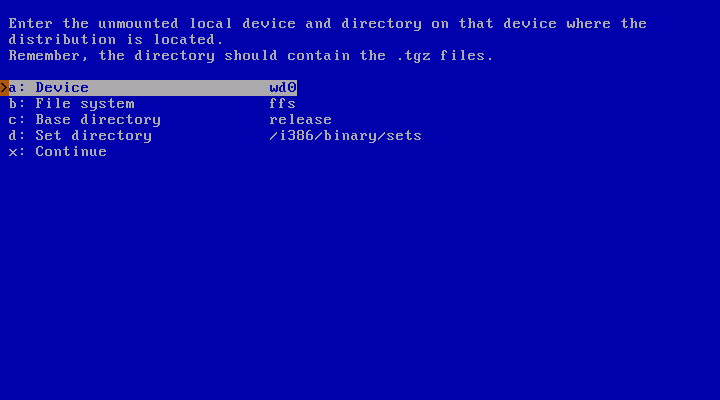
It is usually necessary to specify the device name and the partition. Figure 3.23, “Mounting a partition ” shows how to specify device "sd0" with partition "e".

In Figure 3.24, “Accessing a MSDOS file system” the file system type is specified. It is “msdos” but it could also be the NetBSD file system “ffs” or “ext2fs”, a Linux file system. The “Base directory” item is left blank and the binary sets are stored under “/sets”. Choosing “Continue” will start the extraction of the sets.

If you choose to install from a local network or the Internet via FTP, sysinst will configure the system's network connection, download the selected set files to a temporary directory, and then extract them.
NetBSD currently supports installation via ethernet, USB ethernet or wireless, and wireless LAN. Installation via DSL (PPP over Ethernet) is not supported during installation.
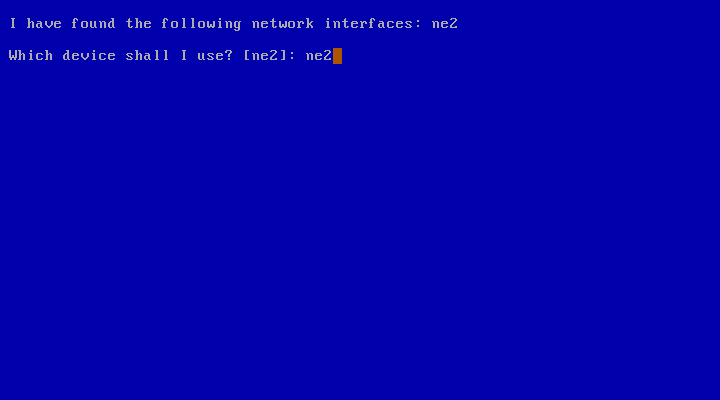
The first step shown in Figure 3.25, “Which network interface to configure” consists of selecting which network card to configure. sysinst will determine a list of available network interfaces, present them and ask which one to use.
Note
The exact names of your network interfaces depend on the hardware you use. Example interfaces are “wm” for Intel Gigabit interfaces, “ne” for NE2000 and compatible ethernet cards, and “ath” for Atheros based wireless cards. This list is by no means complete, and NetBSD supports many more network devices.
To get a list of network interfaces available on your system, interrupt the installation process by pressing “Ctrl+Z”, then enter
#ifconfig -ane2: flags=8822<UP,BROADCAST,NOTRAILERS,SIMPLEX,MULTICAST> mtu 1500 address: 00:06:0d:c6:73:d5 media: Ethernet autoselect 10baseT full-duplex status: active inet 0.0.0.0 netmask 0xffffff00 broadcast 0.0.0.0 inet6 fe80::206:dff:fec6:73d5%ne2 prefixlen 64 scopeid 0x1 lo0: flags=8009<UP,LOOPBACK,MULTICAST> mtu 33196 inet 127.0.0.1 netmask 0xff000000 inet6 ::1 prefixlen 128 inet6 fe80::1%lo0 prefixlen 64 scopeid 0x2 ppp0: flags=8010<POINTOPOINT,MULTICAST> mtu 1500 ppp1: flags=8010<POINTOPOINT,MULTICAST> mtu 1500 sl0: flags=c010<POINTOPOINT,LINK2,MULTICAST> mtu 296 sl1: flags=c010<POINTOPOINT,LINK2,MULTICAST> mtu 296 strip0: flags=0 mtu 1100 strip1: flags=0 mtu 1100
To get more information about all the devices found during system startup, including network devices, type
#dmesg | more
You can return to the NetBSD installation by typing
#fg
Next, you have a chance to set your network medium.
Note
It is unlikely that you will need to enter anything other than the default here. If you experience problems like very slow transfers or timeouts, you may, for example, force different duplex settings for ethernet cards. To get a list of supported media and media options for a given network device (ne2, for example), escape from sysinst by pressing “Ctrl+Z”, then enter:
#ifconfig -m ne2ne2: flags=8822<UP,BROADCAST,NOTRAILERS,SIMPLEX,MULTICAST> mtu 1500 address: 00:03:0d:c6:73:d5 media: Ethernet 10baseT full-duplex status: active supported Ethernet media: media 10baseT media 10baseT mediaopt full-duplex media 10base2 media autoselect
The various values printed after “media” may be of interest here, including keywords like “autoselect” but also including any “mediaopt” settings.
Return to the installation by typing:
#fg
The next question will be whether you want to perform DHCP autoconfiguration as shown in Figure 3.26, “Using DHCP for network configuration”. Answer “Yes” if you have a DHCP Dynamic Host Configuration Protocol (DHCP) running somewhere on your network, and sysinst will fetch a number of defaults from it. Answer “No” to enter all the values manually.
We will assume you answered “No” and go into all the questions asked in detail.
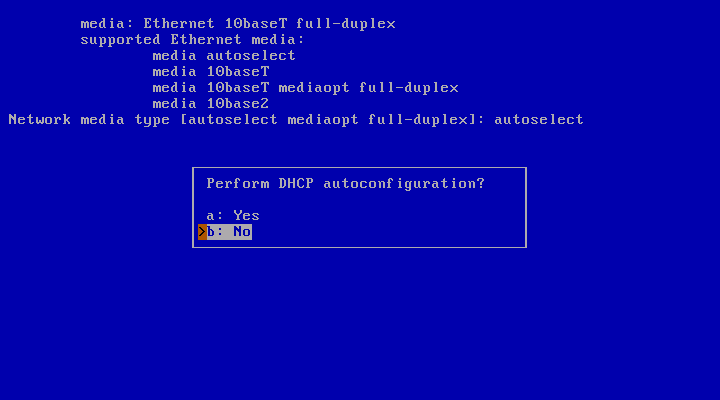
Figure 3.27, “Entering and configuring network data” shows the questions asked for the network configuration. The values to be entered are:
- Your DNS Domain:
This is the name of the domain you are in.
- Your hostname:
The name by which other machines can usually address your computer. Not used during installation.
- Your IPv4 number:
Enter your numerical Internet Protocol address in “dotted quad” notation here, for example, 192.168.1.3
- IPv4 Netmask:
The netmask for your network, either given as a hex value (“0xffffff00”) or in dotted-quad notation (“255.255.255.0”).
- IPv4 gateway:
Your router's (or default gateway's) IP address. Do not use a hostname here!
- IPv4 name server:
Your (first) DNS server's IP address. Again, don't use a hostname.

After answering all of your network configuration info, it will be displayed, and you will have a chance to go back and make changes (Figure 3.28, “Confirming network parameters”).

sysinst will now run a few commands (not displayed in detail here) to configure the network: flushing the routing table, setting the default route, and testing if the network connection is operational.
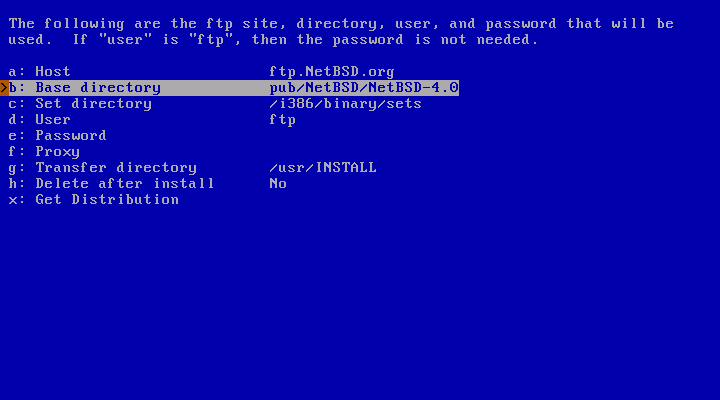
Now that you have a functional network connection, you must tell the installer how to get the distribution sets, as shown in Figure 3.29, “Defining the FTP settings”.
When you are satisfied with your settings (the defaults work most of the time), choose “Get Distribution” to continue.
If you want to install NetBSD from a server in your local network, NFS is an alternative to FTP.
Note
Using this installation method requires the ability to set up an NFS server, a topic which is not discussed here.
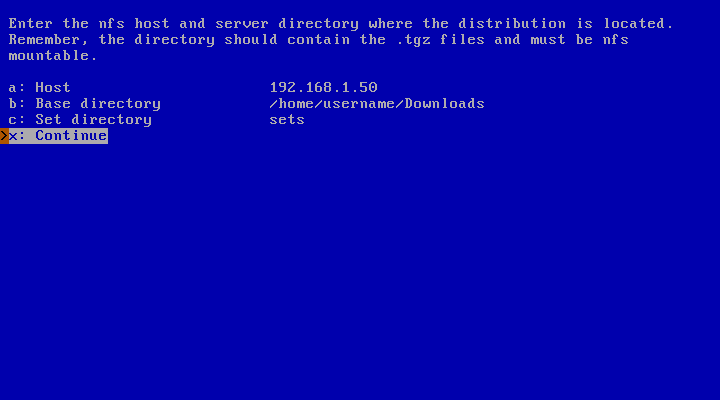
As shown in Figure 3.30, “NFS install screen”, you must specify the IP address of the NFS server with "Host", the "Base directory" that is exported by the NFS server, and the "Set directory", which contains the install sets.

Figure 3.31, “NFS example” shows an example: Host “192.168.1.50 ” is the NFS server that provides the directory “/home/username/Downloads” The NetBSD install sets are stored in the directory “/home/username/Downloads/sets” on the NFS server. Choose “Continue” to start the installation of the distribution sets.
After the method for obtaining distribution sets has been chosen, and (if applicable) after those sets have been transferred, they will be extracted into the new NetBSD file system.
After extracting all selected sets,
sysinst will create device nodes in
the /dev directory and then display a
message saying that everything went well.
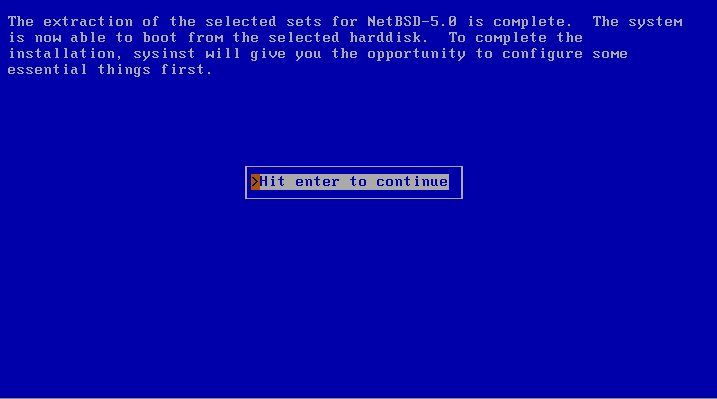
Another message (see Figure 3.32, “Extraction of sets completed”) will let you know that the set extraction is now completed, and that you will have an opportunity to configure some essential things before finishing the NetBSD installation.
The first thing you can configure is your timezone. It is Universal Time Coordinated (UTC) by default, and you can use the two-level menu of continents/countries and cities shown in Figure 3.33, “Selecting the system's time zone” to select your timezone with the Return key. Next, press “x” followed by Return to exit timezone selection.

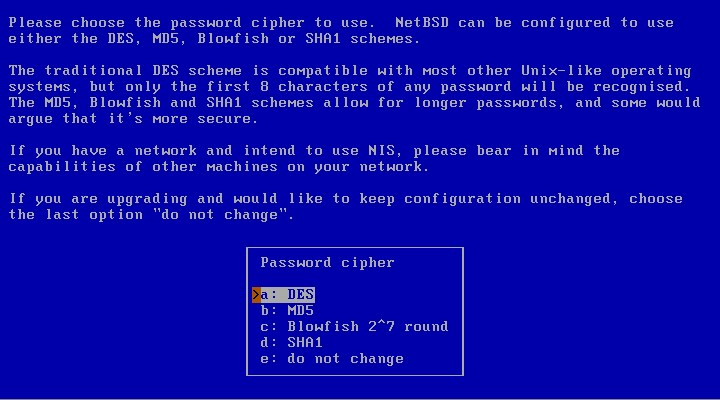
At this point, you are given the option to choose a password encryption scheme. While “DES” is the standard algorithm used on most Unix systems, “MD5”, “Blowfish”, and “SHA1” allow longer passwords than DES, which only uses the first eight characters of the password that is entered. DES is still useful for interoperability with other operating systems.
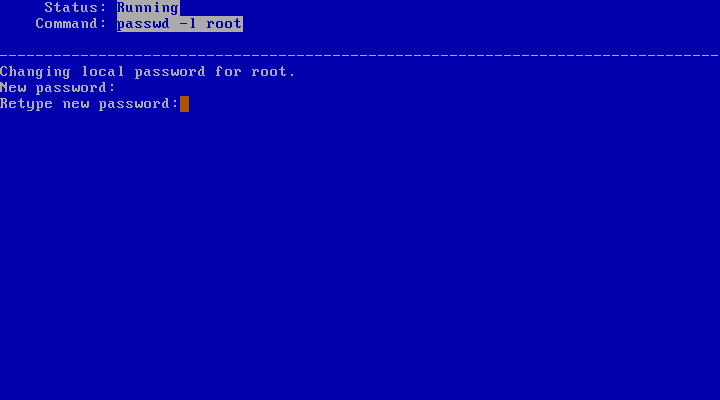
After choosing the password cipher you are asked if you want to set the root password. It is recommended to set a root password at this point for security reasons.
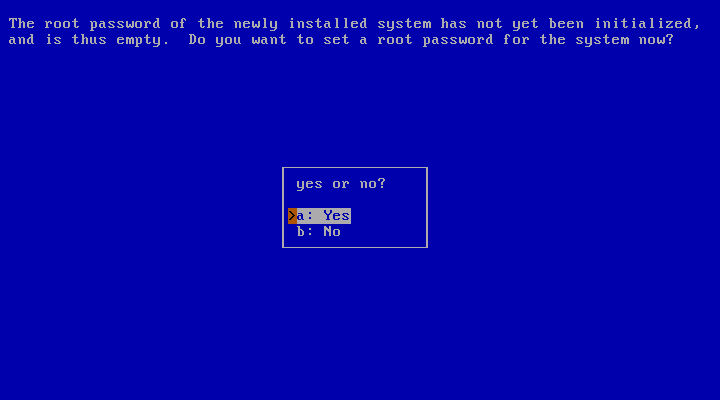
When you agree to set a root password, sysinst will run the passwd(1) utility for you. Please note that the password is not echoed.
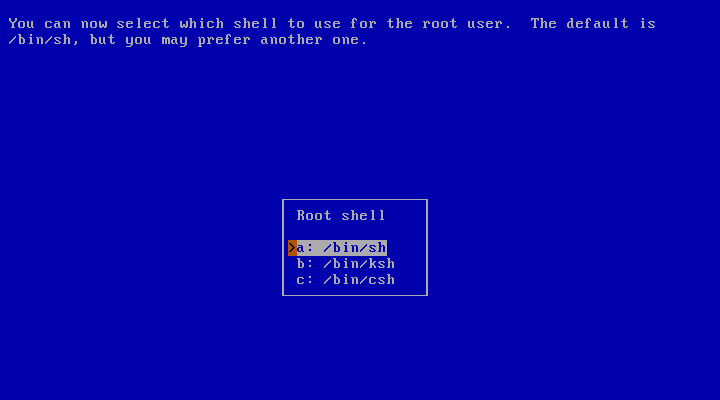
The next menu allows you to choose which command line interpreter - also known as a “shell” - will be used for the root account. The default is the classic Bourne shell, sh(1). Other choices are the Korn shell (ksh(1)) and the C shell (csh(1)). If, upon reading this, you don't have some idea of which shell you prefer, simply use the default, as this is a highly subjective decision. Should you later change your mind, root's shell can always be changed.
At this point the installation is finished.
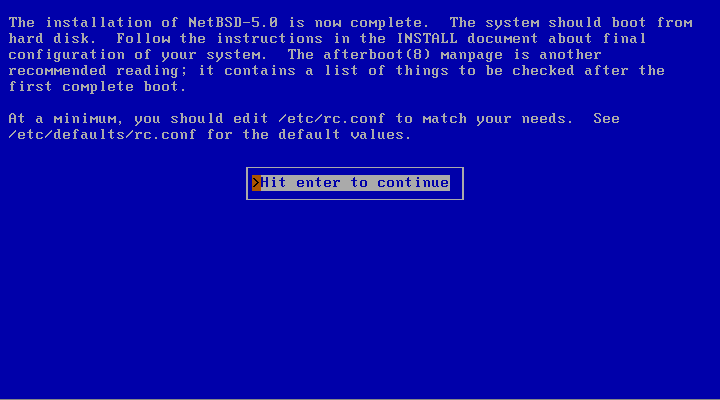
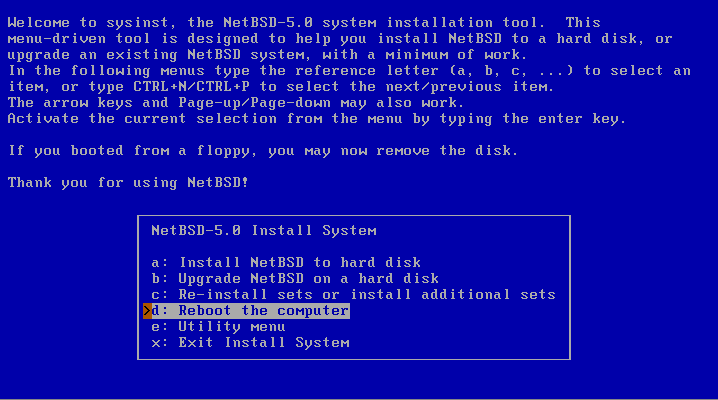
After passing the dialog that confirms the installation, sysinst will return to the main menu. Remove any installation media (CD, floppy, etc.) and choose “Reboot the computer” to boot your new NetBSD installation.