Table of Contents
Administrators and users granted with management rights can create the application structure. They also supervise access to content and can modify the application look.
Only the site administrators can manage domains, but all users can access them, providing they have at least reading rights.
You need to have at least restricted reading rights in the domain to access it. By default, application members have reading rights on the whole application.
To access a domain:
Click on the icon ![]() located at the beginning of the breadcrumb
trail until you arrive on the page Domains on the default
server.
located at the beginning of the breadcrumb
trail until you arrive on the page Domains on the default
server.
The icon ![]() only makes you go up one level.
It doesn't lead the Domains on the default
server directly.
only makes you go up one level.
It doesn't lead the Domains on the default
server directly.
Click on a domain's name to open it.
The domain's root is displayed.

Only the site administrators can create a new domain.
To create a domain:
Log in to the application.
Click on the icon ![]() to access the Domains on the
default server page.
to access the Domains on the
default server page.
Click on the button.
Fill in the domain creation form.
| Field | Description |
|---|---|
| Title | Type the space's name. |
| Description | Type the text that explains the purpose of the space. |
Click on the button.
The Content tab of the new domain is displayed. By default, all users have reading rights on the new domain.
Only users with management rights in the domain can modify it.
When you modify a domain, you modify its title and its description.
To modify a domain:
Click on the Modify tab of the domain.
Edit the modification form's fields.
| Field | Description |
|---|---|
| Title | Modify the space's name. |
| Description | Modify the text presenting the content or the purpose of the space. |
Click on the button
The domain's Content tab is displayed with the modifications you just saved.
Only users with management rights can edit the metadata of a domain.
Metadata are informations describing certain properties of the domain, so that it is more accurately referenced. Some metadata are automatically filled in by the system, but most of them need to be filled in by users. When you create a domain, its metadata are empty.
To edit the metadata of a domain:
Click on the Metadata tab of the domain.
Edit the metadata modification form.
| Field | Description |
|---|---|
| Subjects | Topic of the domain. TipHold down CTRL key and click to select several subjects. |
| Rights | Informations about the reproduction rights of the domain. Rights informations often encompass Intellectual Property Rights and Copyright. |
| Source | The references of the resource from which the domain's content is derived (totally or partially). |
| Coverage | Informations about the scope of the content of the domain. It can either be a spatial location, a temporal period or a jurisdiction. |
| Created at | Date automatically filled in by the system when the domain is created. |
| Last modified at | Date automatically filled in by the system when the domain is modified. |
| Format | Format of the documents created in the domain, if any is preferred. |
| Language | Language used in the domain. |
| Expire on | Date on which the domain's content stops being
valid. Click on the button |
| Owner | User who created the domain. This field is automatically filled in by the system. |
| Contributors | Users who modify the domain. This field is automatically filled in by the system. |
Click on the button.
The domain's Content tab is displayed.
Only the site administrators can delete a domain.
When you delete a domain, you also delete its content. This action is permanent: you cannot reinstate a domain.
To delete a domain:
In the Domains on default server page, check the box corresponding to the domain to delete.
Click on the button.
In the window that pops up, click on the button.
The Domains on default server page is displayed: it doesn't contain the deleted domain anymore.
Workspaces, templates and sections are managed the same way. In this section, we describe the management of workspaces as an example, but the management of sections and templates is the same as workspaces. When a type of space implies a specific functioning, the particular procedure is described beside the generic workspace functioning.
You must have at least restricted reading rights in a workspace, template or section to access it. You can only see workspaces, templates and sections you can access.
To access the workspaces, templates and sections of a domain:
Click on the corresponding root space (Workspaces, Templates or Sections).
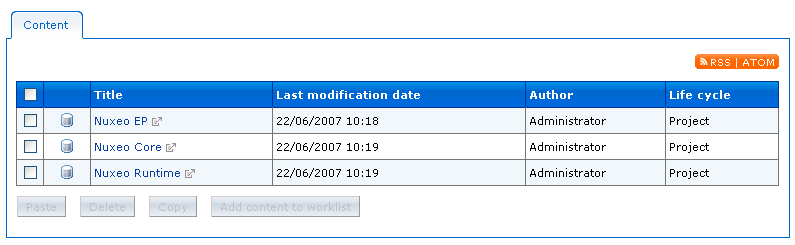
The list of workspaces, templates or section is displayed in the Content tab.
Click on the name of the workspace, template or section you want to access.
Only users with writing or management rights can create a new workspace.
Workspaces are created in Workspaces, sections in Sections and templates in Templates. You can also create sub-workspaces and sub-sections in a regular workspace or section.
To create a workspace or section at the root of Workspaces or Sections:
In Workspaces or Sections, click on the or button.
Fill in the creation form.
| Field | Description |
|---|---|
| Title | Type the workspace's or section's name. |
| Description | Type the text that explains the purpose of the workspace or section. |
| Content | Click on the button to select a file to be used as the workspace's or section's logo instead of the site's logo. The logo size should be 194*99 pixels. |
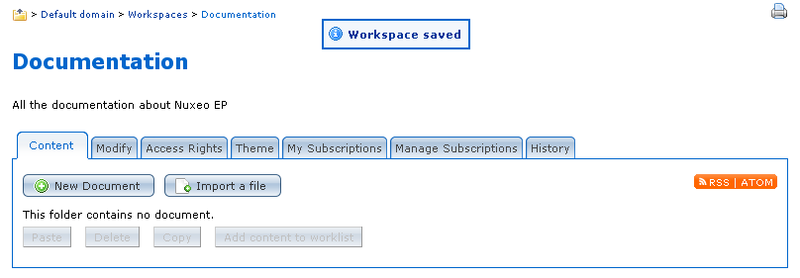
Click on the button.
The workspace's or section's Content tab is displayed.
To create a workspace or a section in a regular workspace or section:
In the workspace or section, click on the button.
On the Available document types page, click on the Workspace or Section link.
Fill in the creation form.
| Field | Description |
|---|---|
| Title | Type the workspace's or section's name. |
| Description | Type the text that explains the purpose of the workspace or section. |
| Content | Click on the button to select a file to be used as the workspace's or section's logo instead of the site's logo. The logo size should be 194*99 pixels. |
Click on the button.
The Content tab of the new workspace or section is displayed.

To create a template:
In Templates, click on the button.
Click on the Workspace link to create a workspace template.
Fill in the creation form.
| Field | Description |
|---|---|
| Title | Type the template's name. |
| Description | Type the text that explains the purpose of the template. |
| Content | Click on the button to select a file to be used as the template's logo instead of the site's logo. The logo size should be 194*99 pixels. |
Click on the button.
The template's Content tab is displayed.
Only users with management rights can modify a workspace.
Modifying a workspace, a template or a section means modifying its properties.
To modify a workspace:
Click on the Modify tab of the workspace.
Edit the modification form's fields.
| Field | Description |
|---|---|
| Title | Modify the workspace's name. |
| Description | Modify the text presenting the content or the purpose of the workspace. |
| Content | Click on the button to select a file to be used as the workspace's logo instead of the site's logo. The logo size should be 194*99 pixels. |
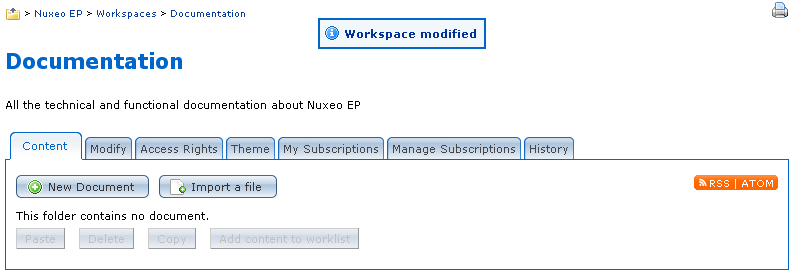
Click on the button
The workspace's Content tab is displayed with the modifications you just saved.
Only users with management rights can edit the metadata of a workspace.
Metadata are informations describing certain properties of the workspace, template or section, so that it is more accurately referenced. Some metadata are automatically filled in by the system, but most of them need to be filled in by users. When you create a workspace, template or section, its metadata are empty.
To edit the metadata of a workspace:
Click on the Metadata tab of the workspace.
Edit the metadata modification form.
| Field | Description |
|---|---|
| Subjects | Topic of the workspace. TipHold down CTRL key and click to select several subjects. |
| Rights | Informations about the reproduction rights of the workspace. Rights informations often encompass Intellectual Property Rights and Copyright. |
| Source | The references of the resource from which the workspace's content is derived (totally or partially). |
| Coverage | Informations about the scope of the content of the workspace. It can either be a spatial location, a temporal period or a jurisdiction. |
| Created at | Date automatically filled in by the system when the workspace is created. |
| Last modified at | Date automatically filled in by the system when the workspace is modified. |
| Format | Format of the documents created in the workspace, if any is preferred. |
| Language | Language used in the workspace. |
| Expire on | Date on which the workspace's content stops
being valid. Click on the button |
| Owner | User who created the workspace. This field is automatically filled in by the system. |
| Contributors | Users who modify the workspace. This field is automatically filled in by the system. |
Click on the button.
The workspace's Content tab is displayed.
Only users with writing or management rights in the parent workspace can delete a workspace.
When you delete a workspace, you also delete its content. This action is permanent: you cannot reinstate a workspace.
To delete a workspace:
In the Content tab of the parent workspace, check the box corresponding to the workspace to delete.
Click on the button.
In the window that pops up, click on the button.
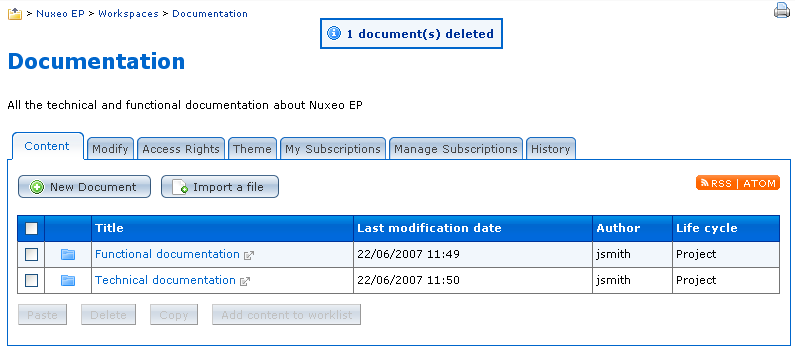
The parent workspace's Content tab is displayed: the deleted workspace is not displayed anymore.
Only functional administrators can manage users and groups. They can create new users and groups, modify their properties or delete them. It is also possible to connect Nuxeo EP to an LDAP directory. However, this procedure is explained in the Reference Guide.
Users can only consult users and groups directories.
Users can be created and their properties modified directly in Nuxeo EP.
Only site administrators can create new users.
By default, Nuxeo EP has one user, called Administrator. This user is the site Administrator. You must use this user to create new users, who you can give administrator rights then.
To create a user:
Click on the Members management link in the upper right corner of the window.

The members management interface opens on the user directory search form.
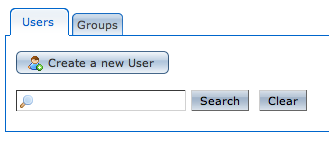
Click on the button.
Fill in the user creation form.
Mandatory fields are indicated by a red asterisk.
| Field | Description |
|---|---|
| Username | Type the name that will identify the user on the Nuxeo EP application. |
| First name | Type the user's first name. |
| Last name | Type the user's last name. |
| Company | Type the name of the company of the user. |
| Type the email of the user. This address will be used for notifications. | |
| Password | Type the password of the user. |
| Password (verify) | Type the password again to confirm it. |
| Groups for this user | Select one or several group(s). The new user must at least be part a the "members" group or one of its sub-groups to be able to access the application's content. |
Click on the button.
The card of the new user is displayed. You can modify its properties and its password.
The user can immediately connect to the Nuxeo EP application using his or her username and password.
All users can search and consult the users directory.
To consult the card of a user:
Click on the Members management link in the top right corner of the page.
The members management interface opens on the user directory search form.
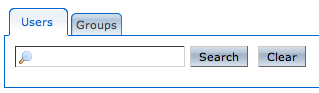
Type a search criteria in one of the field of the search form.
The available fields are:
username,
first name,
last name,
email.
Click on the button.
The results are displayed in a table below the search form.
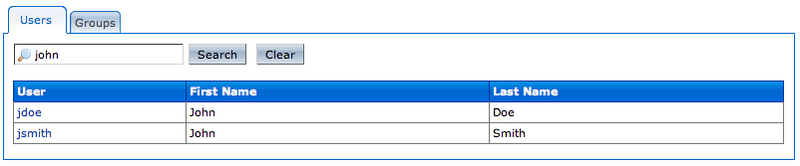
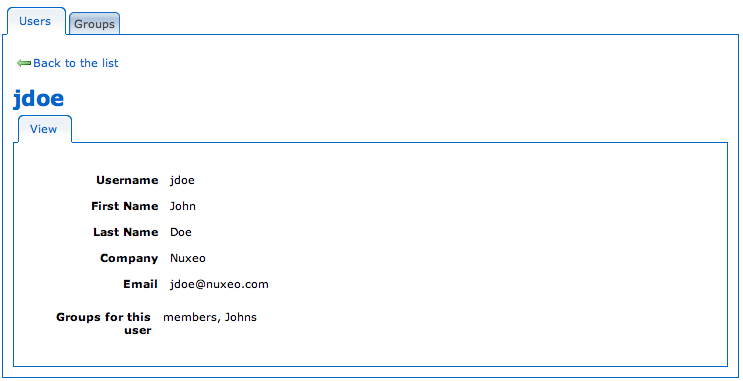
Click on the name of the user to open his or her card.
The user's card is displayed. You can see his or her information.
Only the site administrators can modify other users' cards. But every user can modify his or her own card.
To modify a user's card:
Click on the Members management link in the top rights corner of the page.
The members management interface opens on the user directory search form.
Search a user and click on the user's name to open his or her card.
The user's card is displayed.
Click on the Edit tab.
Modify the fields in the modification form.
Click on the Save button.
The View tab is displayed with your modifications.
Only the site administrators can modify other users' password. However every user can modify his or her own password.
To modify a user's password:
Click on the Members management link in the top rights corner of the page.
The members management interface opens on the user directory search form.
Search a user and click on the user's name to open his or her card.
The user's card is displayed.
Click on the Change password tab.
Type the new password and confirm it.
Click on the button.
The View tab is displayed. The user must use his or her new password the next time he or she logs in.
Only the site administrators can delete users.
Deleting a user is a permanent action.
To delete a user:
Search the user to delete and open his or her card.
Click on the button.
A window pops up.
Click on the button.
The user is deleted. He or she cannot log in to the Nuxeo EP application.
Groups of users can be created and their properties modified directly in Nuxeo EP. Groups of users are used to manage access rights more easily.
There are two default groups in Nuxeo EP:
administrators: the members of this group are site administrators. They can manage users, vocabularies and documents.
members: the members of this group automatically have reading rights on all the content of the application.
Groups can be composed of users and also of sub-groups. Sub-group's members automatically become members of the group. Thus, they are granted all the access rights you give to the group.
Only the site administrators can create groups of users.
To create a group of users:
Click on the Members management link in the top rights corner of the page.
The user directory opens on a search form.
Click on the Groups tab.
A search form and the list of the existing groups is displayed.
Click on the button.
Fill in the creation form.
| Field | Description |
|---|---|
| Name of the group | Type the name of the group. |
| Groups members | Search the users to add to the group. |
| Sub-groups | Select one or several groups to be part of the group. |
Click on the button.
The View tab of the group's card is displayed.
All users can consult the groups directory.
To consult a group's card:
Click on the Members management link in the top rights corner of the page.
The user directory opens on a search form.
Click on the Groups tab.
A search form and the list of the existing groups is displayed.
Type the name of the group in the search form and click on the button.
The results of the search are displayed.
Click on the name of the group to open its card.
The card displays the members and sub-groups of the group in the View tab.
Only the site administrators can modify groups.
Modifying groups consists in adding or removing members of the group. The name of the group cannot be changed.
Click on the Members management link in the top rights corner of the page.
The user directory opens on a search form.
Click on the Groups tab.
A search form and the list of the existing groups is displayed.
Search a group and click on its name to open its card.
The card displays the members and sub-groups of the group in the View tab.
Click on the Edit tab.
The modification form is displayed.
Modify the group's members and click on the button.
The View tab of the group is displayed with the modifications you just made.
The new group members are immediately granted the group's access rights. The users who are no longer members of the group are denied group's access rights. However they still have their individual access rights.
Only the site administrators can delete groups.
To delete a group:
Click on the Members management link in the top rights corner of the page.
The user directory opens on a search form.
Click on the Groups tab.
A search form and the list of the existing groups is displayed.
Search the group to delete and click on its name to open its card.
The card displays the members and sub-groups of the group in the View tab.
Click on the button.
A window pops up.
Click on the button.
The group search form is displayed. The group is displayed and its members lose the group's access rights.
Only users with management rights can manage the access rights of a space.
Managing access rights means granting or denying access rights.
The access rights management tab is composed of three parts:
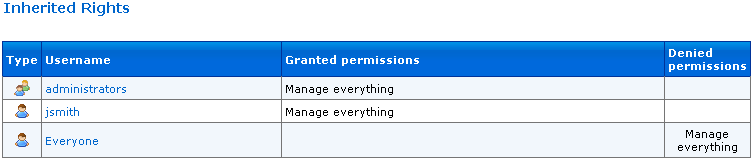
the Inherited rights part displays rights that were granted or denied in a parent space;
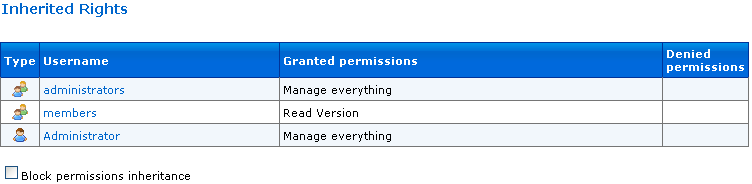
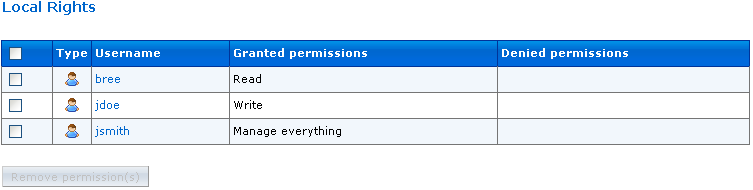
the Local rights part displays the rights that were granted or denied in the current space;
the form to grant or deny access rights in the current space.

To grant access rights:
Click on the Access Rights tab
In the form, type the username of the user you want to grant rights to.
To give access rights to a group, type the group's name.
The usernames corresponding to the typed characters are automatically displayed.
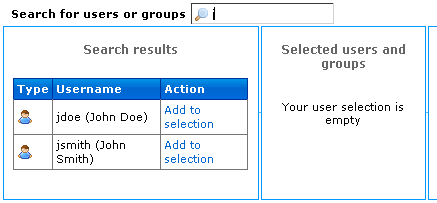
Click on the Add to selection link corresponding to the user you want to grant rights to.
Select the right to grant.
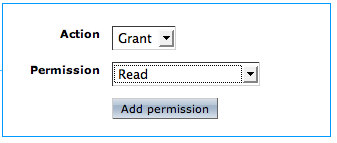
Click on the button.
The user and its rights are displayed in the Local Rights part of the screen.

If a user has inherited rights that you don't want him to have in the current space, you can deny him these rights. If you want to deny access rights to a large number of users, block rights inheritance and give access rights only to the users you want to be able to access the workspace or section.
To deny access rights:
Click on the Access Rights tab of the current space.
In the form, type the username of the user you want to grant rights to.
To deny access rights to a group, type the group's name.
The usernames corresponding to the typed characters are automatically displayed.
Click on the Add to selection link corresponding to the user you want to grant rights to.
Select the right to deny.
Click on the button.
The user is in the Local rights form. The denied rights is displayed in the Denied permissions column.

If you want to refuse rights to a user, and that these rights have been granted in the current space, you can remove the user from the local rights.
To remove a user from the local rights:
Click on the Access Rights tab of the current space.
In the Local Rights part of the screen, check the box corresponding to the user you want to remove.
Click on the button.
The user is removed from the Local Rights table.
The rights that are granted or denied in a space are applied to the space's content, including its sub-spaces. You thus have the same rights in the sub-spaces as in the parent space. That is called rights inheritance.
You can block this inheritance. It enables you to block the access of a sub-workspace to the workspace's users, for instance, or to deeply modify the access rights in the sub-workspace.
To block rights inheritance :
Click on the Access Rights tab of the sub-space you want to modify the access rights.
Check the box Block permissions inheritance located under the Inherited Rights table.
The inherited rights table is not displayed anymore.

You are added in the list of the local rights, like the administrators group.

In the Access Rights tab of the possible sub-workspaces of the workspace whose rights are blocked, a group Everyone is denied all rights.
You can now grant access rights to users.
Only the site administrators can manage vocabularies.
Vocabularies are the lists of terms used on the application, for instance in the drop down lists. A vocabulary is composed of several entries, that are the options in the drop down lists.
Functional administrators can only modify or delete vocabularies. They cannot create a new vocabulary.
You can consult the vocabularies from any page of the application.
To consult a vocabulary:
Click on the Vocabularies management link, located in the top right corner of the page.
The list of the application vocabularies is displayed.
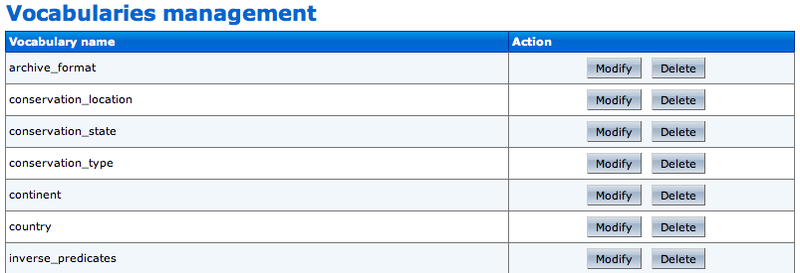
Click on the button corresponding to the vocabulary you want to consult.
The vocabulary entries are displayed.
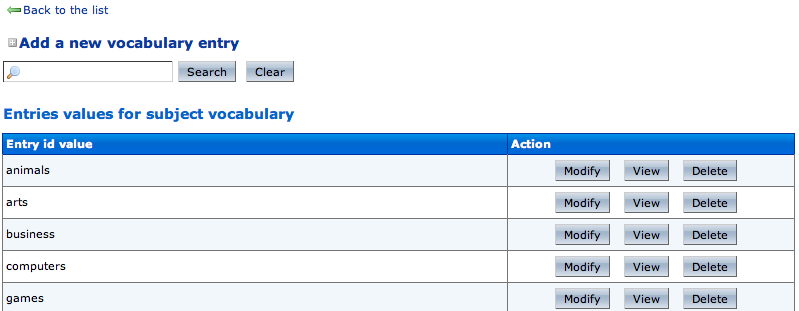
To consult a vocabulary entry:
Click on the button of the entry you want to consult.
When you modify a vocabulary, you can add new entries, modify or delete them.
To add an entry to a vocabulary:
Consult the vocabulary to add an entry to.
Click on the Add a new vocabulary entry link.
The entry creation form is displayed under the link.
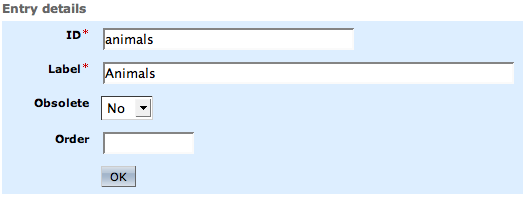
Fill in the entry creation form.
| Field | Description |
|---|---|
| ID | Type a unique identifier for the vocabulary entry. The ID is not displayed to users. |
| Label | Type the value of the entry that will be displayed to users on the application. |
| Obsolescence | Select Yes if the entry should not be displayed. Select No if the entry should be displayed. |
| Order | Type a number indicating the rank of the entry in the vocabulary. |
Click on the button.
The new entry is displayed in the list of the vocabulary entries.
To modify a vocabulary entry:
Consult the vocabulary to add an entry to.
Click on the button corresponding to the entry you want to modify.
The entry modification form is displayed.
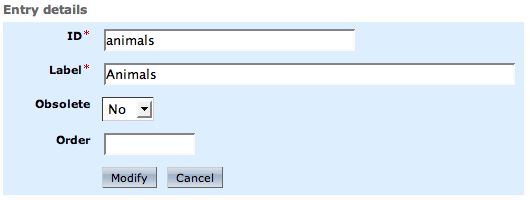
Modify the form.
Click on the button.
The list of the vocabulary entries is displayed.
Deleting a vocabulary entry is an irreversible action. You cannot cancel the entry deletion.
To delete a vocabulary entry:
Consult the vocabulary to delete an entry from.
Click on the button of the entry to erase.
The entry is permanently erased. The list of the vocabulary entries is displayed.
The look of the application can be modified. It is defined bu the themes that are applied on the different pages of the application. A theme is a preset package that determines the graphical appearance of the site. It has several pages appearance determined. For instance, the default theme has four pages:
default page: the page used for content view;
pop-up page: the page used for pop-up windows, such as the relation search window;
user dashboard page: the page used to display the dashboard;
print page: the page used to print the page content.
Only the administrators can deeply modify the look of the application by modifying the themes. Users with management rights can however apply a theme created by an administrator to a workspace or a section.
Theme management is explained in the Reference Guide.
You can apply a theme to spaces only. For instance, you can change the theme of sections, so that they look different from workspaces.
The new space's theme is not applied to the sub-spaces, but it is applied to the documents it contains.
When you choose to apply a theme to a workspace, for instance, you can refine what is displayed on the page by applying a perspective on the theme. A perspective is a fragment visualisation mask that determines that some parts of the page, like the clipboard and worklist, are not displayed to the user if specified conditions are met. The default application has only one perspective.
To change the theme of a workspace:
Click on the Theme tab of the space.
Select the theme, page and perspective you want to apply.
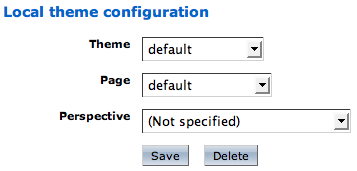
Click on the button.
The page is displayed with the selected look.
