Table of Contents
Beside the document creation and management functionalities, Nuxeo EP integrates collaborative tools that enable teamwork and communication between contributors.
Nuxeo EP automatically creates directories in which all users are registered. Any user can search the different directories to find the contact informations of a site member.
There are two directories:
the member directory contains all site members,
the group directory contains the existing groups and their members.
To find a user and consult his or her directory card:
Click on Members management in the top right corner of the page.

The user directory open on a search form.
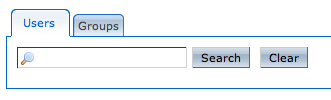
Type the user's username, first name or last name in the search box.
Click on the button.
The results are displayed in a table.
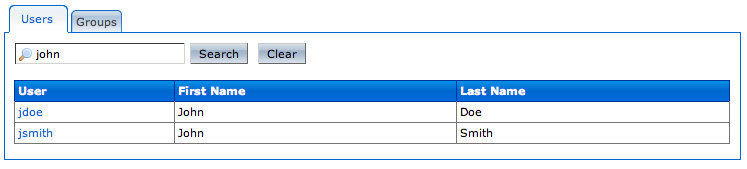
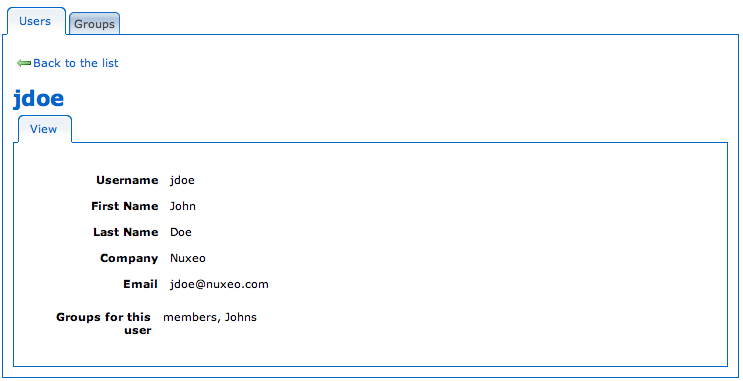
Click on the user's username to consult his or her card.
To make rights management easier, the site administration can create groups of users. Thus, you can give access rights to a whole group instead of each group member individually.
You can consult the card of group, to see which users are members of the group.
To consult the card of a group:
Click on Members management in the top right corner of the page.
The user directory is displayed.
Click on the Group tab.
The list of the existing groups is displayed.
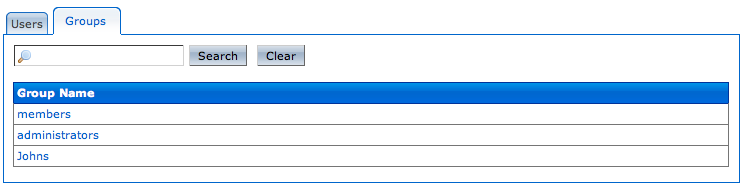
There are two ways to consult a group's card :
Click on a group name to see its members.
Type the group name in the search box displayed in the Group tab and click on the button.
The results are displayed in a table. Click on the group name to see its members.
You can add comments on the documents. Comments enables users to discuss about the document and its evolution.
Comments are attached to the document in the workspace. When the document is published, comments are not published with it.
You must have at least restricted reading rights to read the comments of a document.
To read the comments of the document, click on the Comments tab.

You must have at least reading rights to add comments on documents.
To add a comment on a document:
Click on the Comments tab of the document.
Click on the Add a comment link.
A form to add a comment is displayed.
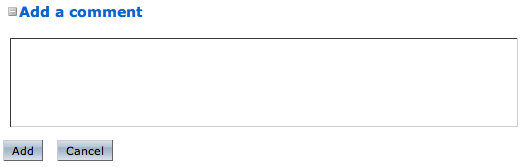
In the text area, type your comment.
Click on the button.
The comment is displayed in the Comment tab. Users can now reply to your comment.

You must have at least reading rights to reply to comments on documents.
When you want to react to a comment, you can reply to it.
To reply to a comment:
Click on the Reply link on the comment.
A form is displayed under the comment.
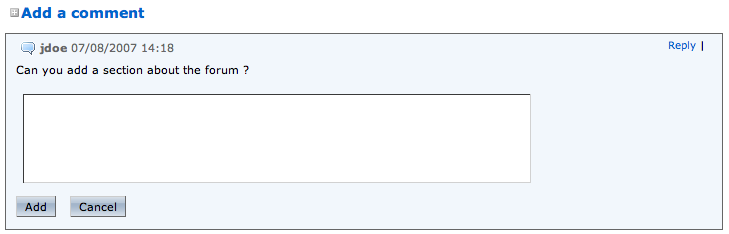
Type your comment in the text area.
Click on the button.
The answer is inserted after the comment it replies to.
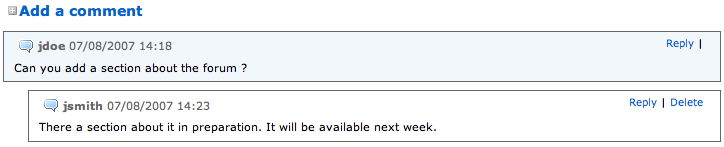
Only the author of the comment and users with management rights can delete the comments of a document.
Deleting a comment is a permanent action.
To delete a comment :
Click on the Comment tab of the document.
Click on the Delete link displayed in the top right corner of the comment.
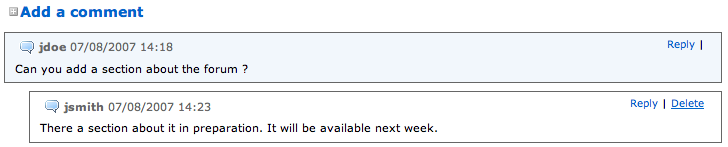
The comment is immediately erased.
A forum is a discussion space in which users can talk together. A forum is organized around different topics, in which users can add comments.
As for workspaces and sections, the access to a forum is defined by access rights. Forum access rights are the same as workspace access rights. However, in the case of a moderated topic, some users are declared "moderators" and are in charge of the approval of the topic content.
Only users with writing or management rights can create a forum.
You can only create forums in workspaces.
To create a forum:
In a workspace, click on the New document button.
In the Available Document Types page, click on Forum.
Fill in the creation form.
| Field | Description |
|---|---|
| Title | Type the name of the forum. |
| Description | Type a text explaining the purpose of the forum. |
Click on the button.
The forum is created. You can now create topics to start discussing.
Only users with writing or management rights can modify a forum.
When you modify a forum, you modify its title and its description.
To modify a forum:
On the forum, click on the Modify tab.
Modify the title or the description of the forum.
Click on the button.
The modifications are saved and the Forum tab is displayed.
Only users with writing or management rights in a forum can manage its topics.
Topics are subjects of discussion, in which users can post comments to participate.
The access to topics is determined by the same access rights as in a workspace.
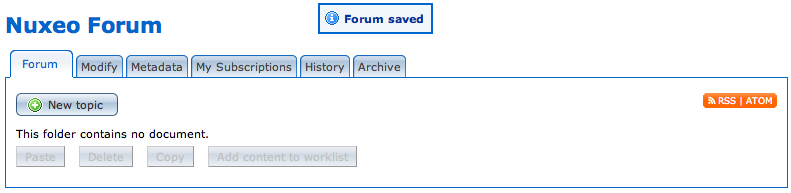
To add a new topic in a forum:
In the Forum tab of the forum, click on the button.
Fill in the creation form.
| Field | Description |
|---|---|
| Topic title | Type the title of the topic. |
| Topic description | Type a text explaining what the topic is about. |
| Moderation | A topic can be moderated, that is to say that the content needs to be approved in order to be available to forum readers.
|
Click on the button.
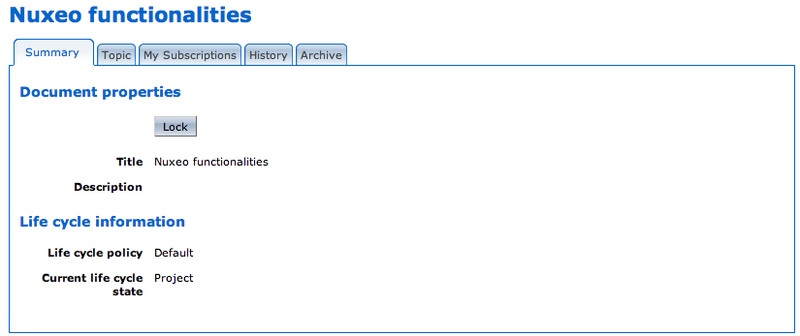
The Summary tab of the topic is displayed.
The list of the topics of a forum is displayed in a table in the "Forum" tab.
Deleting a topic means deleting its content as well.
When you delete a topic, it is definitively erased from the application.
To delete a topic:
In the Forum tab of the forum, select the topic you want to delete by checking the corresponding box.
Click on the button.
A confirmation window pops up.
Click on the button.
The topic is erased from the application.
To participate to a topic, you can add comments in it. The other users will be able to answer your comment.
Yo must have at least reading rights to add comments on a topic.
You can attach a file to your comment, that users will be able to consult. The attached file of a comment cannot be modified or removed afterwards.
To add a comment to a topic:
Click on the Topic tab of the topic.
If the topic is empty, the form to add a comment is automatically displayed in the Topic tab.Click on the button to display the form to add a comment.
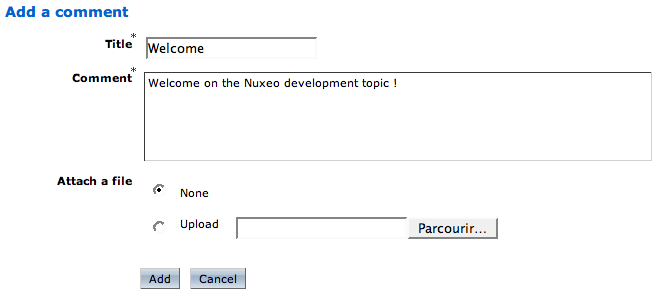
Fill in the comment form.
| Field | Description |
|---|---|
| Title | Type the subject of your comment. |
| Description | Type the content of your comment. |
| Attach a file | Select the button and click on the button to select the file you want to attach to your comment. |
Click on the button.
The comment is displayed in the Topic tab.
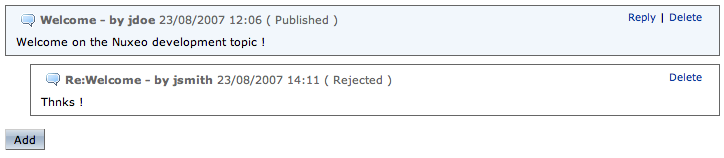
If the topic is not moderated, the comment has the status "Published" and all the users with access rights to the forum can read it.

If the topic is moderated, the comment has the status "Waiting for approval" and is not available in the topic. A moderator is notified that you added a comment and he or she needs to approve it so that the comment becomes available for forum users.

If you are the moderator of the topic, your comment is automatically published.
Yo must have at least reading rights to reply to comments in a topic.
When a comment has been added, you can reply to it. The answer is inserted right after the comment it replies to.
To reply to a comment:
In the Topic tab, click on the Reply link displayed top right corner of the comment you want to reply to.
The reply form is displayed under the comment.
Fill in the form.
| Field | Description |
|---|---|
| Title | The title field is automatically filled in and is of the following form: "Re: Title of the comment". |
| Description | Type the content of your reply. |
| Attach a file | Select the button and click on the button to select the file you want to attach to your reply. |
Click on the button.
The reply is inserted after the comment it replies to.

If the topic is not moderated, the reply has the status "Published" and all the users with access rights to the forum can read it.
If the topic is moderated, the reply has the status "Waiting for approval" and is not available in the topic. A moderator is notified that you added a reply and he or she needs to approve it so that the reply is available for forum users.
If you are the moderator of the topic, your reply is automatically published.
When a user creates a topic, he or she decides if the topic is moderated or not. Moderation is a process that makes comments available to moderators only when they are created, until they approve or reject the pending comments. Approval is thus mandatory to make comments available for forum users.
When a user creates a moderated topic, he appoints users to manage comments on the topic. Only these moderators can approve or reject pending comments. Comments waiting for approval are displayed in the moderator's dashboard.
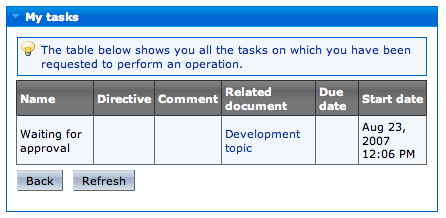
Moderators can also see if there are comments pending in the forum tab. Indeed the number of comments waiting for approval is indicated for each topic of the forum.

Approving a comment means to publish it in the topic and make it available for all forum users.
To approve a comment:
Open the topic that has pending comments.
The pending comments have the status "Waiting for approval".

Click on the Approve link in the top right corner of the pending comment.
The comment's status is "Published". It is now available for all forum readers.

Rejecting a comment means that you make the comment permanently unavailable for forum users.
To reject a comment:
Open the topic that has pending comments.
The pending comments have the status "Waiting for approval".

Click on the Reject link in the top right corner of the pending comment.
The comment's status is "Rejected". It is now permanently unavailable.
Nuxeo EP includes several means to stay informed of the evolution of the Nuxeo EP site's content:
notifications,
RSS and Atom feeds.
You can also send punctual emails to users to let them know about an action on a document.
You can send occasional emails to users. Emails are available on documents only.
You must have at least restricted reading rights to send emails.
To send an email to a user or a group of users:
On the document, click on the ![]() icon, located at the right of the
breadcrumb trail.
icon, located at the right of the
breadcrumb trail.
The email creation form is displayed.
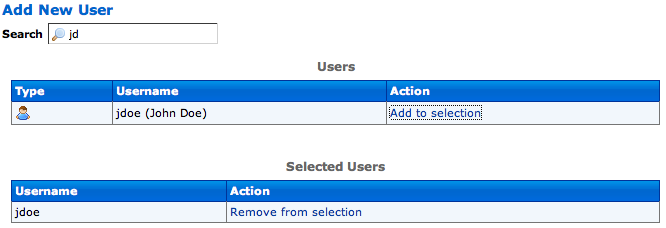
Type the name of the user or group you want to send the email to, in the search box.
The search is automatically done as you type the name of the user or group.
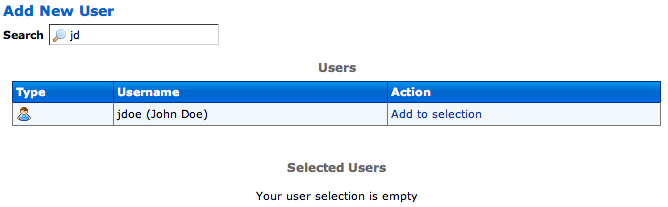
Click on the Add to selection link corresponding to the users or groups whose subscriptions you want to manage.
They are displayed in your selection.
Type the subject and the content of your email.
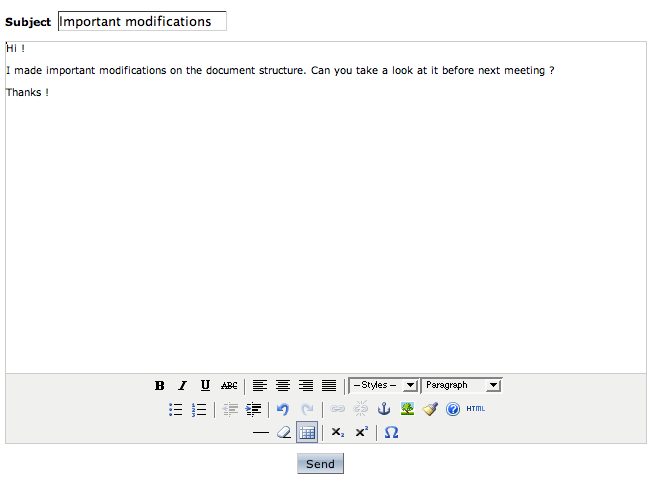
Click on the button.
The email is send to the selected users or groups. The Summary tab of the document is displayed.
Notifications are emails automatically sent to users when an event occurs in a space. Notifications are available in every space of the application and on documents. Users can subscribe to notifications and spaces' managers can subscribe users to notifications.
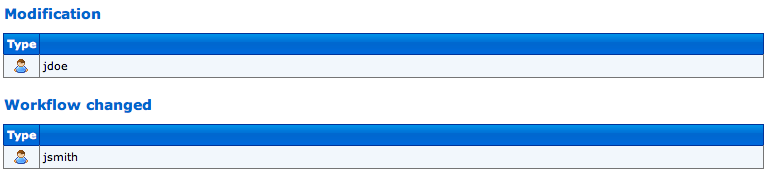
There are three notifications:
modification: the user receives an email every time the space or its content is modified;
workflow changed: the user receives an email for each action that happens during a review (start, abandon, document approval, document rejection);
publish: the user receives an email when a document is published in the specified section.
Publish notification is only available in sections. The other notifications are available in workspaces.
You must have at least restricted reading rights to subscribe to notifications.
To subscribe to notifications:
In the space, click on the My Subscriptions tab.
Click on the button corresponding to the notification you want to subscribe to.
A green check mark is displayed in front of the notification you have subscribed to and an button is displayed instead of the button.

If the workspace or section manager subscribed you to a notification, the notification is already checked.
The notifications subscribed for a group are indicated in the My Subscriptions tab of users as inherited subscriptions.

You must have at least restricted reading rights to unsubscribe from notifications.
You cannot unsubscribe from notifications subscribed for your group.
To unsubscribe from notifications:
In the space, click on the My Subscriptions tab.
Click on the button corresponding to the notification you want to unsubscribe from.
A button is displayed instead of the button.
Only users with management rights can manage the users' subscriptions.
Users with management rights can see the subscriptions users have signed up to. They can also subscribe users or groups to subscriptions or unsubscribe them.
To manage subscriptions:
In the space, click on the Manage Subscriptions tab.
The lists of users subscribed to each notification is displayed above a subscription form.
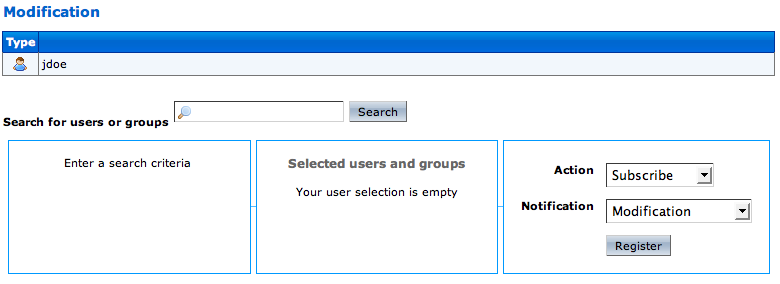
Type the name of a user or a group in the search box.
The results of your search are displayed in the first blue frame.
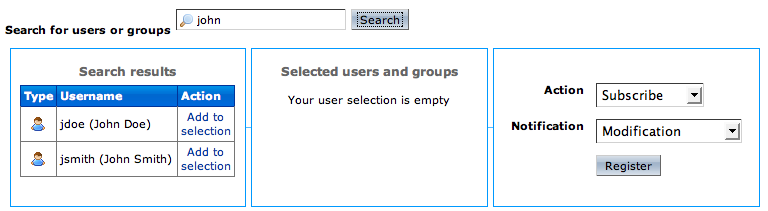
Click on the Add to selection link corresponding to the users or groups whose subscriptions you want to manage.
They are displayed in your selection.

Select the action you want to do (Subscribe or Unsubscribe) and the notification concerned.
Click on the button.
The modifications are displayed in the list of subscriptions.
All users can subscribe to RSS and Atom feeds.
RSS and Atom feeds are web syndication formats that enable users to consult the last modified documents of a space without having to go on the site by means of RSS and Atom readers.
RSS and Atom feeds are available in:
domains,
workspaces,
sections,
folders,
forums.
FireFox 2.0.3 integrates a RSS and Atom reader. You can thus use the RSS and Atom feeds to create a list of dynamic bookmarks.
To subscribe to RSS or Atom feeds:
In your browser, click on the ![]() icon.
icon.
A page with XML code is displayed.
Copy the URL of the page.
In your RSS and Atom reader, create a new RSS feed.
Paste the feed's URL in the appropriate field and validate the feed creation.
The RSS reader should ask for your Nuxeo EP username and password. Indeed, the access to Nuxeo EP is limited to authenticated users.
Type your username and your password and validate the feed creation.
The content of the space is now displayed in your RSS feed and automatically updated.