
We'll run through an example of installing an Ubuntu image. This will focus mainly on Ubuntu 12.04 (Precise Pangolin) server. Because the Ubuntu installation process may change across versions, if you are using a different version of Ubuntu the installer steps may differ.
In this example, we'll use the network installation ISO, since it's a smaller image. The 64-bit 12.04 network installer ISO is at http://archive.ubuntu.com/ubuntu/dists/precise/main/installer-amd64/current/images/netboot/mini.iso
Start the installation process using either virt-manager or virt-install as described in the previous section. If using virt-install, don't forget to connect your VNC client to the virtual machine.
We will assume the name of your virtual machine image is
ubuntu-12.04, which we need to know
when using virsh commands to manipulate
the state of the image.
If you're using virt-manager, the commands should look something like this:
# qemu-img create -f qcow2 /tmp/precise.qcow2 10G
# virt-install --virt-type kvm --name precise --ram 1024 \
--cdrom=/data/isos/precise-64-mini.iso \
--disk /tmp/precise.qcow2,format=qcow2 \
--network network=default \
--graphics vnc,listen=0.0.0.0 --noautoconsole \
--os-type=linux --os-variant=ubuntuprecise
At the initial Installer boot menu, choose the "Install" option. Step through the install prompts, the defaults should be fine.

The installer may ask you to choose a hostname. The
default (ubuntu) is fine. We will
install the cloud-init package later, which will set the
hostname on boot when a new instance is provisioned using
this image.
Step through the install, using the default options.
When prompted for a username, the default
(ubuntu) is fine.
There are different options for partitioning the disks.
The default installation will use LVM partitions, and will
create three partitions (/boot,
/, swap), and this will work
fine. Alternatively, you may wish to create a single ext4
partition, mounted to "/", should also
work fine.
If unsure, we recommend you use the installer's default partition scheme, since there is no clear advantage to one scheme or another.
The Ubuntu installer will ask how you want to manage upgrades on your system. This option depends on your specific use case. If your virtual machine instances will be connected to the internet, we recommend "Install security updates automatically".
Choose "OpenSSH server"so that you will be able to SSH into the virtual machine when it launches inside of an OpenStack cloud.

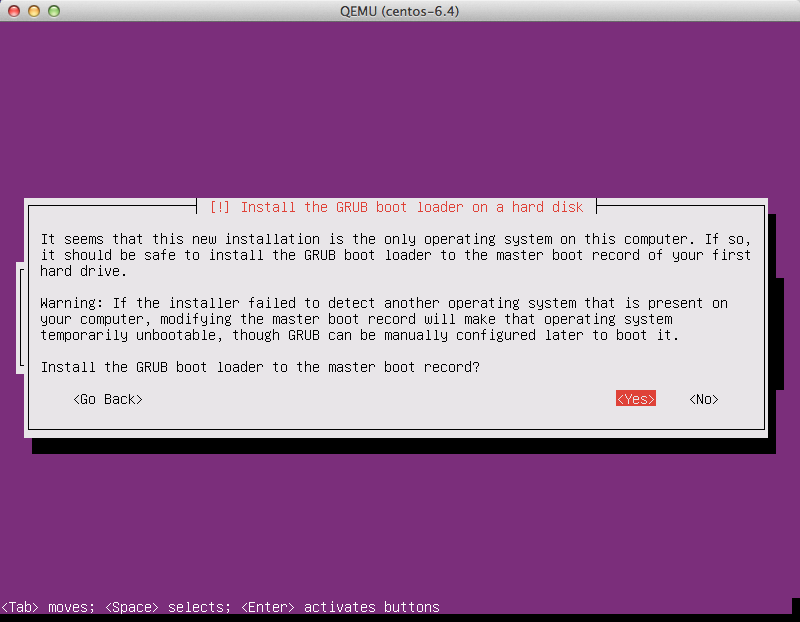
Select "Yes" when asked about installing the GRUB boot loader to the master boot record.
Select the defaults for all of the remaining options. When the installation is complete, you will be prompted to remove the CD-ROM.

![[Note]](../common/images/admon/note.png) | Note |
|---|---|
When you hit "Continue" the virtual machine will shut down, even though it says it will reboot. |
To eject a disk using virsh, libvirt
requires that you attach an empty disk at the same target
that the CDROM was previously attached, which should be
hdc. You can confirm the
appropriate target using the dom dumpxml
vm-image
command.
# virsh dumpxml precise
<domain type='kvm'>
  <name>precise</name>
...
    <disk type='block' device='cdrom'>
      <driver name='qemu' type='raw'/>
      <target dev='hdc' bus='ide'/>
      <readonly/>
      <address type='drive' controller='0' bus='1' target='0' unit='0'/>
    </disk>
...
</domain>
Run the following commands in the host as root to start up the machine again as paused, eject the disk and resume. If you are using virt-manager, you may use the GUI instead.
# virsh start precise --paused
# virsh attach-disk --type cdrom --mode readonly precise "" hdc
# virsh resume precise
| Note |
|---|---|
In the example above, we start the instance paused, eject the disk, and then unpause. In theory, we could have ejected the disk at the "Installation complete" screen. However, our testing indicates that the Ubuntu installer locks the drive so that it cannot be ejected at that point. |
When you boot for the first time after install, it may ask you about authentication tools, you can just choose 'Exit'. Then, log in as root using the root password you specified.
The cloud-init script starts on instance boot and will search for a metadata provider to fetch a public key from. The public key will be placed in the default user account for the image.
Install the cloud-init package:
# apt-get install cloud-init
When building Ubuntu images cloud-init must be explicitly configured for the metadata source in use. The OpenStack metadata server emulates the EC2 metadata service used by images in Amazon EC2.
To set the metadata source to be used by the image run
the dpkg-reconfigure command against
the cloud-init package. When prompted
select the EC2 data source:
# dpkg-reconfigure cloud-init
The account varies by distribution. On Ubuntu-based virtual machines, the account is called "ubuntu". On Fedora-based virtual machines, the account is called "ec2-user".
You can change the name of the account used by
cloud-init by editing the
/etc/cloud/cloud.cfg file and
adding a line with a different user. For example, to
configure cloud-init to put the key in an account named
"admin", edit the config file so it has the
line:
user: admin
The operating system records the MAC address of the
virtual ethernet card in locations such as
/etc/udev/rules.d/70-persistent-net.rules
during the instance process. However, each time the image
boots up, the virtual ethernet card will have a different
MAC address, so this information must be deleted from the
configuration file.
There is a utility called virt-sysprep, that performs various cleanup tasks such as removing the MAC address references. It will clean up a virtual machine image in place:
# virt-sysprep -d precise
Now that the image is ready to be uploaded to the Image
Service, we no longer need to have this virtual machine
image managed by libvirt. Use the virsh undefine
vm-image
command to inform
libvirt
# virsh undefine precise
