Managing Projects
Users must be associated with at least one project, though they may belong to many. Therefore, you should add at least one project before adding users.
Adding Projects
To create a project through the OpenStack dashboard:
- Log in as an administrative user.
- Select the Identity tab in the left navigation bar.
- Under Identity tab, click Projects.
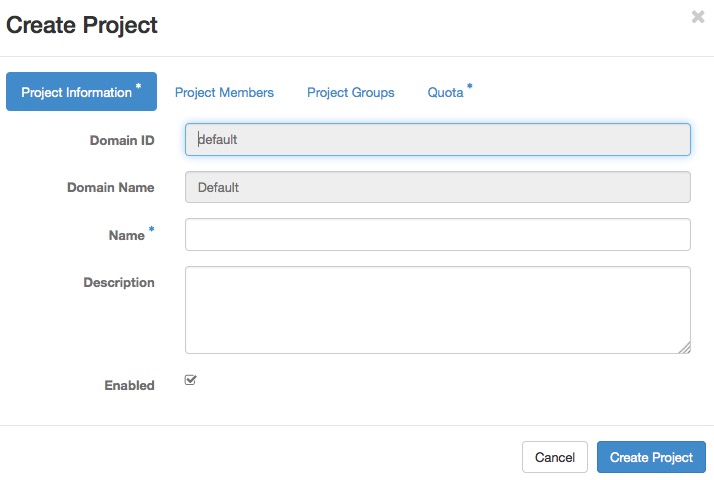
- Click the Create Project button.
You are prompted for a project name and an optional, but recommended, description. Select the check box at the bottom of the form to enable this project. By default, it is enabled, as shown below:
It is also possible to add project members and adjust the project quotas. We’ll discuss those actions later, but in practice, it can be quite convenient to deal with all these operations at one time.
To add a project through the command line, you must use the OpenStack command line client.
# openstack project create demo --domain default
This command creates a project named demo. Optionally, you can add a
description string by appending --description PROJECT_DESCRIPTION,
which can be very useful. You can also
create a project in a disabled state by appending --disable to the
command. By default, projects are created in an enabled state.

Except where otherwise noted, this document is licensed under Creative Commons Attribution 3.0 License. See all OpenStack Legal Documents.