Transfer Orders are used to move Inventory between Sites. They are distinct from Inter-Site Transfers in three primary ways: 1) you can add multiple Items to a single Transfer Order and transfer all the Items at once; 2) all Transfer Order transfers involve a Transit Site, for tracking Inventory while it is "in transit"; and 3) there are reports (i.e., paperwork) associated with Transfer Orders. To enter a new Transfer Order, select the "New Transfer Order" option. The following screen will appear:
When creating a new Transfer Order, you are presented with the following options:
- Order #
Next available Transfer Order Number will automatically display, unless your system requires you to enter Transfer Order Numbers manually. Default values and input parameters for Transfer Order Numbers are configurable at the system level.
- Order Status
Displays the current status of the Transfer Order. Transfer Orders may be either Open = "O" or Closed = "C" depending on the status of the associated Line Items.
- Order Date
Displays current day's date.
- Scheduled Date
Displays the Order's earliest scheduled date. The scheduled date corresponds to the earliest scheduled date for an included Transfer Order Item. Because Transfer Orders may contain multiple Transfer Order Items, the scheduled date indicates the most recent scheduled date. No scheduled date will display in the "Scheduled Date" field until a Transfer Order Line Item has been created and a scheduled date assigned to it.
- Pack Date
The pack date is the same date as the ship date. Because the field can be edited, you have the ability to change the pack date and make it different from the ship date.
- Agent
Specify the Agent associated with the Transfer Order. By default, the name of the logged-in user will be entered as Purchasing Agent-assuming that user is designated as a Purchasing Agent. If the user is not a Purchasing Agent, the first alphabetical name in the list of Purchasing Agents will be entered.
- Project #
Select a Project Number to associate with the Transfer Order. Projects may be used to link Transfer Orders with Work Orders, Sales Orders, Purchase Orders, etc.
- Tax Authority
Specify the Tax Authority associated with the Transfer Order. The Tax Authority associated with the Destination Site will be entered here by default.
- From Site
-
Select a Source Site from the available options. If the following Contact and Address information is defined on the Site master, then it will be entered automatically; otherwise you may enter that information manually:
- Name
The name of the primary Contact at the Source Site.
- Job Title
The primary Contact's Job Title.
- Voice
The primary Contact's phone number.
- Fax
The primary Contact's fax number.
The primary Contact's email address.
- Street Address
The street Address for the Source Site.
- City
The city the Source Site is located in.
- State
The state the Source Site is located in.
- Postal Code
The Postal Code for the Source Site
- Country
The country the Source Site is located in.
- To Site
-
Select a Destination Site from the available options. If the following Contact and Address information is defined on the Site master, then it will be entered automatically; otherwise you may enter that information manually:
- Name
The name of the primary Contact at the Destination Site.
- Job Title
The primary Contact's Job Title.
- Voice
The primary Contact's phone number.
- Fax
The primary Contact's fax number.
The primary Contact's email address.
- Street Address
The street Address for the Destination Site.
- City
The city the Destination Site is located in.
- State
The state the Destination Site is located in.
- Postal Code
The Postal Code for the Destination Site.
- Country
The country the Destination Site is located in.
- Ship Complete
Select to require that all Transfer Order Line Item quantities be issued to Shipping before the Order is shipped. This feature is designed to prevent partial shipments. If selected, users will be prevented from shipping the Order unless all Line Item quantities have been issued to Shipping. If not selected, partial shipments for the Order will be allowed.
- Ship Via
Specify the Ship Via associated with the Transfer Order. You may enter a free-form Ship Via simply by typing the name of the Ship Via into the field.
- Shipping Form
Specify the Shipping Form associated with the Transfer Order.
At the top of the screen, the following buttons are available:
- SAVE AND ADD TO PACKING LIST BATCH
Creates the Transfer Order, saves it, and adds it to the list of Orders available for printing on the Packing List Batch.
- SAVE
Creates the Transfer Order and saves the Transfer Order information. The SAVE button must be selected in order to save the Transfer Order record. It is not enough to save Transfer Order Line Item information. The Transfer Order header must also be saved.
- CANCEL
Closes the screen without creating a new Transfer Order, returning you to the application desktop.
To create or modify Transfer Order Line Items, select the "Line Items" tab at the top of the "Transfer Order" screen. The following screen will appear:
When creating or modifying Transfer Order Line Items, you are presented with the following options:
- Line Items
Display lists Line Items for this Transfer Order.
Note
Transfer Order Line Items may exist in any of the following statuses:
"O" = Open
"C" = Closed
"X" = Cancelled
- Show Canceled Line Items
Select to include in the Line Items display Transfer Order Line Items which have been specifically canceled. Displaying canceled Line Items can provide useful Order history information.
- Require sufficient Inventory
Select to ensure you have enough Quantity on Hand of a Line Item prior to issuing Stock to Shipping. If selected, this option will prevent you from issuing Line Item quantity to Shipping if doing so would force Quantity on Hand for the Item Site to fall below zero. Not selecting this option means issuing Stock to Shipping may drive Item Site Quantity on Hand negative.
- Freight Weight
Displays the combined weight of all Transfer Order Line Items. Freight weight represents the sum of an Item's product weight and packaging weight, both of which are defined on the Item master. The per unit freight weight multiplied by the quantity per gives you the Line Item freight weight. The sum of all Line Item freight weights is the combined weight for the Order.
- Line Item Freight Subtotal
Displays the subtotal for all Line Item Freight. Freight charges may be added when entering or editing a Transfer Order Line Item.
- Tax
Displays the total amount of Tax to be charged on the Transfer Order. Sales Tax is calculated at the Transfer Order Line Item level. The Tax amount displayed here represents the total for all Line Item Tax amounts. To get a detailed view of the Tax calculation, click on the Tax link using your mouse.
- Total
Displays the total amount of the Transfer Order.
Note
Any Transfer Order Line Item may be shipped—even if the Item or Item Site in question becomes inactive after the Sales Order has been created.
At the top of and to the far right of the screen, the following buttons are available:
- CLEAR
Select to clear the contents of the current Transfer Order and open a fresh, new Transfer Order for Order entry. The Order Number of the Order being cleared will display next to the CLEAR button.
Note
Selecting the CLEAR button on the Transfer Order header does not delete any information which has been saved previously.
- SAVE
Saves the Transfer Order information.
- CANCEL
Closes the screen without creating a new Transfer Order, returning you to the application desktop.
- NEW
Opens screen for creating a new Transfer Order Line Item. Mac users may use COMMAND + N to enter a new Line Item.
- EDIT
Enables you to edit highlighted Transfer Order Line Items. The edit screen is the same as that for creating a new Transfer Order Line Item—except that when editing, the fields will contain Transfer Order Line Item information. Double-clicking on a Transfer Order Line Item will also bring you to the editing screen. Mac users may use COMMAND + E to edit an existing Line Item.
- CLOSE
Highlight a Transfer Order Line Item and then select this to close the Transfer Order Line Item. If the highlighted Line Item is already closed, the label will revert to an OPEN, which may be used to open the closed Line Item.
Tip
You may select multiple Line Items for issuing to Shipping by highlighting them using your mouse—or a combination of your mouse and either the SHIFT or CTRL keys.
- ISSUE LINE BAL.
Highlight a Transfer Order Line Item and then select this button to issue the balance of the Line Item quantity to Shipping.
Right-clicking on an Item in the Line Items list enables you to select from the following menu options:
- Edit Line
Enables you to edit highlighted Transfer Order Line Items. The edit screen is the same as that for creating a new Transfer Order Line Item—except that when editing, the fields will contain Transfer Order Line Item information. Double-clicking on a Transfer Order Line Item will also bring you to the editing screen. Mac users may use COMMAND + E to edit an existing Line Item.
- Close Line
Highlight a Transfer Order Line Item and then select this to close the Transfer Order Line Item. If the highlighted Line Item is already closed, the label will revert to an OPEN, which may be used to open the closed Line Item.
Order Notes added to a Transfer Order are used for internal purposes only. To add Notes to a Transfer Order, select the "Order Notes" tab at the top of the "Transfer Order" screen. The following screen will appear:
When adding Notes to a Transfer Order, you are presented with the following options:
- Order Notes
This is a scrolling text field with word-wrapping for entering general Notes related to the Transfer Order. These Notes are for internal use only.
To the far right of the screen, the following buttons are available:
- SAVE
Saves the Order Note.
- CANCEL
Closes the screen without creating an Order Note, returning you to the application desktop.
To add Comments related to a Transfer Order, select the "Comments" tab. The following screen will appear:
When adding Comments related to a Transfer Order, you are presented with the following options:
- Comments
Display lists Comments for the specified Order.
To the far right of the screen, the following buttons are available:
- NEW
Opens screen for creating a new Comment.
- VIEW
Highlight a Comment and then select this button to reach a read-only view of the Comment.
To create a Transfer Order Comment, select the NEW button. The following screen will appear:
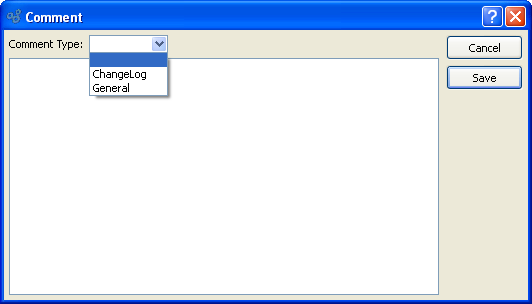
- Comment Type
Specify one of the following Comment Types from the drop-down list: ChangeLog or General. Comment Types are used to categorize Comments. Once you have specified a Comment Type, you may type your Comment in the main text area. The text area features word-wrapping and scroll-bar support for longer Comments.
To the far right of the screen, the following buttons are available:
- CANCEL
Closes the screen without creating a new Comment, returning you to the previous screen.
- SAVE
Creates the Comment and adds it to the list of Order Comments.
Shipping Notes are drawn from the Shipping Comments (if any) associated with Transit Sites. The Notes may vary depending on the Transit Site being used. These Notes provide a mechanism for transferring information about Transit Sites to the Transfer Order. To view Transfer Order Shipping Notes, select the "Shipping Notes" tab at the top of the "Transfer Order" screen. The following screen will appear:
When viewing or editing Shipping Notes for a Transfer Order, you are presented with the following options:
- Shipping Notes
While the content for Shipping Notes may originate from the Transit Site master, you can edit the Notes to fit the requirements of an Order. This is a scrolling text field with word-wrapping.
To the far right of the screen, the following buttons are available:
- SAVE
Saves the Shipping Note.
- CANCEL
Closes the screen without creating a Shipping Note, returning you to the application desktop.
If you want to speed up your data entry of Transfer Order Line Items, you can use the Quick Entry interface. This screen allows you to enter multiple Line Items in one session. It also simplifies the process by presenting only the minimum required fields. To enter Line Items using the Quick Entry interface, select the "Quick Entry" tab at the top of the "Transfer Order" screen. The following screen will appear:
Tip
To get started entering Line Items, place your cursor in the "Item" field. You can then move from field-to-field using the TAB button on your keyboard.
When entering Transfer Order Line Items using the Quick Entry interface, you are presented with the following options:
- Item
Enter an Inventory Item Number. This field is used for entering Items stored in Inventory.
- Qty.
Enter the quantity you want to transfer.
- Standard Cost
Displays the Standard Cost per unit.
- Freight
Enter the Freight amount, if any.
- Due Date
Enter the due date.
To the far right of the screen, the following buttons are available:
- SAVE QUICK ENTRIES
Select to save all the Line Items entered using the Quick Entry interface.
- DELETE QUICK ENTRY
Highlight a Line Item and then select this button to remove the Item from the list.
To add a new Transfer Order Line Item, select the NEW button. The following screen will appear:
When creating a new Transfer Order Line Item, you are presented with the following options:
- Order #
Displays the Transfer Order Number specified on the Transfer Order header screen.
- Line #
Displays the Line Item Number for the current Line Item.
- Item Number
Enter the Item Number of the Item you want to sell. The Item list will contain Items having valid Item Sites in the From (i.e., Source) Site.
- Qty. Ordered
Enter the quantity of the specified Item to be transferred.
- Qty. Shipped
Shipped to Date: Displays the total quantity shipped of the specified Line Item to date.
- Standard Cost
Displays the Standard Cost per unit.
- Line Item Freight
Enter the amount of freight charges for the entire Line Item quantity.
- Tax
Displays the amount of Tax to be charged for the Transfer Order Line Item quantity. Sales Tax is calculated at the Transfer Order Line Item level. To get a detailed view of the Tax calculation, click on the Tax link using your mouse.
- Scheduled Date
The scheduled date is the date when the Line Item should be Shipped. The user who enters the Line Item is responsible for determining the scheduled date. After entering the scheduled date, hit the TAB key on your keyboard to display values in the remaining display only fields.
Note
The Transfer Order Item having the earliest scheduled date will determine the ship date for the Transfer Order.
- Promise Date
An additional informational date that can be used for a user defined purpose.
To the far right of the screen, the following buttons are available:
- CLOSE
Closes the screen without creating a new Transfer Order Line Item, returning you to the Transfer Order header.
- SAVE
Creates the new Transfer Order Line Item and adds it to the list of Transfer Order Line Items.
Note
If there is no Item Site for the Item in the Destination Site, you will automatically be presented with an Item Site screen. Simply enter the required information to create an Item Site in the Destination Site. An Item Site must exist in the Destination Site before material can be received successfully.
- PREVIOUS
Select to view previous Line Items associated with the Transfer Order.
- NEW
Select to create a new Transfer Order Line Item.
- CANCEL ITEM
Select to cancel the current Transfer Order Line Item. Records of canceled Line Items will be retained for informational purposes. To view canceled Line Items associated with a Transfer Order, select the "Show Canceled Line Items" option on the Transfer Order header's "Line Items tab.
- Show Availability
Select to display Availability Supply information for the Transfer Order Item in the following categories:
- Inventory
-
Select radio button to view available inventory.
- On Hand
Displays the current Quantity on Hand value.
- Allocated
Displays the quantity allocated to current Sales Orders, Transfer Orders, and/or Work Orders in the system. An Item is considered allocated to a Sales Order/Transfer Order if a Transfer Order Line Item exists for the Item—and that Line Item has not yet been issued to Shipping. An Item is considered allocated to a Work Order if the Item is a material requirement—and the material has not yet been issued to the Work Order. Once the current Transfer Order Line Item is saved, the "Allocated" value will increase by the quantity ordered.
- Unallocated
Displays the Quantity on Hand remaining after allocations have been accounted for, as in: QOH - Allocated Qty. = Unallocated Qty.
- On Order
If the Transfer Order Item is a manufactured Item, the quantity ordered by current Work Orders will be displayed. If the Transfer Order Item is a purchased Item, the quantity ordered by current Purchase Orders will be displayed.
- Available
Displays the available quantity. Available quantity is determined using the following formula: Unallocated Qty. + On Order Qty. = Available Qty.
- Dependencies
-
Select radio button to review any components dependent on manufactured line Item.
- Show Dependencies as Indented BOM
Displays components Items associated with sold manufactured Item in a nested list with a plus ("+") sign located to the far left of the screen next to each line that may be expanded to lower levels. By clicking your mouse on a plus sign, you reveal lower levels of information related to the Line Item.
When selecting or editing Characteristics for a Transfer Order Line Item, you are presented with the following options:
- Name
Displays the name of any Item Characteristics associated with the Item. Characteristics defined as Item Characteristics may be associated with Items on the Item master.
- Value
Displays the default Value associated with an Item Characteristic, but permits you to specify an alternate Value. When associating Characteristic Values with a Transfer Order Line Item, you have four options: 1) Select the default Value; 2) select an alternate pre-defined Value from the list; 3) manually enter a new Value in place of the pre-defined Value; or 4) make no selection. Making no selection means the Characteristics will not be associated with the Transfer Order Line Item.
Tip
You can link Characteristics and Values to an Item by using the Item master. Once entered, these Characteristics and Values will be available to users entering Transfer Order Line Items.
To enter Notes related to a Transfer Order Line Item, select the "Notes" tab at the bottom of the screen, as shown below:
When adding Notes to a Transfer Order Line Item, you are presented with the following options:
- Notes
This is a scrolling text field with word-wrapping for entering general Notes related to the Transfer Order Line Item.
To add Comments related to a Transfer Order Line Item, select the "Comments" tab. The following screen will appear:
Note
Whenever Transfer Order Line Items are created or their quantities are changed, the system will automatically generate a Comment, which will appear in the list of Line Item Comments.
When adding Comments related to a Transfer Order Line Item, you are presented with the following options:
- Comments
Display lists Comments for the specified Line Item.
To the far right of the screen, the following buttons are available:
- NEW
Opens screen for creating a new Comment. Transfer Order Line Item Comments may only be added after the Line Item has been saved to the Transfer Order.
- VIEW
Highlight a Comment and then select this button to reach a read-only view of the Comment.
To create a Transfer Order Line Item Comment, select the NEW button. The following screen will appear:
- Comment Type
Specify one of the following Comment Types from the drop-down list: ChangeLog or General. Comment Types are used to categorize Comments. Once you have specified a Comment Type, you may type your Comment in the main text area. The text area features word-wrapping and scroll-bar support for longer Comments.
To the far right of the screen, the following buttons are available:
- CANCEL
Closes the screen without creating a new Comment, returning you to the previous screen.
- SAVE
Creates the Comment and adds it to the list of Order Comments.