Beginning of Chapter Next Chapter

3.3.2.  List Unposted Receipts

When you are receiving an Order, you have the option to either post it or save it for posting later. If a Receipt is saved for posting later, it will appear on the List Unposted Receipts screen. To access your unposted Receipts, select the "List Unposted Receipts" option. The following screen will appear:

List Unposted Receipts

The "Unposted Receipts" screen displays information on all existing unposted Order Receipts, including Order Number, Order Type, Vendor name, Line Item Number, Order due date, Inventory Item Number, Inventory UOM, Vendor Item Number, Vendor UOM, quantity ordered, quantity received, quantity to receive, receipt date, and G/L posted date.

Tip

You may select multiple Receipts for printing or posting by highlighting them using your mouse—or a combination of your mouse and either the SHIFT or CTRL keys.

To the far right of the screen, the following buttons are available:

CLOSE

Closes the screen, returning you to the application desktop.

PRINT

Highlight an Order and then select this button to print a copy of the selected Order.

NEW

Opens screen for entering a new Receipt.

EDIT

Enables you to edit Receipts by correcting the received quantity or freight amount. Double-clicking on a Receipt will also bring you to the editing screen.

POST

Highlight a Receipt and then select this button to post the selected Receipt.

DELETE

Highlight a Receipt and then select this button to remove the Receipt from the list.

VIEW ORDER ITEM

Highlight a Receipt and then select this button to reach a read-only view of the original Order Line Item screen.

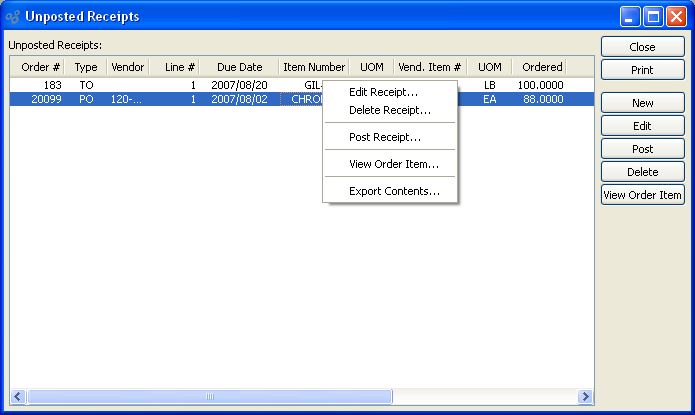
Right-clicking on a Receipt in the unposted Receipts list enables you to select from the following menu options:

Edit Receipt

Enables you to edit Receipts by correcting the received quantity or freight amount. Double-clicking on a Receipt will also bring you to the editing screen.

Delete Receipt

Highlight a Receipt and then select this button to remove the Receipt from the list.

Post Receipt

Highlight a Receipt and then select this button to post the selected Receipt.

View Order Item

Highlight a Receipt and then select this button to reach a read-only view of the original Order Line Item screen.

Export Contents

Export the data displayed on the screen into a plain-text, TAB-delimited file. This file may subsequently be imported into a spreadsheet or other office tool.