Shipping Reports section.
Backlog Reports section.
To view Backlog by Item, select the "Backlog by Item" option. The following screen will appear:
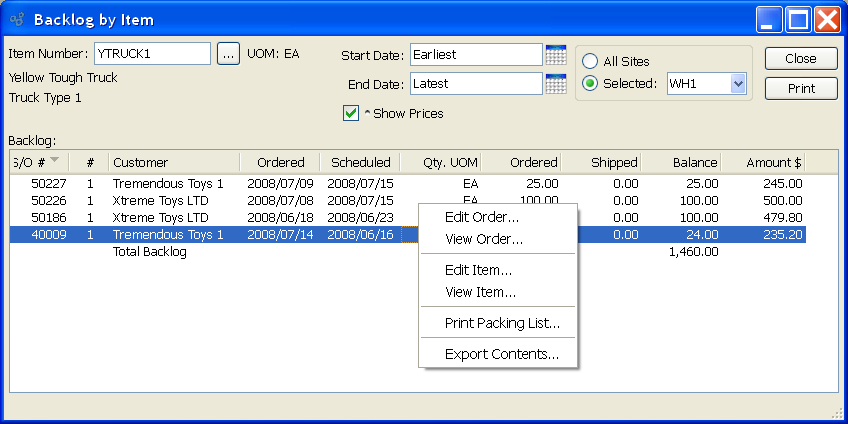
When displaying Backlog by Item, you are presented with the following options:
- Item Number
Enter the Item Number of the Item whose Backlog you want to view. The browse button located to the right of the field leads to a searchable list of make and buy items.
- UOM
Inventory Unit of Measure.
- Start Date
Backlog by Item entered on and after this date will be displayed.
- End Date
Backlog by Item entered on and before this date will be displayed.
- Show Prices
Select to include pricing information in the display.
- All Sites
Select to display Backlog by Item for all Sites.
- Selected
Specify Site whose Backlog by Item you want to display.
- Backlog
Display lists Backlog by Item, using the specified parameters. If the "Show Prices" option is selected, an additional column showing the amount of the backlog, with Prices normalized to the Base Currency using the Currency Exchange Rate effective on the Order Date, will display. The total backlog will also be shown.
To the far right of the screen, the following buttons are available:
- CLOSE
Closes the screen, returning you to the application desktop.
Runs the report associated with this screen.
Right-clicking on a Sales Order Line Item in the Backlog list enables you to select from the following menu options:
To view Backlog by Customer, select the "Backlog by Customer" option. The following screen will appear:
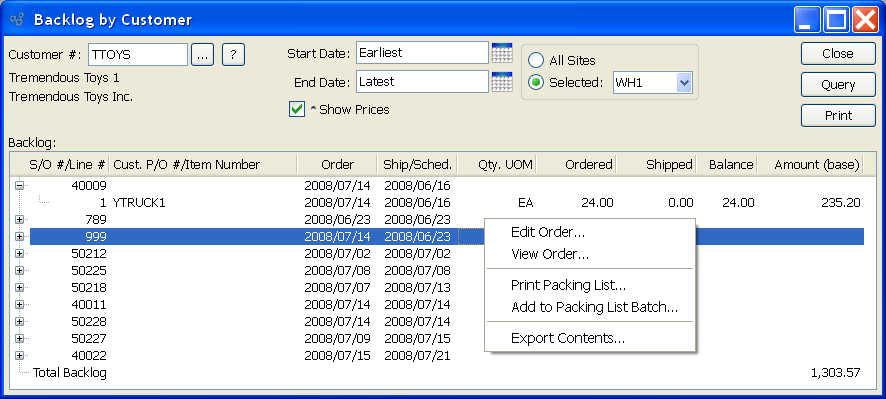
When displaying Backlog by Customer, you are presented with the following options:
- Customer #
Enter the Customer Number of the Customer whose Backlog you want to display. The browse button located to the right of the field leads to a searchable Customers list. You may also access this list using the keyboard shortcut "CTRL + L". Once a Customer Number is entered, the Customer name and billing address will display. Select the "?" or "$" symbol next to the browse button to view Customer information for the specified Customer. If a Customer's credit is "In Good Standing," the button will feature a black question mark ("?") icon. If the icon turns to an orange dollar sign ("$"), the Customer's credit Status is "On Credit Warning." A red dollar sign ("$") indicates the Customer's credit Status is "On Credit Hold."
- Start Date
Backlog by Customer entered on and after this date will be displayed.
- End Date
Backlog by Customer entered on and before this date will be displayed.
- Show Prices
Select to include pricing information in the display.
- All Sites
Select to display Backlog by Customer for all Sites.
- Selected
Specify Site whose Backlog by Customer you want to display.
- Backlog
Display lists Backlog by Customer, using the specified parameters. If the "Show Prices" option is selected, an additional column showing the amount of the backlog, with Prices normalized to the Base Currency using the Currency Exchange Rate effective on the Order Date, will display. The total backlog will also be shown.
To the far right of the screen, the following buttons are available:
- CLOSE
Closes the screen, returning you to the application desktop.
- QUERY
Select to generate the display, using the specified parameters.
Runs the report associated with this screen.
Right-clicking on a Sales Order Line Item in the Backlog list enables you to select from the following menu options:
To view Backlog by Product Category, select the "Backlog by Product Category" option. The following screen will appear:
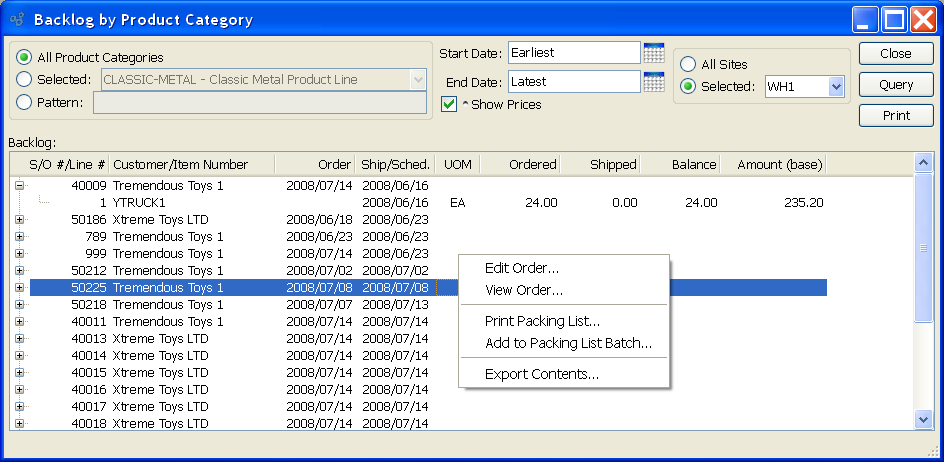
When displaying Backlog by Product Category, you are presented with the following options:
- All Product Categories
Select to display Backlog for all Product Categories.
- Selected
Specify Product Category whose Backlog you want to display.
- Pattern
Enter a Product Category pattern to select a range of Product Categories. Refine your search using Regular Expressions.
- Start Date
Backlog by Product Category entered on and after this date will be displayed.
- End Date
Backlog by Product Category entered on and before this date will be displayed.
- Show Prices
Select to include pricing information in the display.
- All Sites
Select to display Backlog by Product Category for all Sites.
- Selected
Specify Site whose Backlog by Product Category you want to display.
- Backlog
Display lists Backlog by Product Category, using the specified parameters. If the "Show Prices" option is selected, an additional column showing the amount of the backlog, with Prices normalized to the Base Currency using the Currency Exchange Rate effective on the Order Date, will display. The total backlog will also be shown.
To the far right of the screen, the following buttons are available:
- CLOSE
Closes the screen, returning you to the application desktop.
- QUERY
Select to generate the display, using the specified parameters.
Runs the report associated with this screen.
Right-clicking on a Sales Order Line Item in the Backlog list enables you to select from the following menu options:
To view summarized Backlog by Site, select the "Summarized Backlog by Site" option. The following screen will appear:
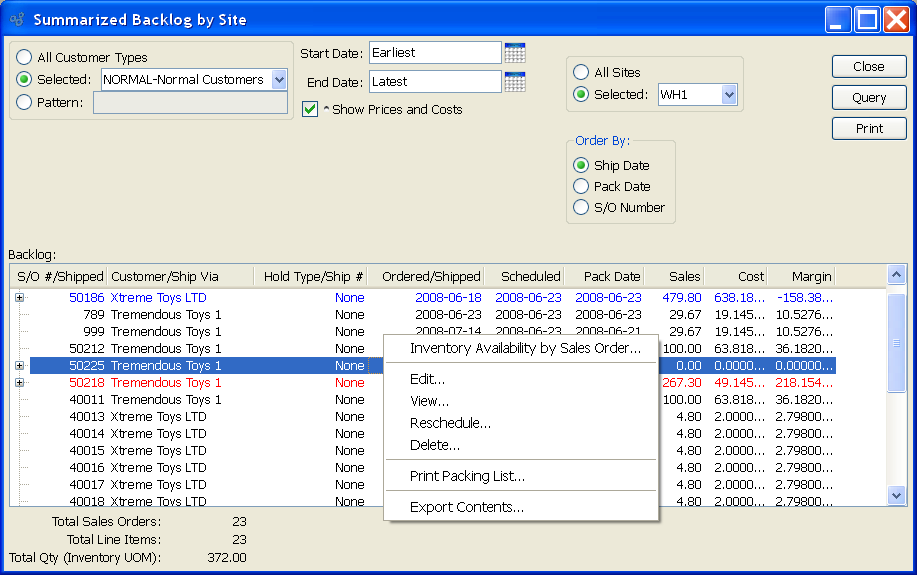
When displaying summarized Backlog by Site, you are presented with the following options:
- All Customer Types
Select to display summarized Backlog by Site for all Customer Types.
- Selected
Specify Customer Type whose Backlog by Site you want to display.
- Pattern
Enter a Customer Type pattern to select a range of Customer Types. Refine your search using Regular Expressions.
- Start Date
Summarized Backlog by Site entered on and after this date will be displayed.
- End Date
Summarized Backlog by Site entered on and before this date will be displayed.
- Show Prices and Costs
Select to include pricing and Cost information in the display.
- All Sites
Select to display summarized Backlog for all Sites.
- Selected
Specify Site whose summarized Backlog you want to display.
- Order By
-
Select one of the following options to indicate how you want the results to be organized:
- Ship Date
Select to order the display by Ship Date.
- Pack Date
Select to order the display by Pack Date.
- S/O Number
Select to order the display by Sales Order Number.
- Backlog
Display lists summarized Backlog by Site, using the specified parameters. The display is a nested list, with a plus ("+") sign located to the far left of the screen next to each line that may be expanded to lower levels. By clicking your mouse on a plus sign, you reveal lower levels of information related to the Order. If the "Show Prices and Costs" option is selected, additional columns showing sales Price, Cost, and margin will display.
Note
The Summarized Backlog by Site display is color-coded for ease of use. The following colors are used to describe the backlog status of Sales Order Line Items:
- Blue
Order is at Shipping but is not yet shipped.
- Green
Order has been shipped complete, but has not yet been selected for Billing.
- Red
Part of the Order has been shipped and selected for Billing, but Backorder Items still need to be shipped and billed.
- Black
None of the above conditions is true.
- Total Sales Orders
Displays the total number of Sales Orders on Backlog.
- Total Line Items
Displays the total number of Sales Order Line Items on Backlog.
- Total Qty (Shipping UOM)
Displays the total number of unshipped Sales Order Line Items on Backlog.
To the far right of the screen, the following buttons are available:
- CLOSE
Closes the screen, returning you to the application desktop.
- QUERY
Select to generate the display, using the specified parameters.
Runs the report associated with this screen.
Right-clicking on a Sales Order in the Backlog list enables you to select from the following menu options:
Shipment Reports section.
To view shipments by Sales Order, select the "Shipments by Sales Order" option. The following screen will appear:
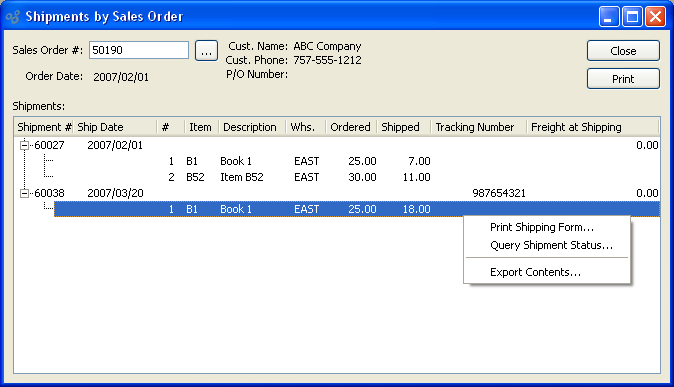
Tip
Get the most up-to-date tracking information directly from the shipper's website by using the "Query Shipment Status" option in the "Shipments by Sales Order" report.
When displaying shipments by Sales Order, you are presented with the following options:
- Sales Order #
Enter the Sales Order Number of the Sales Order whose shipments you want to display.
- Order Date
Displays the Order Date for the specified Sales Order.
- Cust. Name
Displays the Customer Name associated with the specified Sales Order.
- Cust. Phone
Displays the Customer's phone number.
- P/O Number
Displays the Purchase Order Number associated with the specified Sales Order.
- Shipments
Display lists shipments by Sales Order, using the specified parameters.
To the far right of the screen, the following buttons are available:
- CLOSE
Closes the screen, returning you to the application desktop.
Runs the report associated with this screen.
Right-clicking on a Shipment enables you to select from the following menu options:
To view shipments by date, select the "Shipments by Date" option. The following screen will appear:
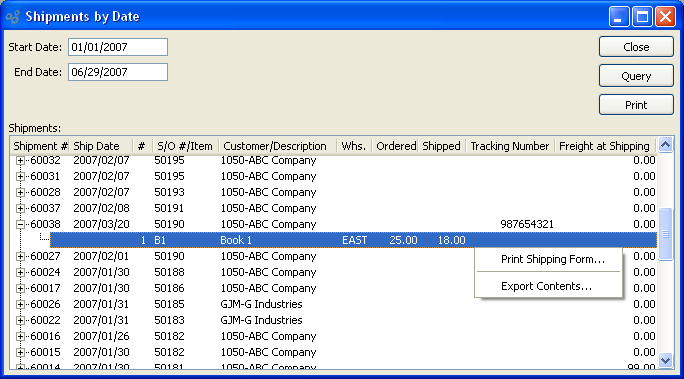
Tip
Get the most up-to-date tracking information directly from the shipper's website by using the "Query Shipment Status" option in the "Shipments by Sales Order" report.
When displaying shipments by date, you are presented with the following options:
- Start Date
Shipments occurring on or after this date will be included in the display.
- End Date
Shipments occurring on or before this date will be included in the display.
- Shipments
Display lists shipments by date, using the specified parameters.
To the far right of the screen, the following buttons are available:
- CLOSE
Closes the screen, returning you to the application desktop.
- QUERY
Select to generate the display, using the specified parameters.
Runs the report associated with this screen.