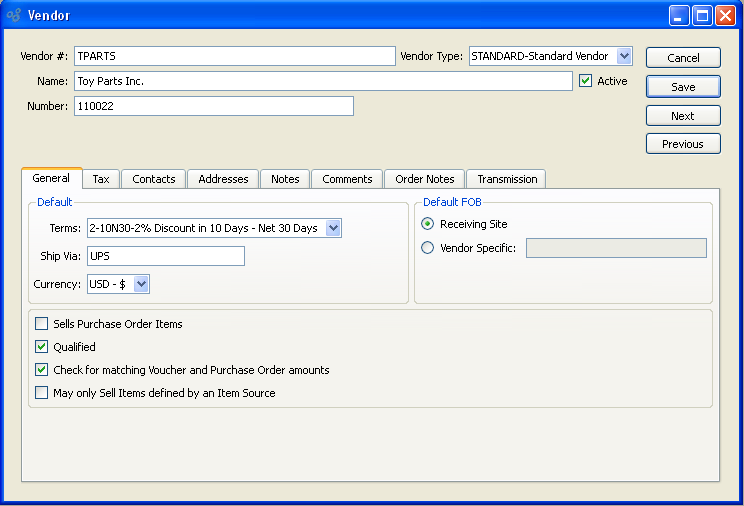
To create a new Vendor, select the "New Vendor" option. The following screen will appear:
Tip
Vendors can also be created from the CRM Account screen. Simply enter a new CRM Account, selecting the "Vendor" Relationship option.
When creating a new Vendor, you are presented with the following options:
- Vendor #
Enter a number to identify the Vendor.
- Vendor Type
Specify the Vendor Type of the Vendor.
- Name
Enter the name of the Vendor.
- Active
Select if you are actively doing business with this Vendor.
- Number
Use this field to indicate the Account number the Vendor assigns to your site.
Note
If a new Address is manually entered here, that Address will be added automatically to the master list of Addresses.
- Default
-
Default settings for Vendor.
- Terms
Specify the default billing Terms for the Vendor.
- Ship Via
Specify default Ship Via for Vendor.
- Currency
Specify the Currency to be used when conducting business transactions with the Vendor. This option will only be visible in systems configured to use multiple Currencies.
- Default FOB
-
Indicate the default Free on Board (FOB) destination by selecting one of the following options:
- Receiving Site FOB
Select if receiving site is default FOB destination.
- Vendor Specific FOB
Select if Vendor specifies an FOB destination other than the receiving Site. Enter alternate FOB details in space provided.
- Sells Purchase Order Items
Select if Vendor accepts Purchase Orders to render goods. This setting is informational only. It has no impact on the ordering process.
- Qualified
Select this flag to indicate that the Vendor is a trusted Vendor.
- Check for matching Voucher and Purchase Order amounts
Select to perform Voucher matching when entering Voucher Items for the Vendor. If selected, users will be presented with a warning message whenever a Voucher Item amount does not match the corresponding Purchase Order Item amount for the Vendor. This option will not prevent users from proceeding. Instead, the warning message simply alerts users that a mis-match exists.
- May only Sell Items defined by an Item Source
Select if you want to restrict Items purchased from the Vendor to Items having a defined Item Source. If not selected, you may choose from all purchased Items when entering a Purchase Order Line Item.
To the far right of the screen, the following buttons are available:
- CANCEL
Closes the screen without creating a new Vendor, returning you to the application desktop.
- SAVE
Creates the Vendor and enters the Vendor into the master list of Vendors.
- NEXT
Select to open the Vendor master whose Vendor Number immediately follows the current Vendor Number.
- PREVIOUS
Select to open the Vendor master whose Vendor Number immediately precedes the current Vendor Number.
To view or enter Vendor Tax information, select the "Tax" tab. The following screen will appear:
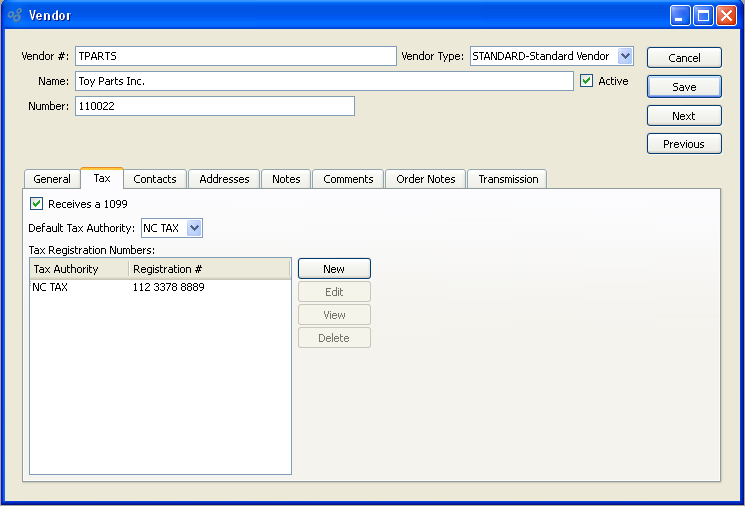
When adding Vendor Tax information, you are presented with the following options:
- Receives a 1099
Select if Vendor receives a 1099 federal Tax form.
- Tax Registration Numbers
Display lists Tax Registration Numbers for the specified Vendor.
To the far right of the screen, the following buttons are available:
- NEW
Opens screen for creating a new Vendor Tax Registration Number.
- EDIT
Enables you to edit highlighted Vendor Tax Registration Numbers. The edit screen is the same as that for creating a new Vendor Tax Registration Number—except that when editing, the fields will contain Vendor Tax Registration Number information. Double-clicking on a Vendor Tax Registration Number will also bring you to the editing screen.
- VIEW
Highlight a Vendor Tax Registration Number and then select this button to reach a read-only view of the "Edit" screen.
- DELETE
Highlight a Vendor Tax Registration Number and then select this button to remove the Vendor Tax Registration Number from the list.
To add a new Vendor Tax Registration Number, select the NEW button. The following screen will appear:
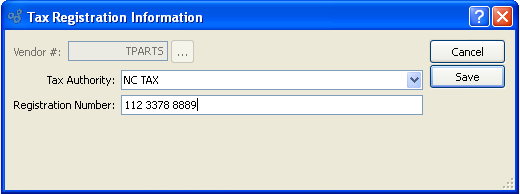
When adding a new Vendor Tax Registration Number, you are presented with the following options:
- Vendor #
Displays the Vendor Number for the specified Vendor.
- Tax Authority
Specify the Tax Authority associated with the Tax Registration Number.
- Registration Number
Enter the Vendor's Tax Registration Number for the specified Tax Authority. The registration number is used by Tax Authorities to identify businesses and/or individuals. An Employer Identification Numbers (EIN) is an example of a Tax Registration Number.
Tip
The Vendor's Tax Registration Number is used for identifying the Vendor to relevant Tax Authorities. This information should not be confused with the Tax Registration Numbers, which are used to identify your company to relevant Tax Authorities.
To the far right of the screen, the following buttons are available:
- CANCEL
Closes the screen without creating a new Vendor Tax Registration Number, returning you to the previous screen.
- SAVE
Creates the Vendor Tax Registration Number and adds it to the master list of Vendor Tax Registration Numbers.
To view or enter Vendor contact information, select the "Contact Information" tab. The following screen will appear:
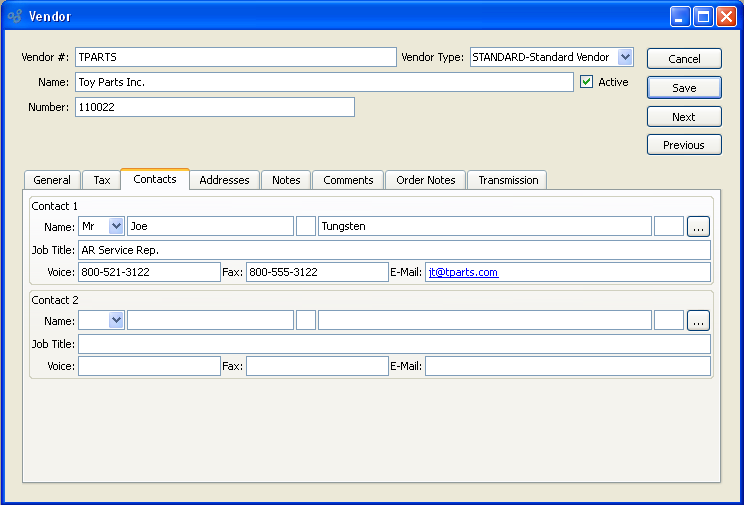
When adding Vendor contact information, you are presented with the following options:
- Contact 1
-
Manually enter Contact information in the fields below—or use the browse button to select pre-existing Contact information.
- Title
Select a Title from the list of available Titles.
- First
Enter the Contact's first name.
- Last
Enter the Contact's last name.
- Job Title
Enter the Contact's job title.
- Voice
Enter the Contact's phone number.
- Fax:
Enter the Contact's fax number.
Enter the Contact's e-mail address.
- Contact 2
-
Manually enter Contact information in the fields below—or use the browse button to select pre-existing Contact information.
- Title
Select a Title from the list of available Titles.
- First
Enter the Contact's first name.
- Last
Enter the Contact's last name.
- Job Title
Enter the Contact's job title.
- Voice
Enter the Contact's phone number.
- Fax
Enter the Contact's fax number.
Enter the Contact's e-mail address.
Just as Customers may have multiple Ship-To addresses, Vendors may also maintain multiple Ship-From addresses. A Vendor address is a Ship-From address. To add Vendor Addresses to a Vendor master, select the "Addresses" tab. The following screen will appear:
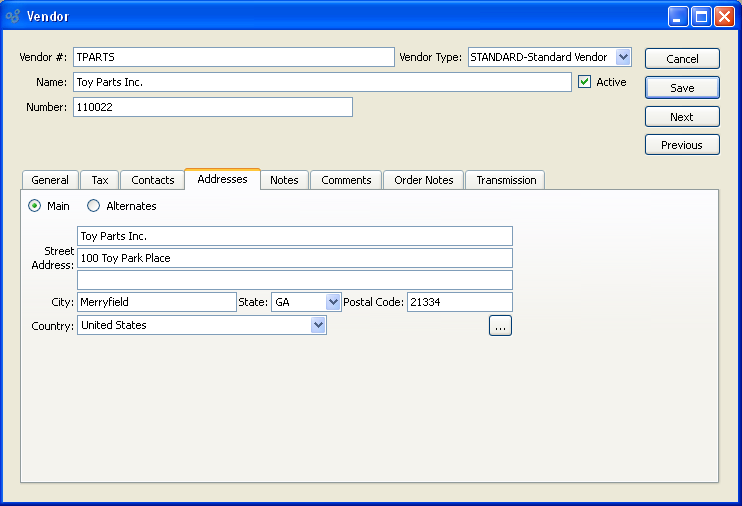
When adding Vendor Addresses, you are presented with the following options:
- Main
-
Select to present primary address used by Vendor. Manually enter Address information in the fields below—or use the browse button to select pre-existing Address information. By default, this address will appear as the main address when entering Purchase Orders for the Vendor.
- Street address
Enter the street Address for the Vendor.
- City
Enter the city where the Vendor is located.
- State
Enter the state where the Vendor is located.
- Postal Code
Enter the Postal Code for the Vendor.
- Country
Enter the country where the Vendor is located.
- Alternates
Select to list various alternate Addresses for Vendor.
To the far right of the screen, the following buttons are available:
Runs the report associated with this screen.
- NEW
Opens screen for creating a new Vendor Address.
- EDIT
Enables you to edit highlighted Vendor Address. The edit screen is the same as that for creating a new Vendor Address—except that when editing, the fields will contain Vendor Address information. Double-clicking on a Vendor Address will also bring you to the editing screen.
- VIEW
Highlight a Vendor Address and then select this button to reach a read-only view of the "Edit" screen.
- DELETE
Highlight a Vendor Address and then select this button to remove the Vendor from the list.
To create a new Vendor Address, select the NEW button. The following screen will appear:
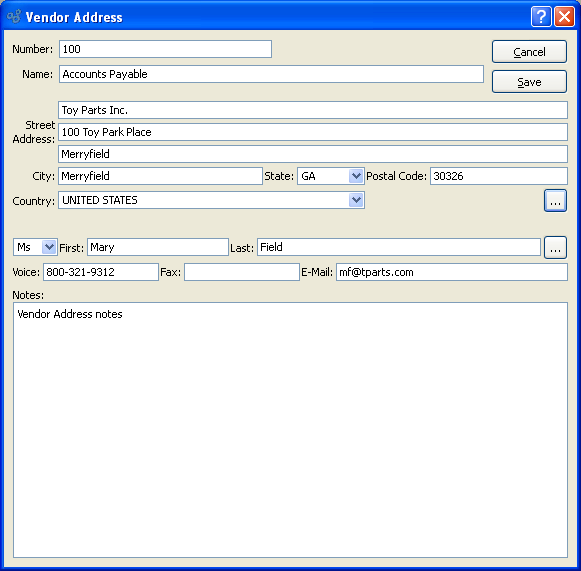
When creating a new Vendor Address, you are presented with the following options:
- Number
-
Enter a number or code to identify the Vendor Address. Using the value "Remit" or "REMIT" or "remit" in this field will cause the specified Address to be used as the default Remit-To Address when printing Checks for the Vendor.
Note
The Remit-To feature is only supported when printing Checks using the APCheck report definition.
- Name
Enter the name of the Vendor Address.
- Address
-
Manually enter Address information in the fields below—or use the browse button to select pre-existing Address information. By default, this address will appear as the main address when entering Purchase Orders for the Vendor.
- Street Address
Enter the street Address for the Vendor.
- City
Enter the city where the Vendor is located.
- State
Enter the state where the Vendor is located.
- Postal Code
Enter the Postal Code for the Vendor.
- Country
Enter the country where the Vendor is located.
- Contact
-
Manually enter Contact information in the fields below—or use the browse button to select pre-existing Contact information.
- Title
Select a Title from the list of available Titles.
- First
Enter the Contact's first name.
- Last
Enter the Contact's last name.
- Job Title
Enter the Contact's job title.
- Voice
Enter the Contact's phone number.
- Fax
Enter the Contact's fax number.
Enter the Contact's e-mail address.
- Comments
This is a scrolling text field with word-wrapping for entering Comments related to the Vendor Address.
To the far right of the screen, the following buttons are available:
- CANCEL
Closes the screen without creating a new Vendor Address, returning you to the previous screen.
- SAVE
Creates the Vendor Address and adds it to the master list of Vendor Addresses.
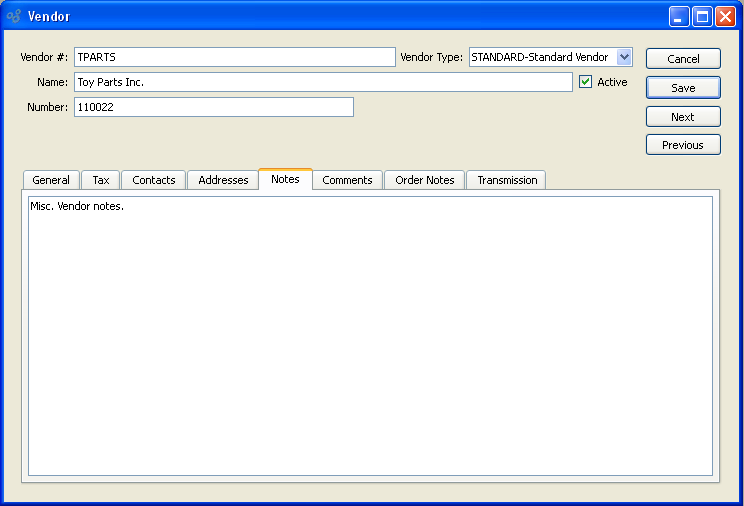
To add Notes related to a Vendor, select the "Notes" tab. The following screen will appear:
To add Comments related to a Vendor, select the "Comments" tab. The following screen will appear:
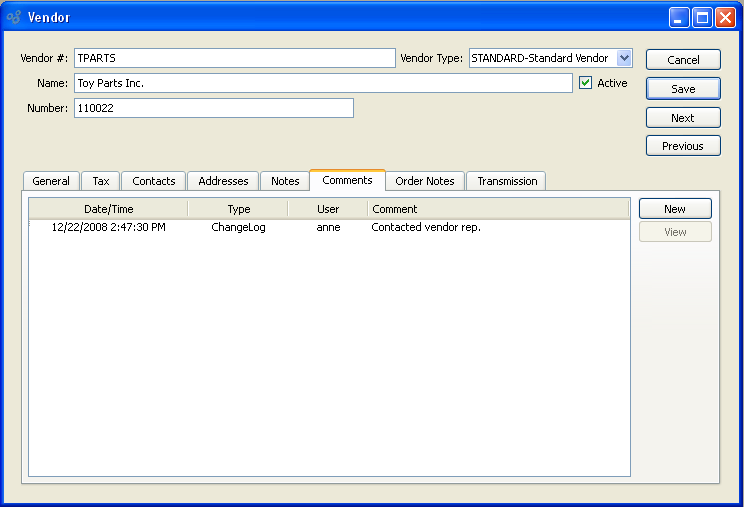
When adding Comments related to a Vendor, you are presented with the following options:
- Comments
Display lists Comments for the specified Vendor.
To the far right of the screen, the following buttons are available:
- NEW
Opens screen for creating a new Comment.
- VIEW
Highlight a Comment and then select this button to reach a read-only view of the Comment.
To create a new Vendor Comment, select the NEW button. The following screen will appear:
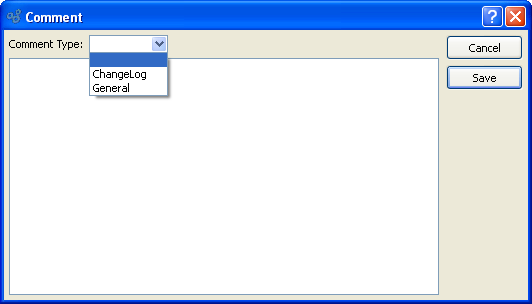
- Comment Type
Specify one of the following Comment Types from the drop-down list: ChangeLog or General. Comment Types are used to categorize Comments. Once you have specified a Comment Type, you may type your Comment in the main text area. The text area features word-wrapping and scroll-bar support for longer Comments.
To the far right of the screen, the following buttons are available:
- CANCEL
Closes the screen without creating a new Comment, returning you to the previous screen.
- SAVE
Creates the Comment and adds it to the list of Vendor Comments.
To add purchasing Notes related to a Vendor, select the "Order Notes" tab. The following screen will appear:
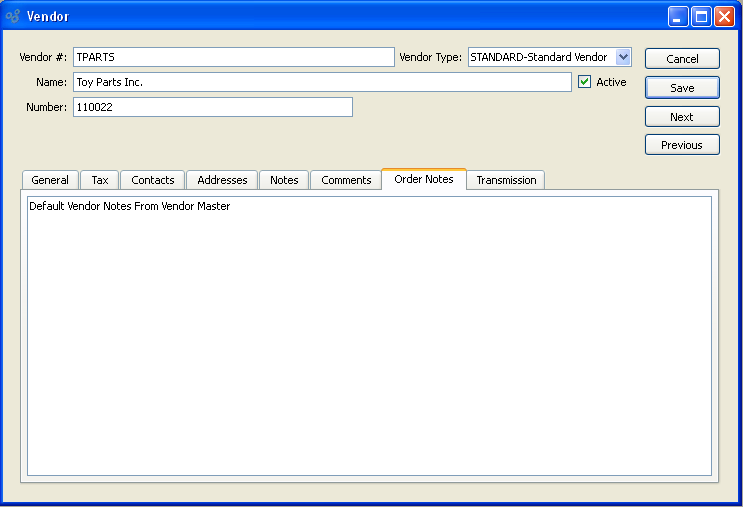
When adding purchasing Notes related to a Vendor, you are presented with the following options:
- Order Notes
Select the "Order Notes" tab to access this scrolling text field with word-wrapping for entering purchasing Notes related to the Vendor.
To the far right of the screen, the following buttons are available:
- CANCEL
Closes the screen without creating new purchasing Notes, returning you to the application desktop.
- SAVE
Creates the purchasing Notes and adds them to the Vendor master.
The Electronic Data Interchange (EDI) system enables you to exchange information electronically with your Vendors. To set up a Vendor to receive Purchase Orders via email or Automated Clearing House (ACH) transmissions, select the "Transmission" tab. The following screen will appear:
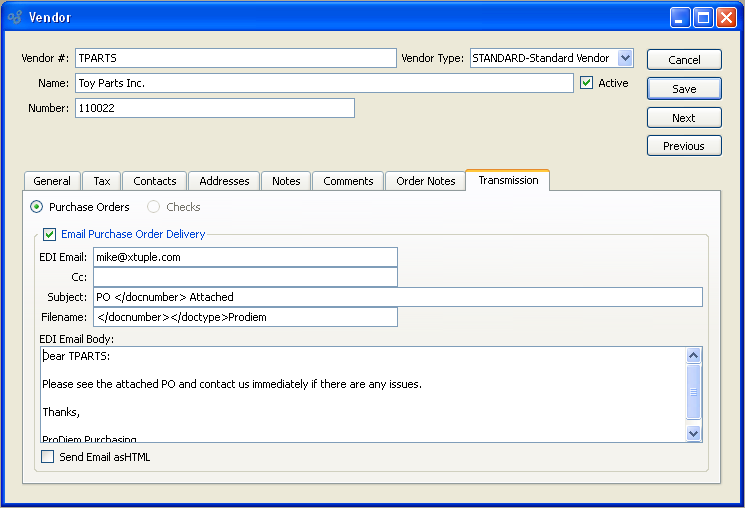
When setting up a Vendor to receive Purchase Orders via email, select the "Purchase Orders" button. The following options will appear:
- Email Purchase Order Delivery
-
Select to enable Vendor to receive Purchase Orders via email.
Note
EDI details entered on the Vendor master will transfer to the Schedule P/O for Email Delivery screen when a Purchase Order for the Vendor is selected for email delivery.
- EDI Email
-
Enter the Vendor email address to be used as the default recipient address whenever Purchase Orders are emailed to the Vendor.
Tip
Send Purchase Orders to multiple recipients by separating email addresses with a comma. Be sure to omit any spaces between addresses when using commas to send copies to multiple recipients.
- Cc
Enter the email address to be used as the default carbon copy address whenever Purchase Orders are emailed to the Vendor.
- Subject
Enter a default email subject line to be used whenever Purchase Orders are emailed to the Vendor.
- Filename
XML tags may be used in this field to dynamically generate filename text. In the example shown in the screenshot above, the filename will include the Document Type (i.e., Purchase Order) and the Document Number (i.e., Purchase Order Number).
- EDI Email Body
Use this text field to enter the default message that will accompany any Purchase Orders emailed to the Vendor.
- Send Email as HTML
Select to send Email in HTML format.
To enable online processing or Automated Clearing House (ACH) Check printing for the Vendor, select the "Checks" radio button. The following options will appear:
- Enable ACH Check Printing
-
Select to enable online processing or Automated Clearing House (ACH) Check printing.
- Routing Number
Enter Bank Account Routing Number.
- Account Number
Enter Bank Account Check Number.
- Account Type
Select type of Bank Account associated with Routing and Account numbers.
- Use Instead of Vendor Number and Name
-
Select to use alternative Vendor identification information other than Vendor Number and Name.
- Identification Number
Enter alternate Vendor identification number (i.e., tax ID number).
- Name
Enter alternate Vendor name (i.e., name of parent company).