The Vendor Workbench groups together in one location a wide range of both current and historical Vendor information. To access the Vendor Workbench, select the "Vendor Workbench" option. The following screen will appear:
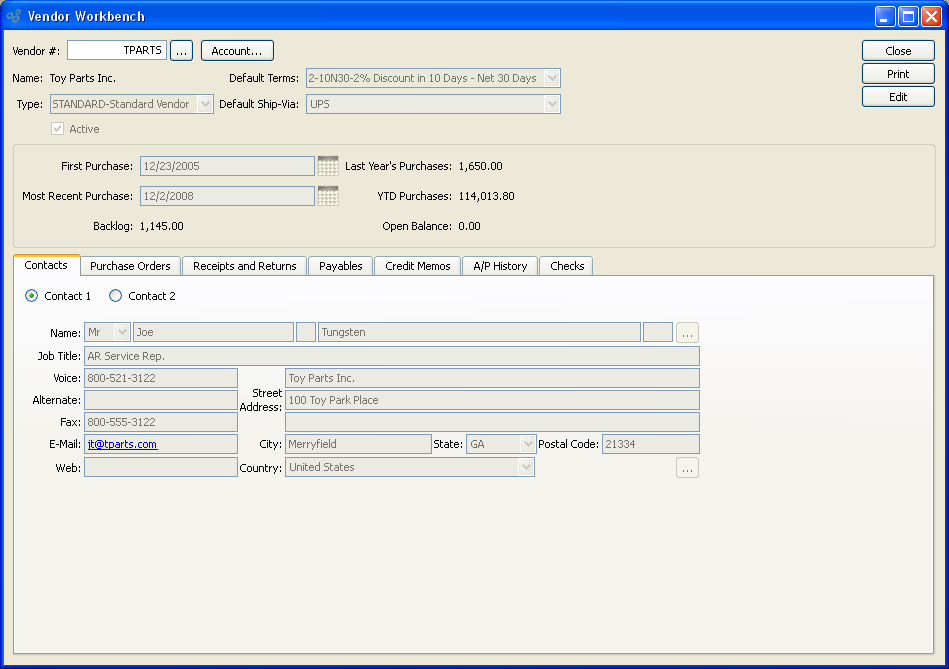
When displaying Vendor information, you are presented with the following options:
- Vendor #
Enter the Vendor Number of the Vendor whose information you want to view.
- Name
Displays Vendor name automatically when Vendor Number is entered.
- ACCOUNT
Select this button to open the CRM Account record associated with the Vendor.
- Type
Displays the Vendor Type for the specified Vendor.
- Default Terms
Displays the Vendor's default Terms.
- Default Ship Via
Displays the default Ship Via for the Vendor.
- First Purchase
Displays the first purchase from the Vendor.
- Most Recent Purchase
Displays the most recent purchase from the Vendor.
- Backlog
Displays the total cost of Purchase Order items that have been ordered but not yet received.
- Last Year's Purchases
Displays total purchases from Vendor for previous year.
- YTD Purchases
Displays year-to-date purchases made from Vendor.
- Open Balance
Displays open balance with Vendor.
To the far right of the screen, the following buttons are available:
- CLOSE
Closes the screen, returning you to the application desktop.
Runs the reports associated with this screen.
- EDIT
Select to edit the Vendor master for the specified Vendor.
To view Purchase Orders associated with the Vendor, select the "Purchase Orders" tab. The following screen will appear:

When displaying the list of Purchase Orders associated with the Vendor, you are presented with the following options:
- All Sites
Select to display Purchase Orders from all sites.
- Selected
Select to display Purchase Orders from a specific site
- Start Date
Displays Purchase orders dated on or after date specified. Date type dependent on radio button selected.
- End Date
-
Displays Purchase Orders dated on or before date specified. Date type dependent on radio button selected.
- Order Date
Specifies Start and End Dates are based on date Purchase Order created.
- Due Date
Specifies Start and End Dates are based on Purchase Order Due Date.
- Receipt Date
Specifies Start and End Dates are based on date goods are received against Purchase Order.
- Show Closed
Select to include closed Purchase Orders in display.
- Where Item Description contains
Specify key word or phrase from the Purchase Order description to use as a parameter for display.
To the far right of the screen, the following buttons are available:
- QUERY
Select to re-generate and update the information on the screen.
Runs the report associated with this screen.
Right-clicking on a Purchase Order in the Purchase Orders list enables you to select from the following menu options:
To view Receipts and Returns associated with the Vendor, select the "Receipts and Returns" tab. The following screen will appear:
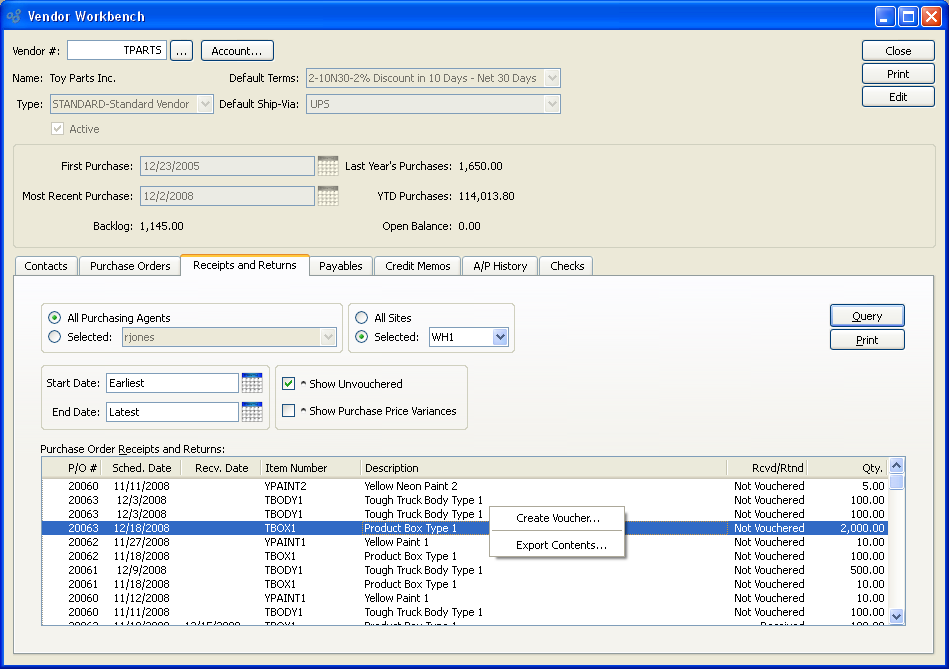
When displaying the list of Receipts and Returns associated with the Vendor, you are presented with the following options:
- All Purchasing Agents
Select to list Purchase Order Receipts and Returns associated with all Purchasing Agents.
- Selected
Select to specify only Purchase Order Receipts and Returns generated by a specific Purchasing Agent.
- All Sites
Select to display Purchase Order Receipts and Returns from all sites.
- Selected
Select to display Purchase Order Receipts and Returns from a specific site
- Start Date
Displays Purchase Order Receipts and Returns created on or after date specified.
- End Date
displays Purchase Order Receipts and Returns created on or before date specified.
- Show Unvouchered
Includes Unvouchered Purchase Order Receipts and Returns in display.
- Show Purchase Price Variances
Displays Purchase Cost, Receiving Cost, and Value in Purchase Order Receipts and Returns in results.
To the far right of the screen, the following buttons are available:
- QUERY
Select to re-generate and update the information on the screen.
Runs the report associated with this screen.
Right-clicking on a Receipt in the Receipts and Returns list enables you to select from the following menu options:
If the Receipt is not yet vouchered, then the following additional option will be available:
To view open Payables associated with the Vendor, select the "Payables" tab. The following screen will appear:
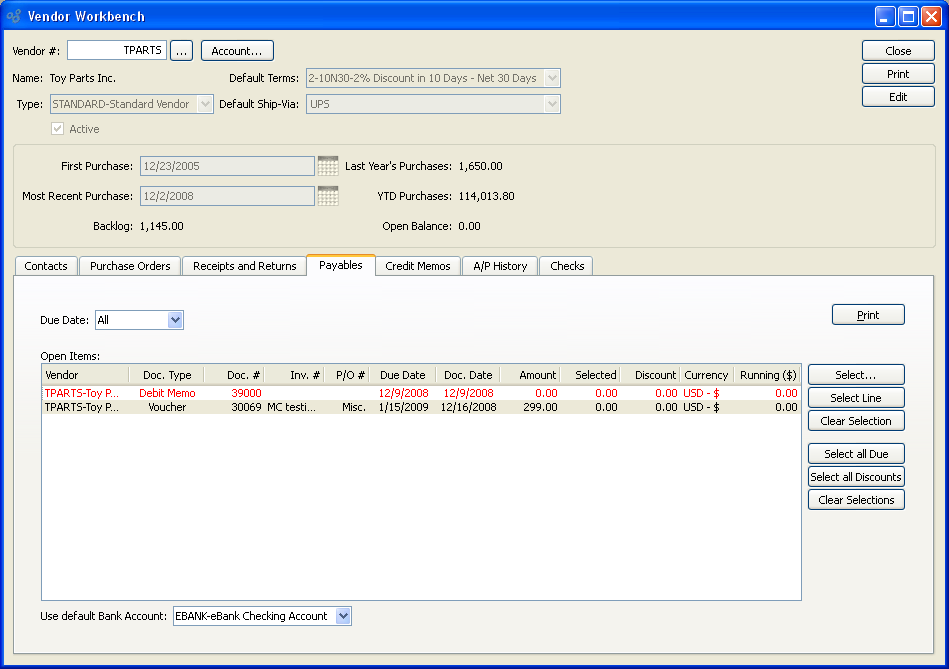
When displaying the list of Payables associated with the Vendor, you are presented with the following options:
- Due Date
Specify date parameters to query open Payables.
- Open Items
Display lists A/P open items. If a Document is past due, the line for that Document will display in red type.
To the far right of the screen, the following buttons are available:
Runs the report associated with this screen.
- SELECT
Highlight an A/P open item and then click this button to manually review and select the Item for payment. This option brings you to the individual Select Payment screen, where you will find the full range of payment options.
- SELECT LINE
Highlight an A/P open item and then click this button to automatically select the open item for payment. Any available Terms Discount will also be applied automatically.
- CLEAR SELECTION
Highlight an A/P open item and then select this button to clear the selected payment. This option effectively reverses the action of the SELECT option.
- SELECT ALL DUE
Select this button to select for payment all A/P open items whose Payment Date is due or past due and whose Currency is the same as the Bank Account's Currency.
- SELECT ALL DISCOUNTS
Select this option to automatically select all A/P open items which are eligible for a Terms Discount and whose Currency is the same as the Bank Account's Currency. The Terms Discount will be applied automatically to all selected open items.
- CLEAR SELECTIONS
Select this button to clear all selected payments due. This option effectively reverses the action of the SELECT ALL DUE option.
To view Credit Memos associated with the Vendor, select the "Credit Memos" tab. The following screen will appear:
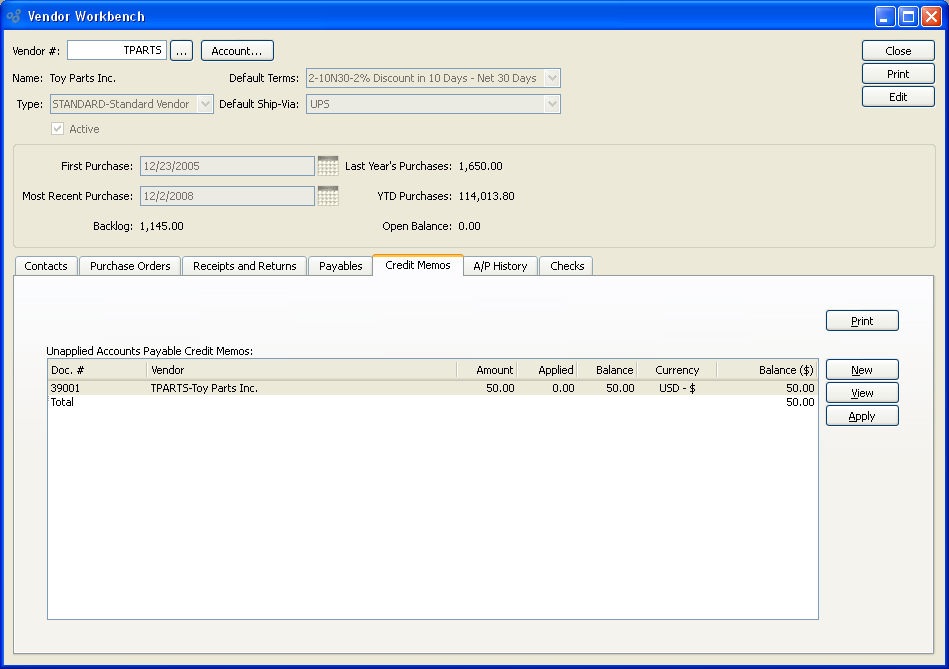
When displaying the list of Credit Memos associated with the Vendor, you are presented with the following options:
- Unapplied Accounts Payable Credit Memos
Displays the list of unapplied Credit Memos associated with the specified Vendor.
To the far right of the screen, the following buttons are available:
Runs the report associated with this screen.
- NEW
Opens screen for creating a new miscellaneous Credit Memo.
- VIEW
Highlight an unapplied Credit Memo and then select this button to reach a read-only view of the A/P open item.
- APPLY
Highlight an unapplied Credit Memo and then select this button to apply an amount.
To view purchasing history with the Vendor, select the "A/P History" tab. The following screen will appear:
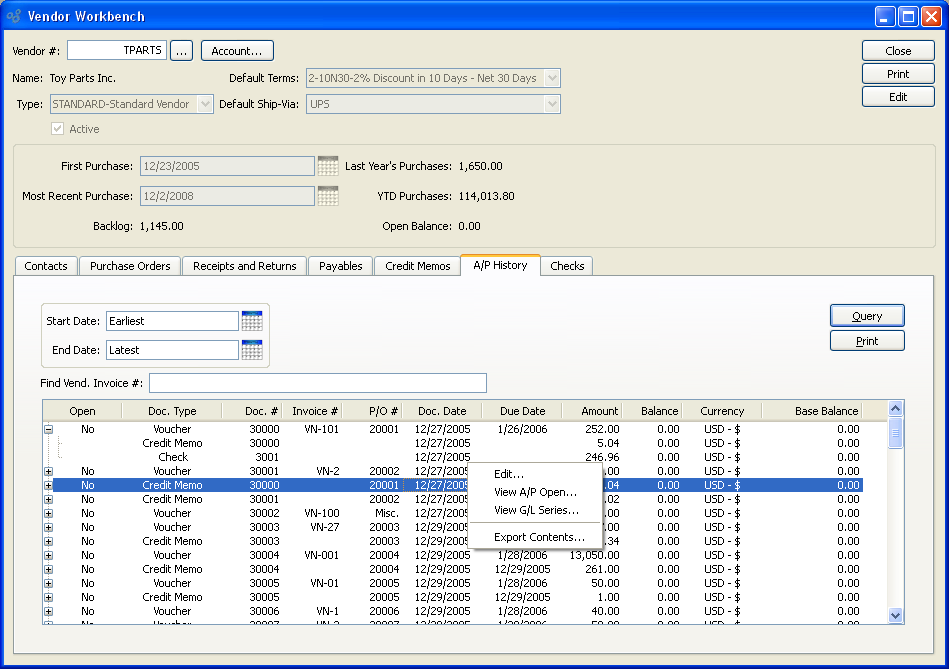
When displaying purchasing history from the Vendor, you are presented with the following options:
- Start Date
Displays Documents created on or after date specified.
- End Date
Displays Documents created on or before date specified.
- Find Vend. Invoice #
Enter specific vendor invoice number to display.
To the far right of the screen, the following buttons are available:
- QUERY
Select to re-generate and update the information on the screen.
Runs the report associated with this screen.
Right-clicking on an Item in the A/R History list enables you to select from the following menu options:
To view Checks associated with the Vendor, select the "Checks" tab. The following screen will appear:
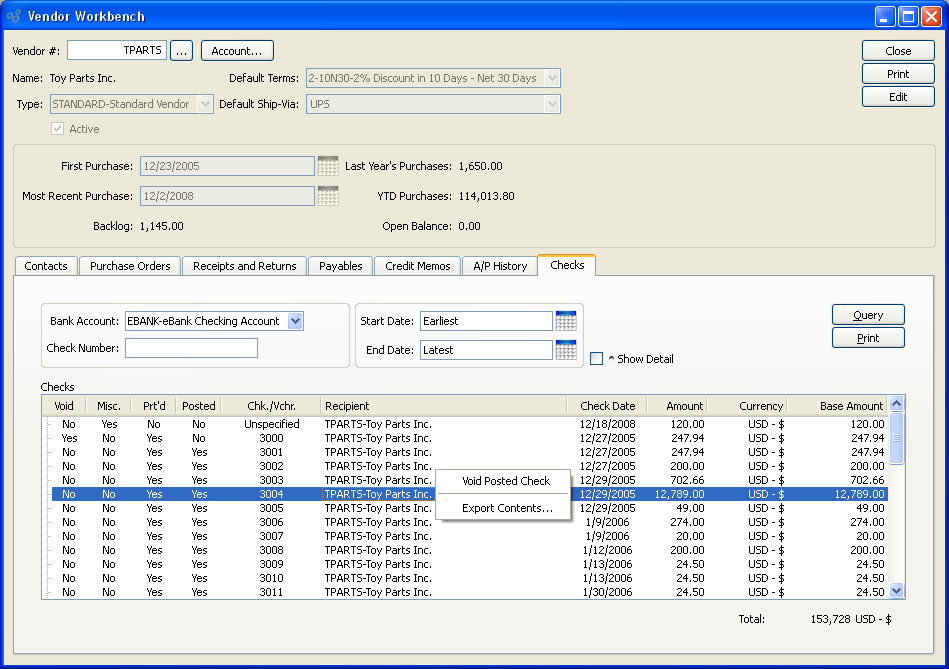
When displaying the Check Register for the Vendor, you are presented with the following options:
- Bank Account
Select Bank Account whose Checks you want to display.
- Check Number
Enter specific Check Number to include in the display.
- Start Date
Checks created on or after specified date will be included in the display.
- End Date
Queries checks created on or before specified date will be included in the display.
- Show Detail
Select to expand check detail for all items listed. This can be done manually for one check at a time by clicking on the plus (+) symbol. To collapse list select the minus (-) symbol.
To the far right of the screen, the following button is available:
- QUERY
Select to re-generate and update the information on the screen.
Runs the report associated with this screen.