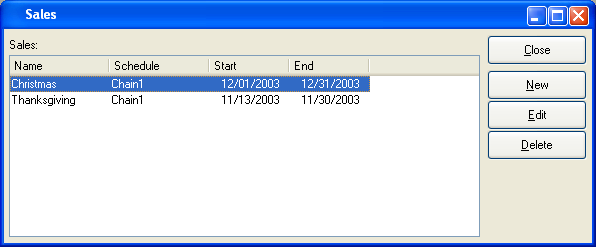
Sales offer the opportunity for discounting Items and Product Categories across all Customer Types. Unlike Pricing Schedule Assignments, Sales cannot be limited to certain Customers or Customer Types. Instead, all Customers benefit from Sales during the period of time when a Sale is in effect. To create a Sale tied to a Pricing Schedule, select the "Sales" option. The following screen will appear:

Note
If a Sale is in effect and the Sale Price is lower than the most specific Customer Price, then the Customer will be given the Sale Price.
When defining and maintaining Sale information, you are presented with the following options:
- Sales
Display lists any and all Sales.
To the far right of the screen, the following buttons are available:
- CLOSE
Closes the screen, returning you to the application desktop.
- NEW
Opens screen for creating a new Sale.
- EDIT
Enables you to edit highlighted Sale. The edit screen is the same as that for creating a new Sale—except that when editing, the fields will contain Sale information. Double-clicking on a Sale will also bring you to the editing screen.
- DELETE
Highlight a Sale and then select this button to remove the Sale from the list of Sales.
To create a new Sale, select the NEW button. The following screen will appear:

Note
Sales make Pricing Schedules available to all Customers for the period of time defined by the Sale.
When creating a new Sale, you are presented with the following options:
- Name
Enter the name of the Sale.
- Description
Enter a description to identify the Sale.
- Start Date
Enter the date when the Sale begins.
- End Date
Enter the date when the Sale ends.
- Schedule
Specify a Pricing Schedule to assign to the Sale. By assigning a Pricing Schedule to a Sale, you make the Prices on the Pricing Schedule available to all Customers for the period defined by the Sale.
To the far right of the screen, the following buttons are available:
- CANCEL
Closes the screen, returning you to the previous screen.
- SAVE
Creates the Sale, adding it to the master list of Sales.