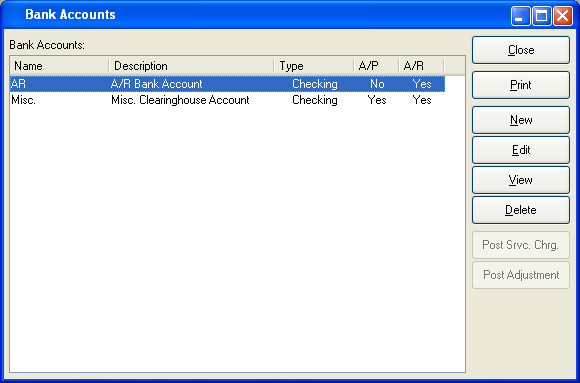
Bank Accounts are established to define the Asset Account to be used when receiving or making payments. To access the master list of Bank Accounts, select the "Bank Accounts" option. The following screen will appear:

The "Bank Accounts" screen displays information on all existing Bank Accounts, including period start date, period end date, and closed status.
To the far right of the list, the following buttons are available:
- CLOSE
Closes the screen, returning you to the application desktop.
Runs the report associated with this screen.
- NEW
Opens screen for creating a new Bank Account.
- EDIT
Enables you to edit highlighted Bank Account. The edit screen is the same as that for creating a new Bank Account—except that when editing, the fields will contain Bank Account information. Double-clicking on a Bank Account will also bring you to the editing screen.
- VIEW
Highlight a Bank Account and then select this button to reach a read-only view of the "Edit" screen.
- DELETE
Highlight a Bank Account and then select this button to remove the Bank Account from the list.
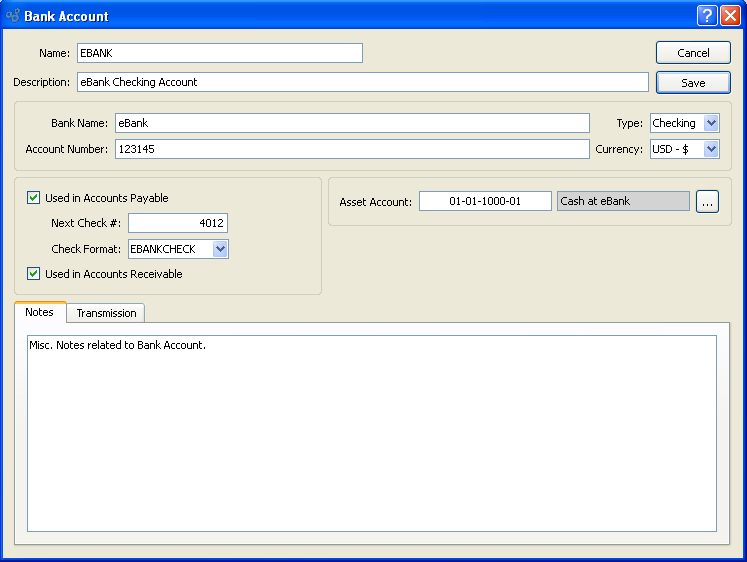
A Bank Account can be set up for use by either Accounts Receivable (A/R), Accounts Payable (A/P), or both. To create a new Bank Account, select the NEW button. The following screen will appear:

When creating a new Bank Account, you are presented with the following options:
- Name
Enter a name to describe the Bank Account.
- Description
Enter a description to further describe the Bank Account.
- Bank Name
Enter the name of the Bank where the Bank Account is held.
- Account Number
Enter the Account Number for the Bank Account.
- Type
Specify whether the Bank Account is a checking or cash account.
- Currency
Specify what type of currency to use for this bank account.
- Used in Accounts Payable
Select if the Bank Account is used for Accounts Payable. If selected, the Bank Account will be available for use when making Payments. Not selecting means the Bank Account is not used for Accounts Payable. Check specifications will be disabled if this option is not selected.
- Next Check #
Indicate the next Check Number to be issued from the Bank Account. Check Numbers will increment in intervals of one (1) beginning with the Check Number entered here. By default, the next available number will display.
- Check Format
Specify the Check Format to be used when Checks drawn against the Bank Account.
- Used in Accounts Receivable
Select if the Bank Account is used for Accounts Receivable. If selected, the Bank Account will be available for use when receiving money. Not selecting means the Bank Account is not used for Accounts Receivable.
- Asset Account
Specify the Asset Account to be credited when payments are made from the Bank Account.
- Notes
This is a scrolling text field with word-wrapping for entering Notes related to the Bank Account.
To the far right of the screen, the following buttons are available:
- CANCEL
Closes the screen without creating a Bank Account, returning you to the previous screen.
- SAVE
Creates the Bank Account and adds it to the master list of Bank Accounts.
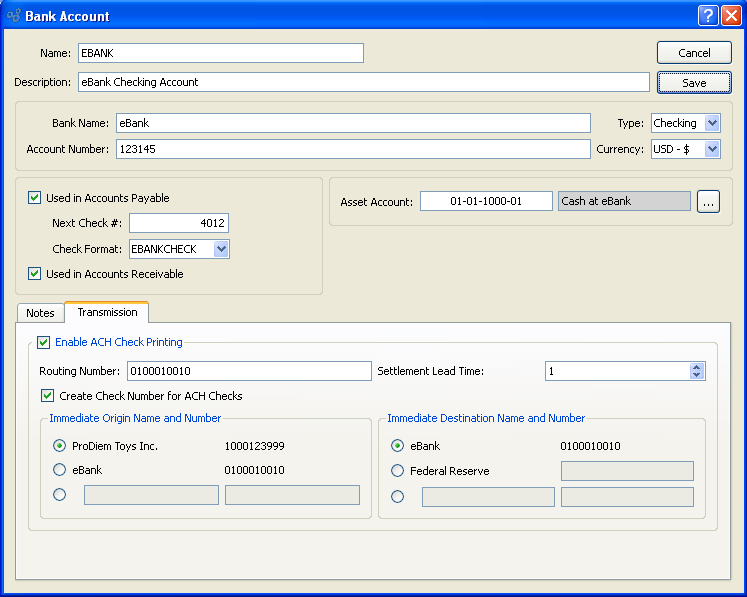
To add Transmission details to an Account, select the "Transmissions" tab. The following screen will appear:

When adding Transmission details to the bank account, you are presented with the following options:
- Enable ACH Check Printing
-
Select to enable online processing or Automated Clearing House (ACH) Check printing.
- Routing Number
Bank Account Routing Number.
- Settlement Lead Time
Number of days prior to funds transfer.
- Create Check Number for ACH Checks
Select to create Check number for automated transactions.
- Immediate Origin Name and Number
Number used by the financial institution of origin, either routing or other, specified by ACH gateway.
- Immediate Destination Name and Number
Number used by the destination financial institution, routing or other, specified by ACH gateway.