Account section.
To access the Chart of Accounts, select the "Chart of Accounts" option. The following screen will appear:

The "Chart of Accounts" screen displays information on all existing G/L Account Numbers defined within the application, including Company segment (if used), Profit Center (if used), Account Number, Subaccount Number (if used), Account description, and Account Type
To the far right of the screen, the following buttons are available:
- CLOSE
Closes the screen, returning you to the application desktop.
Runs the report associated with this screen.
- NEW
Opens screen for creating a new Account Number.
- EDIT
Enables you to edit highlighted Account Number. The edit screen is the same as that for creating a new Account Number—except that when editing, the fields will contain Account Number information. Double-clicking on an Account Number will also bring you to the editing screen.
- DELETE
Highlight an Account Number and then select this button to remove the Account Number from the list.
To add a new G/L Account Number, select the NEW button. The following screen will appear:
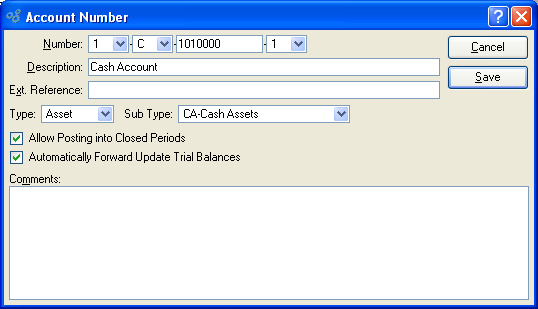
When creating a new G/L Account Number, you are presented with the following options:
- Number
Enter an Account Number for the Account. Depending on how your system is configured, you may add the following segments to an Account Number in the following order: Company segment (optional), Profit Center segment (optional), main segment (required), and Subaccount Number (optional). Once a main segment number has been entered and saved, it may not be edited.
- Description
Enter a brief description of the Account.
- Ext. Reference
Enter an optional external reference to associate with the Account Number. Typically this field is left blank. However, this field is useful during a data conversion when the Account Number is reformatted.
- Type
Specify the Account Type you want to assign the Account Number to. The following selections are available: Asset, Liability, Expense, Revenue, and Equity.
- Sub Type
Specify the Subaccount Type you want to assign the Account Number to. This is an optional selection.
- Allow Posting into Closed Periods
Select to allow transactions involving the Account to update the Account's Trial Balance even if the transactions are posted into closed Accounting Periods. Not selecting this option means users will be prevented from posting transactions into closed Accounting Periods when the Account is used. To correct a situation where transaction posting is being prevented for this reason, either open the Accounting Period in question or change the distribution date of the transaction.
Note
The "Allow Posting into Closed Periods" option applies only to Trial Balances. Account activity is always posted to the General Ledger (G/L) regardless of whether Accounting Periods are open or closed.
- Automatically Forward Update Trial Balances
If your site is configured to control Trial Balance updates on a manual basis, then this option will be visible—allowing you to set forward-updating capability on an Account-by-Account basis. Conversely, if your site in configured to automatically forward-update Accounts in the Accounting Configuration, then this option will be hidden from view. For more information see Section 12.8, “Configure Accounting”.
- Comments
This is a scrolling text field with word-wrapping for entering Comments related to the Account Number.
To the far right of the screen, the following buttons are available:
- CANCEL
Closes the screen without creating an Account Number, returning you to the previous screen.
- SAVE
Creates the Account Number and adds it to the master list of Account Numbers.
To access the master list of Companies, select the "Companies" option. The following screen will appear:
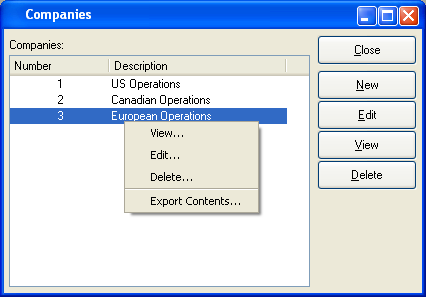
The "Companies" screen displays information on all existing Companies, including Company number and Company description.
Note
The use of Companies can be enabled or disabled by default at the system level.
To the far right of the screen, the following buttons are available:
- CLOSE
Closes the screen, returning you to the application desktop.
- NEW
Opens screen for creating a new Company.
- EDIT
Enables you to edit highlighted Company. The edit screen is the same as that for creating a new Company—except that when editing, the fields will contain Company information. Double-clicking on a Company will also bring you to the editing screen.
- VIEW
Highlight a Company and then select this button to reach a read-only view of the "Edit" screen.
- DELETE
Highlight a Company and then select this button to remove the Company from the list.
To add a new Company, select the NEW button. The following screen will appear:
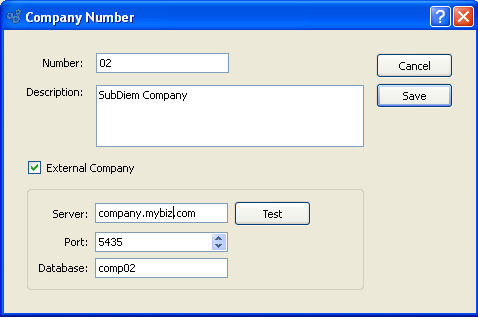
When creating a new Company, you are presented with the following options:
- Number
Enter a number to identify the Company.
- Description
Enter a brief description of the Company.
- External Company
Select to designate the Company as a pointer to a Company on another database. This option will only be visible if external Company consolidation is enabled in the system's Accounting configuration. This option is also available only on xTuple ERP Standard Edition and higher.
Tip
Once G/L Accounts have been created using a defined Company segment, either manually or via synchronization, the "External Company" option will no longer be editable.
- Server
Enter the server address of the external Company.
- Port
Enter the port used by the external Company server.
- Database
Enter the database used by the external Company.
- Test
Select to confirm the connection and external Company compatibility criteria. This option will only be available once the connection details have been entered.
To the far right of the screen, the following buttons are available:
- CANCEL
Closes the screen without creating a Company, returning you to the previous screen.
- SAVE
Creates the Company and adds it to the master list of Companies.
To access the master list of Profit Center Numbers, select the "Profit Center Numbers" option. The following screen will appear:
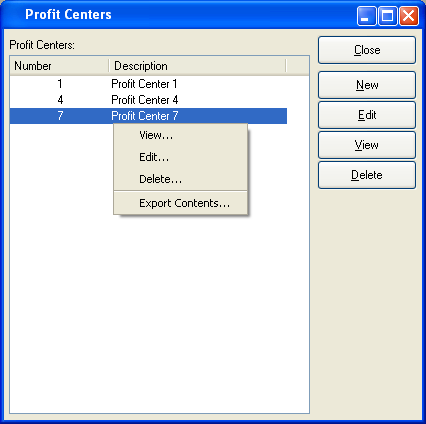
The "Profit Centers" screen displays information on all existing Profit Centers, including Profit Center Number and Profit Center description.
Note
The use of Profit Centers can be enabled or disabled by default at the system level.
To the far right of the screen, the following buttons are available:
- CLOSE
Closes the screen, returning you to the application desktop.
- NEW
Opens screen for creating a new Profit Center Number.
- EDIT
Enables you to edit highlighted Profit Center Number. The edit screen is the same as that for creating a new Profit Center Number—except that when editing, the fields will contain Profit Center Number information. Double-clicking on a Profit Center Number will also bring you to the editing screen.
- VIEW
Highlight a Profit Center Number and then select this button to reach a read-only view of the "Edit" screen.
- DELETE
Highlight a Profit Center Number and then select this button to remove the Profit Center Number from the list.
To add a new Profit Center Number, select the NEW button. The following screen will appear:

When creating a new Profit Center Number, you are presented with the following options:
- Number
Enter a number to identify the Profit Center.
- Description
Enter a brief description of the Profit Center.
To the far right of the screen, the following buttons are available:
- CANCEL
Closes the screen without creating a Profit Center Number, returning you to the previous screen.
- SAVE
Creates the Profit Center Number and adds it to the master list of Profit Center Numbers.
To access the master list of Subaccount Numbers, select the "Subaccount Numbers" option. The following screen will appear:
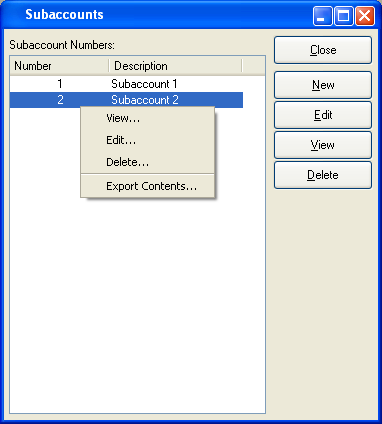
The "Subaccounts" screen displays information on all existing Subaccounts, including Subaccount Number and Subaccount description.
Note
The use of Subaccounts can be enabled or disabled by default at the system level.
To the far right of the screen, the following buttons are available:
- CLOSE
Closes the screen, returning you to the application desktop.
- NEW
Opens screen for creating a new Subaccount Number.
- EDIT
Enables you to edit highlighted Subaccount Number. The edit screen is the same as that for creating a new Subaccount Number—except that when editing, the fields will contain Subaccount Number information. Double-clicking on a Subaccount Number will also bring you to the editing screen.
- VIEW
Highlight a Subaccount Number and then select this button to reach a read-only view of the "Edit" screen.
- DELETE
Highlight a Subaccount Number and then select this button to remove the Subaccount Number from the list.
To add a new Subaccount Number, select the NEW button. The following screen will appear:
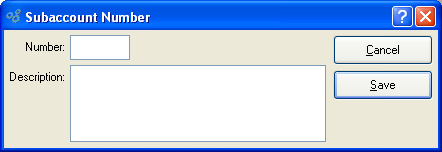
When creating a new Subaccount Number, you are presented with the following options:
- Number
Enter a number to identify the Subaccount.
- Description
Enter a brief description of the Subaccount.
To the far right of the screen, the following buttons are available:
- CANCEL
Closes the screen without creating a Subaccount Number, returning you to the previous screen.
- SAVE
Creates the Subaccount Number and adds it to the master list of Subaccount Numbers.
Subaccount Types may be used to assign additional detail to an Account Number's Account Type. An Account Type may have multiple Subaccount Types. For example, the Account Type "Asset" may have the following Subaccount Types: Cash, Inventory, Accounts Receivable, etc. To access the master list of Subaccount Types, select the "Subaccount Types" option. The following screen will appear:
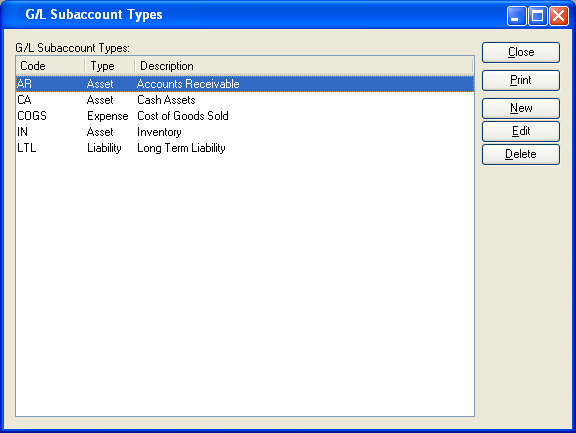
The "Subaccount Types" screen displays information on all existing Subaccount Types, including Subaccount code, Account Type, and Subaccount description.
To the far right of the list, the following buttons are available:
- CLOSE
Closes the screen, returning you to the application desktop.
Runs the report associated with this screen.
- NEW
Opens screen for creating a new Subaccount Type.
- EDIT
Enables you to edit highlighted Subaccount Type. The edit screen is the same as that for creating a new Subaccount Type—except that when editing, the fields will contain Subaccount Type information. Double-clicking on a Subaccount Type will also bring you to the editing screen.
- VIEW
Highlight a Subaccount Type and then select this button to reach a read-only view of the "Edit" screen.
- DELETE
Highlight a Subaccount Type and then select this button to remove the Subaccount Type from the list.
To create a new Subaccount Type, select the NEW button. The following screen will appear:
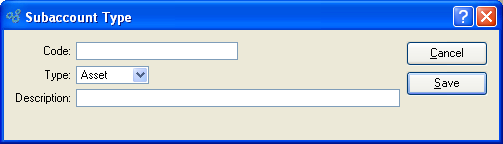
When creating a new Subaccount Type, you are presented with the following options:
- Code
Enter a code to describe the Subaccount Type.
- Type
Specify the Account Type you want to assign the Subaccount Type to.
The following selections are available: Asset, Liability, Expense, Revenue, and Equity.
- Description
Enter a description to further describe the Subaccount Type.