Section contains information on Items whose Item Site control method is either Lot or Serial.
To locate detailed Location and Lot/Serial Number information, select the "Location/Lot/Serial # Detail" option. The following screen will appear:
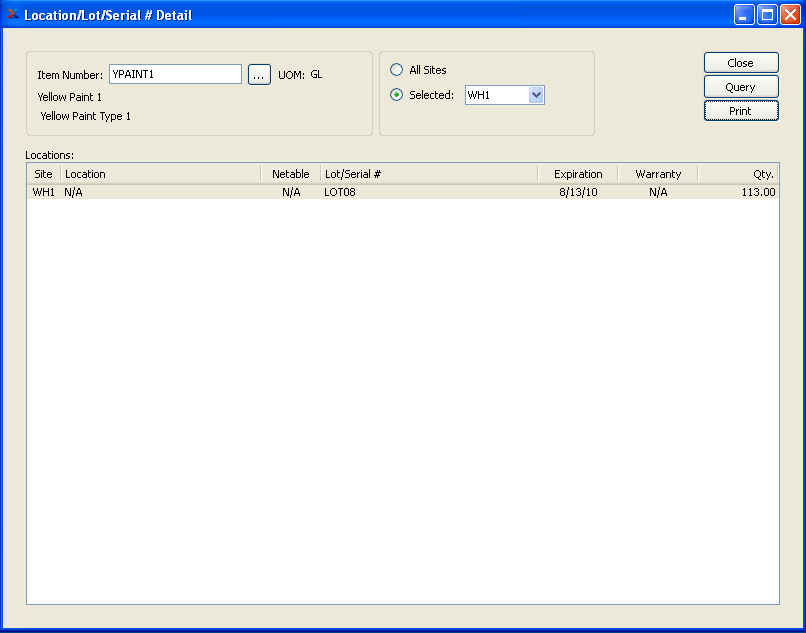
When displaying detailed Location and Lot/Serial Number information, you are presented with the following options:
- Item Number
Enter the Item Number of the Item whose detailed Location/Lot/Serial Number information you want to display.
- UOM
Inventory Unit of Measure.
- All Sites
Select to display detailed Location/Lot/Serial Number information for all Sites.
- Selected
Specify Site whose detailed Location/Lot/Serial Number information you want to display.
- Locations
Display lists Location/Lot/Serial Number detail, using the specified parameters.
To the far right of the screen, the following buttons are available:
- CLOSE
Closes the screen, returning you to the application desktop.
- QUERY
Select to generate the display, using the specified parameters.
Runs the report associated with this screen.
Some users need to be able to track warranty periods of Items from the purchase of raw materials to the sale of finished goods. Such traceability is possible by leveraging the Lot/Serial capability in xTuple ERP. Using Lot/Serial trace, users have access to backwards and forwards tracking through multiple levels of production—including the where used and warranty status of Items.
For example, if a defective internal medical device came back because of a defective spring, a user should be able to determine what Lot of springs went into the device—even if the spring was issued to a subassembly two levels down. Likewise, once the spring Lot is determined, the user should be able to search forward and determine all goods where that Lot of springs was used and shipped so all Customers may be notified of the defect. If the spring was under warranty and is still eligible, the backward search should indicate so.
To view detailed Inventory history by Lot/Serial Number, select the "Detailed Inventory History by Lot/Serial #" option. The following screen will appear:
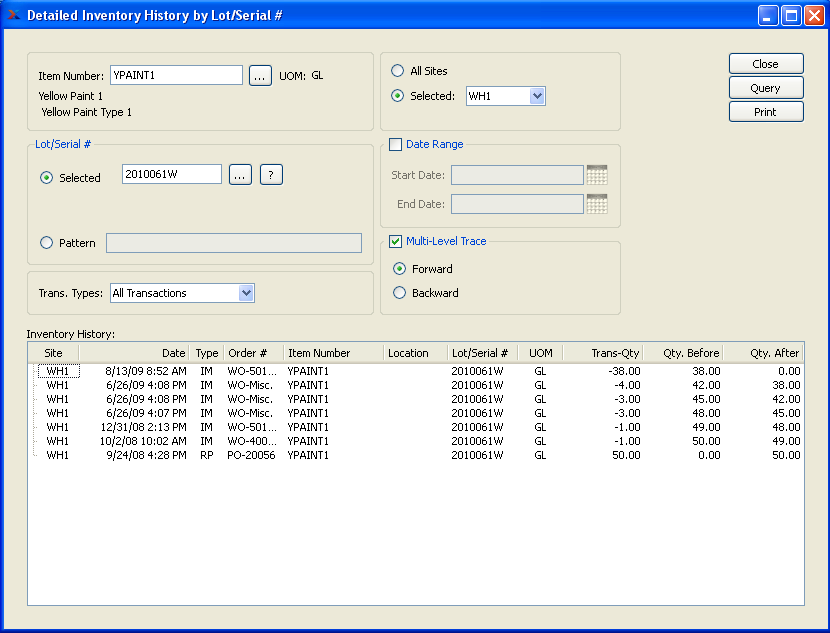
When displaying detailed Inventory history by Lot/Serial Number, you are presented with the following options:
- Item Number
Enter the Item Number of the Item whose detailed Inventory history by Lot/Serial Number you want to display.
- UOM
Inventory Unit of Measure.
- Lot/Serial #
Specify one of the following Lot/Serial Number selection criteria:
- Selected
Enter the Lot/Serial Number of the Inventory whose detailed Inventory history you want to display.
- Pattern
Enter a Lot/Serial Number pattern to select a range of Product CategorieLot/Serial Numbers.
- Trans. Types
Select one of the following transaction types from the drop-down menu.
- All Transactions
Displays all Inventory transactions.
- Receipts
Displays receipts into Inventory from Manufacturing, purchases, or miscellaneous receipts.
- Issues
Displays issues from Inventory to Manufacturing.
- Shipments
Displays shipments to customers.
- Adjustments and Counts
Displays Inventory adjustments and counts.
- Transfers
Displays Inter-Site Transfers and Location and Lot/Serial Number reassignments.
- Scraps
Displays Scrap transfer from Inventory.
- All Sites
Select to display detailed Inventory history by Lot/Serial Number for all Sites.
- Selected
Specify Site whose detailed Inventory history by Lot/Serial Number you want to display.
- Date Range
Select if you want to use specific date range parameters. If not selected, the query will search for all time.
- Start Date
Inventory transactions conducted on and after this date will be displayed. Start date and end date must be entered for calculation to proceed.
- End Date
Inventory transactions conducted on and before this date will be displayed. Start date and end date must be entered for calculation to proceed.
- Multi-Level Trace
Select if you want the query to include one of the following trace options:
- Forward
Select to view transaction activity of Lot/Serial goods through multiple levels showing where they were used. For example, we can see where a purchased Item was used in a Work Order and subsequently shipped against a Sales Order.
- Backward
Select to view transaction activity of Lot/Serial goods though multiple levels showing what serialized Items went into them. For example, we can look at a finished goods shipped to a Customer and determine what purchased Items went into the good.
- Inventory History
Display lists detailed Inventory history by Lot/Serial Number, using the specified parameters.
Note
The system prefixes Order Numbers with letters indicating the Order type. For example, Work Orders are prefixed with "WO", Purchase Orders with "PO", and Sales Orders with "SO". These letters are for display purposes only and are not considered part of the Order Number.
To the far right of the screen, the following buttons are available:
- CLOSE
Closes the screen, returning you to the application desktop.
- QUERY
Select to generate the display, using the specified parameters. Start date and end date must be entered for calculation to proceed. Results will be displayed in the "Inventory History" list.
Runs the report associated with this screen.
To reassign the Lot/Serial Number for a Lot/Serial Item—or to assign a Lot/Serial Number to a quantity located in a Lot/Serial Number controlled Item Site—select the "Reassign Lot/Serial Number" option. The following screen will appear:
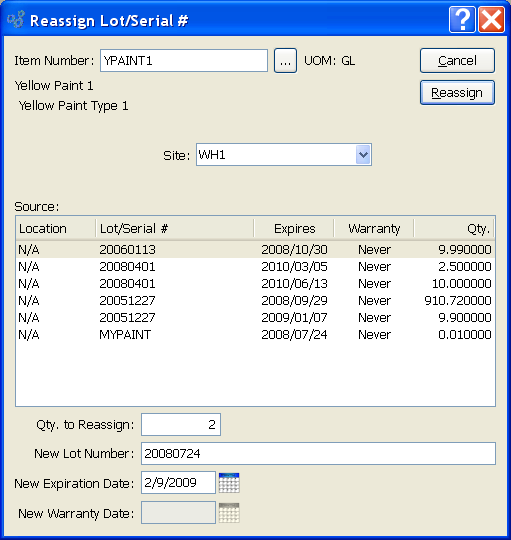
When reassigning the Lot/Serial Number for a Lot/Serial Item, you are presented with the following options:
- Item Number
Enter the Item Number of the Item whose Lot/Serial Number you want to reassign.
- UOM
Inventory Unit of Measure.
- Site
Specify Site where Inventory is located.
- Source
Display lists source Locations for the specified Item. Select the Location containing Inventory whose Lot/Serial Number you want to reassign by highlighting the line using your mouse.
- Qty. to Reassign
to Reassign: Enter the quantity of the specified Item whose Lot/Serial Number you want to reassign.
- New Lot Number
Enter the new Lot Number for the quantity of the specified Item whose Lot/Serial Number you want to reassign.
- New Expiration Date
Specify the date when the Lot/Serial quantity expires.
Note
A value must be entered in the Expiration Date field for Item Sites designated as perishable.
- New Warranty Date
Specify the date when the warranty for the Item expires.
Note
The warranty option is only required and available for Item Sites which require a warranty when purchased.
To the far right of the screen, the following buttons are available:
- CLOSE
Closes the screen without reassigning the Lot/Serial Number, returning you to the application desktop.
- REASSIGN
Reassigns the Lot/Serial Number for the quantity of the specified Item. Additional steps will be necessary if the specified Item is stored in multiple Locations.