Accounting Utilities section.
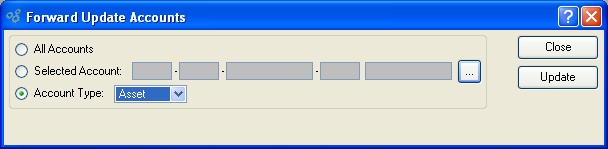
The Forward Update utility forward-updates Account balances from the first Accounting Period when an Account is used all the way forward to the current Period. This utility is only available if your site is configured to manually forward-update Trial Balances. If your site has automatic forward-updating turned on, then this utility will be hidden from view. To manually forward-update multiple Accounts at one time, select the "Forward Update Accounts" option. The following screen will appear:
Note
When forward-updating Revenue and Expense Accounts, keep in mind that the system will automatically reset the beginning balances for these Account Types to $0 at the start of a new Fiscal Year.
When forward-updating multiple Accounts, you are presented with the following options:
- All Accounts
Select to forward-update all G/L Accounts.
- Selected Account
Specify the G/L Account whose Trial Balance you want to display.
- Account Type
Specify the Account Type whose Accounts you want to forward-update.
The following selections are available: Asset, Liability, Expense, Revenue, and Equity.
To the far right of the screen, the following buttons are available:
- CLOSE
Closes the screen, returning you to the application desktop.
- UPDATE
Select to forward-update Accounts, using the specified parameters.
The Duplicate Account Numbers utility provides a method for duplicating (i.e., copying) Account Numbers and saving them with altered segments. To access the utility, select the "Duplicate Account Numbers" option. The following screen will appear:
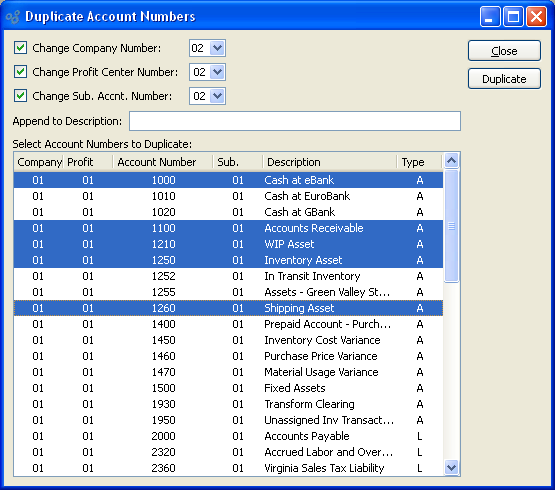
When duplicating (i.e., copying) Account Numbers, you are presented with the following options:
- Change Company Number
Select if you want the Company segment to be different in the duplicate Account Number.
Specify the number you want the Company segment to be changed to. Not selecting this option means the Company segment will not be changed when the Account Number(s) is duplicated.
- Change Profit Center Number
Select if you want the Profit Center segment to be different in the duplicate Account Number.
Specify the number you want the Profit Center segment to be changed to. Not selecting this option means the Profit Center segment will not be changed when the Account Number(s) is duplicated.
- Change Sub. Accnt. Number
Select if you want the Subaccount Number segment to be different in the duplicate Account Number.
Specify the number you want the Subaccount Number segment to be changed to. Not selecting this option means the Subaccount Number segment will not be changed when the Account Number(s) is duplicated.
- Append to Description
Enter any text you want to have appended to the duplicate Account Number's description.
The text entered here will be added to the end of the already-existing Account Number description.
- Select Account Numbers to Duplicate
Select one or multiple Account Numbers using your mouse and a combination of the SHIFT and/or CTRL keys.
To the far right of the screen, the following buttons are available:
- CLOSE
Closes the screen, returning you to the application desktop.
- DUPLICATE
Duplicates the selected Account Numbers and creates new Account Numbers, using the specified parameters.
Purging Invoice records is one method for freeing up disk storage space—without losing important sales history. Running this utility will also purge the whole chain of documents associated with an Invoice. The chain of documents which will be purged when this utility is run include the following: Invoices (invchead, invcitem); Return Authorization (rahead, raitem, rahist); Lot/Serial Registrations (lsreg); Sales Orders (cohead, coitem, payco, backup_payco); Shipments (shiphead, shipitem, pack); and Billing (cobmisc, cobill). Again, running this utility will not purge sales history. That information is retained for historical sales analysis purposes.
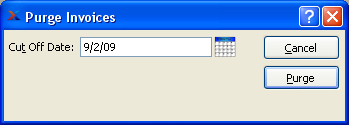
To purge Invoices and their associated documents, select the "Purge Invoices" option. The following screen will appear:
Note
The consequence of purging Invoice records is that any purged Invoice records can no longer be re-printed.
When purging Invoices and their associated documents, you are presented with the following options:
- Cut Off Date
Invoice records created before and including this date will be purged.
To the far right of the screen, the following buttons are available:
- CANCEL
Closes the screen without purging any Invoice records, returning you to the application desktop.
- PURGE
Purges the Invoice records.
The system can be configured to place Customers on credit warning when their A/R open items become past due. Instructions for setting up that configuration can be found here: Section 12.8, “Configure Accounting”. To take full advantage of this functionality, you will need to regularly run the Update Late Customer Credit Status utility.
Note
This utility will be hidden if your system is not configured to place Customers on credit warning when their A/R open items become past due.
When run, this utility will review all late A/R open items for all Customers. Any Customers found to have late items falling outside the grace period will be placed on credit warning. These Customers will automatically be taken off credit warning once their late items are paid. You can run the utility using the following screen:
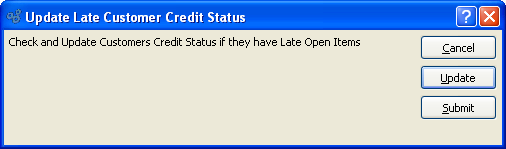
When updating the credit status for late Customers, you are presented with the following options:
To the far right of the screen, the following buttons are available:
- CANCEL
Closes the screen, returning you to the application desktop.
- UPDATE
Select to run the batch allocation process, using the specified parameters.
- SUBMIT
Select to submit requested action to the Batch Manager for processing.
Some Invoices may be marked as recurring. This means the Invoices are designed to be recreated over and over again on a periodic basis. To process recurring Invoices, you need to run the recurring Invoices utility. When the utility is run, new unposted Invoices are created for any recurring Invoices having an Invoice date within the specified number of look-ahead days. The look ahead days, or buffer days, are specified in the Accounting Module configuration. You can read more about recurring Invoice buffer days here Recurring Invoice Buffer.
Newly-created recurring Invoices will appear on the list of unposted Invoices. Their distribution date will depend on the frequency specified and the Invoice date on the original Invoice. For example, if the original Invoice is dated January 1 and the frequency is once every month, then the next Invoices will be dated February 1, March 1, etc.
Tip
Once the recurring flag is set on the original Invoice, all subsequent, recurring Invoices will be marked in the database as children of the original parent Invoice. If you need to make changes to the frequency of a recurring Invoice (or to cancel the recurring Invoice), you must go back to the original parent Invoice and make the changes there.
To create recurring Invoices, select the "Create Recurring Invoices" option. The following screen will appear:

When creating recurring Invoices, you are presented with the following options:
To the far right of the screen, the following buttons are available:
- CANCEL
Closes the screen without creating recurring Invoices, returning you to the application desktop.
- CREATE
Creates the recurring Invoices, using the specified parameters.
- SUBMIT
Select to submit the job to the Batch Manager.
The synchronize Companies utility is designed to synchronize a parent database with child databases for the purpose of consolidated financial reporting. This utility will only be visible when external Company consolidation is enabled—and then only when users have appropriate permissions.
To synchronize Companies, select the "Synchronize Companies" option. The following screen will appear:
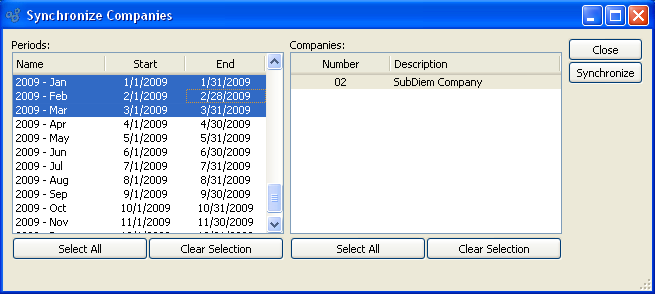
When synchronizing Companies, you are presented with the following lists:
- Periods
Select one or more financial periods to synchronize.
- Companies
Select one or more external companies to synchronize.
Below the lists the following buttons are available:
- SELECT ALL
Selects all the contents of the list above the button.
- CLEAR SELECTION
De-selects all the contents of the list above the button.
On the right of the screen the following buttons are available:
- CLOSE
Closes the window.
- SYNCHRONIZE
Executes the Company synchronization process.