Installing and Configuring Cloud Provisioning
There are many options and actions associated with the main cloud provisioning sub-commands, node, node_vmware, and node_aws. This page provides an overview but, for all the details, check the man pages.
Prerequisites
Software
-
The cloud provisioning tools ship with Puppet Enterprise 2.0 and later.
-
Puppet 2.7.2 or later is required
-
The Fog cloud services library must be installed on the machine running cloud_provisioner. (Some operating systems and environments may also require you to manually install some of Fog’s dependencies.) To install Fog, run
# gem install fog -v 0.7.2
-
Cloud_provisioner also requires the GUID library so it can generate unique indentifiers.
# gem install guid
Note that later versions of fog may not be fully compatible with Cloud Provisioner. This issue is currently being addressed.
Services
The following services and credentials are required:
-
VMware requires: VMware vSphere 4.0 (or later) and VMware vCenter
-
Amazon Web Services requires: An existing Amazon account with support for EC2
Installing
Cloud provisioning tools can be installed on any puppet master or agent node.
The Puppet Enterprise installer will ask whether or not to install cloud provisioning during installation. Answer ‘yes’ to enable cloud provisioning actions on a given node.
If you have already installed PE without installing the cloud provisioning tools, run the upgrader script puppet-enterprise-upgrader and answer “yes” when prompted to install the tools. Running the upgrader script will have no ill effects on your current installation, even if the upgrader is for the version currently installed. (No user-configured files will get overwritten, and of course the installer backs up all relevant files as well.)
If you’re using an answer file to install Puppet Enterprise, you can install cloud provisioning by setting the q_puppet_cloud_install option to y.
Configuring
To create new virtual machines with Puppet Enterprise, you’ll need to first configure the services you’ll be using.
Start by creating a file called .fog in the home directory of the user who will be provisioning new nodes.
$ touch ~/.fog
This will be the configuration file for Fog, the cloud abstraction library that powers PE’s provisioning tools. Once it is filled out, it will consist of a YAML hash indicating the locations of your cloud services and the credentials necessary to control them. For example:
:default:
  :vsphere_server: vc01.example.com
  :vsphere_username: cloudprovisioner
  :vsphere_password: abc123
  :vsphere_expected_pubkey_hash: 431dd5d0412aab11b14178290d9fcc5acb041d37f90f36f888de0cebfffff0a8
  :aws_access_key_id: AKIAIISJV5TZ3FPWU3TA
  :aws_secret_access_key: ABCDEFGHIJKLMNOP1234556/s
See below to learn how to find these credentials.
Adding VMware Credentials
To connect to a VMware vSphere server, you must put the following information in your ~/.fog file:
:vsphere_server- The name of your vCenter host (for example:
vc1.example.com). You should already know the value for this setting. :vsphere_username- Your vCenter username. You should already know the value for this setting.
:vsphere_password- Your vCenter password. You should already know the value for this setting.
:vsphere_expected_pubkey_hash- A public key hash for your vSphere server. The value for this setting can be obtained by entering the other three settings and then running the following command:
$ puppet node_vmware listThis will result in an error message containing the server’s public key hash…
  notice: Connecting ...·
  err: The remote system presented a public key with hash
  431dd5d0412aab11b14178290d9fcc5acb041d37f90f36f888de0cebfffff0a8 but
  we're expecting a hash of <unset>.  If you are sure the remote system is
  authentic set vsphere_expected_pubkey_hash: <the hash printed in this
  message> in ~/.fog
  err: Try 'puppet help node_vmware list' for usage
…which can then be entered as the value of this setting.
Adding Amazon Web Services or OpenStack Credentials
To connect to Amazon Web Services or your OpenStack server, you must put the following information in your ~/.fog file:
:aws_access_key_id- Your AWS Access Key ID. See below for how to find this.
:aws_secret_access_key- Your AWS Secret Key ID. See below for how to find this.
For AWS installations, you can find your Amazon Web Services credentials online in your Amazon account. To view them, go to Amazon AWS and click on the Account tab.
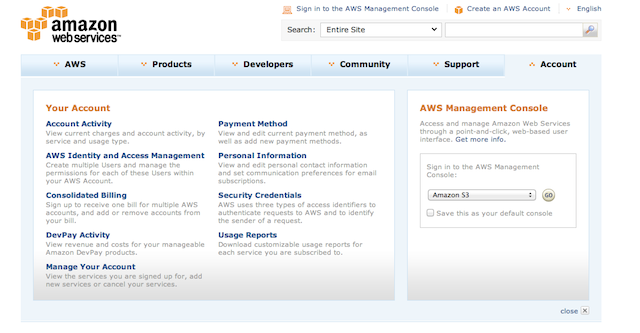
Select the “Security Credentials” menu and choose “Access Credentials.” Click on the “Access Keys” tab to view your Access Keys.
You need to record two pieces of information: the Access Key ID and the Secret Key ID. To see your Secret Access Key, click the “Show” link under “Secret Access Key”.
Additional AWS Configuration
To provision with Puppet, your Amazon Web Services EC2 account will need to have:
- At least one Amazon-managed SSH key pair.
- A security group that allows outbound traffic on ports 8140 and 61613, and inbound SSH traffic (port 22) from the machine being used for provisioning.
You’ll need to provide the names of these resources as arguments when running the provisioning commands.
Key Pairs
To find or create your Amazon SSH key pair, browse to the Amazon Web Service EC2 console.
Select the “Key Pairs” menu item from the dashboard. If you don’t have any existing key pairs, you can create one with the “Create Key Pairs” button. Specify a new name for the key pair to create it; the private key file will be automatically downloaded to your host.
Make a note of the name of your key pair, since you will need to know it when creating new instances.
Security Group
To add or edit a security group, select the “Security Groups” menu item from the dashboard. You should see a list of the available security groups. If no groups exist, you can create a new one by clicking the “Create Security Groups” button. Otherwise, you can edit an existing group.
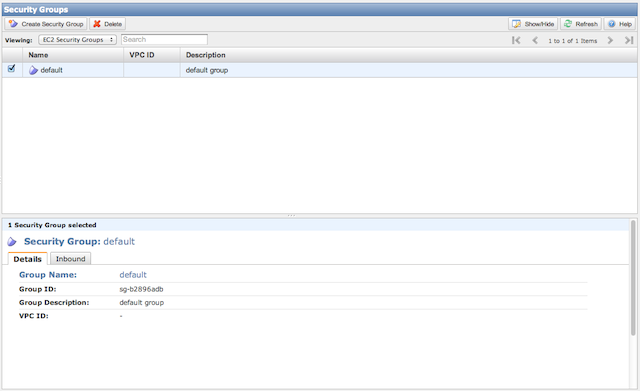
To add the required rules, select the “Inbound” tab and add an SSH rule. Make sure that inbound SSH traffic is using port 22. You can also indicate a specific source to lock the source IP down to an appropriate source IP or network. Click “Add Rule” to add the rule, then click “Apply Rule Changes” to save.
You should also ensure that your security group allows outbound traffic on ports 8140 and 61613. These are the ports PE uses to request configurations and listen for orchestration messages.
Demonstration
The following video demonstrates the setup process and some basic functions: