
Creating Buttons
To create a button component:
- Select File > New File or Project > Qt > QML File > Choose to create a QML file called Button.qml (for example).
Note: Components are listed in the Library only if the filename begins with a capital letter.
- Click Design to edit the file in the visual editor.
- In the Navigator, click Rectangle to set properties for it.
- In the Properties pane, modify the appearance of the button.
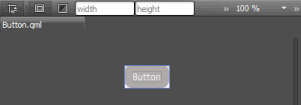
- In the Size field, set the width (W) and height (H) of the button.
- In the Color field, select the button color.
- In the Radius field, use the slider to set the radius of the rectangle and produce rounded corners for the button.
- Drag and drop a Text item on top of the Rectangle. This creates a nested item where Rectangle is the parent item of Text. Items are positioned relative to their parents.
- In the Properties pane, edit the properties of the Text item.
- In the Text field, type Button.
You can select the text color in the Text color field and the font, size, and style in the Font section.
- In the Alignment field, select the center buttons to align the text to the center of the button.
- Click Layout, and then click the
 (Fill to Parent) button to anchor the text to the whole button area.
- In the Text field, type Button.
- Press Ctrl+S to save the button.
To create a graphical button that scales beautifully without using vector graphics, use the BorderImage type. For more information, see Creating Scalable Buttons and Borders.
© 2015 The Qt Company Ltd. Documentation contributions included herein are the copyrights of their respective owners. The documentation provided herein is licensed under the terms of the GNU Free Documentation License version 1.3 as published by the Free Software Foundation. Qt and respective logos are trademarks of The Qt Company Ltd in Finland and/or other countries worldwide. All other trademarks are property of their respective owners.