4.4. Using Security Officer Mode
The Enterprise Security Client, together with the TPS subsystem, supports a special security officer mode of operation. This mode allows a supervisory individual, a security officer, the ability to oversee the face to face enrollment of regular users in a given organization.
Security officer mode provides the ability to enroll individuals under the supervision of a security officer, a designated user-type who can manage other user's smart cards in face-to-face and very secure operations. Security officer mode overlaps with some regular user operations, with additional security features:
The ability to search for an individual within an organization.
An interface that displays a photo and other pertinent information about an individual.
The ability to enroll approved individuals.
Formatting or resetting a user's card.
Formatting or resetting a security officer's card.
Enrolling a temporary card for a user that has misplaced their primary card.
Storing TPS server information on a card. This Phone Home information is used by the Enterprise Security Client to contact a given TPS server installation.
Working in the security officer mode falls into two distinct areas:
When security officer mode is enabled, the Enterprise Security Client uses an external user interface provided by the server. This interface takes control of smart card operations in place of the local XUL code that the Enterprise Security Client normally uses.
The external interface maintains control until security officer mode is disabled.
It is a good idea to run security officer clients over SSL, so make sure that the TPS is configured to run in SSL, and then point the Enterprise Security Client to the TPS's SSL agent port.
4.4.1. Enabling Security Officer Mode
There are two areas where the security officer mode must be configured, both in the TPS and in the Enterprise Security Client's esc-prefs.js file.
In the TPS:
Add the security officer user entry to the TPS database as a member of the TUS Officers group.
It can be simpler to add and copy user entries in the LDAP database using the Red Hat Directory Server Console. Using the Directory Server Console is described more in the
Red Hat Directory Server Administrators Guide in
section 3.1.2, "Creating Directory Entries."
There are two subtrees associated with the TPS. One is for external users, which has a distinguished name (DN) like dc=server,dc=example,dc=com; this directory is used to authenticate any user attempting to enroll a smart card. The other database is used for internal TPS instance entries, including TPS agents, administrators, and security officers. This subtree has a DN like dc=server.example.com-pki-tps. The TUS Officers group entry is under the dc=server.example.com-pki-tps suffix.
Any security officer entry has to be a child entry of the TUS Officers group entry. This means that the group entry is the main entry, and the user entry is directly beneath it in the directory tree.
The TUS Officers group entry is cn=TUS Officers,ou=Groups,dc=server.example.com-pki-tps.
For example, to add the security officer entry using ldapmodify:
/usr/lib/mozldap/ldapmodify -a -D "cn=Directory Manager" -w secret -p 389 -h server.example.com

dn: uid=jsmith,cn=TUS Officers,ou=Groups, dc=server.example.com-pki-tps
objectclass: inetorgperson
objectclass: organizationalPerson
objectclass: person
objectclass: top
sn: smith
uid: jsmith
cn: John Smith
mail: [email protected]
userPassword: secret
Press the Enter key twice to send the entry, or use Ctrl+D.
Check the TPS's security officer workstation to make sure it is pointing to the external user subtree DN to authenticate users who will enroll smart cards.
vim /var/lib/pki-tps/cgi-bin/sow/cfg.pl

#
# Feel free to modify the following parameters:
#
my $ldapHost = "localhost";
my $ldapPort = "389";
my $basedn = "ou=People,dc=server, dc=example,dc=com";
my $port = "7888";
my $secure_port = "7889";
my $host = "localhost";
Then, configure the Enterprise Security Client.
First, trust the CA certificate chain.
Open the CA's end-entities page.
https://server.example.com:9444/ca/ee/ca/
Click the Retrieval tab, and download the CA certificate chain.
Open the Enterprise Security Client.
esc
Click the View Certificates button.
Click the Authorities tab.
Click the Import button, and import the CA certificate chain.
Set the trust settings for the CA certificate chain.
Then, format and enroll the security officer's token. This token is used to access the security officer Enterprise Security Client UI.
Insert a blank token.
When the prompt for the Phone Home information opens, enter the security officer URL.
/var/lib/pki-tps/cgi-bin/so/index.cgi
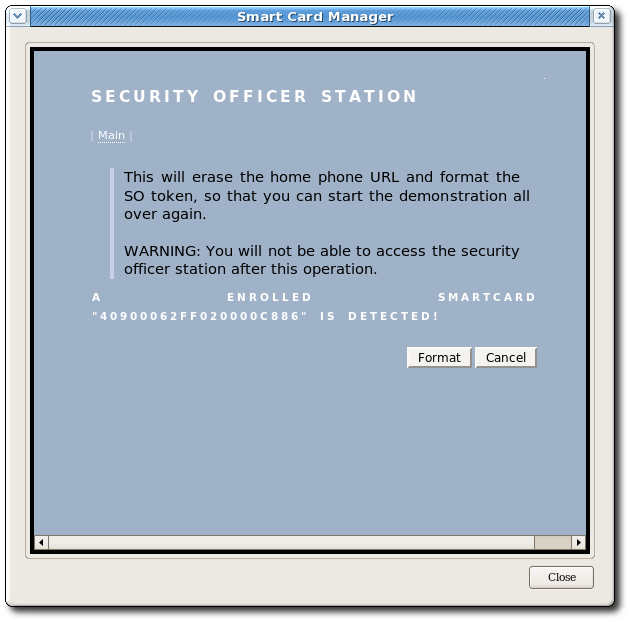
Click the Format button to format the security officer's token.
Close the interface and stop the Enterprise Security Client.
Add two parameters in the esc-prefs.js file. The first, esc.disable.password.prompt, sets security officer mode. The second, esc.security.url, points to the security officer enrollment page. Just the presence of the esc.security.url parameter instructs the Enterprise Security Client to open in security officer mode next time it opens.
pref("esc.disable.password.prompt","no");
pref("esc.security.url","https://server.example.com:7888/cgi-bin/so/enroll.cgi");
Start the Enterprise Security Client again, and open the UI.
esc
Close the interface and stop the Enterprise Security Client.
Edit the esc-prefs.js file again, and this time change the esc.security.url parameter to point to the security officer workstation page.
pref("esc.security.url","https://server.example.com:7889/cgi-bin/sow/welcome.cgi");
Restart the Enterprise Security Client again. The UI now points to the security officer workstation to allow security officers to enroll tokens for regular users.
To disable security officer mode, close the Enterprise Security Client GUI, stop the escd process, and comment out the esc.securty.url and esc.disable.password.prompt lines in the esc-prefs.js file. When the esc process is restarted, it starts in normal mode.
4.4.2. Enrolling a New Security Officer
Security officers are set up using a separate, unique interface than the one for regular enrollments or the one used for security officer-managed enrollments.
Make sure the esc process is running.
esc
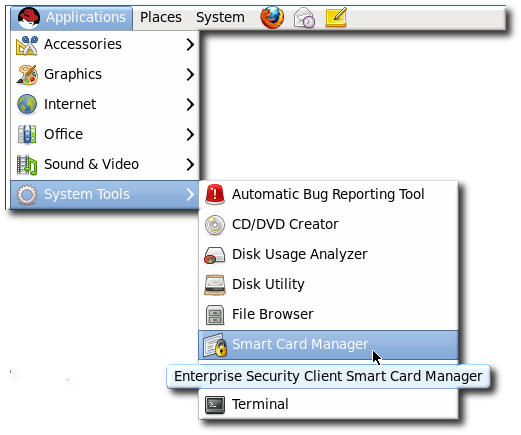
Then open the Enterprise Security Client UI.
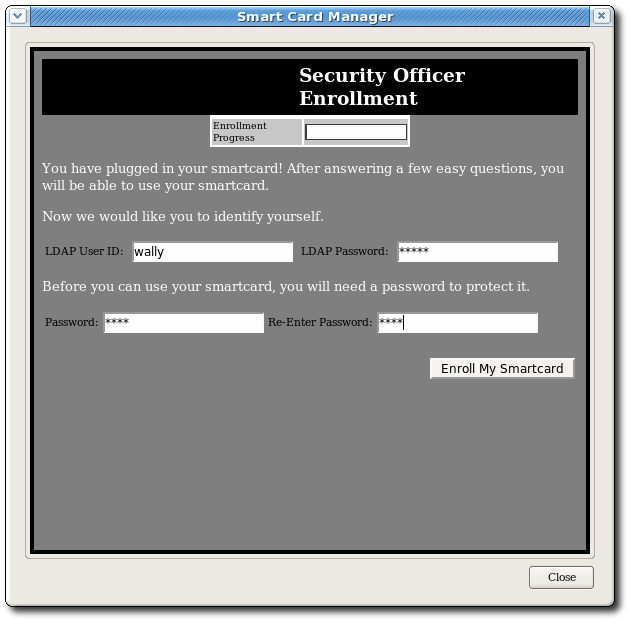
In the Security Officer Enrollment window, enter the LDAP user name and password of the new security officer and a password that will be used with the security officer's smart card.
Click Enroll My Smartcard.
This produces a smart card which contains the certificates needed by the security officer to access the Enterprise Security Client security officer, so that regular users can be enrolled and managed within the system.
4.4.3. Using Security Officers to Manage Users
The security officer Station page manages regular users through operations such as enrolling new or temporary cards, formatting cards, and setting the Phone Home URL.
4.4.3.1. Enrolling a New User
There is one significant difference between enrolling a user's smart card in security officer mode and the process in
Section 5.3, “Enrolling a Smart Card Automatically” and
Section 5.4.6, “Enrolling Smart Cards”. All processes require logging into an LDAP database to verify the user's identity, but the security officer mode has an extra step to compare some credentials presented by the user against some information in the database (such as a photograph).
Make sure the esc process is running. If necessary, start the process.
esc
Then open the Enterprise Security Client UI.
Ensure that there is a valid and enrolled security officer card plugged into the computer. A security officer's credentials are required to access the following pages.
Click Continue to display the security officer Station page. The client may prompt for the password for the security officer's card (which is required for SSL client authentication) or to select the security officer's signing certificate from the drop-down menu.
Click the Enroll New Card link to display the Security Officer Select User page.
Enter the LDAP name of the user who is to receive a new smart card.
Click Continue. If the user exists, the Security Officer Confirm User page opens.
Compare the information returned in the Enterprise Security Client UI to the person or credentials that are present.
If all the details are correct, click Continue to display the Security Officer Enroll User page. This page prompts the officer to insert a new smart card into the computer.
If the smart card is properly recognized, enter the new password for this card and click Start Enrollment.
A successful enrollment produces a smart card that a user can use to access the secured network and services for which the smart card was made.


