Audio Chorus Filter (PRO only)
The Audio Chorus Filter takes an Audio Clip and processes it creating a chorus effect.
The chorus effect modulates the original sound by a sinusoid low frequency oscillator (LFO). The output sounds like there are multiple sources emitting the same sound with slight variations - resembling a choir.

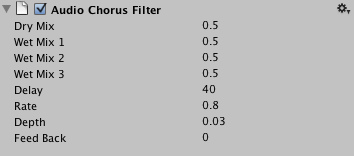
The Audio high Pass filter properties in the inspector.
Properties
| Dry Mix | Volume of original signal to pass to output. 0.0 to 1.0. Default = 0.5. |
| Wet Mix 1 | Volume of 1st chorus tap. 0.0 to 1.0. Default = 0.5. |
| Wet Mix 2 | Volume of 2nd chorus tap. This tap is 90 degrees out of phase of the first tap. 0.0 to 1.0. Default = 0.5. |
| Wet Mix 3 | Volume of 3rd chorus tap. This tap is 90 degrees out of phase of the second tap. 0.0 to 1.0. Default = 0.5. |
| Delay | The LFOs' delay in ms. 0.1 to 100.0. Default = 40.0 ms |
| Rate | The LFOs' modulation rate in Hz. 0.0 to 20.0. Default = 0.8 Hz. |
| Depth | Chorus modulation depth. 0.0 to 1.0. Default = 0.03. |
| Feed Back | Chorus feedback. Controls how much of the wet signal gets fed back into the filter's buffer. 0.0 to 1.0. Default = 0.0. |
Adding a chorus filter
To add a chorus filter to a given audio source just select the object in the inspector and then select Component->Audio->Audio Chorus Filter.
Hints
- You can tweak the chorus filter to create a flanger effect by lowering the feedback and decreasing the delay, as the flanger is a variant of the chorus.
- Creating a simple, dry echo can be done by setting Rate and Depth to 0 and tweaking the mixes and Delay


