Light shafts
Beginner Designer Artist
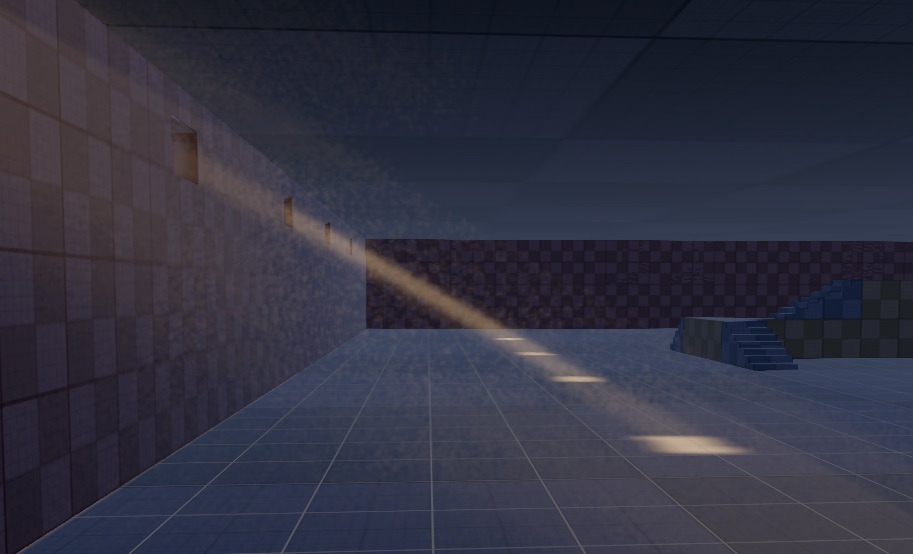
Light shafts, also called god rays, are visible rays originating from a directional light.
Xenko light shafts are based on shadow maps and use raymarching rather than post effects, so they're visible even when the light source isn't.
To create light shafts, use three components together: lights, light shafts, and light shaft bounding volumes.
1. Enable light shafts in the graphics compositor
Xenko disables light shafts by default in new projects. To enable them:
In the asset view (in the bottom pane by default), double-click the Graphics Compositor asset.
The graphics compositor editor opens.
Select the forward renderer node.
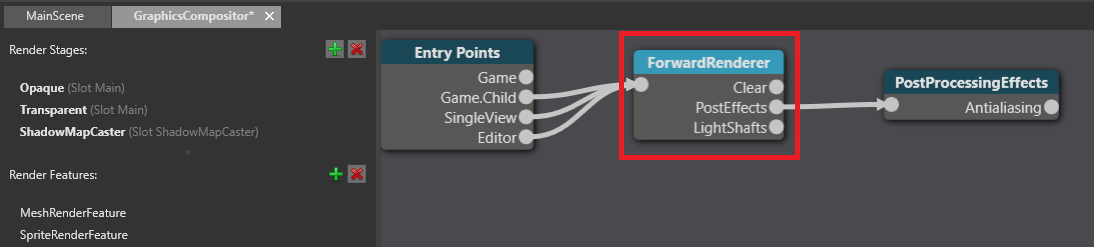
In the property grid (on the right by default), next to Light shafts, click
 (Create an instance with the selected type) and select LightShafts.
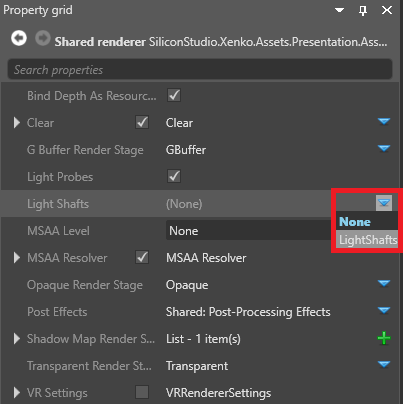
For more information about the graphics compositor, see the Graphics compositor page.
2. Add a light shaft component
In your scene, select the entity with the directional light you want to create light shafts.
For more information about how to use directional lights, including how to add them, see directional lights.
In the property grid, in the Light component properties, make sure the Shadow checkbox is selected.
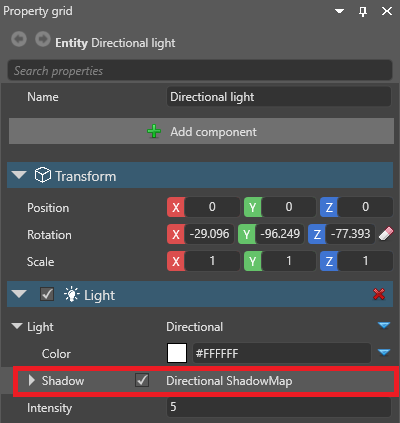
Expand Shadow and set the cascade count to one cascade.
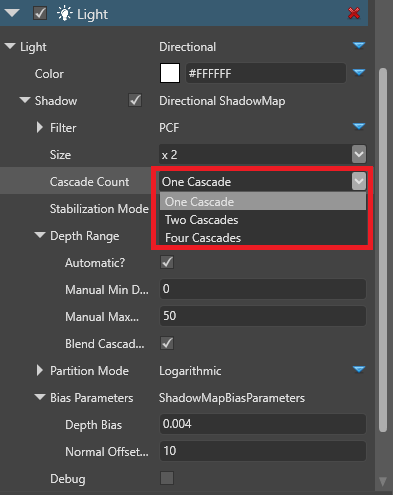
Note
Currently, light shafts are only implemented for directional lights with one cascade. You'll be able to use multiple cascades in future versions. For more information about cascades, see the Directional lights page.
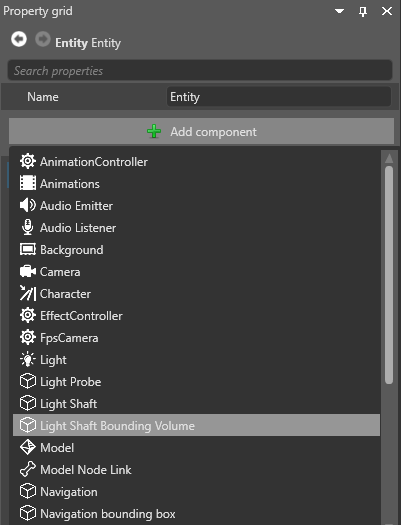
Click Add component and select Light shaft.
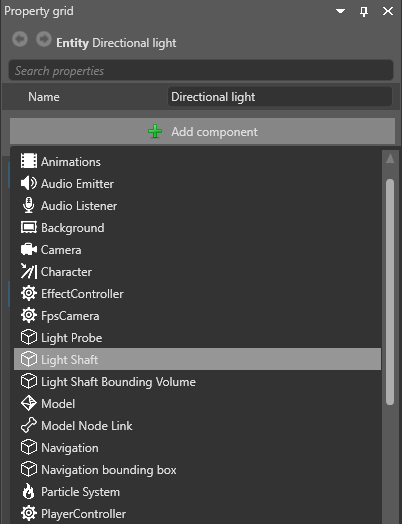
Game Studio adds a light shaft component to the entity.
3. Add a bounding volume
The light shaft bounding volume defines the area in which light shafts are created. You can add the bounding volume to the same entity that has the directional light, but it's usually simpler to add it to a separate entity.
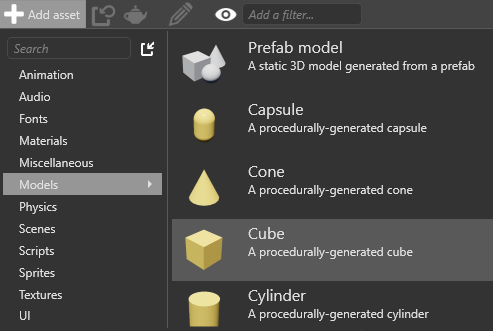
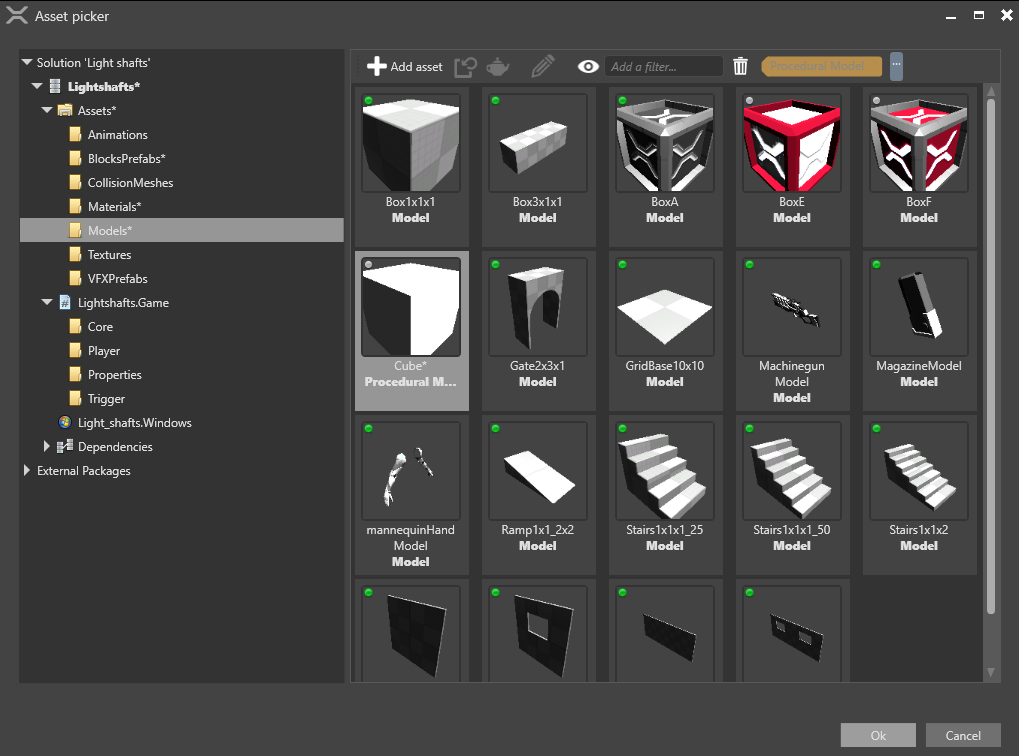
In the asset view, click Add asset.
Under Models, select a model in the shape you want the volume to be. For example, if you use a cube, light shafts will be created in a cube-shaped area.
The asset picker opens.
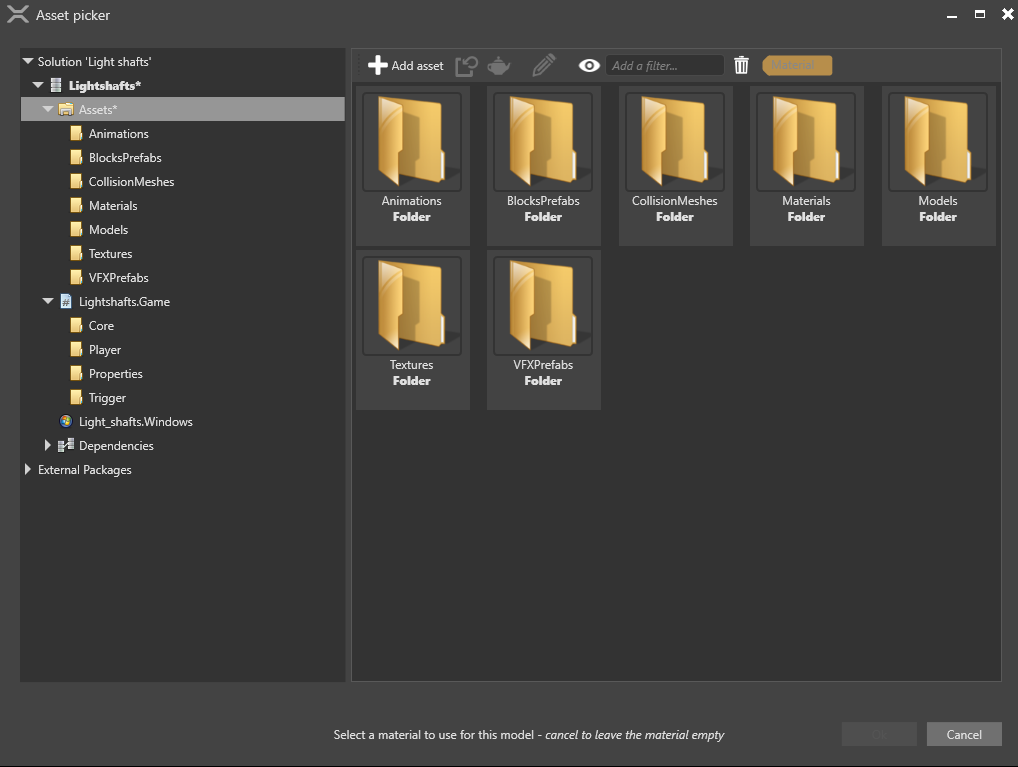
You don't need a material for the model, so click Cancel to create a model without a material.
In the scene, create an empty entity. For now, it doesn't matter where you put it; you can reposition it later.
With the entity selected, in the property grid, click Add component and select light shaft bounding volume.
In the light shaft bounding volume component properties, next to light shaft, click
 (Pick an asset up).
In the entity picker, select the entity with the directional light you want to create light shafts and click OK.
In the light shaft bounding volume component properties, next to Model, click
(Pick an asset up).In the asset picker, select the model you created and click OK.
This model defines the shape of the light shaft bounding volume.
Using the transform component, position and scale the entity to cover the area where you want to create light shafts.
4. Optional: Use a model as a bounding volume guide
Currently, Game Studio doesn't display the bounding volume in the scene editor.
As a workaround, you can add a model component to use as a guide.
On the entity with the light shaft bounding volume component, click Add component and select Model.
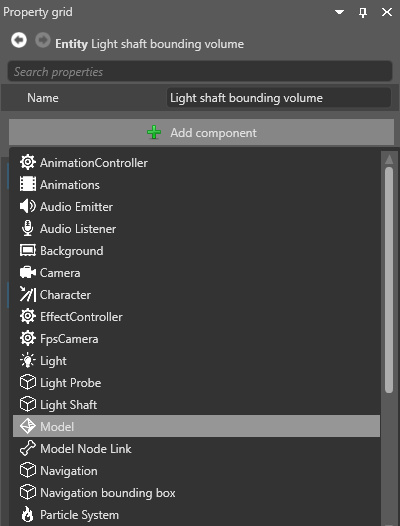
Under the Model component properties, next to Model, click
(Pick an asset up).In the asset picker, select the model you created earlier and click OK.
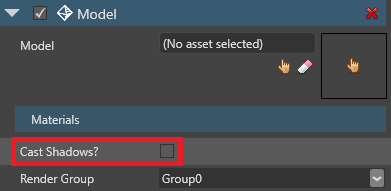
Under Materials, clear the Cast shadows checkbox. This stops your model blocking light shafts.
After you place the bounding volume, disable or remove the model component to hide it at runtime.
Optimize light shafts
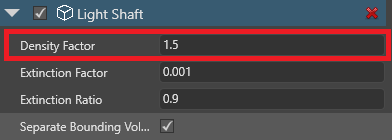
Light shafts work best in dark environments. You can adjust the directional light and light shaft component properties to achieve different results - for example, by changing the directional light color (in the light component properties) or the light shaft density (in the light shaft component properties).
Multiple light shafts viewed through one another can become visually noisy, as in the image below:
To reduce this effect, in the light shaft component properties, reduce the density factor.
Alternatively, use multiple bounding volumes. To do this:
Create additional bounding volumes and position them to cover the area where you want to create light shafts. Make sure the bounding volumes don't overlap (light shafts in overlapping areas are extra-bright).
In the light shaft component properties, make sure separate bounding volumes is enabled.
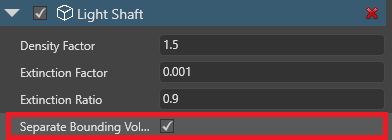
This calculates the light shafts in each bounding volume separately, lessening visual noise.
Note
Using multiple bounding volumes uses more processing power.